Remember Plank, the simplest dock on the planet? There’s now a free open-source fork to make it fully functional in recent Linux Distributions.
Plank is a 14 years old application that provides an iOS bottom bar style dock app launcher, that’s great for lightweight Linux Desktops. The goal is to provide just what a dock needs and absolutely nothing more.
Plank seems not in active development, though it still works in recent Linux Distributions. However, it has compatibility issues and broken docklets/applets. For those who’re still using or prefer this dock, there’s now an open-source fork worth a try.
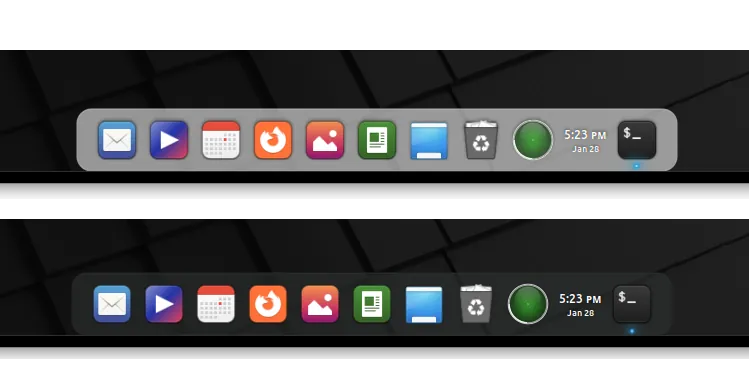
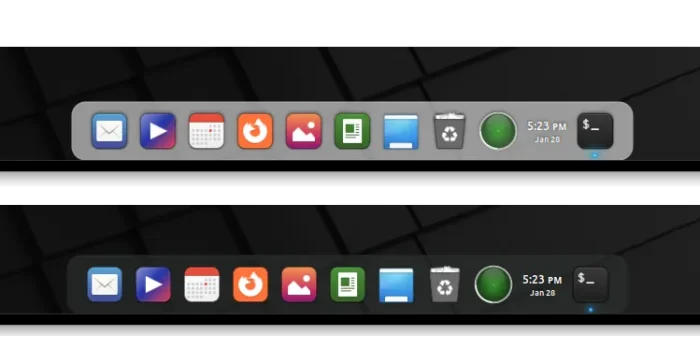
Plank in Linux Mint 22
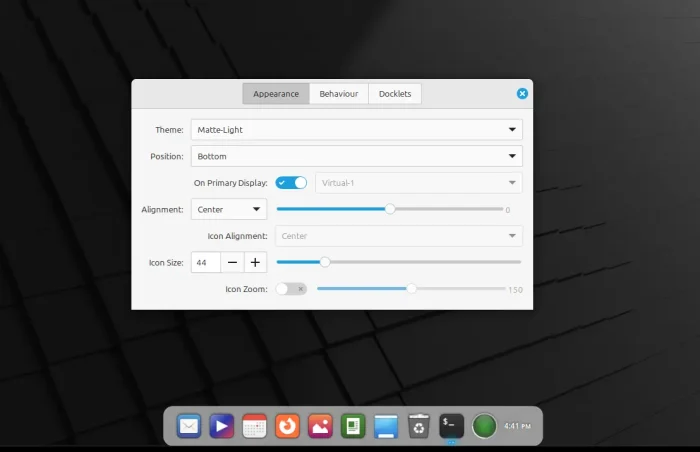
It’s Plank-Reloaded, a fork of the original Plank project that focuses on Cinnamon desktop compatibility and modernized features.
With the new dock, the Clock docklet will no longer crash. And, it features updated digital clock layout as well as a calendar when clicking on the icon.
The Battery docklet has been updated with modern UPower integration. And, the “Matte” theme has been updated to look better, along with a light variant that based on the Arian theme.
New Plank Matte and Matte-light Themes
Other changes include general code cleanup and bug fixes. If you like it, you may report issues and request features by visiting the project page.
How to Install Plank-Reloaded
NOTE: Plank so far does NOT work on Wayland.
According to this feature request, the software developer is going to add pre-built .deb packages for Debian/Ubuntu, and Flatpak package for all Linux users.
At the moment, Arch & its based systems can install from the AUR repository.
While Ubuntu & Linux Mint users (tested on Linux Mint 22.1 & Ubuntu 24.04) can run the commands below one by one in terminal (Ctrl+Alt+T) to build from the source (this is the official guide with minor modification).
- First, remove plank in case you installed the original plank package from system repository:
sudo apt remove plank libplank-common libplank1
- Then, install the dependency libraries for building/running the dock:
sudo apt install git autogen autoconf autopoint libtool make valac libgnome-menu-3-0 libgnome-menu-3-dev libxml2-utils libgee-0.8-dev libbamf3-dev libwnck-3-0 libwnck-3-dev bamfdaemon
- Next, clone the source:
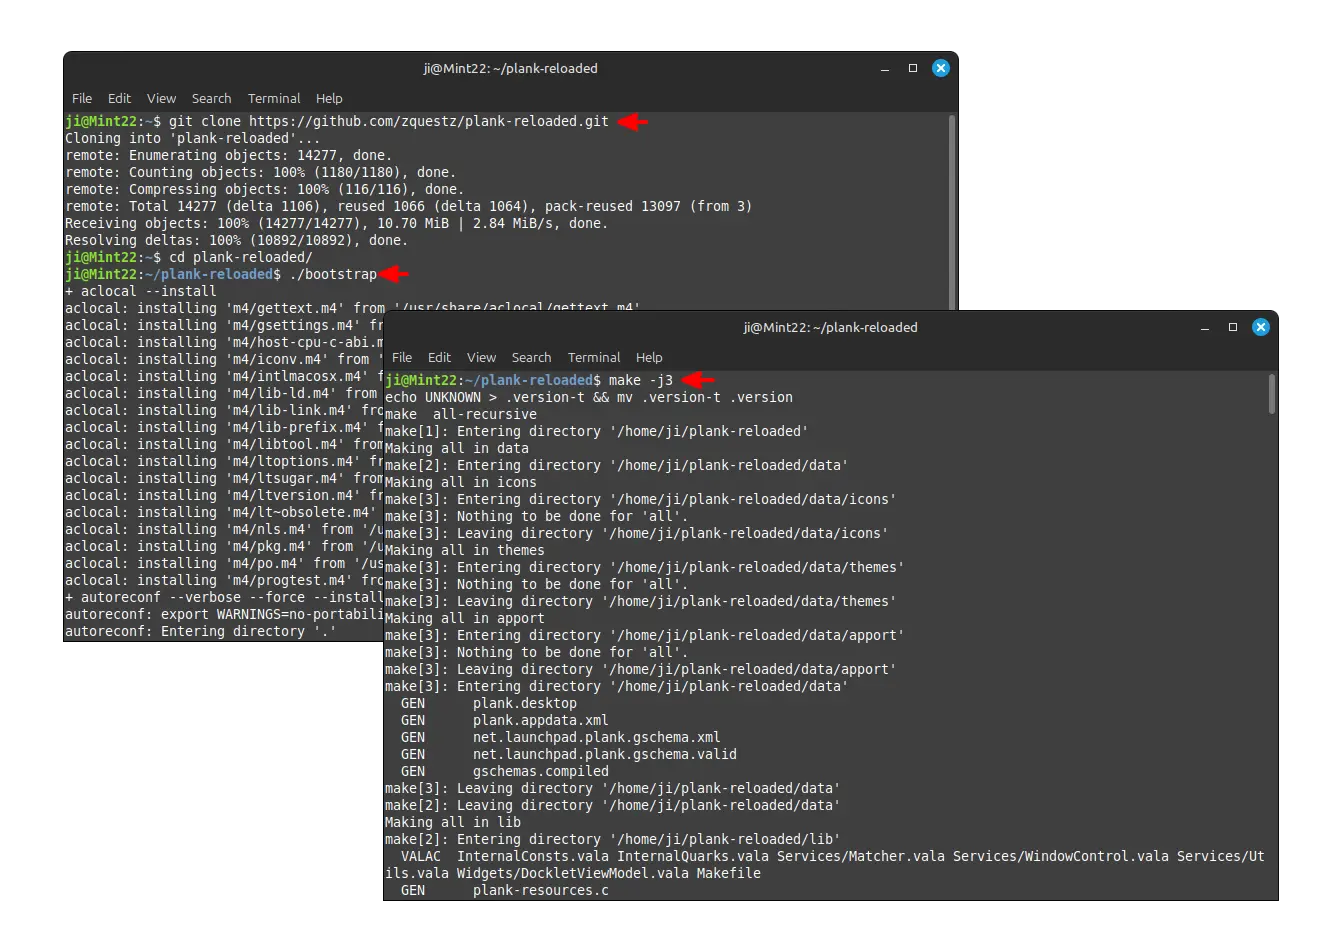
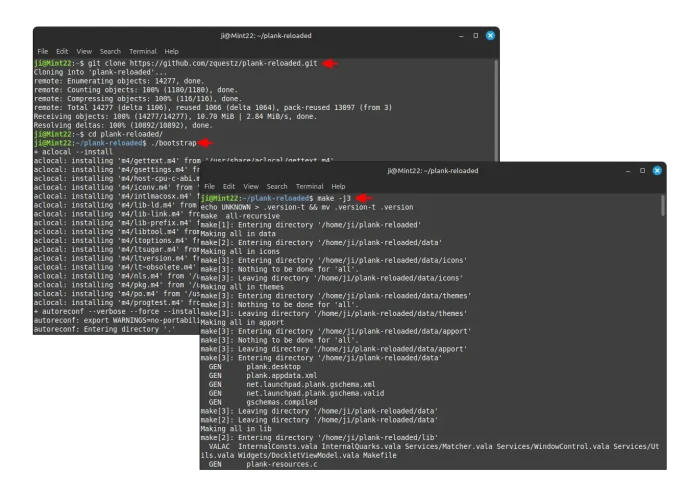
git clone https://github.com/zquestz/plank-reloaded.git
- Navigate into the source folder you just cloned:
cd plank-reloaded
- Finally, run command to configure, build, and install plank-reloaded:
./bootstrap
make -j2
sudo make install
Here, -j2 option in second make command means to start 2 thread in parallel. You may change the number according how many CPU cores you have.
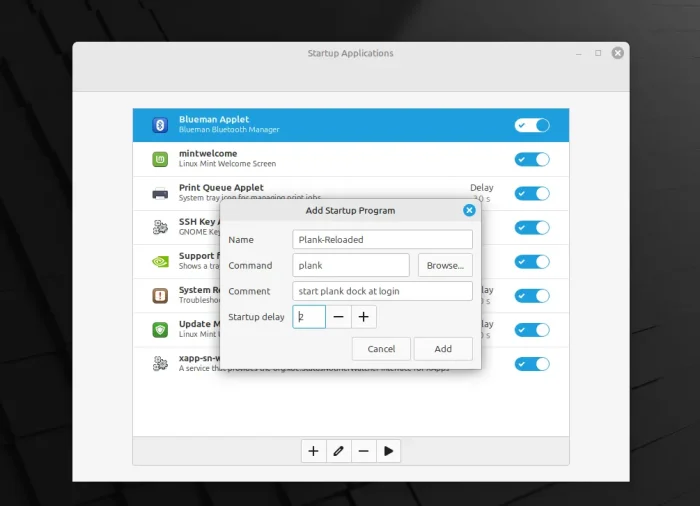
After successfully built the Plank-Reloaded, you may either run plank command in terminal to start the dock, or add it as startup program to auto-start at login.
Uninstall:
Until you removed the source folder, you may navigate into that folder in terminal and run command below to uninstall:
sudo make uninstall