![]()
Ubuntu is working on a new desktop security center and prompting-client. Here’s how to try it out in current Ubuntu 24.04 LTS.
It’s an experimental new feature that will land in next Ubuntu 24.10. Which, provides graphical interface to make it easier for users to control the file/folder access permission for Snap apps.
For example, when browsing web via Firefox (the preinstalled Firefox is a Snap package). You found a good image and want to save it to local folder, or you just want to download something. Before the downloading process starts, it will pop-up a dialog as the screenshot shows you, asking for user permission to allow writing to the file or folder.
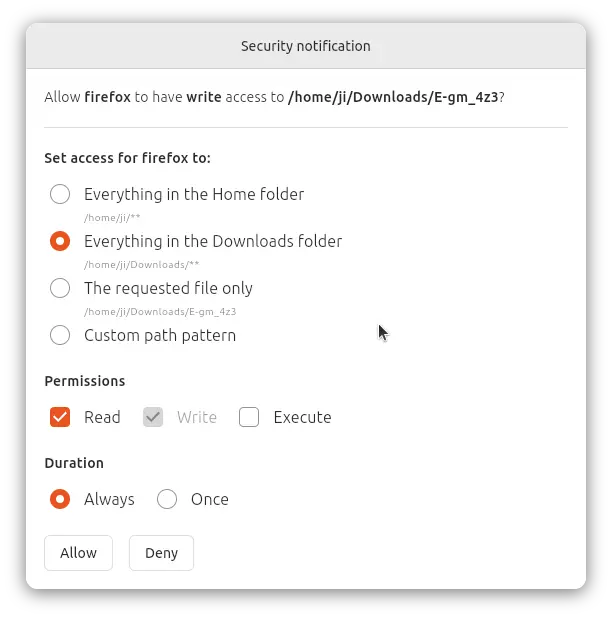
Pop-up for file/folder access permission