Archives For November 30, 1999

Battery Monitor

Battery Monitor is a simple tool written in Python3 and PyGTK3. It notifies battery status of charging, discharging, fully charged through desktop notifications. When the battery is below 10%, it plays a sound and pops up a notification bubble.

No command typing on terminal, no extra indicator, the tool just pop notifications when the battery status changes.

Battery charging battery discharging
battery is fully charged battery low

How to Install Battery Monitor in Ubuntu:

1. Use PPA.

Open terminal (Ctrl+Alt+T) and run the commands below one by one to install it from the PPA:

sudo add-apt-repository ppa:maateen/battery-monitor

sudo apt update

sudo apt install battery-monitor

So far, Ubuntu 16.04 and Ubuntu 14.04 are supported.

2. For those who don’t want to add PPA, grab the .deb installer from the release page.

Once installed, launch the tool via command battery-monitor for the first time. Or just restart, it will start in background automatically at login.

NOTE: The software is in very earlier stage, it may have bugs. Report issues and ask requests at https://github.com/maateen/battery-monitor/issues

To uninstall it, just run command:

sudo apt remove battery-monitor

And remove the PPA if added via Software & Updates -> Other Software tab.

Curlew Multimedia Converter

Curlew is a free multimedia converter for Ubuntu Linux that features small package size, few library dependencies, 100+ output formats, easy to use UI, and more.

Curlew is written in Python and GTK+ 3, and uses FFMPEG (or Libav-tools) to transcode media files. The main features are:

  • Easy to use user interface (New GTK3 Header bar).
  • Hide the advanced options with the ability to show them.
  • More than 100 output formats.
  • Allow to edit formats.
  • Shutdown or suspend PC afer a conversion process.
  • Show file informations, file details using mediainfo.
  • Allow to skip or remove file during conversion process.
  • Preview file before conversion in its context menu.
  • Show video thumbnail.
  • Convert a specified portion of file.
  • Combine subtitle with video.
  • Allow to crop and pad video.
  • Show error details if exist.
  • And more …
Curlew 100+ output formats

Curlew 100+ output formats

Curlew Advanced Settings

Curlew Advanced Settings

Curlew show file info

Curlew show file info

How to Install Curlew transcoder in Ubuntu:

Pre-compiled Ubuntu .deb is available in the link below:

Download Curlew (.deb)

So far, the latest is “curlew_0.2.2-1_all.deb”, just download and install it via either Ubuntu Software or terminal command (Ctrl+Alt+T):

sudo dpkg -i ~/Downloads/curlew_*.deb; sudo apt -f install

Works for Ubuntu 16.04, Ubuntu 15.10, and their derivatives. Once installed, launch Curlew from Unity Dash, or your desktop app launcher.

Relay IRC Client

Relay is a new IRC client designed for Elementary OS that aims to be small, fast, and elegant. It’s written in Vala and also works in Ubuntu and other Linux.

Relay uses very few libraries and takes less memory (<30mb usually). The project was created in June of 2015 so as of now it is a young project with functionality rapidly being added to it. So far, it features:

  • drag and drop to Hastebin – drag files to the paste icon will upload all of them and put the URL’s in the output window.
  • A missed message count.
  • Highlighting tabs with activity from IRC servers.
  • Drag and drop reordering of tabs.
  • Automatic IRC channel connecting
  • URL parsing and the ability to open your browser when clicked
  • Highlights the name of your or anyone else when mentioned in a chat
  • Right click tab switching.
  • The ability to switch channels through tabs or the sidebar.
  • It supports languages that use UTF-8 characters.
  • Although Relay was built on Elementary OS it will switch the theme depending on what operating system you are using.
  • The ability to search users
  • The ability to see where you left off since you last visited a tab
  • The ability to control many settings and set colors in the UI
  • Click a user name to have their name placed in the text entry
  • Private messaging and ability to block users
  • The ability to turn on or off joining or exiting messages
  • Creates a datestamp every 5 minutes to give you a timeline of what has happened

Screenshots:

Relay IRC start window

Relay IRC client in Elementary OS Freya

Relay IRC client in Unity

Relay Irc client in Gnome

At the moment of writing this tutorial there are two bugs for Ubuntu user and I’ve reported them to the project page:

  1. In Unity desktop, when you try to minimize Relay window by clicking its icon on left Launcher, session crashes immediately and brings you back to login screen. – Bug with Compiz
  2. In Gnome Shell, there’s a reading issue (Picture 4) – Fixed

Install Relay IRC client from PPA:

The developer has created a PPA repository for the project. So far, Ubuntu 15.10, Ubuntu 15.04, Elementary OS Freya are supported.

NOTE: Ubuntu 14.04 needs updated version of libgranite (>= 0.3.0) and GTK+3.0 (>= 3.14). You can get them from Gnome Testing PPA and Elementary Stable PPA. But using the PPAs could break your system or make it unstable! Do it at your own risk!

1. To add the PPA, open terminal from the Dash, Launcher, or via Ctrl+Alt+T shortcut keys. When it opens, run command:

sudo add-apt-repository ppa:agronick/relay

relay-irc-client-ppa

2. After added the PPA, install the software via Synaptic Package Manager. Or just run below commands one by one in terminal:

sudo apt-get update

sudo apt-get install relay

For those who don’t want to add PPA, grab the .deb package from the launchpad page.

Feature requests and issues please report at github.com/agronick/Relay

xpad-sticky-notes-icon

Xpad is a sticky note application for Linux desktop with a simple and nice design. Each xpad session consists of one or more open pads and you can set different fonts and colors on each of them.

By toggling the toolbar and window decorations, you can easily change the look of the pads. A pad can contain different stylings. Keyboard shortcuts and undo/redo are supported.

xpad-layout

xpad-editnotes

xpad-noteontop

There’s also a help option shows you how to use this simple sticky notes application.

install xpad in Ubuntu:

Xpad is available in Ubuntu universe repositories. You have to do nothing special, just open Ubuntu Software Center search for and install the xpad package.

install-xpad

spotify console client

Sconsify is a new unofficial spotify client runs in Mac and Linux terminal / command line console. It provides both console UI mode which presents a text user interface with playlists and tracks, and no UI mode which doesn’t present user interface and just suffle tracks.

sconsify

Now the app is at a very early stage. The developer has released the first stable release and below is the how-to-install instructions:

1. In terminal/console, first run below commands one by one to install Libspotify SDK & PortAudio library from mopify repository:

wget -q -O - https://apt.mopidy.com/mopidy.gpg | sudo apt-key add -

sudo wget -q -O /etc/apt/sources.list.d/mopidy.list https://apt.mopidy.com/mopidy.list

sudo apt-get update

apt-get install -y libportaudio2 libspotify12 --no-install-recommends

2. Download the linux binary (“linux-x86_64-sconsify-0.1.0.zip”) from the release page.

Unpack the zip archive and there’s only one file sconsify. In console, navigate to the extracted folder and run it:

./sconsify

Type in username and password when it asks and you can control the UI via below shortcut keys once login:

  • ← ↓ ↑ → for navigation.
  • space or enter: play selected track.
  • >: play next track.
  • p: pause.
  • /: open a search field.
  • s: shuffle tracks from current playlist. Press again to go back to normal mode.
  • S: shuffle tracks from all playlists. Press again to go back to normal mode.
  • u: queue selected track to play next.
  • d: delete selected track from the queue or delete selected search.
  • D: delete all tracks from the queue if the focus is on the queue.
  • PageUp PageDown Home End.
  • Control C or q: exit.

via: github.com/fabiofalci/sconsify

valentina-patternmaking-logo

Valentina is an open source pattern making program for clothing. It allows pattern creation using either standard sizing tables or an individual’s set of measurements. It blends new technologies with traditional methods to create a unique pattern making tool.

Currently, there is a lack of affordable software tools designed for creating patterns. Some people faced with this problem resort to using CAD tools or graphical editors designed for other purposes. However, these tools are inadequate when performing certain pattern making tasks (e.g. adding seam allowance, truing a dart, walking a seam). Moreover, these programs are good enough to create a pattern in a single size, but when you want to make changes for another person, you can’t do it quickly. You need to create the pattern from scratch. This is where traditional methods of pattern drafting can be very useful. Why can’t you tell a program how to change the pattern so you don’t need to do it ever again?

FSjacket FSpants
layout_in_obj blouse_draw
blouse_pieces layout_options

How to install Valentina in Ubuntu:

Open terminal from the Dash/Menu or by pressing Ctrl+Alt+T on keyboard. When it opens, run commands below one by one to install the software from PPA:

sudo add-apt-repository ppa:dismine/valentina

sudo apt-get update

sudo apt-get install valentina

Or you can download the .deb binary from PPA packages page and install it via Ubuntu Software Center.

Ubuntu 14.10, Ubuntu 14.04, Linux Mint 17 are supported so far!

Papyrus Note Manager

Papyrus is a free, open-source, and modern note manager focused on privacy, socials, and better user interface.

Papyrus is developed by Aseman Land, the team behind Cutegram telegram client. It’s a fork of Kaqaz project by sialan labs and works on Linux, Windows, Mac, Android and iOS soon.

Papyrus Note Manager

Papyrus Touch Version

The software provides both desktop and touch version and features:

  • Notes management by means of labels and categories
  • Sorting notes by day
  • Advance and Smart searching in notes
  • To-Do papers
  • Backing up notes
  • Encrypted synchronization via Dropbox among all your devices
  • Supporting left-to-right and right-to-left languages
  • Sharing papers with other applications
  • Assigning password for protecting notes
  • Attach map and weather to note informations automatically
  • Attaching photos, audio files and folders to any note
  • Search on papers by location
  • Capability of running and sync data on all operating systems (Android, Windows, Linux, Mac and soon other operating systems)
  • Canvas for painting
  • Search on papers using weather and temperature, your notes wrote.
  • Can move data to sd-card (on old phones)
  • Status and statistics page for notes
  • Synchronizing files

Install Papyrus in Ubuntu/Linux Mint:

The note manager has an official PPA with supports for Ubuntu 14.04, Ubuntu 14.10, Linux Mint 17 so far.

Open terminal (Ctrl+Alt+T) and run below commands one by one to add PPA and install the app:

sudo add-apt-repository ppa:aseman/desktop-apps

sudo apt-get update

sudo apt-get install papyrus

An alternative way is to download Linux Installer from the bottom of its homepage. Give executable permission and run the installer wizard:

  1. Select download the installer that matches your OS type, 32-bit or 64-bit
  2. In terminal navigate to Downloads page by cd ~/Downloads
  3. make the installer executable by command chmod +x FILENAME
  4. Finally start the install via ./FILENAME

Papyrus Linux Installer

Paper GTK3 and Icon themes

Paper project is a GTK3 and icon theme suite inspired by Google’s material design guidelines. They are developed by Sam Hewitt, the man behind the Moka icons project.

Paper started as a single GTK3 theme. It’s developed primarily for GNOME 3 and other GTK3 desktops. Its design is mostly flat with a minimal use of shadows for depth and looks really beautiful in desktops that make use of the GTK3 headerbars/client-side decorations (e.g. Gnome Shell).

Paper icon theme is under serious development. The GNOME icon theme is the fallback set for missing icons.

paper GTK and Icon themes in Unity

Paper GTK3 and Icons in Gnome

How to Install Paper GTK3 & Icon themes:

The developer has created a daily build PPA, available for Ubuntu 12.04, Ubuntu 14.04, Ubuntu 14.10, Ubuntu 15.04 and derivatives.

To add the PPA, open terminal (Ctrl+Alt+T) and run:

sudo add-apt-repository ppa:snwh/pulp

paper-daily-ppa

Then update and install the themes:

sudo apt-get update

sudo apt-get install paper-gtk-theme paper-icon-theme

Since the icons & theme are under-development, you will receive updates (changes or fixes) from PPA via Software Updater.

If you don’t want to add PPA, grab the .deb packages from ppa page and install them via Software Center.

Once installed, apply the themes via Gnome Tweak Tool or Unity Tweak Tool (both are available in Software Center).

NOTE: Since the paper icon theme is under early stage, please report issues here.

Picty Manager for large photo collections

Picty is a free, open-source, and lightweight manager for large photo collections. It is designed around managing metadata and a lossless approach to image handling.

metadata: descriptive and other information about images (created by you, your camera or the programs you use) that are embedded inside image files alongside the pixels.

lossless: by only ever writing information about images, including image processing instructions, as metadata, the original image pixels are never altered allowing you to preserve the images as they were taken on your camera.

Picty is lightweight and has a snappy interface. All the heavy lifting is done on background threads or external processes to ensure the UI never blocks. User is informed of what is going on in the background with progress notifications etc.

Picty Photo Manager in Ubuntu 14.04

Picty Features:

  • Supports big photo collections (20,000 plus images).
  • Open more than one collection at a time and transfer images between them.
  • Collections are:
    • Folders of images in your local file system.
    • Images on cameras, phones and other media devices.
    • Photo hosting services (Flickr currently supported).
  • picty does not “Import” photos into its own database, it simply provides an interface for accessing them wherever they are. To keep things snappy and to allow you to browse even if you are offline, picty maintains a cache of thumbnails and metadata.
  • Reads and writes metadata in industry standard formats Exif, IPTC and Xmp
  • Lossless approach:
    • picty writes all changes including image edits as metadata. e.g. an image crop is stored as any instruction, the original pixels remain in the file
    • Changes are stored in picty’s collection cache until you save your metadata changes to the images. You can easily revert unsaved changes that you don’t like.
  • Basic image editing:
    • Current support for basic image enhancements such as brightness, contrast, color, cropping, and straightening.
    • Improvements to those tools and other tools coming soon (red eye reduction, levels, curves, noise reduction)
  • Image tagging:
    • Use standard IPTC and Xmp keywords for image tags
    • A tag tree view lets you easily manage your tags and navigate your collection
  • Folder view:
    • Navigate the directory heirarchy of your image collection
  • Multi-monitor support
    • picty can be configured to let you browse your collection on one screen and view full screen images on another.
  • Customizable
    • Create launchers for external tools
    • Supports plugins – many of the current features (tagging and folder views, and all of the image editing tools) are provided by plugins
    • Written in python – batteries included!

How to Install Picty in Ubuntu:

The developer maintains a PPA repository contains the latest Picty packages for Ubuntu 15.04, Ubuntu 14.10, Ubuntu 14.04, Ubuntu 12.04, Ubuntu 10.04, and derivatives (Linux Mint 13/17/17.1).

To add the PPA, open terminal from the Dash or by pressing Ctrl+Alt+T. When it opens, run command:

sudo add-apt-repository ppa:damien-moore/ppa

Type in your password when it asks and hit Enter to continue.

After you added the PPA, update package cache and install the software by running below two commands one by one:

sudo apt-get update

sudo apt-get install picty

For basic raw processing, video thumbnailing, flickr collection, and geotagging support, run command to install below packages:

sudo apt-get install dcraw totem python-gdata python-flickrapi python-osmgpsmap

(Optional) To remove the photo manager as well as PPA repository, run command:

sudo apt-get remove picty && sudo add-apt-repository -r ppa:damien-moore/ppa && sudo apt-get update

Go For It To-Do List App

Go-For-It is a new and open-source to-do list application available for both Windows and Ubuntu Linux. It features a simple and stylish UI with built-in productivity timer.

To-do lists are stored in the Todo.txt format. This simplifies synchronization with mobile devices and makes it possible to edit tasks using other front-ends.

Go For It To-Do List App in Ubuntu 14.04

The developer has created a Youtube video that describes the workflow of this application:

How to Install ‘Go For It’:

The developer, mank319, has built this app into PPA, available for Ubuntu 14.04, Ubuntu 14.10, Ubuntu 15.04 and derivatives.

To add the PPA and install the app, open terminal from the Dash or by pressing Ctrl+Alt+T. When it opens, run the commands below one by one:

sudo add-apt-repository ppa:mank319/go-for-it

sudo apt-get update

sudo apt-get install go-for-it

Or you can simply download & click install the .deb package via Software Center (i386 for 32-bit, amd64 for 64-bit) the matches your OS edition at the PPA packages page.

For Windows version, go to the Go-For-It website.

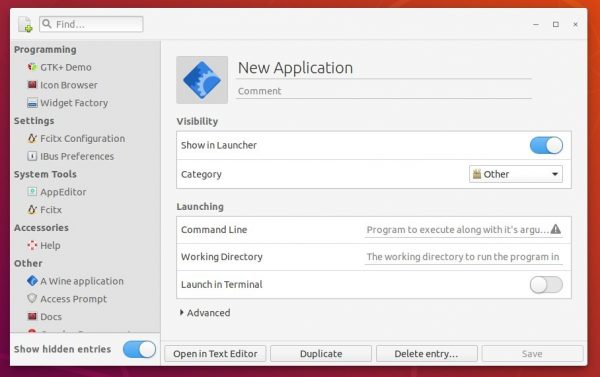
NOTE: Due to the bug related to Unity Overlay Scrollbars, the background sometimes looks like broken. As a workaround, run command below to edit the app’s shortcut file:

gksudo gedit /usr/share/applications/go-for-it.desktop

When the file opens, edit the ‘Exec’ line so that it looks like:

Exec=env LIBOVERLAY_SCROLLBAR=0 go-for-it

This disables the overlay scrollbars for the single app.

Disable Overlay Scrollbars for single application