Archives For November 30, 1999

Looking for task manager or todo list app for Linux? ‘Getting Things GNOME’ is worth a try!

There are quite a few task managing apps for Linux desktop. ‘Getting Things GNOME’ (GTG in short) is one of the best for the GNOME desktop.

I’m using Gnome ToDo to write down what to do in next days. It’s easy to use, and has a good-looking UI that turns dark automatically according to sunrise / sunset. It’s so good until I found GTG.

GTG is attractive by the flexible tagging and searching system. User may create tags either by inserting ‘@‘ with the keyword in tasks, or using the tasks’ context menu. Each tag may have its own icon and color.

The app also supports sub-task that can be easily created either from a task’s context menu. Or, just type new line started with ‘‘ will generate a sub-task, and that line turns blue with underline and checkbox at the beginning automatically.

GTG also features a ‘Actionable’ view tab, that shows all ‘start-able’ tasks, i.e. the start date is already over, or doesn’t have open subtasks.

Other features of ‘Gnome Things GNOME’ include:

  • Emoji support
  • Searching system (with save support)
  • Easily set start date / due date.
  • Drag & drop rearrange tasks.
  • ‘Closed’ tab for done, dismiss tasks.
  • Dark mode support.
  • Plugin support.

How to Install Getting Things GNOME:

The app is available to install as Flatpak package, which could be the only downside for those having low disk space.

Firstly, open terminal (Ubuntu may simply press Ctrl+Alt+T on keyboard) and run command to install flatpak daemon:

sudo apt install flatpak

Ubuntu 16.04 and Ubuntu 18.04 needs to add this PPA first before installing Flatpak.

Next, install the ToDo app via command:

flatpak install https://dl.flathub.org/repo/appstream/org.gnome.GTG.flatpakref

Remove Getting Things GNOME:

To remove the Flatpak package, run command after making backup of your data:

flatpak uninstall --delete-data org.gnome.GTG

And clear useless run-times via flatpak uninstall --unused.

Boring with the poor boot menu appearance? Try the cool DedSec GRUB theme.

It’s a Grub boot-loader (defaults in most Linux) theme inspired by the fictional hacker group DedSec from Watch Dogs series video game. With it installed, you’ll get the themed background, font, icons, and so forth in the boot-screen:

How to Install DedSec Grub Theme:

The theme project is hosted on Github. User may install it either by the installer script in the source or manually by configuring Grub.

Method 1: Install DedSec theme via the script:

Firstly, search for and open terminal from start menu (Ubuntu may just press Ctrl+Alt+T on keyboard). When it opens, run command to grab the source:

git clone --depth 1 https://github.com/vandalsoul/dedsec-grub2-theme.git

Install git if you don’t have it via sudo apt install git.

After the downloading process finished, go to the source folder:

cd dedsec-grub2-theme

Finally, run the installer and select from the 18 theme-styles to install:

sudo python3 install.py

If everything runs successfully, you’ll see the new boot-menu appearance in next boot!

Method 2: Manually Install DedSec theme:

The installer script seems to always install theme name as ‘dedsec‘. While there are 18 theme styles, you can only get one of them installed at a time.

To get them all, download the package from the link below:

Extract and put the sub-folder(s) (which contains icons, background, and theme.txt file) into “/boot/grub/themes” folder.

Create ‘boot/grub/themes’ folder via sudo mkdir /boot/grub/themes if NOT exist. And open that folder via “sudo nautilus /boot/grub/themes” command as you need root permission to do drag & drop operation.

Finally, apply a Grub theme either via ‘Grub Customizer’ (available in Ubuntu Software):

or manually edit the ‘/etc/default/grub’ file via the command below:

sudo gedit /etc/default/grub

Replace gedit with your favorite text editor or use xdg-open as GNOME 42 will no longer defaults to gedit. And, write new line GRUB_THEME = “PATH/TO/theme.txt”.

Changing the configuration file manually needs to update the grub via the command below:

sudo update-grub

For Fedora, the command will be:

grub2-mkconfig -o /boot/efi/EFI/fedora/grub.cfg

Using KeePassXC to store your passwords? By releasing v2.7.0 (Beta at the moment), the popular password manager introduced many exciting new features!

KDBX 4.1. The new release finally implements the KDBX 4.1 which was introduced 10 months ago via KeePass 2.48. The new version of the KDBX file format features

  • assign tags to groups;
  • optional password quality estimation;
  • remember previous parent group;
  • custom icons with names and last modification/deletion times;
  • custom data items with last modification times.

Replace all crypto libraries with Botan. Due to feature list and maintainer support, the release now replaces Argon2 library with Botan on all platforms. And, the minimum requirement is Botan 2.11.0.

Quick unlock database via Windows Hello / Apple Watch. If you’re using the software in Windows 10+, then you’re able to unlock KeePassXC database easily via a PIN, facial recognition, or fingerprint. And, macOS Catalina (10.15)+ may use TouchID or Apple Watch to get access.

Security improvements. Also in Windows and macOS, the new release now make KeePassXC (main & child windows) invisible for screen recording and screen shooting. It prevents malware from looking at your screen by recording your desktop or taking screenshots.

Other changes in KeePassXC 2.7.0 (Beta) include:

  • Direct write save option, which my solve problems for cloud storage and GVFS
  • Allow to specify custom backup location & filename.
  • Add group clone action.
  • Add tag functionality.
  • Implement support for hardware keys via wireless NFC
  • Add support for OpenSSH 8.2 FIDO/U2F keys
  • Add Microsoft Edge support for Linux
  • Bulk-delete and purge unused custom icons
  • Support adding custom passphrase wordlists
  • Improve attachment handling and security
  • Add option to double-click copying some entry columns.

Download / Install KeePassXC:

As the release is in beta stage, it’s not available in the official download page so far.

However, you may download the packages for Linux, Windows, and macOS from ‘Assets‘ section via the release page:

For Linux user, grab the ‘.AppImage‘ package. Add executable permission by right-clicking and going to ‘Properties -> Permissions’. And finally run it to launch the password manager.

HP’s Linux printer and scanner driver, HPLIP, released new 3.22.2 version today with many new printers support!

According to the release note, HPLIP 3.22.2 adds official support for Red Hat Enterprise Linux 8.5, Elementary OS 6.1, and Linux Mint 20.3.

And,

  • HP LaserJet Tank MFP 1602a, 1602w, 1604w
  • HP LaserJet Tank MFP 2602dn, 2602sdn, 2602sdw, 2602dw
  • HP LaserJet Tank MFP 2604dw, 2604sdw
  • HP LaserJet Tank MFP 2603dw, 2603sdw
  • HP LaserJet Tank MFP 2605sdw
  • HP LaserJet Tank MFP 2606dn, 2606dsn, 2606sdw, 2606dw, 2606dc
  • HP LaserJet Tank MFP 1005, 1005w, 1005nw
  • HP LaserJet Tank 1502a, 1502w
  • HP LaserJet Tank 1504w
  • HP LaserJet Tank 2502dw, 2502dn,
  • HP LaserJet Tank 2504dw
  • HP LaserJet Tank 2503dw
  • HP LaserJet Tank 2506dw, 2506d, 2506dn
  • HP LaserJet Tank 1020, 1020w, 1020nw

Download & Install HPLIP 3.22.2

To get the software package, download the “hplip-x.xx.x.run” file from the link page below:

Next, search for and open a terminal window from start menu. And, run command to grant executable permission, and run the installer script to install it:

cd ~/Downloads && chmod +x hplip-*.run && ./hplip-*.run

Just follow the terminal output and answer questions. It will build and install the software automatically.

Tip: For those still using Python 2 and getting into python-pyqt5 dependency issue, see this workaround.

How to Remove HPLIP:

Running the “hplip-x.xx.x.run” installer will generate a source folder in user Downloads directory. If you don’t see it, re-run it via command:

~/Downloads/hplip*.run --target ~/Downloads/hplip

Then in file manager, go to “Downloads”. Right-click on ‘hplip’ folder and select ‘Open in Terminal’, finally run the uninstall script in pop-up terminal window:

sudo python3 uninstall.py

That’s all. Enjoy!

TeXworks, the free open-source application for authoring TeX (LaTeX, ConTeXt, etc) documents, released 0.6.7 today. Here’s how to install it in Ubuntu 18.04, Ubuntu 20.04, Ubuntu 21.10, and Ubuntu 22.04.

TeXworks 0.6.7 added some minor new features, improved dark mode support, and fixed various bugs.

  • Add a ruler with draggable guidelines to the PDF previewer
  • Improve preservation of Unicode characters during loading/saving
  • Prevent concurrent typesetting in multi-file sources
  • Disable “Remove Aux Files” during typesetting
  • Add full paths as tool tips in the “Open Recent” menu
  • Use native separators (/ or \) in the recent files menu
  • Add “Fit to Content Width” to the PDF preview zoom context menu and to the scaling preferences
  • Improve interoperability with docstrip by adding support for “%^^A ! TeX…” magic comments

Install TeXworks via PPA in Ubuntu:

Ubuntu includes the software package in its official repositories, but it does not provide package updates. To get the latest version, an official PPA is available which so far support all current Ubuntu releases and the next Ubuntu 22.04 LTS. As well, the old Ubuntu 14.04 and Ubuntu 16.04 are supported!

1. Add the PPA:

Firstly, press Ctrl+Alt+T on keyboard to open a terminal window. When it opens, paste the command below and hit Enter:

sudo add-apt-repository ppa:texworks/stable

Type user password (no asterisk feedback) and hit Enter to continue

2. Update system package cache:

Ubuntu 20.04 and higher now refresh the package cache automatically after adding PPA. However, Ubuntu 18.04 and old releases need to do it manually by running command:

sudo apt update

3. Install or Upgrade TeXworks:

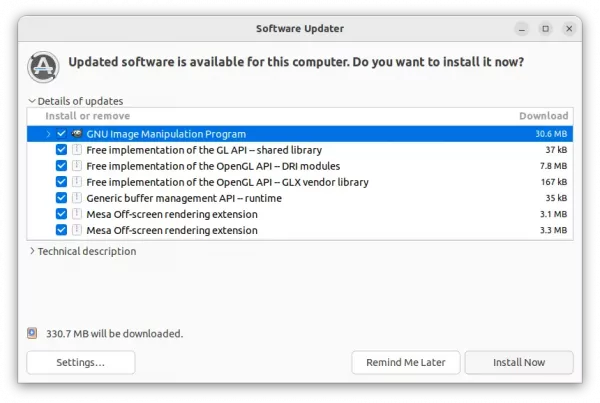
If an old package was installed, using ‘Software Updater‘ may upgrade the package to the latest:

Or, run the command below in terminal to install (or upgrade) the package:

sudo apt install texworks

How to Remove TeXworks:

To remove the software package installed via PPA repository, simply run the command below in terminal:

sudo apt remove --autoremove texworks

To remove the PPA repository, either run the command below:

sudo add-apt-repository --remove ppa:texworks/stable

Or, open ‘Software & Updates‘ utility, navigate to ‘Other Software’ tab and remove the relevant source line.

The Ubuntu team announced the release of Ubuntu 20.04.4 last night, with hardware enablement stacks, many security updates and bug-fixes.

‘Like previous LTS series, 20.04.4 includes hardware enablement stacks for use on newer hardware. This support is offered on all architectures.’

Linux Kernel 5.15 is still in proposed repository at the moment of writing, while Kernel 5.13 has been distributed for a period of time. So I’m kinda confused about the ‘hardware enablement stacks’.

Perhaps they are the following updates:

  • Update hardware support for Dell XPS 13 9300.
  • Add support for Alder Lake P graphics (ADL-P).
  • Add support for AMD’s Yellow Carp.
  • Update hardware support for Lenovo ThinkStation P340 Tiny, Lenovo ThinkCentre M70q/M80q/M90q.
  • Update hardware support for HP Z8 G4 Workstation, HP Z2 Mini G5 Workstation, SFF G5 Workstation, TWR G5 Workstation.
  • Add support for AMD’s Beige Goby.
  • Support Foxconn SDX55 T99W175 5G sub6 PCIE and Quectel SDX24 EM160R-GL 4G LTE CAT16 PCIE wireless Modem

In the release, it also enabled native Wayland support for thunderbird package, and restored nautilus copying filenames functionality. See the change summary for more.

How to Get Ubuntu 20.04.4:

For Ubuntu 20.04.x, simply run regular system update via either ‘Software Updater‘ or the command below will bring you to the new release.

sudo apt update && sudo apt upgrade

To verify, either run cat /etc/issue or see the ‘About’ page in settings.

Or download Ubuntu 20.04.4 from the official website:

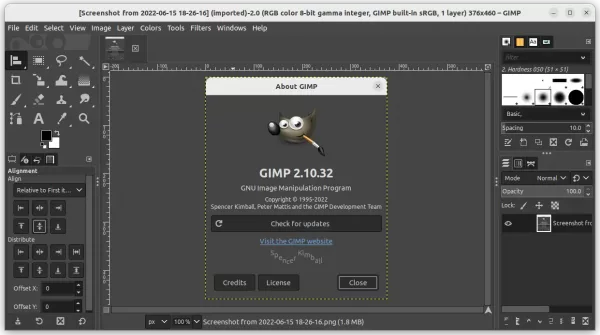
The new development release for the next major 3.0 of the popular image editor, GIMP 2.99.10, is out last night!

The GIMP website does not announce the release at the moment. According to the welcome dialog, the new release introduced the new ‘Layer set’ concept to replace ‘Linked layers’. It also added Microsoft Windows Cursor file format (.cur files) support, and improved support for Wayland, macOS Big Sur, as well as PSD / JPEG-XL / HEIF files.

other changes in GIMP 2.99.10 include:

  • Lock icons in item dockables (Layers, Channels, Paths) moved next to the visibility (eye) icon
  • Alt-click on visibility and lock icons in item dockables massively toggles visibility and locks among selected items
  • Item dockables now display icon headers for visibility and locks column
  • The System theme shows visible hints around unset visibility and locks icons when hovering them in item dockables
  • New checkbox to enable or disable dynamics in paint tools’ options (replacing “Dynamics Off” dynamics)
  • “Fill by line art detection” in Bucket Fill tool has a new option
  • Channels and paths multi-selectable with part of relevant actions working
  • Removed KDE and GNOME screenshot portals in favor of Freedesktop one
  • Windows screenshot implementation now has an “Include mouse pointer” option
  • New and modified libgimp API for plug-in developers

Install GIMP 2.99.10 in Ubuntu:

The develop team publishes the Dev package via Flatpak package. Just open terminal by pressing Ctrl+Alt+T on keyboard. Then run the commands below one by one will install it:

sudo apt install flatpak
flatpak remote-add --user flathub-beta https://flathub.org/beta-repo/flathub-beta.flatpakrepo
flatpak install --user flathub-beta org.gimp.GIMP

For more, see this detailed how to install guide.

The Tiling Terminal Emulator Tilix 1.9.5 Released

Last updated: February 23, 2022

Tilix, the popular tiling terminal emulator, released v1.9.5 with a few new features and some bug-fixes.

Tilix is a GTK+3 terminal emulator supports for splitting app window horizontally or vertically. It supports drag and drop re-arranging terminals, quake mode, custom hyperlinks, as well as many other features.

After a year of development, it finally announced the new 1.9.5 with only a few new features due to lack of maintainers.

New features in Tilix 1.9.5 include:

  • Disable advanced paste when there is no linebreak like iTerm2
  • Add environment variable when in quake mode
  • Add possibility to configure always enabled regex

Get Tilix 1.9.5 in Ubuntu:

There’s no binary package for current Ubuntu releases so far, though it’s proposed to be included in Ubuntu 22.04 LTS repository.

User may download the source code and build manually via the link below:

Prefer running Linux apps via AppImage package format? ‘AppImage Pool’ is an app center for searching and downloading your favorite apps as AppImage.

More and more apps today publish Linux packages via universal Flatpak, Snap and AppImage. The former two are easy to install since they are well integrated in Ubuntu or other Linux. But, AppImage is a non-install portable package. It uses one file per application. Just run the file will launch the app.

To make it easy to find out and download an app as AppImage, the free libre and open-source software ‘AppImage Pool’ is created as a simple, modern AppImageHub client.

AppImage Pool

The tool uses Google’s flutter to provide a Gnome Software and Ubuntu Software look like user interface, allows user to browser, search for, and download AppImage packages. Though, it so far has sharp window borders that looks not native in GNOME.

Instead of using ‘Install‘ option, each app has a blue ‘Download‘ button. By clicking on it will pop up the dialog to choose package to download. Not only the latest, history packages are also available. And, it downloads from github directly, no extra-server involved

Downloaded packages are listed under ‘Installed‘ tab, with ability to click to launch app as well as delete buttons.

Other features include:

  • Dark / Light mode.
  • Store files by default in ‘Applications‘ folder in user home.
  • Multi download support.

How to Install AppImage Pool:

The app itself is available as AppImage package, which can be downloaded from the GitHub releases page (via Assets section):

It’s also available as universal Flatpak package. Ubuntu user may firstly press Ctrl+Alt+T to open terminal and run command to install Flatpak daemon:

sudo apt install flatpak

Then install the tool via command:

flatpak install https://dl.flathub.org/repo/appstream/io.github.prateekmedia.appimagepool.flatpakref

Uninstall AppImage Pool:

For the Flatpak package, run the command below in terminal to remove it:

flatpak uninstall --delete-data io.github.prateekmedia.appimagepool

And clear useless library via flatpak uninstall --unused.

There are quite a few YouTube apps for Linux today. SF Tube is a new one that has an elegant user interface with easy to use download options.

SF Tube, formerly FluTube, is a free libre and open-source app made using Google’s flutter. So far, it provides packages for Linux, Android, and Windows.

The app provides a beautiful user interface with Home, Like, Downloads, and Settings tabs. A ‘search‘ button is available in top-right corner, allows to search in YouTube. And, the results are displayed along with download buttons.

By clicking on download, it pop-up a dialog allows to choose download ‘Video + Audio‘, ‘Audio only‘, or ‘Video only‘ with quality options.

On the ‘⤓’ tab, it shows history downloads as well as current downloading process if any. As well, each video/audio has a delete button in the right.

In any page clicking on a video will open the detail page with descriptions, comments, as well as share, like, download buttons. Sadly, the video playback is not implemented at the moment of writing though the developer is now working on it!

SF Tube Dark Mode

Other features of SF Tube include:

  • Download via YouTube url via ‘+’ button.
  • Dark / Light mode.
  • Lightweight and fast.
  • No Login Required.
  • Playlists support.
  • Ads free forever.

Install SF Tube in Ubuntu & other Linux:

The app provides packages in the Github releases page under ‘Assets’ section:
Linux user may choose the non-install .Appimage package. Add executable permission via file’s ‘Properties’ dialog, and finally click run it to launch the app.

Ubuntu, Debian and Linux Mint based systems may just download the ‘.deb‘ package and double-click on file to install the app.

As well, a Linux tarball is available. Grab and then extract the package, then user may run the executable from extracted folder to launch the YouTube app.

That’s all. Enjoy!