Archives For November 30, 1999

Want to remap your keyboard or gamepad keys in Ubuntu Linux? It’s easy to do this via Input Remapper.

Input Remapper is a free and open-source tool written in Python 3. With it, you can change the mapping for input devices, including mouse, keyboard, and gamepad.

It works on both X11 and Wayland, and supports for mapping to combined buttons (e.g., Control+A) and programmable macros.

The software has an easy to use interface. Simply start the app, choose the device (e.g., keyboard) to you want to remap, then click add new preset and do:

    1. Click ‘Add’ button in left to add an item.
    2. Click the pencil icon and type a name.
    3. Use “Record” button to record the original keyboard key or key combination.
    4. Choose device to map the input key to.
    5. Finally, type the output key, e.g., letter (a, b, …, z), number (1, 2, …, 9), and/or function keys (Alt_L Control_L Control_R Shift_L Shift_R)

Presets are saved in user’s .config/input-remapper-2/presets folder. You can use them in another machine that can read these “.json” files.

How to Install Input Remapper in Ubuntu:

The software offers official .deb package for Ubuntu / Debian based systems.

Grab the deb package, then open terminal and run command to install it:

sudo apt install ~/Downloads/input-remapper*.deb

It should work on all current Ubuntu releases since it requires only a few python modules.

Once installed, open it from system app launcher and enjoy!

(Optional) For choice, there’s command to remove the tool from Ubuntu:

sudo apt remove --autoremove input-remapper

For dark mode fans, you may found the color scheme in Gedit Text Editor is not so good! Focused line is not even readable due to the light text on light line background.

There’s already an upstream fix, though it’s not made into current Ubuntu releases. There are however workarounds and I’m going to show you how!

Option 1.) Use another color scheme:

There are a few other built-in color schemes available in the default Gedit text editor.

Firstly, open the editor and go to ‘Preferences’ in the hamburger menu. While Ubuntu defaults to the ‘Classic’ colors, you can then choose another from Font & Colors tab.

And new colors take places immediately!

Option 2.) Hack the current line background color:

Sticking to the default color scheme? It’s easy to hack the xml config file to change the current line background.

1.) Firstly, open terminal either from system app launcher or by pressing Ctrl+Alt+T on keyboard.

2.) When terminal opens, run command to edit the xml:

sudo gedit /usr/share/gtksourceview-4/styles/classic.xml

Type user password (no visual feedback) when it asks and hit Enter. When file opens, scroll down to find out and change the background value of ‘current-line’ and ‘current-line-number’.

NOTE: If you stick to dark mode, color #181818 is great! However, it’s not good in light mode. So if you switch between light and dark mode regularly, use another color value, such as #99999c.

After saving the changes, the color will take place in new app window.

Linux Mint introduced a new batch file renamer app ‘Bulky’ in the upcoming 20.2 release. Here’s how you can install it in Ubuntu 18.04, Ubuntu 20.04, Ubuntu 21.04.

Bulky is a simple and elegant tool for renaming multiple files and folders in Linux. It’s a free and open-source tool developed by Linux Mint team.

With Bulky Renamer, you can find and replace file / folder names with regular expression support, while preview the changes under ‘New name’ section before clicking “Rename” button.

As well, it allows to remove letters and insert text with specified position, batch change filename to lower case, upper case, title case, or first character upper case.

How to Install Bulky in Ubuntu:

The tiny tool is an XApp that works on any distribution and many desktop environments. It only requires a few Python3 libraries.

Which means, you can get the .deb from Mint repository and install on all current Ubuntu releases (Ubuntu 18.04 and higher) without any issue.
Download the .deb package from the button above, and double-click to install via Ubuntu-install. Or, open terminal (Ctrl+Alt+T) and run command to install the local package:

sudo apt install ./Downloads/bulky*.deb

For other Linux, grab and build the source tarball from the Github project page.

Once installed, search for and open ‘File Renamer’ from system app launcher and enjoy!

Uninstall Bulky:

To remove the tool, simply run command:

sudo apt remove bulky

For those dual boot Windows 11 with Ubuntu or other Linux, you’ll find different time display in each system. And usually Windows shows the incorrect clock time.

There are two time standards, localtime and Coordinated Universal Time (UTC, aka GMT). The local time standard is dependent on the current time zone, while UTC is the global time standard that is independent of time zone.

By default, Windows uses localtime, but Ubuntu uses UTC. So you get the different time in the dual boot. And the solution is set the same time standard in the two systems.

Method 1.) Set RTC to local time zone in Ubuntu:

Though it’s not recommended, set the Real Time Clock (RTC) to use local time zone just works.

Firstly, open terminal either from system app launcher or by pressing Ctrl+Alt+T on keyboard. When it opens, run command:

timedatectl set-local-rtc 1 --adjust-system-clock

Then you can check system clock status via command:

timedatectl

And “RTC in local TZ: yes”, where TZ means time zone, tells localtime standard is in use.

As I said “it’s not recommended“, it warns that localtime standard may cause various problems with time zone changes and daylight saving time adjustments.

You can restore UTC time standard and do method 2 instead by running command:

timedatectl set-local-rtc 0

Method 2.) Enable UTC time in Windows 11:

If you’re now running Windows 11, you can easily enable the UTC / GMT time standard via following steps.

1. Firstly, click on ‘Search’ icon on task bar. Then search for and right-click on ‘Command Prompt’ and select ‘Run as administrator’.

2. When command prompt opens, copy and paste the command below and hit run:

reg add "HKEY_LOCAL_MACHINE\System\CurrentControlSet\Control\TimeZoneInformation" /v RealTimeIsUniversal /d 1 /t REG_DWORD /f

The command creates a registry key to tell Windows to use universal time standard.

Refresh the display time to apply change:

If Windows 11 shows the incorrect date and time, search for and open “Settings” from start menu. Then go to “Time & Language” from left pane, click “Date & time” and finally disable and re-enable ‘Set time automatically’ option will correct your system time.

For Ubuntu users, it may also display incorrect time when “Automatic Date & Time” not enabled. Simply enable or refresh the option in System “Settings -> Date & Time” will do the trick.

Microsoft has announced Windows 11. Besides online upgrading, here’s how to burn Windows 11 as an USB installer in Ubuntu Linux.

The official Windows 11 iso image will be available to download soon in next week. Though it has leaked! And you can easily install it using an USB stick.

Requirements:

Before getting started, you need a 6 GB+ USB drive, as well as a computer or laptop with:

  • 1 gigahertz (GHz) or faster processor.
  • 4GB+ RAM.
  • 60GB+ hard disk.
  • Graphics with DirectX 12 or later compatible.
  • UEFI, Secure Boot capable.
  • TPM 2.0 (Some succeed on old machines via WinPE).

Option 1: Boot Windows 11 iso via Ventoy:

It has been tested that Ventoy works for Windows 11. Simply install Ventoy on your USB stick and then copy the iso and boot it! See the link for more:

Option 2: Create Windows 11 USB via WoeUSB:

WoeUSB is a free and open-source Microsoft Windows® USB installation media preparer for GNU+Linux.

1. Install WoeUSB in Ubuntu:

For all current Ubuntu releases, including Ubuntu 18.04, Ubuntu 20.04, Ubuntu 21.04, you can install the tool from the PPA repository.

First, search for and open terminal from system app launcher.

Next, run command to add the PPA. Type user password, no asterisk feedback, when it asks and hit Enter.

sudo add-apt-repository ppa:tomtomtom/woeusb

Finally, install WoeUSB via command:

sudo apt install woeusb woeusb-frontend-wxgtk

For Ubuntu 18.04, Linux Mint, you need to run sudo apt update command to refresh package cache first.

2. Burn Windows 11 iso image:

Now plug-in your USB drive! Search for and open WoeUSB from system app launcher.

When it opens, select ‘From a disk image (iso)’ and choose your ISO image. Then highlight the USB device from ‘Target device’. Finally click on ‘Install’ button.

NOTE you have to unmount the USB or it will pop-up an error dialog. To do so, search for and open Disks utility.
Select your device in left pane, and click on the square icon to unmount it.

Next go back to WoeUSB, click refresh and select the USB device. After clicking on the Install button, it starts to wipe USB and burn Windows 11 into it.

When everything’s done successfully, it will prompt that installation succeeded. Close it and boot the USB to get start installing Windows 11!

Audacity audio editor and recorder is easy to install in Ubuntu Software via Snap package. For those prefer the classic deb package, the Ubuntu PPA has updated for the latest Audacity 3.0.2.

Since Audacity 3.0, it requires the development branch of wxWidgets toolkit 3.1.x. However, Ubuntu provides only the stable v3.0 series packages.

Thanks to Pascal de Bruijn, I’ve successfully built wxWidgets 3.1.3 for Audacity. So the audio editor packages updated for Ubuntu 18.04, Ubuntu 20.04, Ubuntu 21.04, and Linux Mint 20.

Known issues:

There are however known issues in the PPA build. When starting Audacity in Ubuntu 21.04 or Linux Mint 20, it will popup “An assertion failed” dialog, which indicates:

./src/widgets/FileConfig.cpp(98): assert “mDirty == false” failed in ~FileConfig().

Just click on “continue” button, and the software should start.

Another issue is that the app window slow to open. It takes a few seconds to start due to AlSA issues and warning. However, it works once app window opens!

Install Audacity 3.0.2 via PPA:

Open terminal either from system application menu or by pressing Ctrl+Alt+T on keyboard. When terminal opens, run following commands one by one:

1.) Run command in terminal to add the Ubuntu PPA:

sudo add-apt-repository ppa:ubuntuhandbook1/audacity

Type user password (no asterisk feedback due to security reason) when it prompts and hit Enter to continue.
2. Then either upgrade from an old release (if exist) via Software Updater, or run following commands one by one to check updates and install (or upgrade) audacity 3.0.2:

sudo apt update

sudo apt install audacity

Uninstall:

To remove the PPA repository, launch Software & Updates utility and remove relevant line under ‘Other Software’ tab. Or simply run command in terminal:

sudo add-apt-repository --remove ppa:ubuntuhandbook1/audacity

To remove Audacity audio software, either use system package manager or run command in terminal:

sudo apt-get remove --autoremove audacity audacity-data

Kid3 3.8.7 was released as the latest version of the KDE’s audio tag editor. You can install it easily in Ubuntu 18.04, Ubuntu 20.04, Ubuntu 21.04, Linux Mint 20 via PPA.

Kid3 is a free open-source tool to edit tags in MP3, Ogg/Vorbis, FLAC, MPC, MP4/AAC, MP2, Opus, Speex, TrueAudio, WavPack, WMA, WAV and AIFF files.

It can edit ID3v1.1 tags, all ID3v2.3 and ID3v2.4 frames, and edit tags for multiple files. As well it can convert between ID3v1.1, ID3v2.3 and ID3v2.4 tags.

Version 3.8.7 is a minor release added Russian handbook as well as following bug-fixes:

  • ID3v2: wrong numeric strings for genres Fast Fusion, Fok, Folk Rock, Folklore, Funk, Fusion.
  • ID3v1: Genres Avant-Garde, Beat Music, Bebop, Britpop, Dancehall, Dark Wave, Euro House, Eurotechno, Fast Fusion, Folk Rock, Hip Hop, Jazz-Funk, Pop-Funk, Synth-Pop, Worldbeat cannot be set with TagLib version < 1.12.
  • Memory leak in the rare case where the file type is detected not by the extension but by the contents.
  • CLI: fields (sub-elements of a frame) with a non-string value cannot be set with id3lib.

How to Install Kid3 3.8.7 in Ubuntu via PPA:

The official Kid3 PPA has made the new packages for Ubuntu 18.04, Ubuntu 20.04, and Ubuntu 21.04.

1. Open terminal either from application launcher or by pressing Ctrl+Alt+T on keyboard. When it opens, run command to add the PPA:

sudo add-apt-repository ppa:ufleisch/kid3

Type user password (no asterisk feedback) when it prompts and hit Enter to continue.
2. If an old version was installed, upgrade Kid3 using Software Updater:
upgrade kid3 via software updater

or run commands one by one in terminal to install or upgrade to the latest tag editor:

sudo apt update

sudo apt install kid3-qt

You may replace kid3-qt with kid3 in the code for KDE integration, and/or with kid3-cli for the command-line interface.

Uninstall

To remove the PPA repository, either open Software & Updates -> Other Software tab and remove the relevant line, or run command:

sudo add-apt-repository --remove ppa:ufleisch/kid3

To remove the audio tag editor, either use your system package manager or run command:

sudo apt remove --auto-remove kid3 kid3-*

This simple tutorial shows how to search for, install, remove, and manager Flatpak apps in Ubuntu Linux.

Flatpak is an universal Linux package format developed by an independent community. Like snap, it runs in sandbox and bundles most runtime libraries.

Flatpak is supported out-of-the-box in many Linux Distros, e.g., CentOS, Fedora, Linux Mint. And it’s available in the most Linux repositories. Since many software developers publish binary packages via flatpak, it’s a good choice to install external apps in Ubuntu Linux.

1. Install Flatpak daemon in Ubuntu:

Unlike Snap, the flatpak daemon is not pre-installed in Ubuntu. You have to first open terminal (Ctrl+Alt+T) and run command to install it:

sudo apt install flatpak

For Ubuntu 18.04, you have to first add this PPA repository before running this command.

Then add the flathub repository via command:

flatpak remote-add --if-not-exists flathub https://flathub.org/repo/flathub.flatpakrepo

2. Find for Flatpak App in Ubuntu:

Flathub.org is the de facto standard for getting applications packaged with Flatpak. You can browse flatpak apps directly in the web browser via the link below:

If you use Gnome Software instead of Snap Store in Ubuntu, installing gnome-software-plugin-flatpak package will make Flatpak apps available in Software Center.

As well, you can search for an app via flatpak search TEXT. For instance, searching for an radio app via command:

flatpak search radio

NOTE the first time running this command takes quite a few seconds to update database.

3. Install Flatpak package:

If you find an app using the flathub.org web page, then there are 3 ways to install it in Ubuntu.

Option 1. Click on the “INSTALL” button to download the installer file. Then open terminal (Ctrl+Alt+T) and run command to install it:

flatpak install /PATH/TO/FILE

Since downloaded files mostly save to Downloads folder. Type ~/Downloads/ and hit TAB key twice will show you available flatpak files.

In the case, the command can be:

flatpak install ~/Downloads/com.spotify.Client.flatpakref

Option 2. You can also right-click on “INSTALL” button and copy the URL link. Then install the app via command:

NOTE: It’s NOT the web page url, but the url link of the “install” button.

flatpak install URL

In the case, the command will be:

flatpak install https://dl.flathub.org/repo/appstream/com.spotify.Client.flatpakref

Option 3. In each app page, user can click the Down Arrow icon beside the “Install” button, where it provides the commands to install and run the Flatpak package.

If you found an app use flatpak search command, copy the App ID, then install it via:

flatpak install flathub App-ID

In the case the command can be:

flatpak install flathub com.spotify.Client

4. List installed flatpak apps:

For all the installed apps, you can simply run command to list them all:

flatpak list

To make it clean, only list apps via command:

flatpak list --app

And you can list installed runtime libraries, e.g., GNOME, KDE, QT platforms, via command:

flatpak list --runtime

5. Uninstall a flatpak package:

To remove a flatpak, you need to firstly get the App-ID via the previous steps. Then run command:

flatpak uninstall --delete-data App-ID

For instance, remove GIMP as the previous picture shows via command:

flatpak uninstall --delete-data org.gimp.GIMP

Removing flatpak apps WILL NOT remove the independent runtime libraries (QT, GNOME platforms, etc). You can run this command to get rid of them to free up disk space:

flatpak uninstall --unused

And to remove everything your installed, run:

flatpak uninstall --all

In addition for managing flatpak app permissions, try Flatseal.


Working with multiple computers at your desk? To make it clean, you can use single mouse and keyboard to control all the machines via Barrier.

Barrier is a free and open-source solution forked from Synergy. It makes it easy to share mouse & keyboard, over local network, between machines running Windows, Linux, Mac OS, FreeBSD. Either wired, wireless, or laptop’s built-in keyboard and touchpad can be shared with the software.

NOTE: This tutorial is tested in following machines:

  • Two Windows 10 machines, both wired network – working so far so good!
  • Ubuntu 22.04 (server, wireless network), and Windows PC (wired network) – sometimes works, sometimes NOT

1. How to Install Barrier

Barrier is a popular software that most Linux Distros have it in the main repositories. So you can install it in Linux either via system package manager or Distro’s own command line installer (e.g., apt install, dnf install, and pacman -S)

For Ubuntu 20.04/22.04 & higher, Linux Mint 20/21, and current Debian releases, open terminal and run command to install it:

sudo apt install barrier

Since Ubuntu 20.04 has version 2.3.2, you can alternatively install most recent version using the Flatpak or Snap package.

For Windows and Mac OS, the latest packages are available to download at the link below:

2. Setup Barrier server and client.

After installed Barrier in all the machines, launch it, choose your language and then select either Server or Client.

Select “Server” on the machine that connected with the mouse and keyboard. And all others set to “Client”.

Setup the server.

On the server computer, click on “Configure Server…” button.

In the screen configuration page, you have to drag and drop small “computer” icon into the grid to add clients.

  • The center one is the current server screen.
  • Drag & drop ‘computer’ icon to create client screens.
  • Double-click to rename client screen name (according to the name show in Barrier app in client machines).
  • Move client screens around the server (left, right, top, bottom) as you prefer.

In the case (as picture shows), when I move the mouse cursor to the left screen edge in server, the mouse & keyboard will take control of “fedora” machine. In “fedora”, move to the right screen edge will go back to server machine.

As well, move the cursor to the right edge in server will go to “Desktop-PC”.

In the “Hotkeys” tab, you can configure keyboard shortcut to switch screens.

  • First click ‘New’ and create a shortcut key.
  • Second highlight the key you created.
  • Click ‘New’ in right to specify an action to perform.

And you can get optional settings in the ‘Advanced server settings’ page. They include:

  • switch time delay.
  • dead corners.
  • transfer and share files between machines.

Setup the client.

It’s easy to configure the clients since it supports ‘auto config’. Just click start, it will automatically connect to the server if available, and prompt you to trust the fingerprint if SSL enabled.

By disabling ‘Auto config’, you can type server IP manually. And a dialog will pop-up indicates you connected successfully.

For connecting issues, check the log from menu. As well, you can change the listening port, toggle SSL via settings menu.

NOTE: for better working, try disable “Enable SSL” in both server and clients machines.

3. Start Sharing

After setup both server and clients, click ‘Start’ button in both machines. Then, try moving mouse cursor to screen edge to switch machine, or use the keyboard shortcut you set.

This simple tutorial shows how to enable & configure the multi-touch gestures in Ubuntu 22.04 using touchegg.

NOTE: This tutorial also works in Ubuntu 22.04, but only on Xorg session. In login screen, select username, and click bottom right gear button to make switch.

For those running Ubuntu on laptop or PC with external touchpad, multi-finger gestures enable users with more actions to control your system.

Since Ubuntu does not offer a utility to configure multi-touch functions, touchegg is a free open-source tool to enable this feature for you. And it supports for both global gestures or gestures for Firefox, Chromium, Google Chrome only.

Touchégg Enables Touchpad Gestures include:

  • Swipe up, down, left, and right with 3 fingers and/or 4 fingers.
  • Pinch in / out with 2, 3, and/or 4 fingers.
  • Tap with 2, 3, 4, and/or 5 fingers.

Actions you can set for touchpad gesture:

  • Minimize, Maximize, Restore, Close a window.
  • Tile a window.
  • Toggle full-screen.
  • Switch desktop.
  • Show desktop.
  • Execute a command.
  • Specify a keyboard shortcut, e.g., to open terminal, switch workspace, toggle activities overview.

Step 1: How to Install Touchégg Service in Ubuntu via PPA:

The software has an official PPA which so far supports for Ubuntu 20.04, Linux Mint 20, and higher.

1.) Firstly open terminal from system application launcher and run command to add the PPA:

sudo add-apt-repository ppa:touchegg/stable

Type user password, no asterisk feedback, when it asks and hit Enter to continue.

2.) Next run command to install the touchegg service via command:

sudo apt install touchegg

The service should run automatically once you installed it. To verify the status, run command:

systemctl status touchegg.service

It should show you ‘active (running)‘. If not, try to enable and start the service:

systemctl enable touchegg.service && systemctl start touchegg.service

Step 2: Install Graphical Configuration tool: Touché

UPDATE (Nov 2021): It’s not a good idea in my own opinion, but they did it. The project does no longer provide native DEB package for the graphical configuration tool ‘Touché‘, though still maintains Ubuntu PPA with the package for the Touchégg system service. Some user do not like Flatpak since it requires hundreds of MB runtime libraries, while the app itself is only few dozen MB. For choice, you may use the GNOME Extension instead, see the link in bottom!

Now the project offers the graphical tool via universal Flatpak package runs in sandbox.

1.) Firstly, press Ctrl+Alt+T on keyboard to open terminal. When it opens, run command to install the flatpak daemon first:

sudo apt install flatpak

2.) Next, run command to install the configuration tool via Flatpak:

flatpak install https://dl.flathub.org/repo/appstream/com.github.joseexposito.touche.flatpakref

Finally restart your system is required to make multi-touch work!

Step 3: Enable/Configure Multi-Touch Gestures

After restarted your system, search for and launch touché from Activities overview. When it opens, enable one or more finger gestures as you prefer. Then choose an action from the drop-down box.

Turn on the slider icons as you prefer, and select an action to do from the drop-down box. You may also simulate a keyboard shortcut, such as “Super” key to toggle overview and “Super+Pageup/Pagedn” to switch workspace.

The changes in touche apply immediately. And there’s also Gnome Extension to enable multi-touch gestures on X11. For more, see touchegg on github.

Step 4: Install Extension (for GNOME only)

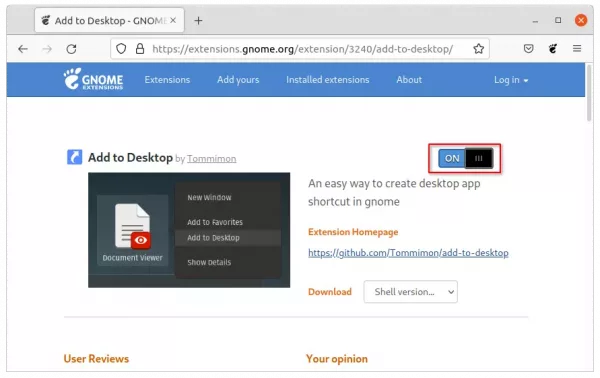
For the default GNOME desktop with Xorg session, you also need to install an extension to make the multi-touch gestures work.

To do so, first open terminal (Ctrl+Alt+T) and run command to install the agent package:

sudo apt install chrome-gnome-shell

Then, go to the link page below, and use ON/OFF switch to install the extension for X11.

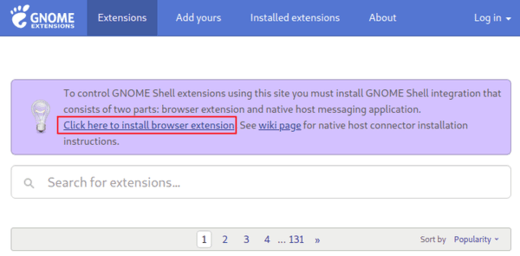
If you don’t see the toggle switch, install browser extension (it should prompt you via link in the page) and refresh.

Finally, log out and back in, or restart computer to apply change.

Uninstall Touchégg:

To remove the Touchégg service, open terminal and run command:

sudo apt remove --autoremove touchegg

And remove the Ubuntu PPA via command:

sudo add-apt-repository --remove ppa:touchegg/stable

For the graphical configuration tool Touché, remove it via command:

flatpak uninstall --delete-data com.github.joseexposito.touche

You may also run flatpak uninstall --unused to clean up disk space.