![]()
Mixxx, the free open-source DJ software, released new 2.5.1 version one day ago.
Although this is a first minor update for the 2.5 branch, it includes new features such as mapping support for several new MIDI controllers. They include:
News, Tutorials, Howtos for Ubuntu Linux
Free open-source software updates and Linux news
![]()
Mixxx, the free open-source DJ software, released new 2.5.1 version one day ago.
Although this is a first minor update for the 2.5 branch, it includes new features such as mapping support for several new MIDI controllers. They include:

![]()
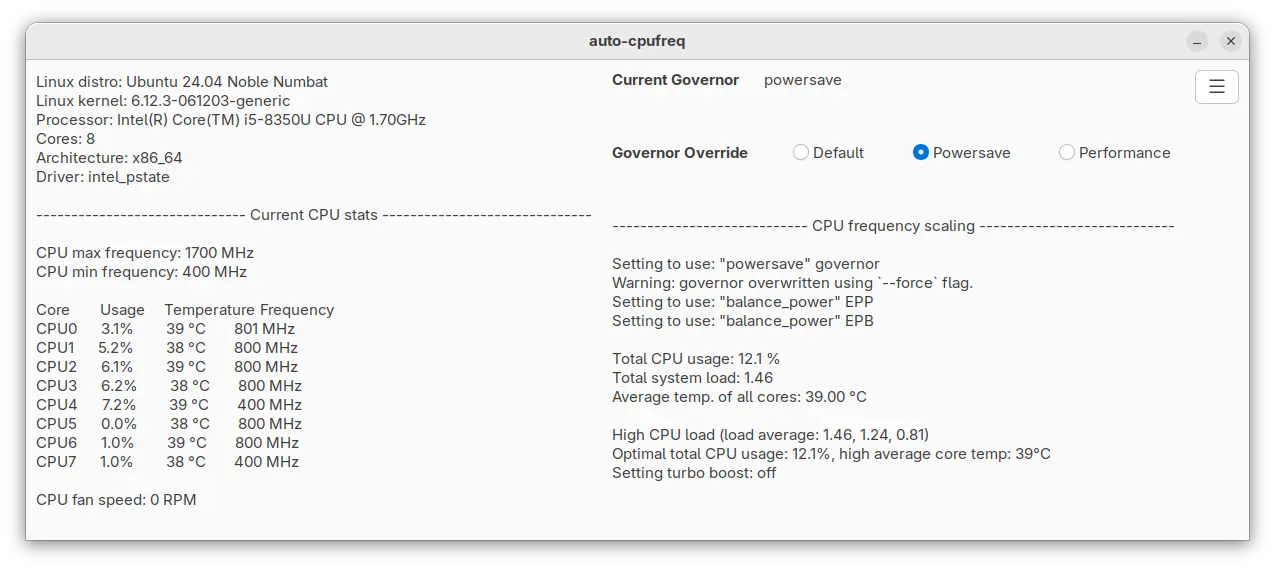
Auto-CPUFreq, automatic CPU speed & power optimizer, released version 2.6.0 with some new features and many bug-fixes.
For those who don’t know about auto-cpufreq, it is a free open-source Linux app, which can monitor and automatically manage CPU speed according to battery state, CPU usage, temperature, and system load.
![]()
For Ubuntu 24.10 users who are going to upgrade to the latest Ubuntu 25.04, the upgrade channel was temporarily suspended due to bugs!
Ubuntu 25.04, code-name Plucky Puffin, is the latest Ubuntu version that was officially released in last week! As Ubuntu 24.10 has only 3 months support, it’s usually recommended to upgrade to the newer Ubuntu 25.04.
UPDATE: All bugs have been fixed! And, the upgrade channel re-opened.
This time, however, it’s better to wait for a few days until the developer team fixed the issues!

![]()
Scribus, the popular free open-source desktop publishing software, released new 1.6.4 version yesterday.
This is a maintenance release for current 1.6 stable release series. It features only some bug-fixes and few minor new features.
![]()
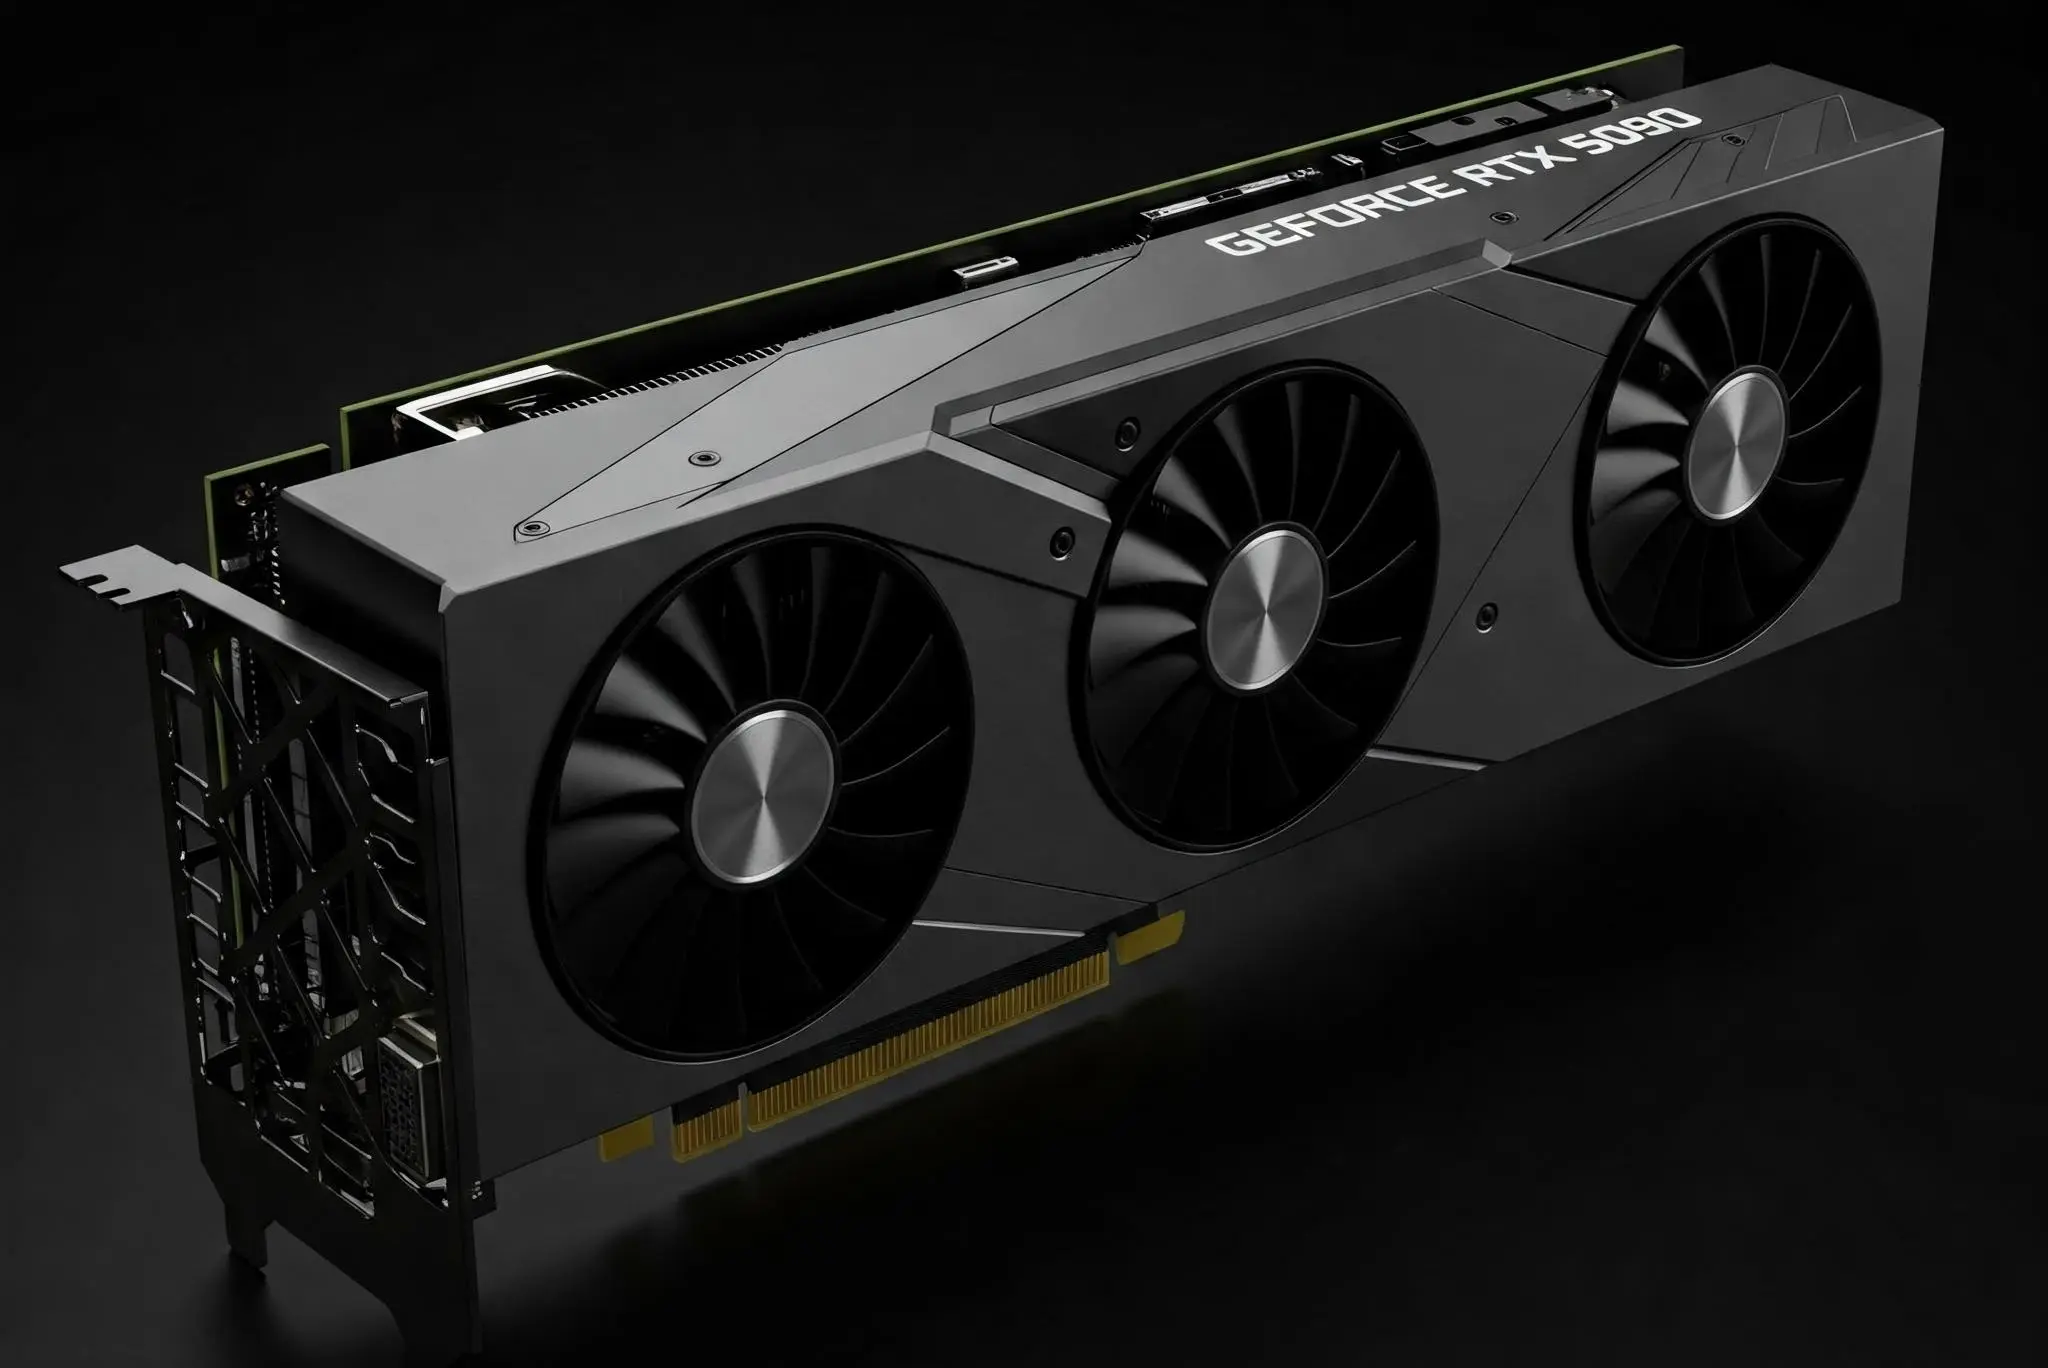
NVIDIA announced the first release of its 575 driver series for Linux few days ago.
It’s NVIDIA 575.51.02, a Beta driver, that features NVIDIA Smooth Motion support for GeForce RTX 50 series graphics cards, which is also coming to RTX 40 series.

Kdenlive, the popular free open-source KDE video editor, released new 25.04.0 version few days ago.
The new Kdenlive 25.04.0 can now import and export projects using the OpenTimelineIO format. Meaning, it can now import and export projects from/to other video editors that support this format.
![]()
Ubuntu 25.04, code-name Plucky Puffin, was officially released today!
Ubuntu 25.04 is a short term release with 9-month support until Jan 2026. It features Linux Kernel 6.14, GNOME 48 desktop, updated toolkits and applications.
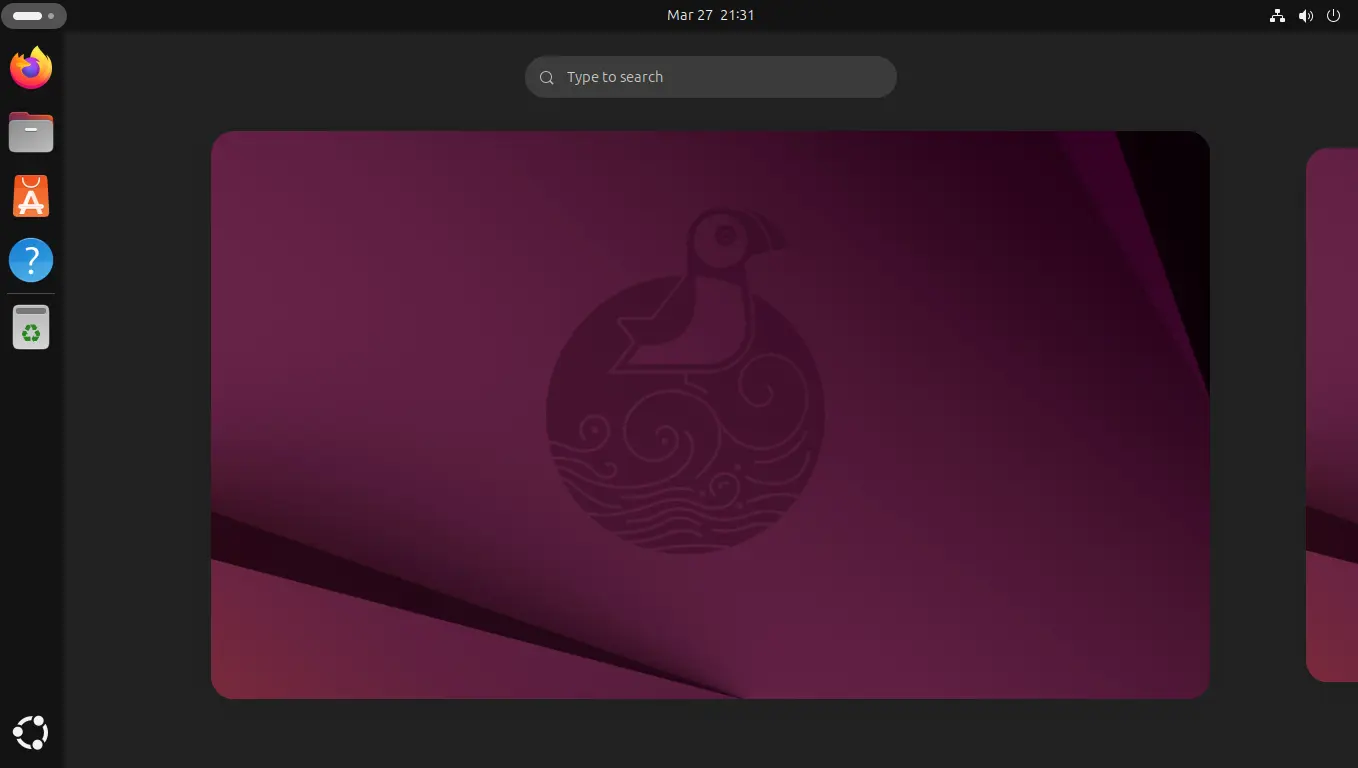
Ubuntu 25.04 Desktop

Oracle VirtualBox announced new 7.1.8 maintenance release on Tuesday with bug-fixes and support for recent Linux Kernels.
VirtualBox improved the Linux Guest screen flickering issue in the past few releases, the new 7.1.8 continued fixing the screen display issue on certain conditions, and finally marked that the heavy screen flickering on Ubuntu Guest with Wayland as fixed!
screen tearing and flickering issue finally closed
![]()
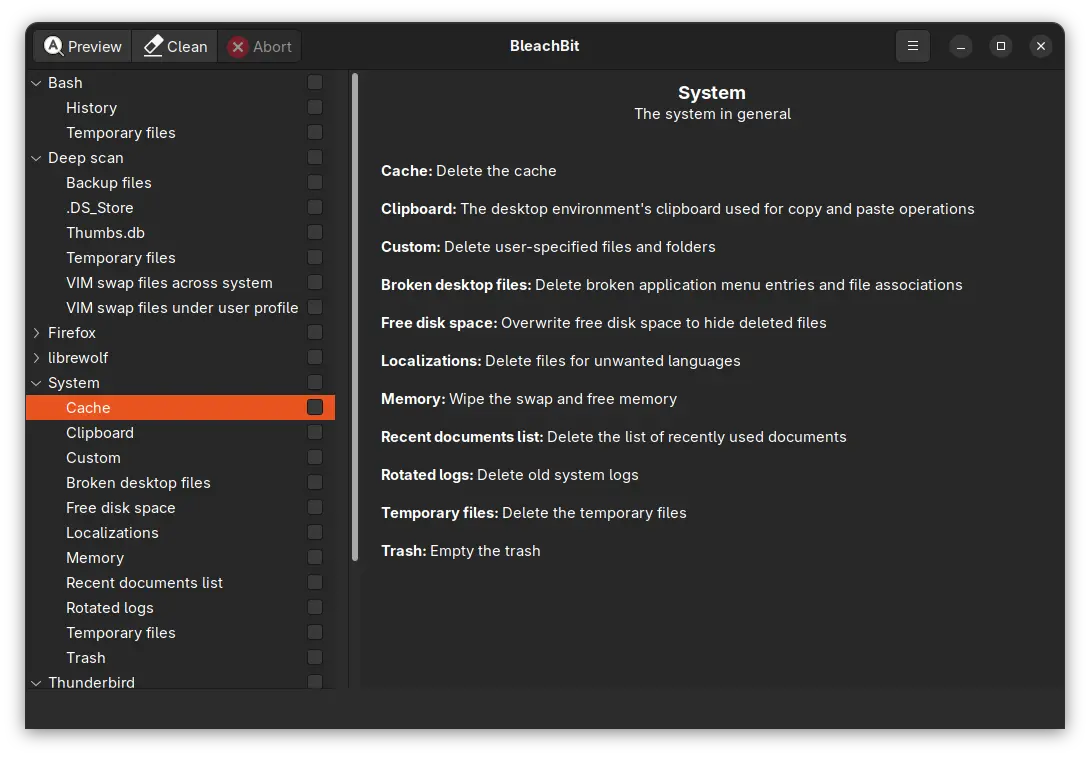
BleachBit, the popular free open-source system cleaner application, released new 4.9.2 development version few days ago.
After 2 alpha releases, BleachBit 4.9.2 is marked as Beta and final release before the next major 5.0.0.
![]()
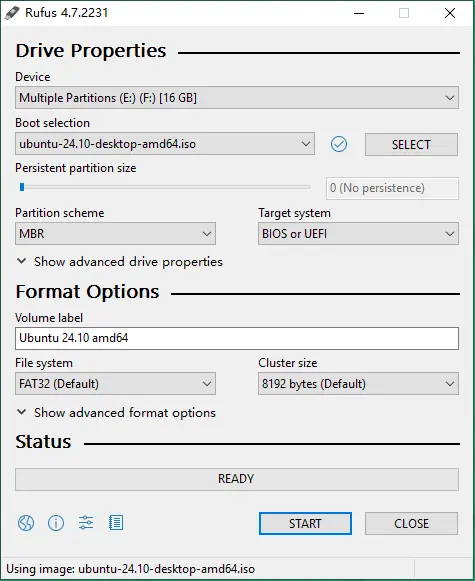
Rufus, the popular free open-source app to create bootable USB flash drives or Live USBs, released new 4.7 version last night with new features.
Rufus, stands for The Reliable USB Formatting Utility with Source, is a Windows only app originally designed to create DOS bootable USB flash drives. But, it now supports a variety of bootable .iso files, including various Linux Distributions, such as Ubuntu, Debian, Fedora, Arch, and more.