Archives For November 30, 1999

RetroArch, free and open-source front-end for emulators, game engines, released version 1.8.5 one day ago as the latest stable version.

RetroArch 1.8.5 brings Cheevos improvements, including support for extended Sega CD memory, queue multiple popups, prevent buffer overflow when encountering an unknown macro, don’t block Sameboy core as it only exposes some memory, etc.

The new release also adds Menu Scroll Acceleration option, new timedate styles, DPI-based scaling, ‘Nord’ and ‘Gruvbox Dark’ Ozone themes, ‘Flux’ RGUI theme, and many other UI improvements.

Also it adds ‘Arcade DAT Filter’ option for scanner, supports for scanning Korea, Asia PS1 discs, and PSP Korean. And it adds disk control interface API extension, and brings stability improvements for 3DS, Linux, and video widgets etc. See CHANGELOG for details.

How to Install RetroArch in Ubuntu:

For Ubuntu 18.04 and higher, RetroArch snap package (runs in sandbox) can be simply installed from Ubuntu Software utility. Though it’s still v1.8.4 at the moment, the snap version will be updated automatically once installed.

Libretro Stable PPA maintains the most recent .deb packages for Ubuntu 16.04, Ubuntu 18.04, Ubuntu 19.10, and Ubuntu 20.04.

1. Open terminal either by pressing Ctrl+Alt+T on keyboard or by searching for ‘terminal’ from application menu. When it opens, run command to add the PPA:

sudo add-apt-repository ppa:libretro/stable

Type your password (no asterisk feedback while typing) when it prompts and hit Enter.

2. After that, you can install RetroArch by running commands:

sudo apt update

sudo apt install retroarch

The PPA also contains a list of games available to install via command: sudo apt install libretro-*

Uninstall:

To remove the software, run command in terminal:

sudo apt-get remove --autoremove retroarch libretro-*

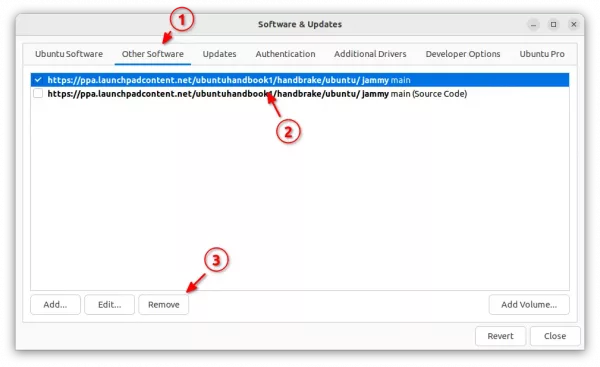
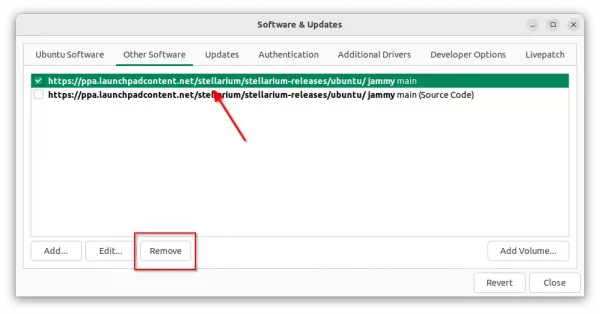
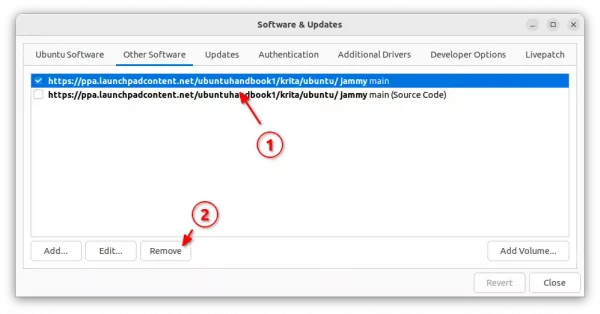
And remove the PPA repository by launching “Software & Updates” utility and navigating to “Other Software” tab.

DeaDBeeF music player 1.8.3 was released a day ago as the third bugfix update for 1.8 series.

The new release fixed CD Text reading issue, added more title formatting functions & value, added option to start deadbeef hidden / minimized to tray, and added detecting and ignoring freeformat MP3 files.

There also a lots of bug-fixes in the release including fixes to AAC plugin, HTTP stream interruption, ALSA, handle ffmpeg file, and a bunch of crashes and memory leaks. See here for more details.

How to Install DeaDBeeF 1.8.3 in Ubuntu:

There’s an Ubuntu PPA repository that contains deadbeef .deb packages, though it’s not been updated for the new release at the moment.

You may also download the 64-bit .deb package from the link below:

DeaDBeeF for Linux

NOTE: If you’ve installed an old Deadbeef version from an Ubuntu PPA, you have to remove it first (run following command in terminal), as the .deb from the previous link will install the music player into /opt/ directory.

sudo apt remove deadbeef

Then install the .deb via Gdebi package installer (available in Ubuntu Software) and enjoy!

OBS Studio 25.0 was finally released today after 6 release candidates. Here’s how to install it in Ubuntu 18.04, Ubuntu 19.10, via PPA.

Changes in OBS Studio 25.0 include:

  • Ability to capture Vulkan-based games
  • Add new window capture mode to capture browser-based windows, Microsoft Store (UWP) programs.
  • Add advanced scene collection importing
  • Media source hotkeys to allow control of playback
  • Add T-bar to studio mode
  • Add support for the SRT protocol
  • Ability to copy/paste multiple selected sources

There are also many other new features, enhancements, and various bug-fixes. See MORE.

How to Install OBS Studio 25.0 in Ubuntu 18.04:

The containerized Snap package has been updated and available to install via Ubuntu Software.

The official PPA offers the latest release packages for Ubuntu 18.04 and Ubuntu 19.10:

1. Open terminal either by pressing Ctrl+Alt+T on keyboard or by searching for “terminal” from app launcher. When it opens, run command to add the PPA:

sudo add-apt-repository ppa:obsproject/obs-studio

Type user password (no asterisk feedback) when it prompts and hit Enter.

2. Then either upgrade OBS Studio from an existing version via Software Updater, or run command in terminal to install the software:

sudo apt-get update

sudo apt-get install obs-studio

Once installed, launch the software from your system application launcher and enjoy!

Uninstall:

To remove the software, either use Synaptic package manager or run command in terminal:

sudo apt-get remove --autoremove obs-studio

To remove PPA repositories, launch Software & Updates and navigate to ‘Other Software’ tab.

Mozilla Firefox 74.0 was released a day ago. Now it’s available to install in Ubuntu 16.04, Ubuntu 18.04, Ubuntu 19.10 via the security & updates repositories.

FireFox 74.0 features:

  • Make it easy to import bookmarks and history from Microsoft Edge
  • Add-ons installed by external applications can now be removed via Add-ons Manager
  • Add custom site exception to the Facebook Container.
  • Bettery privacy through support for mDNS ICE by cloaking your IP address with a random ID in certain WebRTC scenarios.
  • Various security fixes. See release note for details.

How to Install FireFox 74.0:

FireFox 74.0 has been made into security & updates repositories for all current Ubuntu releases. Simply launch Software Updater (Update Manager) and install the updates.

Don’t see Firefox updates in Software Updater? Make sure security & updates repositories are enabled in Software & Updates utility. And you may also select the Main Server in the first tab.

Gscan2pdf, a graphical tool to produce PDF / DjVu from scanned document, released version 2.6.5 with some bug fixes and improvements. Here’s how to install it in all current Ubuntu releases.

As a new monthly release, Gscan2pdf 2.6.5 includes following changes:

  • Fixed bug when editing page number causing page to deselect and thumbnails to scroll to top of list
  • Use a scrolled window in the multiple message dialog to prevent it from growing too large.
  • Use the “Don’t show these messages again” checkbox to switch the checkboxes for the individual messages. Set the button inconsistent if the states are not all the same.
  • Fix warning message about pdftk (again) by making sure that user-defined tmp directory is available in time.
  • Improve responsiveness with OCR output (again)
  • Select # pages = all when switching from reverse->facing.
  • Show “waiting” cursor for longer to prevent scans from being started before all options applied.
  • Respect ‘Use timezone from locale’ option when setting file system timestamp
  • Updated translations.

How to Install gscan2pdf 2.6.5 in Ubuntu:

The official Gscan2PDF PPA has made the new release packages for all current Ubuntu releases, and their derivatives, including Ubuntu 16.04, Ubuntu 18.04, Ubuntu 19.10, Ubuntu 20.04, Linux Mint 18.x and 19.x

1. Open terminal either by pressing Ctrl+Alt+T on keyboard or by searching for ‘terminal’ from application menu. When it opens, run command to add the PPA:

sudo add-apt-repository ppa:jeffreyratcliffe/ppa

Type user password (no asterisk feedback due to security reason) when it prompts and hit Enter.

2. For those who have a previous release installed, upgrade it through Software Updater:

upgrade gscan2pdf

Or run following command in terminal to install or upgrade the software:

sudo apt update && sudo apt install gscan2pdf

How to Remove:

To remove gscan2pdf, either use your system package manager or run command:

sudo apt-get remove --autoremove gscan2pdf

And the PPA can be removed via Software & Updates utility, under Other Software tab.

OpenShot Video Editor

OpenShot video editor 2.5.1 was released a day ago. Here’s how to install it in Ubuntu 16.04, Ubuntu 18.04, Ubuntu 19.10, and derivatives via PPA.

OpenShot 2.5.1 features faster performance, huge optimizations with effects, and improved UTF-8 character support. Release highlights include:

  • UTF-8 Project Encoding Bug Fix (for non-ASCII characters)
  • Auto-Repair UTF-8 Corrupted Projects
  • Thumbnail Server UTF-8 Encoding
  • Fixed Broken Color-Shift and Shift Effects
  • Optimize Saturation, Hue, Blur, Wave, Brightness, Pixelate Effects
  • Frame: Fix interlaced AddImage
  • Raise Preview Cache to CPUs X 8 Frames (max 64)
  • Enhance Json Data Handling
  • Improve Travis Speed (remove homebrew from Mac builds)
  • Auto-Update HEX Version (for older CMake versions)

How to Install OpenShot 2.5.1 in Ubuntu:

1. Open terminal from software launcher (or press Ctrl+Alt+T), when it opens, run command to add the PPA:

sudo add-apt-repository ppa:openshot.developers/ppa

Type user password (no asterisk feedback due to security reason) when it prompts and hit Enter.

2. Then run following commands one by one to refresh repository cache and install OpenShot:

sudo apt update

sudo apt install openshot-qt

Also it’s recommended to upgrade your system libraries via sudo apt upgrade to avoid launching issue.

Uninstall:

To uninstall openshot video editor, run following command in terminal:

sudo apt-get remove --autoremove openshot-qt

And remove the PPA by launching “Software & Updates” and navigating to Other Software tab.

Glimpse, an open source image editor based on GNU Image Manipulation Program (GIMP in short), released version 0.1.2 today.

Due to the problematic word “gimp”, Glimpse forked the well known image editor so there are no potential barriers to using the software in businesses and educational institutions.

Glimpse is small release with minor tweaks and bug fixes. Changes in the release include:

  • Improved non-English translations and rebranding
  • Upstream contributors are better credited in the UI
  • “Color” icon pack and the “Gray” UI theme are back
  • Rebranded “Gimpressionist” plug-in and text color chooser
  • Unnecessary “fun” brushes have been removed

How to Install Glimpse 0.1.2 in Ubuntu:

The community build Snap package is available in Ubuntu Software, though it’s not updated at the moment.

The official Flatpak package has been updated to v0.1.2. And you can do following steps one by one to install it in Ubuntu 18.04 and higher.

1.) Open terminal either from system application menu or by pressing Ctrl+Alt+T on keyboard. When it opens, run command:

sudo apt install flatpak

2.) Add the flathub repository which hosts the flatpak package:

flatpak remote-add --if-not-exists flathub https://flathub.org/repo/flathub.flatpakrepo

3.) Finally install the Flatpak package of Glimpse via command:

flatpak install flathub org.glimpse_editor.Glimpse

If you already installed an old version, run command to update the package:

flatpak update org.glimpse_editor.Glimpse

Once installed, launch the image editor from your system application menu and enjoy!

Uninstall Glimpse:

To remove Glimpse image editor flatpak package, simply run command in terminal:

flatpak uninstall org.glimpse_editor.Glimpse

Kodi Media Center 18.6 now is available to install via its official PPA in Ubuntu 16.04, Ubuntu 18.04, Ubuntu 19.10, and their derivatives.

Kodi 18.6 is a maintenance release contains mainly bug-fixes and stability improvements. It’s not officially announced at the moment. According to the changelog, changes in the new release include: add image mime type for support over imagedecoder.raw, fix launching zip and 7z files from MyGames, fix error playing disk image games, remove now superflous HeadSet check, Remove Headphone check, and much more other changes.

How to Install Kodi 18.6 in Ubuntu:

The Kodi stable PPA has made the new release packages for Ubuntu 16.04, Ubuntu 18.04, Ubuntu 19.04, and Ubuntu 19.10.

1. Open terminal either from application menu or by pressing Ctrl+Alt+T on keyboard. When it opens, run command to add the PPA:

sudo add-apt-repository ppa:team-xbmc/ppa

Type user password (no asterisk feedback) when it prompts and hit Enter to continue.

2. Then either upgrading Kodi from an existing version via Software Updater:

upgrade Kodi

or refresh system package cache and install Kodi 18.6 via commands:

sudo apt update

sudo apt install kodi

Uninstall:

To remove the Kodi PPA repository, simply open Software & Updates -> Other Software.

To remove Kodi, run command:

sudo apt remove --autoremove kodi kodi-data kodi-bin

HPLIP 3.20.2 Released with Linux Mint 19.3 Support

Last updated: February 27, 2020

HP Linux Imaging and Printing

HPLIP 3.20.2, HP developed open source Linux driver for HP printers and scanners, was released today with many new devices and Linux Mint 19.3 support.

HLIP 3.20.2 added support for Linux Mint 19.3 and the following new printers:

  • HP Neverstop Laser MFP 1200n, 1200nw
  • HP Neverstop Laser MFP 1201n, 1202nw
  • HP Laser NS MFP 1005n
  • HP Neverstop Laser 1000n, 1001nw
  • HP Laser NS 1020n
  • HP ScanJet Pro 2000 s2
  • HP ScanJet Pro 3000 s4
  • HP ScanJet Pro N4000 snw1
  • HP ScanJet Enterprise Flow 5000 s5
  • HP ScanJet Enterprise Flow N7000 snw1

1. To install the software, download the package “hplip-3.20.2.run” from the link below:

HPLIP Download Page

2. Then open terminal (Ctrl+Alt+T) and run command to make the file executable.

chmod +x ~/Downloads/hplip-3.20.2.run

3. Finally run command to run the downloaded file:

sh ~/Downloads/hplip-3.20.2.run

4. Follow the terminal prompts, answer some questions to build and install HPLIP on your system. When everything is done, plug/re-plug your printers and enjoy!

opera web browser

Opera web browser 67 was released a few days ago with tab organization redefined via a new tool called ‘Workspaces’.

Often have your browser with too many tabs open? With Opera 67, opened tabs can be grouped into different workspaces. And you can easily switch workspaces via the icons in the left sidebar.

You can add up to 5 workspaces, name them, and designate their icons. Tabs can be moved to the workspace of your choice via their context (right-click) menu.

Other new features in Opera 67 include:

  • Highlight duplicated tabs when hover mouse pointer over a tab.
  • New tab-cycler via Ctrl+Tab shortcut.
  • Sidebar setup panel via the three-dot icon in the bottom left.
  • Improved security with DNS over HTTPS
  • Improved Video pop-out (picture in picture)

How to Install Opera 67 in Ubuntu:

The Opera team offers snap package (runs in sandbox), available to install in Ubuntu Software:

Also the native Ubuntu .deb package is available for downloading at the link below:

Download Opera for Linux

Grab the .deb package, and double-click to install it.

If you installed Opera via the .deb package, you may also add the official apt repository via following steps to receive future software updates.

1. Open terminal (Ctrl+Alt+T) and run command to add the opera repository:

sudo sh -c 'echo "deb http://deb.opera.com/opera-stable/ stable non-free" >> /etc/apt/sources.list.d/opera.list'

2. Get the key:

wget -O - http://deb.opera.com/archive.key | sudo apt-key add -

Finally either install Opera via following command or upgrade the browser via Software Updater:

sudo apt update

sudo apt install opera-stable

Uninstall:

For the Opera snap package, simply remove it from Ubuntu Software.

For the Opera apt repository, launch Software & Updates and navigate to Other Software tab.

To remove traditional opera package, either use your system package manager or run command in terminal:

sudo apt remove --autoremove opera-stable