Archives For November 30, 1999

DeaDBeeF music player 1.8.0 was released a few days ago. Here’s how to install it in Ubuntu 16.04, Ubuntu 18.04, Ubuntu 18.10, Ubuntu 19.04, and derivatives.

It’s been almost 3 years since the last 0.7.2 release. DeaDBeeF is considered mature enough and stops using version 0. DeaDBeeF 1.8.0 features:

  • add Opus support
  • add ReplayGain Scanner
  • add proper tracks+cue support
  • add/improve MP4 tag reading and writing
  • load embedded album art from MP4 files
  • add File Copy and File Move converter presets
  • add GBS, SGC support to Game_Music_Emu
  • improve detecting GTK theme colors for custom widgets
  • add Copy & Paste in playlist
  • add localization support for plugin UI
  • add Drag’n’drop support from deadbeef to other applications
  • add --volume command line option
  • and a large list of other improvements and bug-fixes (See the previous link).

How to Install DeaDBeeF 1.8.0 in Ubuntu:

Besides using the official portable package, the new release is available to install in all current Ubuntu releases via PPA repository.

1. Open terminal either from app launcher or by pressing Ctrl+Alt+T on keyboard. When it opens, run command to add the PPA:

sudo add-apt-repository ppa:spvkgn/deadbeef

Type user password (no asterisk feedback) when it prompts and hit Enter to continue.

2. Then refresh system package cache and install deadbeef via following 2 commands:

sudo apt update

sudo apt install deadbeef

If you wouldl like to install GTK2 interface, replace deadbeef with deadbeef-gtk2 in the code.

Uninstall:

To remove the music player, open terminal and run command:

sudo apt remove --auto-remove deadbeef

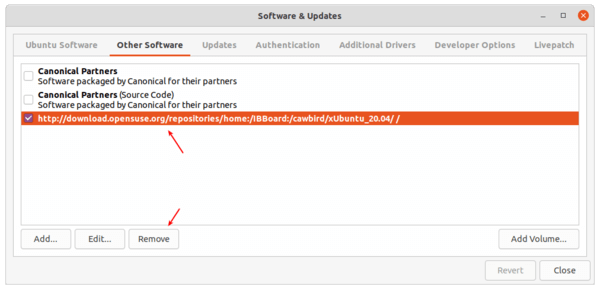
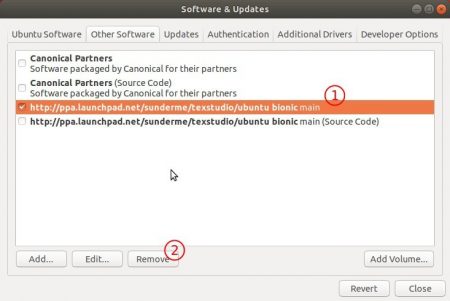
And remove the PPA via Software & Updates -> Other Software.

GIMP extra color palettes

GIMP image editor 2.10.10 was released on Sunday with new features, optimizations, and stability fixes.

GIMP 2.10.10 release highlights:

  • Line art detection in the Bucket Fill tool for comic artists
  • Various usability improvements in transformation tools
  • Sample Merged option added to the Heal tool and fixed in the Clone tool
  • Parametric brushes now have 32-bit per channel precision
  • Easier brush and pattern creation workflow
  • On-canvas layer selection
  • Faster saving/exporting and layer groups rendering
  • Initial DDS support
  • Many improvements in GEGL, the image processing engine

GIMP 2.10 Splash

How to Install the latest GIMP in Ubuntu:

GIMP 2.10.10 packages will be available in both PPA repository and Snap store (CHECK the links before getting started) in a few days.

Install GIMP via Snap in Ubuntu:

For Ubuntu 18.04 and higher, simply install the snap package from Ubuntu Software (See picture above).

For Ubuntu 16.04, open terminal (Ctrl+Alt+T) and run following 2 commands one by one:

sudo apt-get install snapd

sudo snap install gimp

The snap co-exists with native Ubuntu package, you’ll have two GIMP icons in app launcher if both were installed.

Install GIMP via PPA in Ubuntu:

For Ubuntu 18.04 and Ubuntu 18.10, you can upgrade the native Ubuntu package using PPA repository.

1. Open terminal either via Ctrl+Alt+T keyboard shortcut or by searching for ‘terminal’ from application launcher. When it opens, run command:

sudo add-apt-repository ppa:otto-kesselgulasch/gimp

Type user password (no asterisk feedback) for sudo prompt and hit Enter to continue.

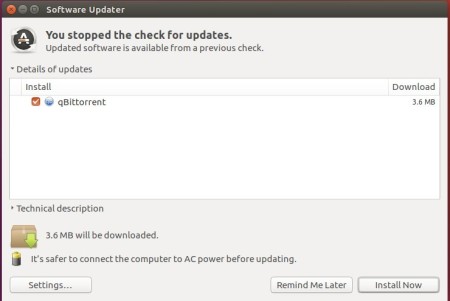
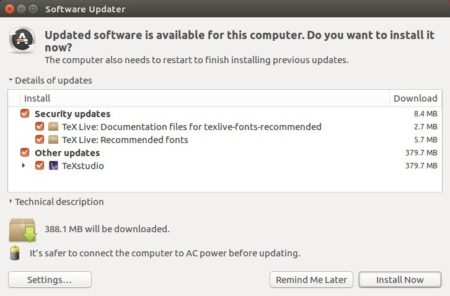
2. After that, launch Software Updater (Update Mananger) and upgrade GIMP after checking for updates:

Uninstall:

To remove the GIMP snap packge, either use Ubuntu Softwrae or open terminal and run command

sudo snap remove gimp

To purge the PPA repository as well as downgrade GIMP to its stock version, run command:

sudo apt install ppa-purge && sudo ppa-purge ppa:otto-kesselgulasch/gimp

Visual Studio Code IDE

MicroSoft and Canonical (the company behind Ubuntu) finally announced the official Snap package of Visual Studio Code IDE.

Which means you can install VS Code easily from Ubuntu Software and keep it always up-to-date automatically, though the old Snap package maintained by an independent developer was available for nearly two years.

4th April 2019, London, UK – As of today, Microsoft Visual Studio Code is available for Linux as a snap, providing seamless auto-updates for its users. Visual Studio Code, a free, lightweight code editor, has redefined editors for building modern web and cloud applications, with built-in support for debugging, task running, and version control for a variety of languages and frameworks.

Snaps are containerised software packages designed to work across cloud, desktop, and IoT devices. They work natively on most popular Linux distributions and feature automatic updates and rollback functionality, enhanced security, and greater flexibility for developers working within Linux environments.

Install VS Code via Snap in Ubuntu 18.04 / Higher:

Simply open Ubuntu Software, search for and install visual studio code:

Install VS Code via Snap in Ubuntu 16.04:

For Ubuntu 16.04, the snap packages are not integrated in Ubuntu Software.

Open terminal (Ctrl+Alt+T) and run command to install snapd first:

sudo apt-get install snapd

Then install the VS Code IDE via command:

sudo snap install code --classic

Uninstall:

Depends on your system edition, remove VS Code either via Software Center or run command in terminal:

sudo snap remove code

Hugin panorama stitcher 2019.0.0 was released today. Here’s how to install it in Ubuntu 16.04, Ubuntu 18.04, Ubuntu 18.10, Ubuntu 19.04.

Changes in Hugin 2019.0.0 include:

  • Added raw import: It converts the RAW images to TIFF using a raw converter.
  • Fixes for align_image_stack with EXR images.
  • Added option for range compression.
  • New hotkeys for mask editor (change zoom level with 0, 1 and 2).
  • Expression parser can now read also all image variables.
  • line_find: Ignore lines with low distance to each other to get better coverage.
  • pano_modify: Added new switch --projection-parameter to set projection parameters.
  • Store program settings according to XDG base dir specification (Linux only, needs wxWidgets >= 3.1.1).

How to Install Hugin 2019 in Ubuntu:

For all current Ubuntu releases, do following steps to install the panorama stitcher via an unofficial PPA.

1. Open terminal either via Ctrl+Alt+T or by searching for ‘terminal’ from app launcher. When it opens, run command to add the PPA:

sudo add-apt-repository ppa:ubuntuhandbook1/apps

Type user password (no asterisk feedback) when it prompts and hit Enter to continue.

2. Then run commands to check updates and install Hugin 2019:

sudo apt update

sudo apt install hugin

or upgrade it via Software Updater if a previous release was installed.

Uninstall:

To remove Hugin panorama stitcher, run command in terminal:

sudo apt-get remove --autoremove hugin hugin-tools

To remove PPA, launch Software & Updates and navigate to ‘Other Software’ tab.

The first release candidate of the open-source kart racing game, SuperTuxKart 0.10 RC1, was released today.

Since the last beta, SuperTuxKart rc1 features:

  • Networked multiplayer (over LAN or the net) is now ready for general use
  • Replace the old mansion track with the new upgraded Ravenbridge Mansion track.
  • Add the Black forest add-on to the official STK track set!
  • Also numerous bugs have been fixed.

How to Install SuperTuxKart 0.10 in Ubuntu:

The followings steps will install the RC1 release at the moment for Ubuntu 16.04, Ubuntu 18.04, Ubuntu 18.10, Ubuntu 19.04.

This also works for the final SuperTuxKart 0.10 once it’s released.

1. Open terminal either via Ctrl+Alt+T keyboard shortcuts, or by searching for ‘terminal’ from app launcher. When it opens, run command:

sudo add-apt-repository ppa:stk/dev

Type user password (no asterisk feedback) when it prompts and hit Enter to continue adding the PPA.

2. For Ubuntu 16.04 and Linux Mint, you need to run command to refreah system package cache:

sudo apt update

3. Finally install the game via command:

sudo apt install supertuxkart

Once installed, open the game from your system application launcher and enjoy!

Uninstall:

To remove SuperTuxKart, open terminal and run command:

sudo apt remove –auto-remove supertuxkart supertuxkart-data

To remove the PPA, open Software & Updates -> Other Software, and remove the repository line:

WPS office for Linux 2019 was released with numerous new features and performance improvements. Here’s how to install it in Ubuntu 18.04.

WPS Office is developed by Zhuhai-based Chinese software developer Kingsoft. The office suite is made up of WPS Writer, WPS Presentation, and WPS Spreadsheet. The latest 2019 release features:

  • New skin style, icons, control points, Supports high resolution screen and custom appearance.
  • New pages, integration of recently opened documents, local templates, document templates, online templates, etc.
  • Document area supports preview effect when setting font size.
  • New built-in browser.
  • Support Home Page, Collection Document Search, Common Location, Cloud Documents, etc.
  • Support personal center, displaying account details and modifying account information.
  • Support for inserting SVG format pictures.
  • Support insertion of QR Code and bar code.
  • Support multi-window, multi-label free splitting and combination, and free management of labels.
  • Support setting areas for dates/times in charts.
  • Support Uygur typesetting.
  • Optimize skin and appearance settings to support custom appearance.
  • And many other new features and bug-fixes.

Download / Install WPS 2019 in Ubuntu:

Go to official WPS Linux download page, scroll down and select download amd64.deb for 64-bit OS, or i386.deb for 32-bit OS.

Downlowd WPS (.deb)

Then open terminal (Ctrl+Alt+T) and install the package via command:

sudo dpkg -i ~/Downloads/wps-office*.deb

Uninstall:

To remove the office suite, run command in terminal:

sudo apt remove --auto-remove wps-office

Vivaldi web browser released version 2.4 today. The new release supports drag & drop moving toolbar icons by holding Shift key.

Vivaldi 2.4 release highlights:

  • Toolbar buttons now is movable.
  • Option to reset toolbar.
  • Bookmark a selection of tabs via the context menu (right-click)
  • Support managing people and guest profiles
  • Basic Calculator in Quick Commands
  • Allow double-click to rename tab stack
  • Make it possible to sync the content of the bookmarks bar
  • And many more other changes. See the previous link for details.

How to Install Vivaldi 2.4 in Ubuntu:

The official Ubuntu .DEB packages are available for download at the link below:

Download Vivaldi (DEB)

Grab the deb matches your OS, then install it via Ubuntu Software or Gdebi package manager. Or run command in terminal:

sudo dpkg -i ~/Downloads/vivaldi-stable_2.4*.deb

In addition, after installed the .deb package, you can enable Vivaldi apt repository (Softare & Updates -> Other Software) to receive future updates through Software Updater:

Stellarium released version 0.19.0 today. Here’s how to install it in Ubuntu 16.04, Ubuntu 18.04, Ubuntu 18.10, and higher.

Stellarium 0.19.0 features 5 new sky cultures, many new DSO textures, code refactoring, and many other changes including:

  • Add new type of computation for AstroCalc/Phenomena tool
  • Add GUI options to change constellations and asterisms font size
  • Add Chinese medieval sky culture.
  • Add DSO textures
  • Add scripting graphics tool
  • Add classifications support for sky cultures
  • Add support 2 southern deep sky catalogues
  • Add armintxe, paleolithic sky culture and landscape
  • Add Maya constellations
  • Add 2 Babylonian skycultures

How to Install Stellarium 0.19.0 in Ubuntu:

1. Open terminal either via Ctrl+Alt+T keyboard shortcut or by searching ‘terminal’ from app launcher. When it opens, run command to add the PPA:

sudo add-apt-repository ppa:stellarium/stellarium-releases

Type user password (no asterisk feedback while typing) when it prompts and hit Enter.

2. Then upgrade Stellarium from an existing release with Software Updater utility:

Or run following commands to install the software for the first time:

sudo apt-get update

sudo apt-get install stellarium

Uninstall:

To remove the software, either use your system package manager or run command:

sudo apt-get remove --autoremove stellarium

And remove the PPA via “Software & Updates” utility under Other Software tab.

Avidemux video editor

Avidemux video editor released a new bug-fix version just 11 days after the last, with decoder fixes and misc small improvements

Avidemux 2.7.3 release highlights:

  • Vapoursynth is now dynamically loaded to avoid error popup
  • ASF/WMV demuxer fix
  • BMP decoder fix
  • Re-enabled PNG decoder
  • Basic save current state when crashing
  • Misc small improvements

avidemux 2.6 ubuntu 14.04

How to Install Avidemux 2.7.3 in Ubuntu:

There are a few ways installing the latest the video editor in all curren Ubuntu releases.

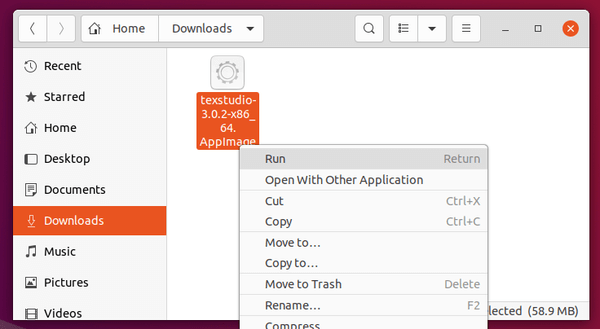
  • Appimage, single executable (enable it in file properties dialog) to launch the editor.
  • Flatpak, community maintained package that runs in sandbox.
  • Native Ubuntu (.deb) packages via an unofficial PPA.

For Ubuntu 16.04, Ubuntu 18.04, and higher, heres how to install Avidemux 2.7.3 via the unofficial PPA.

1. Open terminal either from app launcher or via Ctrl+Alt+T keyboard shortcut. When it opens, run command to add the PPA:

sudo add-apt-repository ppa:ubuntuhandbook1/avidemux

Type user password (no asterisk feedback due to security reason) when it prompts and hit Enter.

avidemux ppa

2. Then run following 2 commands to refresh package cache and install the video editor:

sudo apt update

sudo apt install avidemux2.7-qt5 avidemux2.7-qt5-data avidemux2.7-plugins-qt5 avidemux2.7-jobs-qt5

Uninstall:

To remove the native Ubuntu .deb package of Avidemux 2.7, run command in terminal:

sudo apt remove --autoremove avidemux2.7-*

And remove the PPA via Software & Updates utility under ‘Other Software’ tab.

Mozilla Firefox

Mozilla Firefox 66.0 was released two days ago. Now it’s available in main repositories of Ubuntu 16.04, Ubuntu 18.04, Ubuntu 18.10.

Firefox 66.0 release highlights:

  • Block sound auto-play. You can add exceptions, or turn the feature off.
  • Easier search via a redesigned new tab in Private Windows
  • Basic support for macOS Touch Bar
  • Title bar is hidden by default in Linux (Unfortunately I still see it in Ubuntu build).
  • Search from the tab overflow menu
  • Scroll anchoring keeps content from jumping as images and ads load at the top of the page
  • Redesigned certificate error pages
  • Improved extensions to load web page faster
  • Enabled AV1 support on 32-bit Windows and MacOS.

Upgrade to Firefox 66 in Ubuntu:

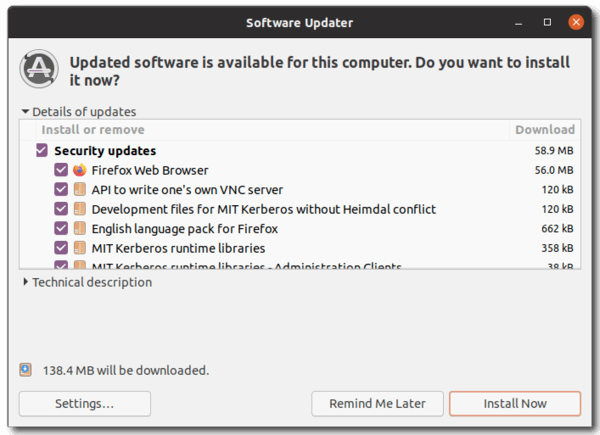
For all current Ubuntu releases, simply open Software Updater and install the updates after checking for updates.

If you don’t see the Firefox updates, go to Software & Updates and make sure the security and updates repositories are enabled in Updates tab.