Archives For News

Free open-source software updates and Linux news

Kxstitch cross stitch

KXStitch 2.1.0, free and open-source cross stitch pattern software, was released a day ago. Here’s how to install it in Ubuntu via PPA.

KXStitch is a cross stitch pattern editor by KDE. The software features:

  • Importing images
  • Multiple floss palettes
  • Multiple stitch types
  • Pattern libraries
  • Reads PCStitch files
  • Flexible printing options

The latest KXStitch 2.1.0 was released silently. No announcement, no changelog. If you want to know what changed, look over the project commits on github page.

KX Stitch PPA for Ubuntu

How to Install KXStitch 2.1.0 in Ubuntu:

For Ubuntu 16.04, Ubuntu 17.10, Ubuntu 18.04 users, it can be easily installed via the unofficial PPA.

1. Open terminal either via Ctrl+Alt+T or by searching for ‘terminal’ from app launcher. When it opens, run command:

sudo add-apt-repository ppa:ubuntuhandbook1/kxstitch

Input your password (no visual feedback while typing) when it prompts and hit Enter to add the PPA.

2. Then check updates and install the software either via Synaptic Package Manager or by running commands:

sudo apt-get update

sudo apt-get install kxstitch

Uninstall:

To remove KXStitch cross stitch software, either use Synaptic or run command in terminal:

sudo apt-get remove --autoremove kxstitch

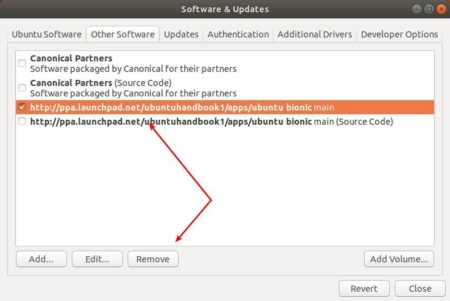
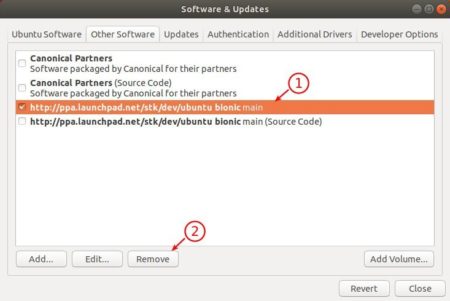
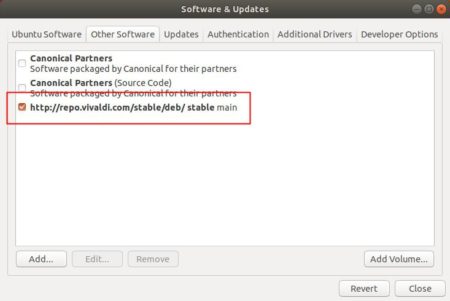
The PPA can be removed via “Software & Updates” utility under “Other Software” tab.

uGet download manager

uGet download manager has reached the new stable 2.2 release series. The new release features ability to download from Youtube.

“uGet respects the YouTube Policies so depending on the individual settings of a video it may not be possible to download video from YouTube. The vast majority of videos will be available for use in uGet. The reason this was done instead of using something youtube-dl is because this method allows uGet for Android to also download YouTube videos as well as not have to worry about the ever changing APIs of YouTube that consistently break alternative methods of downloading.” uGet team announced.

The “uGet Chrome Wrapper” browser extension is compatible with Firefox, Chromium, Google Chrome, Opera, and Vivaldi. It will be renamed in the near future to better reflect the functionality.

uGet 2.2.0 features:

  • Support for downloading from YouTube
  • Support for downloading from MEGA
  • Batch Downloading up to 3 Wildcard Ranges
  • Better support for Wayland
  • New Browser Extension: uGet Chrome Wrapper

How to Install uGet 2.2.0 in Ubuntu:

The new release has been made into uGet Stable PPA, available for Ubuntu 14.04, Ubuntu 16.04, Ubuntu 17.10, and Ubuntu 18.04.

1. Open terminal via Ctrl+Alt+T or from app launcher, and then run command to add the PPA:

sudo add-apt-repository ppa:plushuang-tw/uget-stable

Input your password (no visual feedback while typing) when it prompts and hit Enter.

uGet Stable PPA

2. Then upgrade the download manager from an existing release via Software Updater:

or you can run following 2 commands to check updates and install / upgrade uGet:

sudo apt-get update 

sudo apt-get install uget

How to Remove:

Run following command in terminal will remove the PPA and also downgrade to the stock version of uGet in your Ubuntu system:

sudo apt-get install ppa-purge && sudo ppa-purge ppa:plushuang-tw/uget-stable

If you want to remove uGet download manager, simply search for and remove it via “Ubuntu Software” utility.

Ubuntu 17.04 Reaches End of Life Today

Last updated: January 13, 2018

Ubuntu 17.04

Ubuntu 17.04 Zesty Zapus reaches end of its life today on Jan 13. Ubuntu Security Notices will no longer include information or updated packages for Ubuntu 17.04.

Users can either upgrade to Ubuntu 17.10 (support will end in July 2018), or download Ubuntu 16.04, the current LTS with 5-year support cycle.

Ubuntu announced its 17.04 (Zesty Zapus) release almost 9 months ago, on April 13, 2017. As a non-LTS release, 17.04 has a 9-month support cycle and, as such, will reach end of life on Saturday, January 13th.

At that time, Ubuntu Security Notices will no longer include information or updated packages for Ubuntu 17.04.

The supported upgrade path from Ubuntu 17.04 is via Ubuntu 17.10. Instructions and caveats for the upgrade may be found at:

https://help.ubuntu.com/community/Upgrades

Note that is NOT patched against Meltdown and Spectre vulnerabilities due to the End of Life timing. Users are advised to upgrade to Ubuntu 17.10 and install the updated kernel packages.

Development of a complete response to the highly-publicized Meltdown and Spectre vulnerabilities is ongoing, and due to the timing with respect to this End of Life, we will not be providing updated Linux kernel packages for Ubuntu 17.04. We advise users to upgrade to Ubuntu 17.10 and install the updated kernel packages for that release when they become available.

Read the announcement for more details.

FileZilla Client 3.30.0 Released, How to Install

Last updated: January 9, 2018

FileZilla FTP Client

The FileZilla ftp client reached the 3.30.0 release a day ago with two new features and a few bug-fixes. Here’s how to install it in Ubuntu 16.04, Ubuntu 17.04, Ubuntu 17.10.

Changes in Filezilla 3.30.0 include:

  • In the search dialog local files can now be deleted or opened
  • The root node in the remote directory tree is now expanded by default
  • Fix uploading from search dialog
  • Fix formatting of filename in rename dialog
  • Fix Windows installer crash if an update installation is started with the updated version having been installed
  • Add additional logging if autoupdate mechanism fails

How to Install Filezilla 3.30.0 in Ubuntu:

So far the only to install the latest Filezilla client in Ubuntu is using the Flatpak package. And following steps will tell you how:

1. Open terminal via Ctrl+Alt+T or by searching for ‘terminal’ from app launcher. When it opens, do:

  • Run command to add the flatpak PPA:
    sudo add-apt-repository ppa:alexlarsson/flatpak

    Input your password (no visual feedback) when it prompts and hit Enter to continue.

  • Then run commands one by one to get the latest flatpak daemon:
    sudo apt-get update
    
    sudo apt-get install flatpak

2. After installed Flatpak, run following single command to install FileZilla client along with required Gnome platform.

flatpak install --from https://flathub.org/repo/appstream/org.filezillaproject.Filezilla.flatpakref

Uninstall:

To remove Filezilla installed via flatpak, run command:

flatpak uninstall org.filezillaproject.Filezilla

To remove flatpak, run command:

sudo apt-get remove --autoremove flatpak

To remove the PPA, open “Software & Updates” utility and navigate to “Other Software” tab.

Sayonara, a Qt music player aims to be intuitive, easy usablility, and organizes even big music collections, reached the 1.0 release a few days ago.

Changes in Sayonara 1.0 include:

  • Choose covers between Google, Discogs and Last.fm servers.
  • Cover view: Reload covers, zoom and sorting
  • Multiple library support for Directories, Library.
  • Move/Copy/Rename operations and show Song info in Directories.
  • Removed date filter support
  • Add “Clear selection” button
  • Ability to choose system icons
  • Fast preference access
  • Lyric server updates
  • Removed MTP device support
  • Moved load/save to playlist tabs instead of plugin
  • Added proxy support
  • Set custom paths for stream recorder.
  • Added preferences options for Streams/Podcast

How to Install Sayonara 1.0 in Ubuntu:

To install the latest Sayonara 0.9.1 in Ubuntu 16.04, Ubuntu 17.04, Ubuntu 17.10, and their derivatives, do:

1. Open terminal (Ctrl+Alt+T) and add the official Sayonara PPA:

sudo add-apt-repository ppa:lucioc/sayonara

sayonara-player-ppa

2. Update and install the player via commands:

sudo apt update

sudo apt install sayonara

For those who don’t want to add PPA, grab .deb package from the PPA file archive.

3. (Optional) If you dislike the player, simply remove it via command:

sudo apt remove sayonara && sudo apt autoremove

And the PPA can be removed via Software & Updates utility under Other Software tab.

Stellarium, a free planetarium software, reached the 0.17.0 release with many new features, bug-fixes, and other changes.

The major changes in Stellarium 0.17.0:

  • Added support for nomenclature of planetary surface (SOCIS 2017 project)
  • Added improvements for AstroCalc tool
  • Added improvements for Oculars plugin
  • Added improvements for Exoplanets plugin
  • Added INDI support for Telescope Control plugin
  • Updated code and data

For the full changes, see the release note.

How to Install Stellarium 0.17.0 in Ubuntu:

The official Stellarium PPA has built the packages for Ubuntu 16.04, Ubuntu 17.04, Ubuntu 17.10, and Ubuntu 18.04.

1. Open terminal either via Ctrl+Alt+T or from app launcher. When it opens, run command to add the PPA:

sudo add-apt-repository ppa:stellarium/stellarium-releases

Input your password (no visual feedback while typing) when it prompts and hit Enter.

2. Then upgrade Stellarium from an existing release with Software Updater utility:

Or run following commands to install the software for the first time:

sudo apt-get update

sudo apt-get install stellarium

Uninstall:

To remove the software, either use your system package manager or run command:

sudo apt-get remove --autoremove stellarium

And remove the PPA via “Software & Updates” utility under Other Software tab.

PyCharm IDE

Jetbrains announced the release of its Python IDE, PyCharm 2017.3.2, a day ago. Here’s how you can install it in Ubuntu 16.04 and higher.

Changes in PyCharm 2017.3.2 include:

  • Type annotation ahead of time. You can’t put an inline type annotation when defining a variable in a for or a with statement, so you need to provide the annotation in a separate place, read more on the ticket. This is now supported in PyCharm.
  • ‘Show command line afterwards’ now works correctly for remote interpreters. And further fixes to this feature
  • Various SQL syntax fixes for PostgreSQL and Oracle (PyCharm Professional Edition bundles all DataGrip features)
  • React code completion improvements (PyCharm Professional Edition bundles all WebStorm features)
  • And more, see the release notes for details

How to Install PyCharm 2017.3.2 in Ubuntu:

You can easily run the new release in Ubuntu either via:

method 1: official Linux binaries. NON-INSTALL version, just extract and run executable file to launch the IDE:

Download PyCharm Linux binary

method 2: or install the Snap package. App run in sandbox. Support for Ubuntu 16.04 and higher:

Simply open terminal via Ctrl+Alt+T or by searching for ‘terminal’ from app launcher. When it opens, run command:

snap install pycharm-community --classic

For professional edition, run following command instead:

snap install pycharm-professional --classic

Once installed, launch the IDE from your application launcher and enjoy!

Uninstall:

To remove the snap packages, either use Ubuntu Software or run command in terminal:

sudo snap remove pycharm-community pycharm-professional

For those who prefer traditional Ubuntu PPA, keep an eye on the launchpad PPA.

How to Install MPV 0.28.0 in Ubuntu 18.04, 16.04

Last updated: December 28, 2017

MPV media player logo

MPV media player reached the 0.28.0 release a few days ago. Here’s how to install it via PPA in Ubuntu 18.04, Ubuntu 16.04.

MPV 0.28.0 requires FFmpeg 3.4 and features initial d3d11 and vulkan support. Other changes include:

  • Add DRM_PRIME Format Handling and Display for RockChip MPP decoders
  • Add support for Display P3 primaries
  • support multiple seekable cached ranges, display cache ranges on OSC
  • demux_playlist: support .url files
  • dvb: Add multiple frontends support (up to 8)
  • dvb: implement parsing of modulation for VDR-style channels config
  • hwdec: add mediacodec hardware decoder for IMGFMT_MEDIACODEC frames, rename mediacodec to mediacodec-copy
  • lua: integrate stats.lua script (bound to i/I by default)
  • add support for nvdec hwaccel
  • add android opengl backend

MPV

How to Install MPV 0.28.0 in Ubuntu:

MPV does not provide official Linux binaries, but it refers to a third-party PPA which contains the latest packages for Ubuntu 16.04, Ubuntu 18.04, and derivatives.

To install it, open terminal via Ctrl+Alt+T or by searching for “Terminal” from start menu. When it opens, do:

1. add the PPA repository via command:

sudo add-apt-repository ppa:mc3man/mpv-tests

Type in your password (no visual feedback due to security reason) when prompts and hit Enter.

2. If you have a previous release installed, you can now launch Software Updater and upgrade the software after checking for updates:

Or just run commands to install it for the first time:

sudo apt update && sudo apt install mpv

Uninstall:

For any reason, you can remove the PPA easily by going to System Settings -> Software & Updates -> Other Software tab. And remove the player via command:

sudo apt remove mpv && sudo apt autoremove 

Liferea Feed Reader 1.12.1 Released with Some Fixes

Last updated: December 27, 2017

Liferea Feed Reader

The Liferea feed reader reached the 1.12.1 release earlier today with some bug-fixes. Here’s how to install it in Ubuntu 16.04, Ubuntu 17.04, Ubuntu 17.10, Ubuntu 18.04.

Changes in Liferea 1.12.1 include:

  • Fix typo in debug message
  • Add patch: appstream data has new format
  • Fix that Liferea doesn’t remember the feeds’ custom settings
  • Fix assertions/crashes on changing view layouts
  • Workaround to avoid GtkPaned shrinking
  • Added Indonesian default feed list
  • And some translation updates.

liferea feed reader

How to Install Liferea 1.12.1 in Ubuntu:

For Ubuntu 16.04 and higher, you can easily install the new release from this PPA repository.

1. Open terminal either via Ctrl+Alt+T or by searching for ‘terminal’ from app launcher. When it opens, run command:

sudo add-apt-repository ppa:ubuntuhandbook1/apps

Type your password (no visual feedback while typing) when it asks and hit Enter.

2. Then upgrade Liferea via Software Updater utility:

upgrade Liferea via Software Updater

or run commands one by one to install the Linux feed reader:

sudo apt-get update

sudo apt-get install liferea

Uninstall Liferea:

To remove the software, either use your system package manager or run command:

sudo apt-get remove --autoremove liferea

To remove the PPA repository, open “Software & Updates” utility and navigate to Other Software tab.
IntelliJ IDEA Reached 2017.3.2 with Numerous Fixes

Last updated: December 26, 2017

IntelliJ IDEA 2017.3.2 was released earlier today with some new features and numerous bug-fixes.

New Features in IntelliJ IDEA 2017.3.2 includes:

  • Support Heroku API v3
  • Add dedicated support for java.time.Duration in config files
  • Spring Boot: Endpoints: support new SB 2.0.0 properties for managing actuator endpoints
  • Allow configure vuejs interpolation literals
  • Node debugging: allow to override default debug options passed to Node
  • ES6: Copy-paste support. Add imports for referenced exported elements
  • Support authorization with Basic or Digest
  • TypeScript service: if project contains only one root tsconfig.json use the config options for all files from the project
  • And see the release note for bug-fixes.

How to Install IntelliJ IDEA 2017.3.2 in Ubuntu:

There are a few ways to run the latest release of the Java IDE in Ubuntu desktop. And here are 3 of them:

method 1: Download official Linux package (NON-INSTALL), extract and run the executable to launch the IDE:

Download IntelliJ IDEA for Linux

method 2: Install the Snap package (runs in sandbox) for Ubuntu 16.04 and higher:

Open terminal via Ctrl+Alt+T or by searching ‘terminal’ from app launcher. When it opens, run command:

sudo snap install intellij-idea-community --classic

Replace intellij-idea-community with intellij-idea-ultimate for ultimate edition. And type your password (no visual feedback) when it asks.

method 3: Install the traditional .deb package via PPA to get the official Linux package and install the application shortcut automatically.

To do so, open terminal (Ctrl+Alt+T) and run following commands one by one to add the PPA and install the .deb packages:

sudo add-apt-repository ppa:ubuntuhandbook1/apps

sudo apt-get update

sudo apt-get install intellij-idea-community

Also replace intellij-idea-community in the code with intellij-idea-ultimate for ultimate edition.

Uninstall:

For the snap packages, you can either remove them from Ubuntu Software, or by running command in terminal:

sudo snap remove intellij-idea-community intellij-idea-ultimate

For the PPA packages, remove them either via Synaptic package manager, or by running command in terminal:

sudo apt-get remove --autoremove intellij-idea-community intellij-idea-ultimate

And you can remove the PPA via “Software & Updates” utility under Other Software tab.