Archives For November 30, 1999

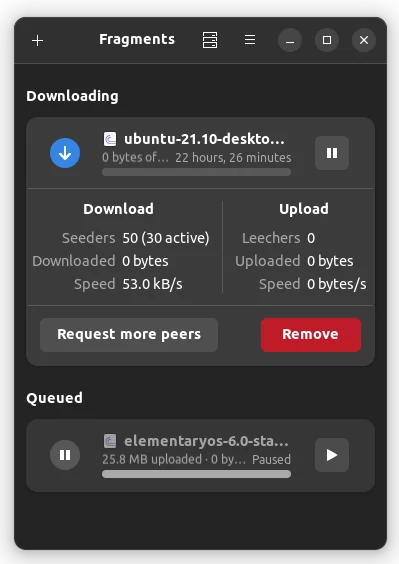
For GNOME fans, there’s now a GTK 4 BitTorrent client that has a stylish user interface looks native in Ubuntu, Fedora Workstation or other Linux with GNOME desktop.

The software was originally written in Vala as a GTK3 app. By the 2.0 release (in beta at the moment), it’s rebuilt from scratch using Rust. Along with libadwaita library, it has an adaptive UI that fits well in small displays (e.g., Linux mobile or tablet).

Fragments adaptive UI

Fragments is based on Transmission, the out-of-the-box BitTorrent client in Ubuntu. Besides deep integration with GNOME desktop, the key features so far include:

  • Automatic clipboard detection. Click or copy a magnet link, it will handle the downloads automatically.
  • Control remote Fragments or Transmission sessions.

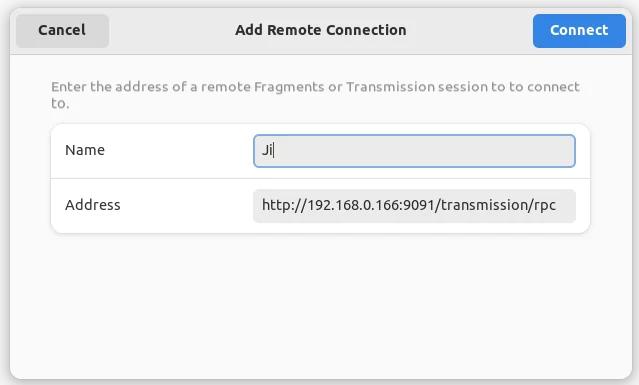
Say you have a Linux machine running as a ‘download server’ either with desktop environment or not. After setting up the remote access functionality in Transmission GTK or CLI, user may use Fragments’ menu option ‘Add Remote Connection‘ to remote control the server via RPC protocol.

Fragments add remote session

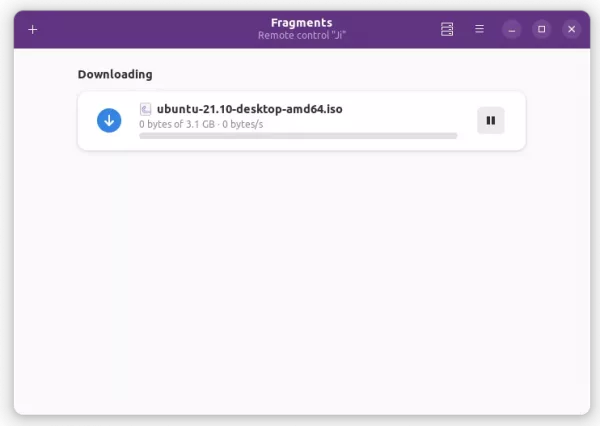
Once connected, the header-bar turns purple and it displays ‘Remote Control “Name”‘ as subtitle indicates that you’re in control of the remote session. A little server icon appears in header-bar, allows to switch between local and remote sessions.

As well, it displays statistics about current session, such as overall network usage, and allows to select encryption type and toggle dark mode, and more.

How to Install Fragments in Ubuntu & other Linux:

The software is available as Flatpak package. Open terminal by searching from ‘Activities’ overview screen. When it opens, run following commands one by one:

1.) Install Flatpak framework if you don’t have it installed via command:

sudo apt install flatpak

2.) Add flathub, the main repository hosts a large list of flatpak packages:

flatpak remote-add --if-not-exists flathub https://flathub.org/repo/flathub.flatpakrepo

3.) Finally install the BitTorrent client via command:

flatpak install flathub de.haeckerfelix.Fragments
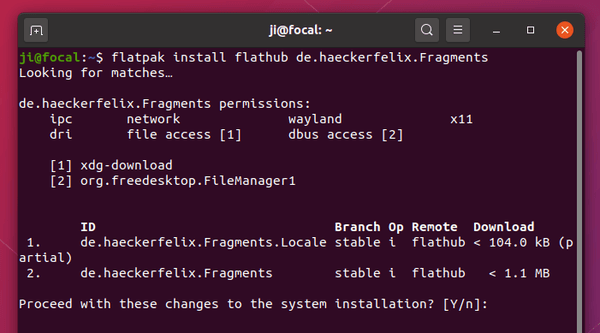
The last command will install the latest stable release. For those want to try out the 2.0 Beta with newest features, run command below instead:

flatpak install https://dl.flathub.org/beta-repo/appstream/de.haeckerfelix.Fragments.flatpakref

Once installed, search for and open it from ‘Activities’ overview and enjoy!

How to remove Fragments BitTorrent Client:

To uninstall the app, simply run command in a terminal window:

flatpak uninstall --delete-data de.haeckerfelix.Fragments

That’s all. Enjoy!

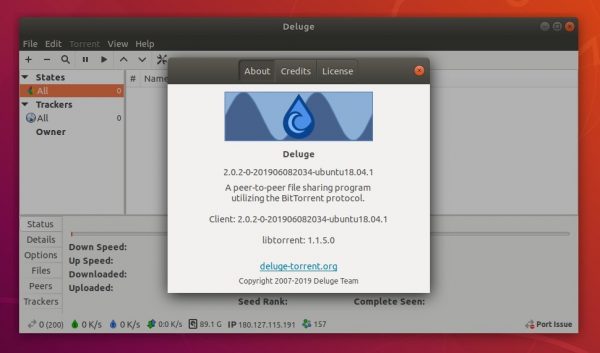
Deluge bittorrent client 2.0 was released a few days ago. Here’s how to install it in Ubuntu 18.04, Ubuntu 18.10, Ubuntu 19.04.

Deluge 2.0 was released with following exciting new features:

  • Shiny new logo.
  • Multi-user support.
  • Performance updates to handle thousands of torrents with faster loading times.
  • A New Console UI which emulates GTK/Web UIs.
  • GTK UI migrated to GTK3 with UI improvements and additions.
  • Magnet pre-fetching to allow file selection when adding torrent.
  • Fully support libtorrent 1.2 release.
  • Language switching support.
  • Improved documentation hosted on ReadTheDocs.
  • AutoAdd plugin replaces built-in functionality.

How to Install Deluge 2.0 in Ubuntu:

Deluge stable PPA has built the latest packages for Ubuntu 18.04, Ubuntu 18.10, Ubuntu 19.04 and their derivatives.

Open terminal either via Ctrl+Alt+T keyboard shortcut or by searching for ‘terminal’ from application menu. When it opens, run commands:

1. Run command to add the PPA:

sudo add-apt-repository ppa:deluge-team/stable

Type user password (no asterisk feedback) when it prompts and hit Enter to continue.

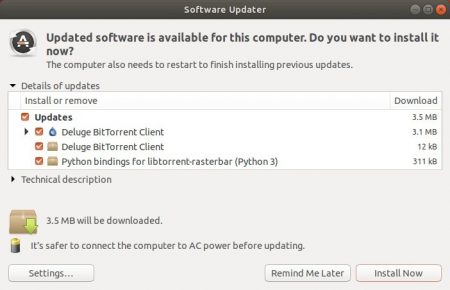
2. If a previous release was installed, upgrade it via Software Updater:

or run command in terminal to install or upgrade Deluge:

sudo apt install deluge

Uninstall:

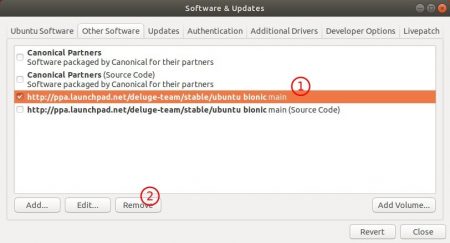
To uninstall Deluge PPA, open Software & Updates -> Other Software tab and remove the repository line.

To remove Deluge torrent client, run command in terminal:

sudo apt remove --autoremove deluge

qBittorrent

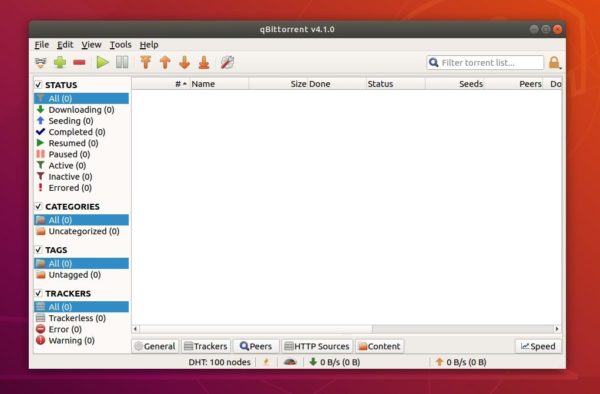
The third bug-fix release for qBittorrent 4.1 was released a day ago with new features, some bug-fixes, web UI and search improvements.

qBittorrent 4.1.3 release highlights:

  • Preselect name without extension when renaming files
  • Allow setting seq & first/last from context menu without metadata
  • Show “N/A” if there is no scrape
  • Save option about tracker favicons under correct key
  • When file data are unreachable pause torrent and show “Missing Files” status
  • Don’t disable DHT when using force proxy
  • Correctly save torrent queue position/state/priority changes in fastresume
  • Fix icon height/width ratio
  • Fix values sorted wrong in “Last Activity” column
  • Replace png icons with svg
  • Various Web UI improvements
  • Refactor in searchjob to always color visited entries
  • Set “enter” as shortcut to download the selected torrents in search job
  • Add regex option in the search filter’s context menu
  • Fix GUI scaling issue on Linux

How to Install qBittorrent 4.1.2 in Ubuntu:

The official qBittorrent PPA maintains qBittorrent binary packages for Ubuntu 16.04, Ubuntu 18.04, and derivatives.

1. To add the PPA, open terminal either via Ctrl+Alt+T or searching “Terminal” from app launcher. When it opens, run:

sudo add-apt-repository ppa:qbittorrent-team/qbittorrent-stable

Type in your password (no visual feedback while typing due to security reason) when it prompts and hit Enter to continue.

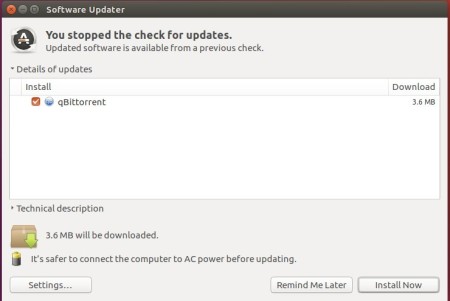
2. To upgrade from a previous release, launch Software Updater and you’ll see qBittorrent available for upgrade after checking for updates.

upgrade qBittorrent

Or run commands below to install /upgrade it from terminal:

sudo apt update && sudo apt install qbittorrent

Uninstall:

To remove qBittorrent PPA, go to Software & Updates -> Other Software, or run command in terminal:

sudo add-apt-repository --remove ppa:qbittorrent-team/qbittorrent-stable

To remove the bittorrent client, either use your system package manager or run command:

sudo apt-get remove --autoremove qbittorrent

qBittorrent

qBittorrent 4.1.2, free and reliable p2p bittorrent client, was released a few days ago with some new features, various bug-fixes and other improvements.

qBittorrent 4.1.2 release highlights:

  • New options for “inhibit sleep”
  • Add option for regexps in the transferlist search filter’s context menu
  • Add async io threads option to AdvancedSettings
  • Allow save resume interval to be disabled
  • Add checkbox for recursive download dialog
  • Add changelog link in program updater
  • Implement “Sequential downloading” feature.
  • Various bug-fixes, WebUI improvements, and more.

How to Install qBittorrent 4.1.2 in Ubuntu:

The official qBittorrent PPA maintains qBittorrent binary packages for Ubuntu 16.04, Ubuntu 18.04, and derivatives (though the new 4.1.2 release is not ready at the moment of writing).

1. To add the PPA, open terminal either via Ctrl+Alt+T or searching “Terminal” from app launcher. When it opens, run:

sudo add-apt-repository ppa:qbittorrent-team/qbittorrent-stable

Type in your password (no visual feedback while typing due to security reason) when it prompts and hit Enter to continue.

2. To upgrade from a previous release, launch Software Updater and you’ll see qBittorrent available for upgrade after checking for updates.

upgrade qBittorrent

Or run commands below to install /upgrade it from terminal:

sudo apt update && sudo apt install qbittorrent

Uninstall:

To remove qBittorrent PPA, go to Software & Updates -> Other Software, or run command in terminal:

sudo add-apt-repository --remove ppa:qbittorrent-team/qbittorrent-stable

To remove the bittorrent client, either use your system package manager or run command:

sudo apt-get remove --autoremove qbittorrent

qBittorrent

qBittorrent reached the new major 4.1.0 release a few days ago. Here’s how to install it in Ubuntu 18.04, Ubuntu 17.10, Ubuntu 16.04.

qBittorrent 4.1.0 release highlights:

  • Add “Coalesce reads & writes” checkbox in advanced options
  • Smart Filter for RSS
  • Possibility to configure at which speed a torrent is considered slow.
  • When creating a torrent you can choose to preserve the file order
  • A new, redesigned and refactored WebAPI
  • Switch built-in Web UI html to HTML5
  • Allow to disable Stacktrace support
  • Various other Web UI improvements.
  • Various code optimizations and bug-fixes. Read NEWS page for details.

How to Install qBittorrent 4.1 in Ubuntu:

The official qBittorrent PPA contains the latest packages for Ubuntu 16.04, Ubuntu 17.10, Ubuntu 18.04, and derivatives.

1. To add the PPA, open terminal either via Ctrl+Alt+T or searching “Terminal” from app launcher. When it opens, run:

sudo add-apt-repository ppa:qbittorrent-team/qbittorrent-stable

Type in your password (no visual feedback while typing due to security reason) when it prompts and hit Enter to continue.

2. To upgrade from a previous release, launch Software Updater and you’ll see qBittorrent available for upgrade after checking for updates.

upgrade qBittorrent

Or run commands below to install /upgrade it from terminal:

sudo apt update && sudo apt install qbittorrent

3. (Optional) To uninstall the 4.1 release and revert to the stock version of qBittorrent in Ubuntu repository, do:

sudo apt install ppa-purge && sudo ppa-purge ppa:qbittorrent-team/qbittorrent-stable

Transmission BitTorrent

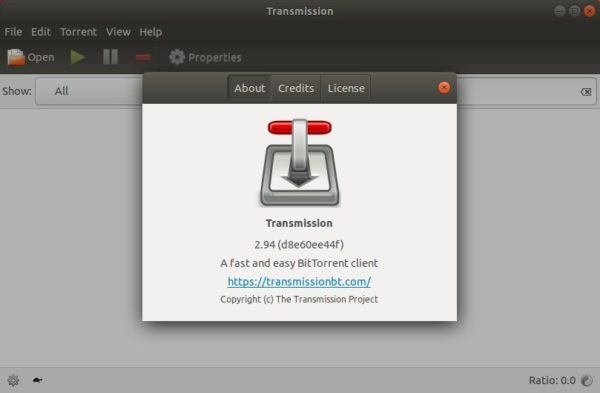
Transmission, the default BitTorrent client, reached the 2.94 release a few days ago. Now you can install it in Ubuntu 16.04, Ubuntu 17.10, Ubuntu 18.04 easily via PPA.

Transmission 2.94 is a bug-fix release with following changes:

  • Fix building against LibreSSL
  • Fix building against mbedTLS
  • Fix torrents ETA calculation
  • Fix cross-compilation issues caused by miniupnpc configuration test
  • Fix bad downloaded percentage in DetailsDialog for Qt client
  • Fix tracker error XSS in inspector for web client
  • Fix torrent name HTML-escaping in trackers inspector tab for web client.

How to Upgrade Transmission in Ubuntu:

Transmission has a stable PPA that so far maintains the latest packages for Ubuntu 16.04, Ubuntu 17.10, and Ubuntu 18.04.

1. Open terminal either via Ctrl+Alt+T or by searching for ‘terminal’ from app launcher. When it opens, run command to add the PPA:

sudo add-apt-repository ppa:transmissionbt/ppa

Input your password (no visual feedback while typing) when it prompts and hit Enter to continue.

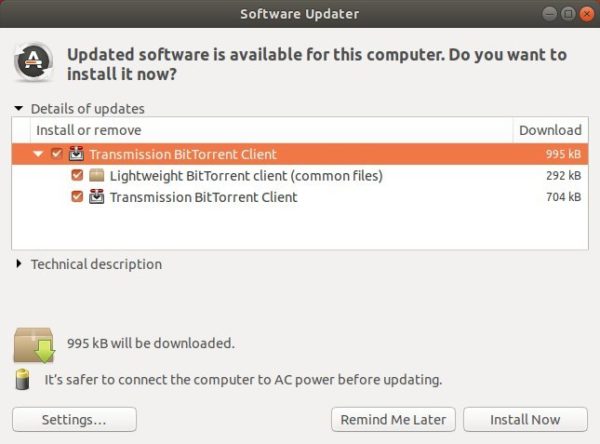
2. Then launch Software Updater (update manager) and install updates for Transmission to upgrade the software:

How to Restore:

To restore to the default transmission installed by default, run command to purge the PPA as well as downgrade the software:

sudo apt-get install ppa-purge && sudo ppa-purge ppa:transmissionbt/ppa

qBittorrent

qBittorrent 4.0.4 was released earlier today with numerous bug-fixes. Here’s how to install it in Ubuntu 16.04, Ubuntu 17.10, Ubuntu 18.04.

qBittorrent 4.0.4 contains a few new features and lots of bug-fixes include:

  • Add source field in Torrent creator.
  • Torrent creator: raise maximum piece size to 32 MiB
  • Add a force reannounce option in the transfer list context menu.
  • Fix sorting of country flags column in Peers tab.
  • Fix natural sorting when the common part of 2 strings ends partially in a number which continues in the uncommon part.
  • Fix application of speed limits on LAN and μTP connections.
  • Make peer information flags in peerlist more readable.
  • Fix gui issues on high DPI monitor.
  • Fix dialog and column size on high DPI monitors.
  • Fix constant status of ‘[F] Downloading’.
  • Fix translation context.
  • Separate subnet whitelist options into two lines.
  • Don’t set application name twice.
  • Set default file log size to 65 KiB and delete backup logs older than 1 month.
  • And see more changes for web UI, RSS, Windows and Mac OS editions.

How to Install qBittorrent 4.0.4 in Ubuntu

The official PPA has built the new release packages, available for install/upgrade in Ubuntu 16.04, Ubuntu 17.10, Ubuntu 18.04, and derivatives.

1. To add the PPA, open terminal (Ctrl+Alt+T) and run:

sudo add-apt-repository ppa:qbittorrent-team/qbittorrent-stable

qbittorrent PPA

2. To upgrade from a previous release, launch Software Updater and you’ll see qBittorrent available for upgrade after checking for updates.

upgrade qBittorrent

Or run commands below to install /upgrade it from terminal:

sudo apt update && sudo apt install qbittorrent

3. (Optional) To uninstall the 4.0.4 release and revert to the stock version of qBittorrent in Ubuntu repository, do:

sudo apt install ppa-purge && sudo ppa-purge ppa:qbittorrent-team/qbittorrent-stable

Thanks for reading. Happy new year!

Deluge BitTorrent Client

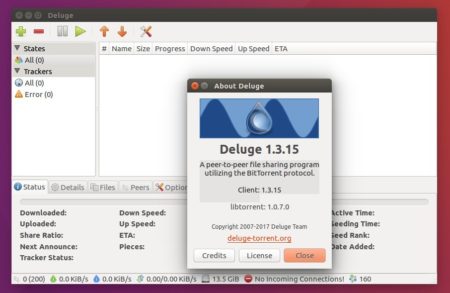
Deluge BitTorrent client 1.3.15 was released a day ago with various fixes. Web UI users are highly recommended to upgrade to this release due to a security fix.

Deluge 1.3.15 changelog:

  • Fix issues with displaying libtorrent single proxy.
  • Fix libtorrent 1.2 trackers crashing Deluge UIs.
  • Fix error in torrent priorities causing file priority mismatch in UIs.
  • Gtk UI:

    • Configure gtkrc to use consistent button ordering on Windows.
    • Fix column sort state not saved in Thinclient mode.
    • Fix connection manager error with malformed ip.
    • Rename SystemTray/Indicator? ‘Pause/Resume? All’ to ‘Pause/Resume? Session’.
    • Workaround lt single proxy by greying out unused proxy types.
  • Security fix for Web UI: Check render template files exist otherwise raise 404.
  • Some plugin fixes. See the release note.

Deluge  1.3.15

How to Install Deluge 1.3.15 in Ubuntu:

Deluge has an official PPA contains the latest packages for Ubuntu 14.04, Ubuntu 16.04, Ubuntu 16.10, Ubuntu 17.04, and their derivatives.

1. Open terminal via Ctrl+Alt+T or by searching for “Terminal” from start menu. When it opens, run command to add the PPA:

sudo add-apt-repository ppa:deluge-team/ppa

Type in your password when prompts and hit Enter.

Deluge PPA

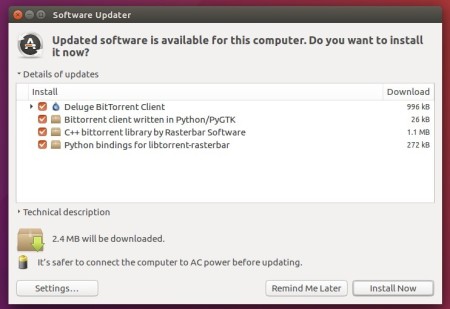
2. If you have a previous release installed, upgrade Deluge using Software Updater after checking for updates:

upgrade deluge bittorrent

Or run commands to check updates and install Deluge:

sudo apt-get update && sudo apt-get install deluge

In the command, you may replace deluge with deluge-web for web UI, or deluge-console for console UI, deluged for daemon.

How to Restore:

To restore to the stock version of Deluge BitTorrent client in your main Ubuntu repository, purge the PPA via command:

sudo apt-get install ppa-purge && sudo ppa-purge ppa:deluge-team/ppa

Deluge BitTorrent Client

The Deluge BitTorrent client 1.3.14 was release one day ago. Users with previous release installed are highly recommended to upgrade to this release.

For WebUI, Deluge 1.3.14 contains a fix for CSRF vulnerability that has the real potential to compromise your machine. For Windows user, the package now includes libtorrent 1.0.11 which should fix crashing on startup.

  • Fixed ‘Too many files open’ errors.
  • Added support for python-geoip for use with libtorrent 1.1.
  • Fixed a single proxy entry being overwritten resulting in no proxy set.
  • Added tracker_status translation to UIs.
  • [GtkUI] Strip whitespace from infohash before checks.
  • Add missed feature autofill infohash entry from clipboard.
  • Backport bind interface option for server.
  • Security: Fixed WebUI CSRF Vulnerability.
  • [Console] Fix decode error comparing non-ascii (str) torrent name.
  • Fixes for splitting magnets from file.
  • Remove duplicate magnet extension when splitting.

How to Install Deluge 1.3.14 in Ubuntu / Linux Mint:

The new release has been made into the official PPA, available for Ubuntu 12.04, Ubuntu 14.04, Ubuntu 16.04, Ubuntu 16.10, Ubuntu 17.04, Linux Mint 13, 17, 18, and their derivatives.

1. To add the PPA, open terminal and run command:

sudo add-apt-repository ppa:deluge-team/ppa

Type in your password (no visual feedback) and hit Enter

Deluge PPA

2. Then upgrade Deluge using Software Updater (Update Manager):

upgrade deluge bittorrent

Or install it for the first time via commands:

sudo apt-get update

sudo apt-get install deluge

How to Restore:

To restore deluge BitTorrent client to the stock version in your Ubuntu main repository, open terminal and run command to purge the PPA:

sudo apt-get install ppa-purge && sudo ppa-purge ppa:deluge-team/ppa

How to Install Deluge 1.3.13 in Ubuntu 16.04

Last updated: August 2, 2016

Deluge 1.3.13

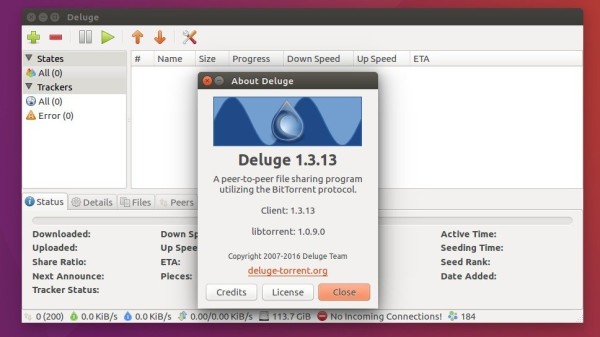
While Ubuntu 16.04 offers Deluge 1.3.12, the BitTorrent client has recently reached the 1.3.13 release with an extremely large set of bug fixes.

Deluge 1.3.13 now includes libtorrent 1.0.9 for all platforms. Python 2.6 is not supported for Windows. So if you were using py2.6 when you upgrade your 3rd party plugins will disappear from the plugins list.

For the full list of changes in Deluge 1.3.13, see this page.

Deluge 1.3.13

How to install or upgrade Deluge in Ubuntu:

The official Deluge PPA has made the binary packages for Ubuntu 16.04, and also Ubuntu 14.04, Ubuntu 12.04, Ubuntu 16.10, and derivatives.

1. add PPA:

Open terminal and run the command:

sudo add-apt-repository ppa:deluge-team/ppa

Type in your password (no visual feedback) when it prompts and hit Enter.

Deluge PPA

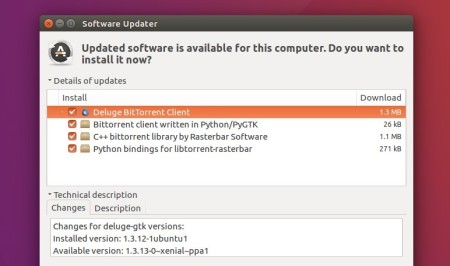
2. Upgrade Deluge via Software Updater:

upgrade-deluge

Or you can run the commands below in terminal to install the software for the first time:

sudo apt update && sudo apt install deluge

3. (Optional) For any reason, you can easily switch back to Deluge 1.3.12 by installing ppa-purge and purge the PPA.

sudo apt install ppa-purge && sudo ppa-purge ppa:deluge-team/ppa