Archives For November 30, 1999

The popular FFmpeg media library released new version 7.1 a few days ago. Here are the new features and Ubuntu PPA for Ubuntu 22.04 and Ubuntu 24.04 users.

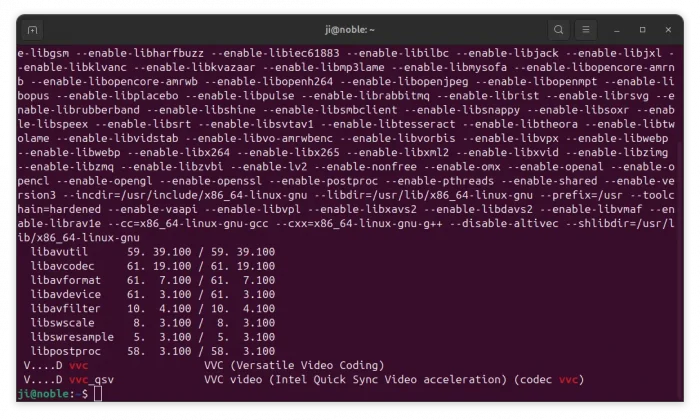
The new release of FFmpeg library added official VVC decoder support. Versatile Video Coding (VVC in short), also known as H.266, has about 50% better compression rate for the same quality compared to HEVC (aka H.265).  It supports resolutions ranging from very low up to 4K, 16K, and 360° videos, as well as YCbCr 4:4:4, 4:2:2 and 4:2:0 with 8–10 bits per component, HDR, variable and fractional frame rates from 0 to 120 Hz, and more.

FFmpeg added experimental VVC decoding support since the last 7.0 version. Now, the decoder goes official and it’s compatible with DVB test content. The release also supports for decoding VVC with Intel Quick Sync Video acceleration. As well, it supports encoding VVC using libvvenc library.

Continue Reading…

This simple tutorial shows how to easily turn your Ubuntu or Debian into home media server, so that you can listen to the music, watch photos and videos that are stored in Linux PC remotely using your mobile phones and/or smart TVs.

GNOME, the default desktop in Ubuntu and Fedora Workstation, has built-in option to enable this feature. It uses Rygel home media solution as backend.

It automatically transcode media to a format compatible with the client device. And, client machines that supports DLNA/UPnP, such as Sony PlayStation, Microsoft Xbox, smart TV, Android, iOS, can access them through the local network.
Continue Reading…

The first point release of Kodi 20 ‘Nexus’ is out today after almost 2 months of development.

As the title said, the new Kodi 20.1 includes mainly bug-fixes. It introduced a new algorithm to look to overcome some audio issues on Android devices. Fixed DVD playback folder structures over network sources (e.g. SMB/NFS/HTTP, etc.)

Other changes include:

  • Assorted fixes to the new Savestate Manager to improve usability.
  • An assortment of OSD improvements
  • A number of performance improvements (memory reads, faster dialogs/savestates).
  • Input fixes allow resetting multitap controller inputs
  • Sync of some of the common controller types
  • Fixes various overflows when using new chrono infrastructure.
  • A fix for an issue on 32-bit systems that affected the sorting of items.
  • Resolve PVR Channel Groups to correctly show channels ordered as provided by a PVR backend.
  • A couple of fixes for WebVTT subtitles

How to Install Kode 20.1 in Ubuntu

Kodi website provides the downloads for all supported platforms.

For Ubuntu and Linux Mint users, the official PPA repository is one of the best choices to install the media play. So far, it supports Ubuntu 20.04, Ubuntu 22.04, Ubuntu 22.10, Ubuntu 23.04, Linux Mint 20/21.

1. First, open terminal by pressing Ctrl+Alt+T on keyboard. When it opens, run command to add the PPA:

sudo add-apt-repository ppa:team-xbmc/ppa

Type user password (no asterisk feedback) when it asks and hit Enter to continue.

2. Software Updater may not upgrade the media center if an old version was installed in Ubuntu 22.04. Instead it show ‘Partial Updates’ issue.

As a workaround, either run apt install command below:

sudo apt install kodi kodi-bin

Or run sudo apt full-upgrade to install all available updates (you may still need to install kodi-bin manually). For Linux Mint, run sudo apt update before doing updates!

How to Uninstall:

For choice, you can either run command in terminal to purge the PPA, which will downgrade Kodi to stock version in system repository:

sudo apt install ppa-purge && ppa:team-xbmc/ppa

Or manually remove the software package via command:

sudo apt remove kodi kodi-bin --autoremove

And remove the PPA via command as you prefer:

sudo add-apt-repository --remove ppa:team-xbmc/ppa

The popular FFmpeg multimedia library announced the new major 6.0 (updated to v6.1). Here are the new features and how to install guide for Ubuntu 22.04, Ubuntu 20.04, and Ubuntu 18.04.

FFmpeg 6.0, code name “Von Neumann”, features new decoders support, including Bonk, Micronas SC-4, APAC, ViewQuest VQC, RKA, Radiance, WavArc, CBD2 DPCM and a few ADPCM formats.

There are also QSV and NVenc AV1 encoding, VAAPI and QSV decoding and encoding for 10/12bit 422, 10/12bit 444 HEVC and VP9.

Other changes FFmpeg 6.0 include:

  • New audio and video filters, such as adrc, afdelaysrc, corr, showcwt, backgroundkey, a3dscope, ddagrab, ssim360, hstack_qsv, vstack_qsv and xstack_qsv filters
  • Radiance HDR image support
  • Add new mode to cropdetect filter to detect crop-area based on motion vectors and edges
  • WBMP (Wireless Application Protocol Bitmap) image format
  • LAF, SDNS demuxer
  • DTS to PTS reorder bsf
  • backgroundkey filter, showcwt multimedia filter
  • hstack_vaapi, vstack_vaapi and xstack_vaapi filters
  • MediaCodec decoder via NDKMediaCodec and encoder
  • oneVPL support for QSV
  • ffmpeg CLI new options: -stats_enc_pre[_fmt], -stats_enc_post[_fmt], -stats_mux_pre[_fmt]
  • media100 to mjpegb bsf
  • ffmpeg CLI new option: -fix_sub_duration_heartbeat
  • CrystalHD decoders deprecated
  • RKA, WavArc, XMD ADPCM, WADY DPCM decoder and demuxer
  • filtergraph syntax in ffmpeg CLI now supports passing file contents as option values

NOTE: Upgrade FFmpeg library in Ubuntu may break other apps and/or run into dependency issue!! You must know how to restore. And don’t do it in production machine!!

How to Install FFmpeg (6.1 Updated) via PPA in Ubuntu:

As many users reported, the Rob Savoury’s PPA seems broken due to dependency issue.

So, I upload the  FFmpeg 6 and its dependency libraries into this unofficial PPA for those need FFmpeg 6.

NOTE: 1. The PPA so far is for Ubuntu 22.04 only!
NOTE: 2. The packages seem working good in my case. But it may or may not work for you! Use it at your own risk!

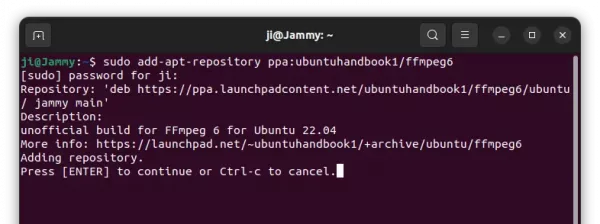
1. First, press Ctrl+Alt+T on keyboard to open a terminal window. When it opens, run command to add the PPA:

sudo add-apt-repository ppa:ubuntuhandbook1/ffmpeg6

Type user password (no asterisk feedback) when it asks and hit Enter to continue.

2. For Linux Mint 21, you need to manually refresh package cache after adding PPA. To do so, run command:

sudo apt update

3. Finally, run the command below to either install or upgrade to FFmpeg 6.1:

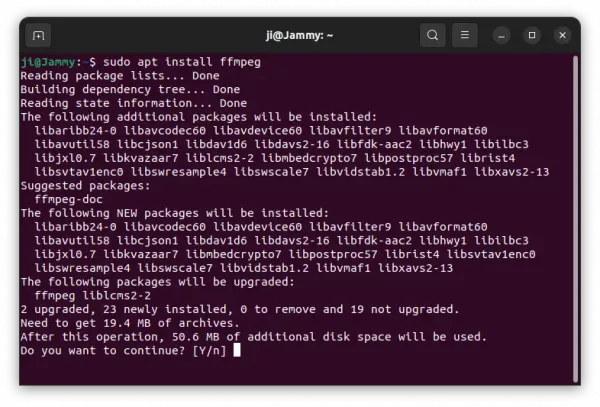
sudo apt install ffmpeg

In case of in-complete installation, it’s HIGHLY recommend to run sudo apt upgrade to upgrade all the packages to the latest versions.

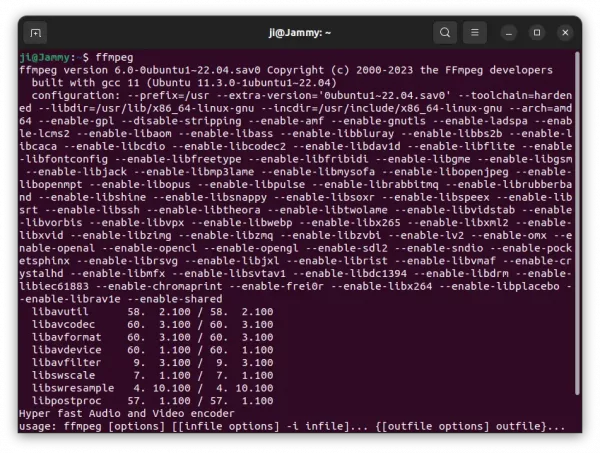
4. After installation, run the command below in terminal to verify:

ffmpeg --version

How to Downgrade FFmpeg library:

In case you want to downgrade the FFmpeg library to the stock version available in system repository. Open terminal and run command:

sudo apt install ppa-purge && sudo ppa-purge ppa:ubuntuhandbook1/ffmpeg6

NOTE: Keep an eye on terminal output before answering yes to confirm! It MAY remove some other useful app packages.

Kodi media center finally announced the new major 20.0 release! Here are the new features and how to install guide for Ubuntu/Linux Mint based systems.

Kodi 20, code-name ‘Nexus’, is a big release with 4,600 commits since the last v19. It features AV1 media decoding support for several platforms. As well, it allows add-ons using inputsream.adaptive to play AV1 streams.

For Windows user, the release has implemented the full HDR support, though it’s not available in non-Desktop, i.e. UWP Store (Xbox) versions. As well, Kodi v20 has implemented NFSv4 support.

Other changes in Kodi 20.0 include:

  • Ability to load multiple instances of a binary add-on
  • Rework subtitles with option to change border and background colors, subtitle position.
  • Save game state at any time, even if games do not provide native savestate features themselves.
  • Improved right-click/long-press context menu
  • stability, performance improvements, and more.
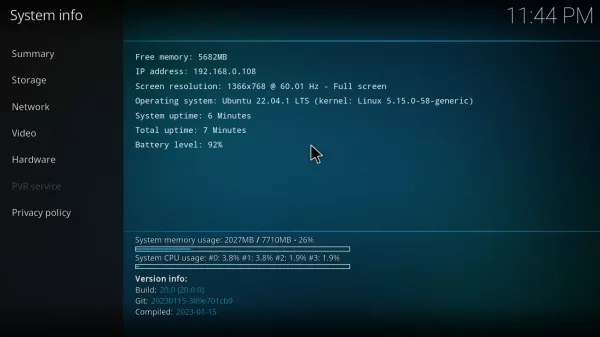
There are so far 2 official ways to install Kodi in Ubuntu Linux. They are Ubuntu PPA contains the native .deb packages and Flatpak package works in most Linux.

Option 1: Install Kodi via Ubuntu PPA

Kodi website provides the downloads for all supported platforms.

For Ubuntu and Linux Mint users, the official PPA repository is one of the best choices to install the media player. So far, it supports Ubuntu 20.04, Ubuntu 22.04, Linux Mint 20/21 on Intel/AMD platforms.

UPDATE: The Ubuntu PPA packages lag behind a bit. It contains Kodi 20.2, while the latest so far has reached v20.4. And only a few plugins have ported to v20.x. 

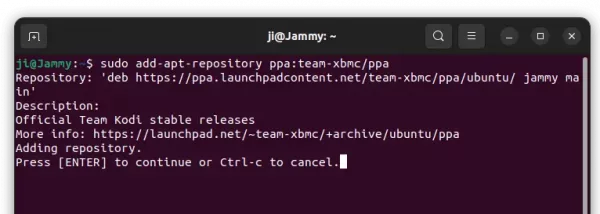
1. First, open terminal by pressing Ctrl+Alt+T on keyboard. When it opens, run command to add the PPA:

sudo add-apt-repository ppa:team-xbmc/ppa

Type user password (no asterisk feedback) when it asks and hit Enter to continue.
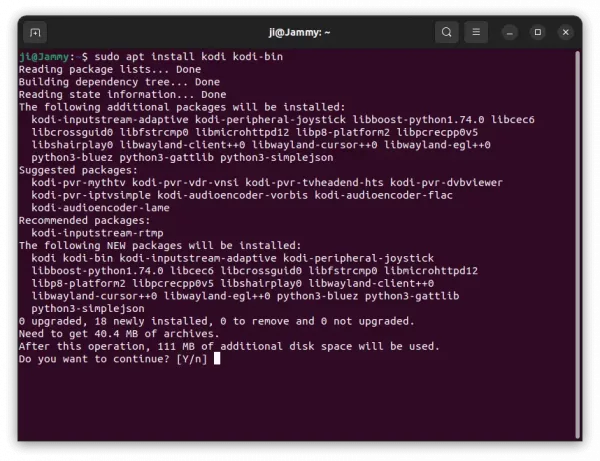
2. Software Updater may not upgrade the media center if an old version was installed in Ubuntu 22.04. Instead it show ‘Partial Updates’ issue.

As a workaround, either run apt install command below:

sudo apt install kodi kodi-bin

Or run sudo apt full-upgrade to install all available updates (you may still need to install kodi-bin manually). For Linux Mint, run sudo apt update before doing updates!
Option 2: Install Kodi using Flatpak package

For most Linux on amd64 (Intel/AMD), and arm64 (Apple Silicon, Raspberry Pi, etc), Kodi also is available to install as Flatpak package, though runs in sandbox.

Fedora 38/39 (with 3rd repository enabled) and Linux Mint 21 can directly search for and install it from either GNOME Software or Software Manager.

While, Ubuntu users can press Ctrl+Alt+T on keyboard to open terminal, and run 2 commands one by one to get it:

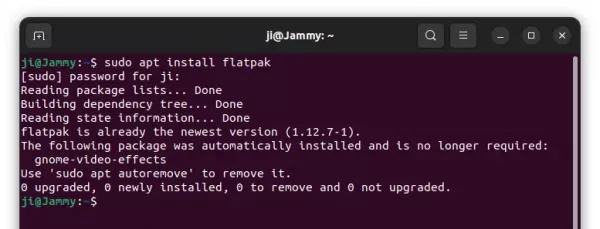
  • First, run command to enable Flatpak support:
    sudo apt install flatpak

    For other Linux, see the official setup guide to enable Flatpak.
  • Then, install Kodi as Flatpak package by running command:
    flatpak install https://dl.flathub.org/repo/appstream/tv.kodi.Kodi.flatpakref
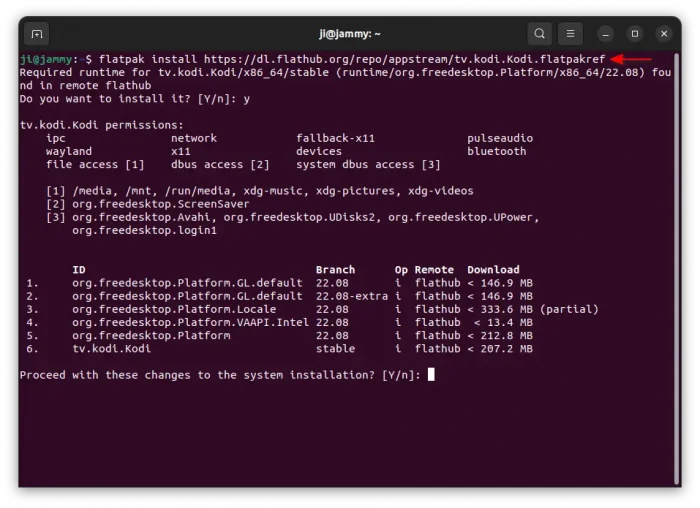
First time installing an app as Flatpak package needs log out and back in to make app icon visible.

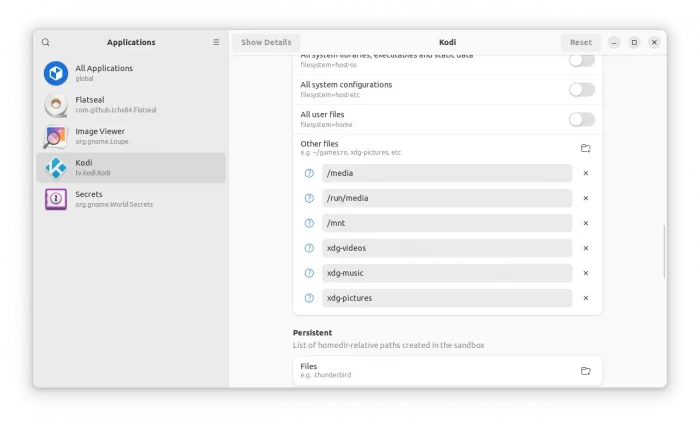
As the Flatpak app runs in sandbox, you may also run command to install Flatseal:

flatpak install https://dl.flathub.org/repo/appstream/com.github.tchx84.Flatseal.flatpakref

Which, provides a graphical interface to manage the permissions.
How to Uninstall:

For the Ubuntu PPA package, you can either run command in terminal to purge the PPA, which will downgrade Kodi to stock version in system repository:

sudo apt install ppa-purge && ppa:team-xbmc/ppa

Or manually remove the software package via command:

sudo apt remove kodi kodi-bin --autoremove

And remove the PPA via command as you prefer:

sudo add-apt-repository --remove ppa:team-xbmc/ppa

For the Flatpak package, open terminal (Ctrl+Alt+T) and run command to uninstall:

flatpak uninstall --delete-data tv.kodi.Kodi

Also, run command flatpak uninstall --unused will free up some disk space by removing useless runtime libraries.

Happy Christmas and happy new year to my dear readers! Kodi, the popular home media center software, release 19.5 version to celebrate the holidays.

It’s the last point release for the 19.x release, while Kodi 20 now is in RC2 stage. And, this release mainly include bug-fixes and improvements backport from dev release. They are:

  • Update controller add-ons.
  • Fix wrong player playlist with playlist files.
  • Prevent crash on app quit in macOS.
  • Fix memory leak while zapping from channels to channels on live streams.
  • Expands the use of PasswordManager so that it is used for dav://, davs://, http://, https://, ftp://, and ftps:// protocol schemes.
  • Fix Ubuntu PPA packaging for Matrix.
  • Fix CC condition for valid captions [subtitles].
  • Fix refresh rate not switch back to 60Hz/GUI after HDR toggle in Windows.
  • Fix incorrect window position for Windows, which switching from full-screen.
  • Fixe some specific H265 Full HD videos crashes because needs more decoding surfaces.
  • Fix Xbox needs 10 bit swapchain to output true 4K resolution.
  • Fix bluray playback start from the simplified menu.
  • Fix adjust refresh rate start/stop settings behavior.
  • Fix subpar quality HQ convolution scalers.
  • Let the context menu action propagate through window.
  • Fix audio player to correctly start playback at given offset or percentage of track duration.
  • Fix incorrect colors in some AMD graphics when used 10bit in SDR
  • Fix last character corruption on AMD RX 6000 series.
  • Add support for ppc64le.
  • Fix EPG search genre matching.
  • Limit max width for long text cases.
  • Make sure we populate playerstate when it’s available from db.
  • Fix crash related to DXVA2 decoding of H264 SD interlaced videos
  • Fix window origin in multiscreen setup for macOS.
  • Fix crash when resuming from contextmenu and close contextmenu on playback started
  • Fix crash on open of Guide window.
  • Improves/fix 48000 Hz sample rate detection.
  • Fix colour management ICC profile/3DLUT parameters are not applied for Windows.
  • Fix GUI controls not loading if cloned after window load.
  • Remove unused function.

Install Kodi 19.5 in Ubuntu via PPA

If you found there’s important fixes for you, you can easily install or update to the new release by using its official PPA.

So far, the PPA contains the latest packages for Ubuntu 20.04, Ubuntu 22.04, Ubuntu 22.10 and Ubuntu 23.04. Though Ubuntu has include the new 20 RC release in the official repositories for 22.10+, the PPA should update your package into 19.5 due to higher packaging version.

1. First, open terminal by pressing Ctrl+Alt+T on keyboard. When it opens, run command to add the PPA:

sudo add-apt-repository ppa:team-xbmc/ppa

Type user password (no asterisk feedback) when it asks and hit Enter to continue.

2. Software Updater won’t upgrade the media center if an old version was installed in Ubuntu 22.04. Instead it show ‘Partial Updates’ issue.

As a workaround, either run apt install command below:

sudo apt install kodi kodi-bin

Or run sudo apt full-upgrade to install all available updates (you may still need to install kodi-bin manually). For Linux Mint, run sudo apt update before doing updates!

How to Uninstall:

For choice, you can either run command in terminal to purge the PPA, which will downgrade Kodi to stock version in system repository:

sudo apt install ppa-purge && ppa:team-xbmc/ppa

Or manually remove the software package via command:

sudo apt remove kodi kodi-bin --autoremove

And remove the PPA via command as you prefer:

sudo add-apt-repository --remove ppa:team-xbmc/ppa

bomi multimedia player

Bomi, formerly known as CMPlayer, is a graphical user interface (GUI) player based on mpv for Linux. It aims to be easy to use and also provides various powerful features and convenience functions.

By taking the advantage of mpv and GUI, bomi provides various features:

  • User-friendly interface: all features are available in context menu
  • Unlimited playback history
  • Automatic playlist generation and restoration
  • render styled subtitles such as SAMI and ASS format, bomi can render multiple subtitle files at the same time.
  • bomi supports hardware-accelerated decoding by GPU. bomi will utilize available native API for the system between VA-API and VDPAU.
  • dvd playback, image slide show, and other more basical player features.

Bomi player in Ubuntu

Install Bomi player from PPA:

1. If you have CMPlayer installed on your system, you have to remove it first since it conflicts with bomi.

To do so, open terminal from the Dash or by pressing Ctrl+Alt+T on keyboard. When it opens, run below command:

sudo apt-get remove cmplayer

2. Bomi has an official PPA that contains the latest packages for Ubuntu 14.04, Ubuntu 14.10 and Linux Mint 17.1.

To add the PPA, run below command in terminal:

sudo add-apt-repository ppa:darklin20/bomi

Bomi multimedia player ppa

3. Finally search for and install bomi via Synaptic Package Manager, or by running below commands one by one:

sudo apt-get update

sudo apt-get install bomi

For those who don’t want to add PPA, grab the .deb installer directly from the PPA packages page.

install multimedia codecs, enable dvd playback

Due to legal constraints in many countries, Ubuntu does not include multimedia codecs to play mp3, movies, and DVDs out-of-the-box.

This quick tutorial will show you how to manually install the multimedia codecs to enable playback audio, video, DVDs in Ubuntu 14.10 Utopic.

Install Multimedia Codecs:

There is a package “Ubuntu restricted extras” available in Ubuntu Software Center. Installing it will pull in support for MP3 playback and decoding, support for various other audio & video formats such as mp4, avi, rmvb, wmv and more, Microsoft fonts, Flash plugin, LAME (to create compressed audio files), and DVD playback.

To install the package, just click the link below to bring up Ubuntu Software Center and click the install button:

install ubuntu-restricted-extras

During the installing process, you will be asked to accept the EULA license terms.

Tip: If you get a warning dialog says “to install ubuntu restricted extras, these items must be removed”, just click the ignore because -extra versions of these libraries will be installed instead, to provide additional functionality.

Enable DVD Playback:

After installed the package above, you should be able to play normal DVDs. But for playing encrypted DVDs, libdvdread4 and libdvdcss2 are also required.

Press Ctrl+Alt+T on keyboard to open the terminal. When it opens, paste the commands below to install libdvdread4:

sudo apt-get install libdvdread4

The package provides a simple script to download & install libdvdcss2, to run the script:

sudo /usr/share/doc/libdvdread4/install-css.sh

If you can’t get the libdvdcss2 package from the script, download & install,

  • libdvdcss2_1.2.13-0_amd64.deb for 64-bit Ubuntu.

  • libdvdcss2_1.2.13-0_i386.deb for 32-bit ubuntu.

from the page: download.videolan.org/ubuntu/utopic

When done, you should be able to playback (and navigate DVD menus) in most video applications, including the default Totem and VLC media player..