Archives For November 30, 1999

This tutorial shows how to install the lightweight text editor Textadept via ppa in Ubuntu 13.10, Ubuntu 13.04, Ubuntu 12.04, Ubuntu 12.10 and Linux Mint.

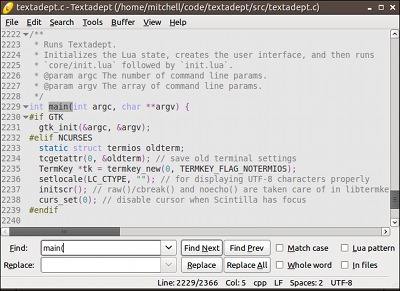
Textadept is a fast, minimalist, and ridiculously extensible cross-platform text editor for programmers. Written in a combination of C and Lua and relentlessly optimized for speed and minimalism over the years, Textadept is an ideal editor for programmers who want endless extensibility without sacrificing speed or succumbing to code bloat and featuritis.

Textadept Ubuntu

Features:

  • Entirely keyboard driven.
  • Unlimited split views (GUI version).
  • Support for over 80 programming languages.
  • Powerful snippets and key commands.
  • Code autocompletion and API lookup.
  • Unparalleled extensibility.
  • Terminal (curses) version.

Install Textadept via PPA:

Press Ctrl+Alt+T on your keyboard to open terminal. When it opens, run below command to add the PPA:

sudo add-apt-repository ppa:nilarimogard/webupd8

Update package lists:

sudo apt-get update

Install the Editor:

sudo apt-get install textadept

Enjoy!

The 2D CAD software QCad 3.3 has been released with a focus on block attributes. Block attributes can be used to define variable, dynamic text entities in blocks. Watch this screencast for a brief introduction on creating and using block attributes with QCAD.

QCAD is available in Ubuntu Software Center by default, but it’s old. This tutorial is going to show you how to download & install the latest package (so far, it’s 3.3) in Ubuntu 13.04 Raring, Ubuntu 13.10 Saucy, Ubuntu 12.04 Precise and their derivatives such as Linux Mint and Elementary OS.

Download & Install QCad 3.3:

Download:

QCad installer for 32-bit Linux

QCad installer for 64-bit Linux

Install:

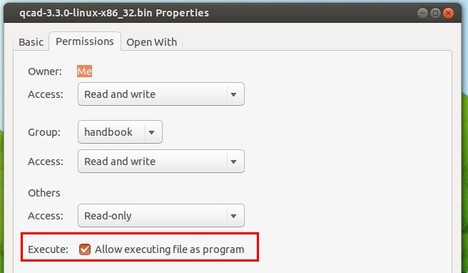
1. Go to Downloads folder, right-click on downloaded file and go to its Properties window. Check on ‘Allow executing file as program.’ under Permissions tab.

qcad installer properties

2. Press Ctrl+Alt+T on your keyboard to open terminal. When it opens, run below commands to run the installer:

cd ~/Downloads/ && ./qcad-3.3.0-linux-x86_*.bin

That’s it. Enjoy!

Thunderbird 24 Stable has been released. Here’s how to upgrade in Ubuntu 13.04 Raring, Ubuntu 12.04 Precise, Ubuntu 12.10 Quantal.

New Features in Thunderbird 24:

  • Message threads can now be ignored or watched
  • Emails can now be sent to IDN based email addresses
  • Zoom functionality is now available in the compose window
  • In the Compose window, ctrl/cmd + and ctrl/cmd – now change the zoom setting rather than the font size
  • In Twitter, replying to a tweet now replies to all users, just like on the Twitter website
  • Interactions in the filter list dialogs have been improved
  • In Chat user nicknames are now highlighted when mentioned
  • In IRC, long messages will now be sent in multiple parts instead of being cut off
  • Various security fixes

You don’t have to do something special to install Thunderbird 24 because Canoncial has updated Ubuntu universe repository, so that you can easily upgrade to the latest version via Sysnaptic Package Manager. For details, follow the steps below:

1.) Open Ubuntu Software Center, search for and install Synaptic Package Manager:

2.) Open Synaptic Package Manager from Unity Dash.

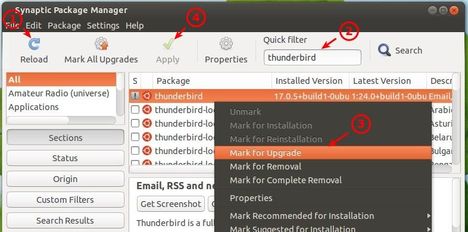
3.) Click Reload button to update package lists.

4.) Search thunderbird in the Quick filter box.

5.) Right-click on the package and choose ‘Mark for Upgrade’

6.) Click Apply button to start upgrading.

upgrade thunderbird 24 ubuntu

Enjoy!

Komodo Edit 8.5 has been released for days, now the PPA is ready for Ubuntu 13.10, Ubuntu 13.04, Ubuntu 12.04, Ubuntu 12.10 and their derivatives such as Linux Mint and Elementary OS.

What’s new in Komodo 8.5:

  • Code Refactoring (Komodo IDE only)
  • you can now select multiple positions in the editor, so that changes made at one position will be reflected in all selected positions.

    komodo multiple selections

  • A breadcrumbs navigation bar has been added to show a trail of directory ancestors relative to the current editor file.
  • Add the new Open Files side pane, which groups open files by language. In 8.5, you can now sort and group the Open Files pane by various attributes: language, file extension, directory, location, and even custom regex pattern match.

    komodo group open files

  • Add a touch of darkness with the new “Abyss” native dark UI theme. This theme applies to the UI elements outside of the main editor and can be enabled in the Appearance preferences.

    komodo dark theme

  • Komodo can now be configured to consolidate the menu bar into a collapsible button (Windows and Linux). The last used menu items will be displayed in the top-level of the button menu, making it quick and easy to run the same menu command again.

    komodo unified menu

  • php 5.5 support
  • Komodo’s code intelligence system is now handled by an external process, greatly enhancing editing responsiveness.
  • added two-character length triggering for Python symbols.
  • Komodo now runs on Mozilla 24, Python 2.7.5, Scintilla 3.34 and other updated components. What this means for you:
    • Faster startup times and less CPU and memory resources
    • Better hardware support for newer systems
    • Better browser preview, supporting the latest web technologies
  • Other improvements

Install Komode Edit 8.5 via PPA:

Press Ctrl+Alt+T on your keyboard to open terminal. When it opens, run below commands to add the PPA:

sudo add-apt-repository ppa:mystic-mirage/komodo-edit

Then update package lists and install Komode Edit:

sudo apt-get update; sudo apt-get install komodo-edit

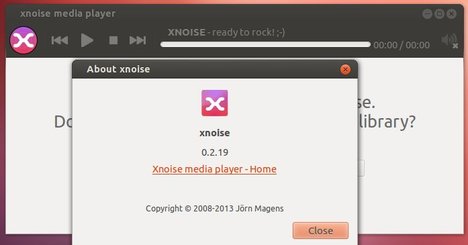
Xnoise Media Player 0.2.19 has been released with some internal updates, new translation updates and some GUI changes. Here’s how to install it in Ubuntu 13.10, Ubuntu 13.04, Ubuntu 12.10, Ubuntu 12.04 and Linux Mint.

xnoise 0.2.19 ubuntu 12.04

Changes in Xnoise 0.2.19:

  • Don’t ignore last song in random mode.
  • GUI updates
  • Allow compilation with valac 0.22
  • Changes for Settings dialog
  • AsyncQueues for background worker threads
  • Add media browser visibility option to app menu
  • Media browser rendering fixes for Adwaita
  • Fix rendering of background on Manjaro + Adwaita
  • Desktop file fixes
  • Localization fixes
  • More bug fixes
  • update translations

Install Xnoise 0.2.19

The Xnoise PPA is ready for Ubuntu 13.10 Saucy, Ubuntu 13.04 Raring, Ubuntu 12.10 Quantal. Due to dependency problem, you need to install gstream1.0 in Ubuntu 12.04 Precise. To get started, follow the steps below:

1.) Press Ctrl+Alt+T on your keyboard to open terminal. When it opens, run below command to add Xnoise PPA:

sudo add-apt-repository ppa:shkn/xnoise

2.) For Ubuntu 12.04 Precise only, run blow command to add the gstreamer developer ppa:

sudo add-apt-repository ppa:gstreamer-developers/ppa

sudo add-apt-repository ppa:kubuntu-ppa/backports

Edit Xnoise repository by running below command:

sudo gedit /etc/apt/sources.list.d/shkn-xnoise-precise.list

Change precise to quantal and save the file.

3.) Update package lists and install the player:

sudo apt-get update; sudo apt-get install xnoise

That’s it. Enjoy!

phpMyAdmin is an open-source tool written in PHP intended to handle the administration of MySQL over the Web. The latest phpMyAdmin 4.0.6 has fixed a lot of security problems and bugs since version 3.x.x is the default in Ubuntu repository.

latest phpmyadmin ubuntu

Here’s how to install or upgrade to the latest version of phpMyAdmin (4.0.6) in Ubuntu 12.04 LTS Server, Ubuntu 10.04 Server, Ubuntu 13.04 and Ubuntu 12.10 via PPA.

To get started, connect to your Ubuntu server. When you’re log in, run below command to add the PPA:

sudo add-apt-repository ppa:tuxpoldo/phpmyadmin

Update package lists on your system:

sudo apt-get update

Install or upgrade phpMyAdmin to the latest:

sudo apt-get install phpmyadmin

That’s it. If you want to remove this PPA after installation (without removing any packages you may have installed / upgraded from the PPA), run:

sudo add-apt-repository --remove ppa:tuxpoldo/phpmyadmin

If you want to remove the PPA as well as downgrade phpMyAdmin to the version available in the official Ubuntu repositories, run:

sudo apt-get install ppa-purge; sudo ppa-purge ppa:tuxpoldo/phpmyadmin

Enjoy!

How to Install and Play Stendhal MMORPG in Ubuntu

Last updated: September 17, 2013

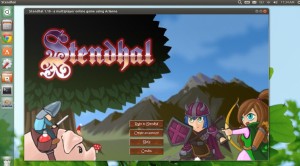
Stendhal is a fun friendly and free multiplayer online adventure game developed using the Arianne game development system. This tutorial shows you how to install & play this game in Ubuntu 13.04 Raring, Ubuntu 12.10 Quantal, Ubuntu 12.04 Precise, Ubuntu 10.04 and their derivatives such as Linux Mint and Elementary OS.

Stendhai MMORPG

Install Stendhal MMORPG

The latest version has reached Stendhal 1.10, which adds many cosmetic changes and some new features. Have a look at the announcement of Stendhal 1.10

The PlayDeb repository contains the latest packages for Ubuntu 13.04, Ubuntu 12.04 and old versions for Ubuntu 12.10, Ubuntu 11.10, Ubuntu 10.04. Follow the steps below to install it on your system:

1.) Press Ctrl+Alt+T on your keyboard to open terminal. When it opens, run below command to add the PlayDeb to your repository:

sudo sh -c 'echo "deb http://archive.getdeb.net/ubuntu $(lsb_release -sc)-getdeb games" >> /etc/apt/sources.list.d/getdeb.list'

For Linux Mint user, read this post to add playdeb repository.

2.) Get the key:

wget -q -O- http://archive.getdeb.net/getdeb-archive.key | sudo apt-key add -

3.) Then update package lists and use apt-get command to download and install the game:

sudo apt-get update; sudo apt-get install stendhal

Once installed, start it from the Unity Dash.

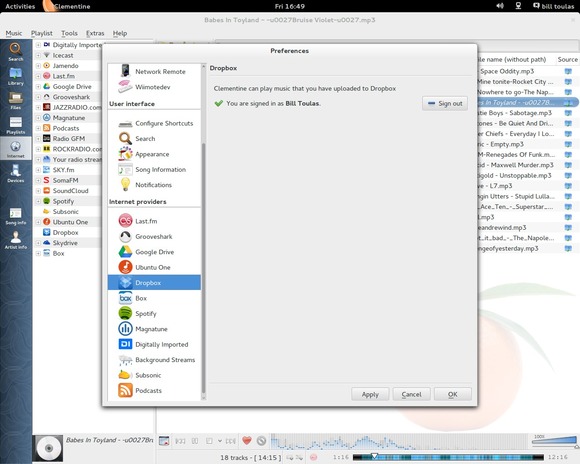
The Music Player Clementine 1.2 is coming with cloud services. It adds support for Subsonic, indexing & playing music from Box, Dropbox, Skydrive, and Ubuntu One. Add remote control support for Android and Playlist tab to the sidebar.

Clementine-1.2

As well as the above main features, Clementine 1.2 also contains below new features:

  • Add configurable blur & opacity to album art when used as a playlist background.
  • Support Opus where available.
  • Support .mka and .oga file extensions.
  • Parsing support for WPL playlists.
  • Sort providers by user preference.
  • Add year and bitrate to MPRIS2 messages.
  • Add “not equals” operator to fields in the smart playlist wizard.
  • Add an option to write ratings, play count and scores to files.
  • Add options to show the rating and score on the OSD.
  • Add support for POPM tags.
  • Add support for FMPS tags in Ogg, FLAC, MP4 and ASF files.
  • Compile the bundled Taglib with ASF, MP4 and Opus support.
  • Make it possible to cancel cover searches.
  • Add an option to resume playback on startup.
  • Add support for Performer and Grouping tags.
  • Add Radio GFM.
  • Add an Apply button to the settings dialog.
  • Make it possible to mark all episodes of a podcast as new/listened.
  • Add an option for fading in/out on pause/unpause.
  • Add stereo balance slider to the equalizer.
  • Add a –restart-or-previous commandline flag.
  • Allow files to be transcoded directly from the playlist.
  • Export downloaded album covers
  • see changelog

Although this is not officially 1.2 yet, it already works completely flawless Clementine 1.2 stable is out! Packages for Ubuntu 13.04, Ubuntu 12.04, Ubuntu 12.10, Debian wheezy, squeeze, Fedora, Windows are ready!

Download Clementine on Google Code

You can also add the Clementine PPA to get it on your Ubuntu system when it’s ready. Press Ctrl+Alt+T on your keyboard to open terminal. When it opens, run below commands one by one:

sudo add-apt-repository ppa:me-davidsansome/clementine
sudo apt-get update
sudo apt-get install clementine

Enjoy!

Tomahawk is a social music player which allows to connect with your jabber / gtalk / twitter friends and share collections and playlists.

Tomahawk in Ubuntu Software Center is version 0.6 while the latest has reached 0.7. Here’s the changelog:

  • JavaScript Resolvers can now expose collections.
  • Introduced bundle system for JavaScript Resolvers, called “axes”.
  • Fixed playback-loop caused by duplicate tracks in a playlist.
  • Improved peer handling and removed connection support through Twitter.
  • Taking an account offline now also disconnects associated peers.
  • Improved Spotify protocol handling.
  • Added “Append to Playlist” context menu item.
  • User-friendlier collection handling: added info-buttons for artists and albums. Double-clicking an item expands it now.
  • Charts only load on-demand now.
  • Fixed Diagnostics information not correctly updating.
  • Fixed issue with hidden sidebar and panels.
  • Fixed issues with some color schemes.
  • Fixed playing files with special characters in the filename.
  • Improved stability.
  • Added translations for Catalan, Czech, Galician, Greek, Italian and Chinese.
  • (Windows) Smoother and more responsive audio playback.
  • (Linux) Fixed grid issues with GTK-styles.

Install Tomahawk via PPA:

The Tomahawk PPA always contains the latest release for Ubuntu, Linux Mint and Elementary OS users. Press Ctrl+Alt+T on your keyboard to open temrinal. When it opens, run below command to add the PPA:

sudo add-apt-repository -y ppa:tomahawk/ppa; sudo apt-get update

After that, you can use Ubuntu Software Center, Synaptic package manager or other package manager to install this player. Or run below command in terminal:

sudo apt-get install tomahawk tomahawk-dbg

Enjoy!

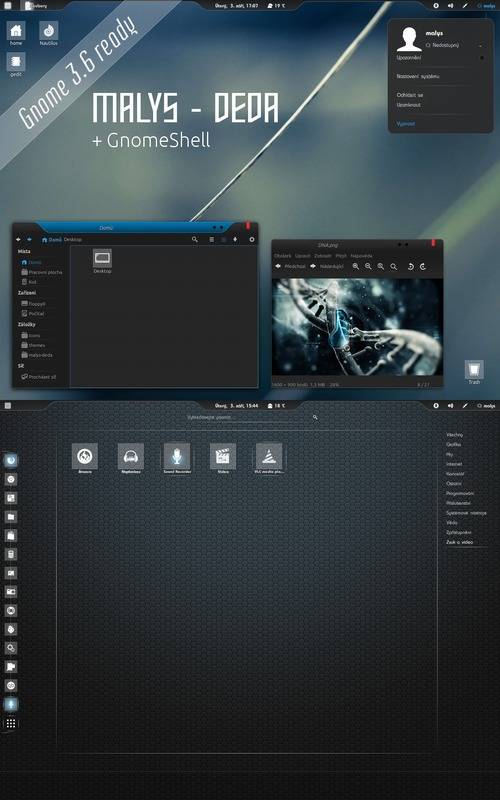
This tutorial shows you how to install the beautiful Malys-Deda GTK Theme in Ubuntu 13.04, Ubuntu 12.10, Ubuntu 12.04 and Linux Mint.

malys deda gtk theme

The installation is very easy, just download the theme and put the extracted folder to themes folder and finally you can apply it via gnome tweak tool or unity tweak tool. Follow the steps below to get started:

1.) Open Ubuntu Software Center, search for and install gtk3-engines-unico or gtk2-engine-pixbuf

2.) Clike to download Malys-Deda GTK Theme

3.) Extract the download package. Copy the result folders (malys-deda & malys-dedaGS) and paste to:

  • user Home -> .themes # For local user only, press Ctrl+H to see hidden folders. Create .themes folder if not exist.
  • /usr/share/themes # For global. You need to press Alt+F2 and type to run gksudo nautilus to open file manager with root privilege.

4.) Open Unity Tweak Tool or Gnome Tweak Tool, go to Themes and choose Malys-Deda.