Archives For November 30, 1999

Opera for Linux 24

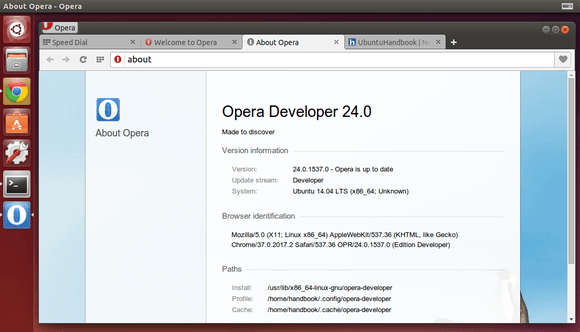
Opera 24 for Linux, the first Chromium-based build, was finally released today on June 23, 2014, as part of the ‘developer stream’. It has been almost one year since Opera released version 12.16 for Linux in July 2013.

Now, Linux users can get the newest Opera features, including:

  • Aura-powered UI
  • Discover
  • Stash
  • A wide selection of extensions and themes
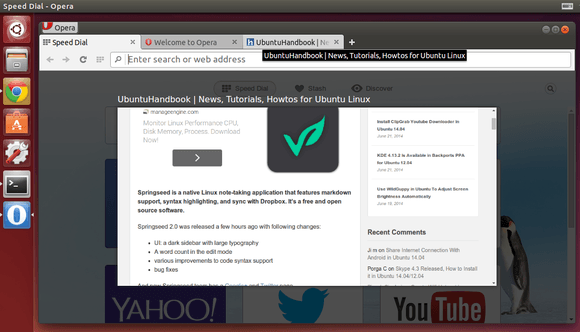
  • Vastly improved Speed Dial and Opera Turbo.
  • and more.

Opera for Linux 24

Opera for Linux tag preview

A 64-bit .deb package is available from the link below:

Download Opera 24 for Linux

Click to install the package via Ubuntu Software Center. During the installing process, it will add the Opera repository into your system so that you can receive future updates by running regular Ubuntu updates via Software Updater. Also, it will install the Pepper Flash Plugin to get flash working.

Tip:

I’ve installed Opera 24 on my 64-bit Ubuntu 14.04 laptop, but it does not launch due to permissions issue (might be).

I can open it by running below command in terminal (Ctrl+Alt+T) to open it via root:

sudo opera-developer

Or edit the .desktop file (sudo gedit /usr/share/applications/opera-developer.desktop) and change the exe command to make it look like:

Exec=gksudo opera-developer %U

via: blogs.opera.com

Spring Note-taking App

Springseed is a native Linux note-taking application that features markdown support, syntax highlighting, and sync with Dropbox. It’s a free and open source software.

Springseed 2.0 was released a few hours ago with following changes:

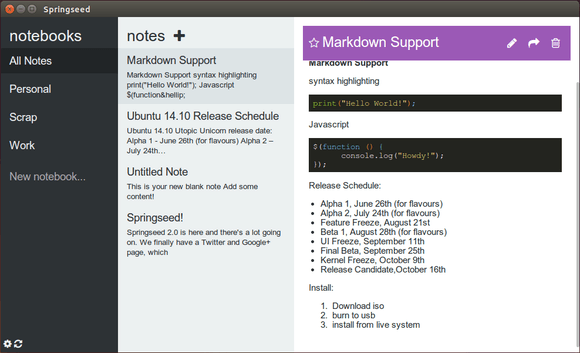
  • UI: a dark sidebar with large typography
  • A word count in the edit mode
  • various improvements to code syntax support
  • bug fixes

And now Springseed team has a Google+ and Twitter page.

Springseed note-taking in Ubuntu 14.04

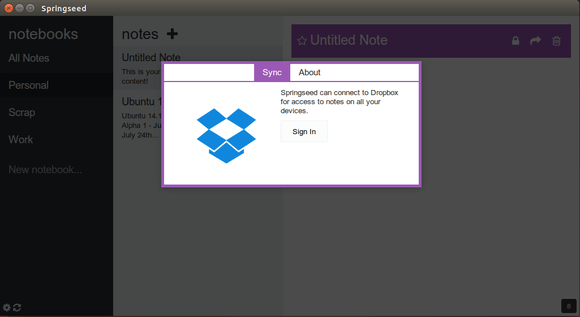
Springseed note-taking dropbox

Version 2.0 works on Ubuntu 13.10 and Ubuntu 14.04. Download the packages from its website and click open with Ubuntu Software Center and finally install it on your system:

Download Springseed

share printer in ubuntu 14.04

This quick tutorial is going to show you how to share a wired printer in Ubuntu 14.04 Trusty over local network.

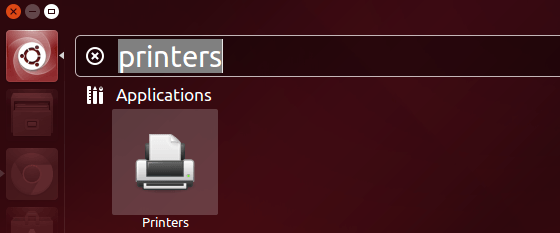
To get started, open Printers utility from Unity Dash search results or System Settings.

Printers setting in Ubuntu 14.04

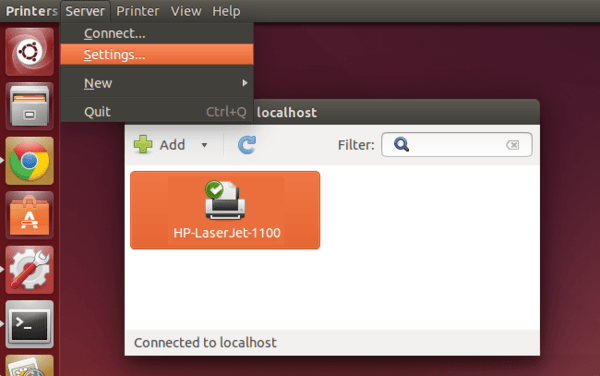
Once it opens, go to menu Server -> Settings…

Share Printer in Ubuntu 14.04

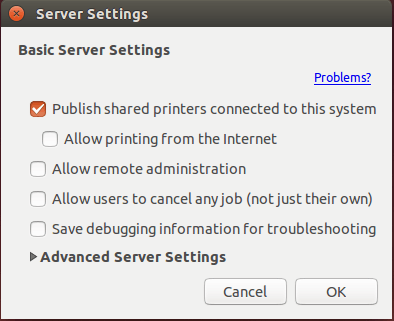
Check the box where it says “Publish shared printers connected to this system” to enable network sharing of connected printers.

share printer ubuntu 14.04

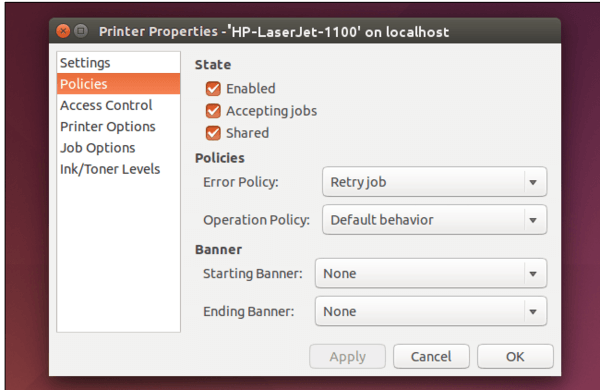
Finally, right-click on a printer in the list and go to its Properties window. Under Policies tab, make sure all three boxes (Enabled, Accepting jobs, and Shared) are checked.

share printer in ubuntu 14.04

Now you’re able to connect to this printer from Ubuntu/Windows client using Internet Printing Protocol (ipp://ip.address.or.name/printers/Printername).

ClipGrab Youtube Downloader

This quick tutorial shows you how to install ClipGrab, a simple video downloader and converter, and create a launcher icon in Ubuntu 14.04 Trusty LTS.

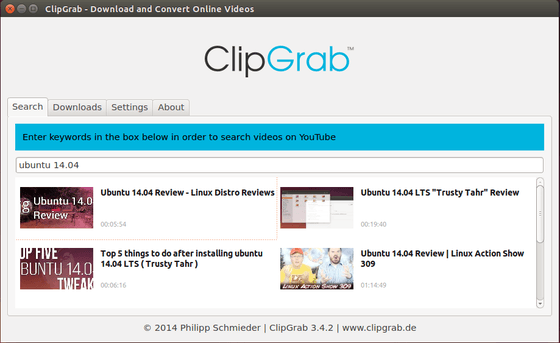
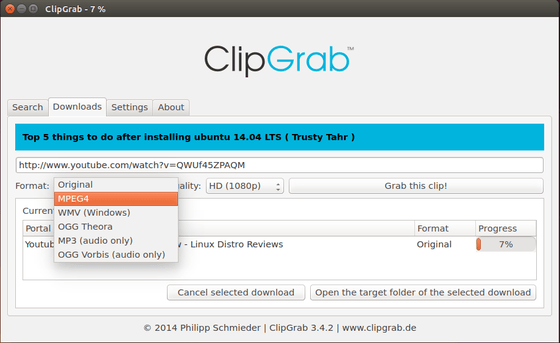
ClipGrab is a simple graphical tool that allows you to search and download videos from YouTube, Vimeo, Metacafe, and other video sites. It allows to save original video format or convert to MPEG4, MP3, WMV, OGG.

This free app supports HD 1080p videos after ffmpeg or avconv is installed.

ClipGrab search video

ClipGrab download video and convert format

ClipGrab has an Ubuntu PPA, but Ubuntu 14.04 Trusty is not supported yet. Below steps will show you how to install the .tar.gz package from its web site.

For easy way, you can grab the deb directly from ubuntuupdates. Remember to install libav-tools to get HD 1080p support.

1. Press Ctrl+Alt+T on keyboard to open the terminal. When it opens, run below command so the app will support HP 1080p videos.

sudo apt-get install libc6 libgcc1 libqt4-network libqt4-xml libqtcore4 libqtgui4 libqtwebkit4 libstdc++6 libvorbis0a libogg0 libavcodec-extra-54 libav-tools

ClipGrab HD 1080p support

2. Download ClipGrab for Linux from its website:

Download ClipGrab

So far, it is clipgrab-3.4.2.tar.gz.

3. Extract the package to /opt/ for global use:

cd /opt/ && sudo tar -xvzf ~/Downloads/clipgrab-*.tar.gz

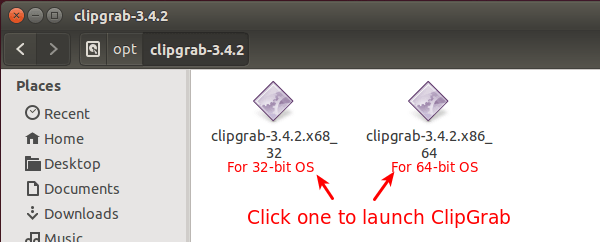
In file browser, go to Computer -> opt -> clipgrab-3.4.2 and you’ll see the app executable files. Run below command to allow executing them as program and finally click one to launch ClipGrab.

cd /opt/clipgrab-3.4.2/ && sudo chmod +x *

ClipGrab Executable

Create a launcher icon for ClipGrab:

Besides “lock to launcher” after you launched ClipGrab, you can create a shortcut icon manually by running below command:

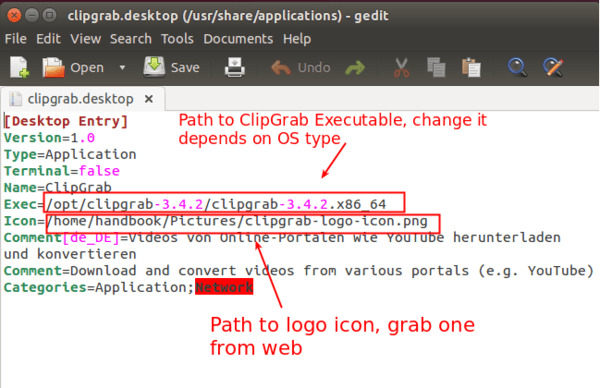
sudo gedit /usr/share/applications/clipgrab.desktop

Paste below content when the file opens. You may change the PATH to exec and icon to yours.

[Desktop Entry]
Version=1.0
Type=Application
Terminal=false
Name=ClipGrab
Exec=/opt/clipgrab-3.4.2/clipgrab-3.4.2.x86_64
Icon=/home/handbook/Pictures/clipgrab-logo-icon.png
Comment[de_DE]=Videos von Online-Portalen wie YouTube herunterladen und konvertieren
Comment=Download and convert videos from various portals (e.g. YouTube)
Categories=Application;Network

ClipGrab launcher

Save the file and done.

Change Ubuntu Laptop brightness automatically

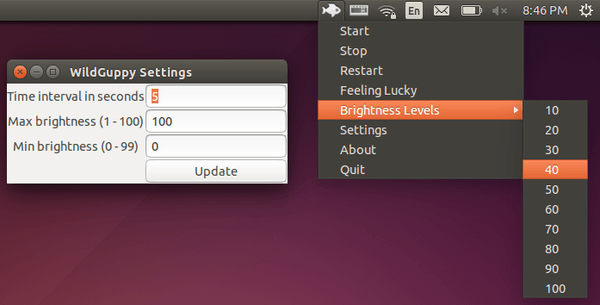
WildGuppy is a simple application that automatically adjusts Ubuntu laptop’s screen brightness depending on one’s sitting environment.

The app changes your laptop’s screen brightness by using camera samples taken at a user definable interval. Besides that, you can always set the brightness manually from Brightness Levels menu. When you choose this option, webcam sampling process will stop!

change screen brightness automatically

About the Feeling lucky option, it takes a sample from your webcam at that time you click on it and set the right brightness level and will not take any further samples.

Install WildGuppy in Ubuntu:

It’s recommended to install the app from developer’s PPA. After that, you can receive updates by Ubuntu’s Software Updater.

To add the PPA, press Ctrl+Alt+T on keyboard to open the terminal. When it opens, run the command below:

sudo add-apt-repository ppa:fantasyleague0629/wildguppy

Then install WildGuppy via:

sudo apt-get update; sudo apt-get install wildguppy

Works on Ubuntu 14.04, Ubuntu 13.10, Ubuntu 13.04, Ubuntu 12.10 and Ubuntu 12.04.

Make WildGuppy running at startup:

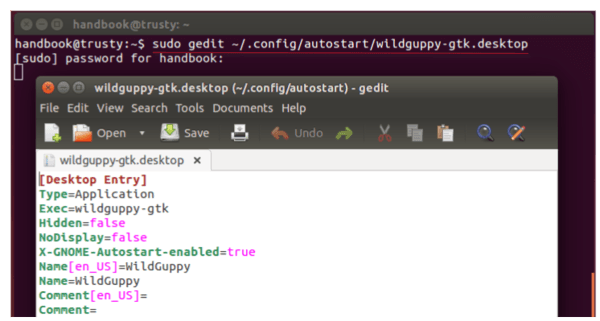
Run command to edit the config file.

sudo gedit ~/.config/autostart/wildguppy-gtk.desktop

Type in your password when prompted. Note that terminal will not display your password when typing, just type in mind and hit enter.

When the file opens, paste below content and save it.

[Desktop Entry]
Type=Application
Exec=wildguppy-gtk
Hidden=false
NoDisplay=false
X-GNOME-Autostart-enabled=true
Name[en_US]=WildGuppy
Name=WildGuppy
Comment[en_US]=
Comment=

auto-start-wildguppy

via: github.com

install Skype 4.3 in Ubuntu

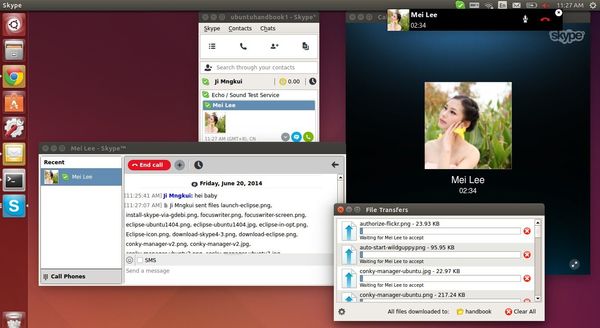
Skype for Linux has been updated to version 4.3.0.37 with updated UI, new cloud-based Group chat experience, and more.

Microsoft finally announced Skype for Linux 4.3 on June 18, 2014. The new release dropped support for direct Alsa support, now it uses PulseAudio for better calling experience. Also Skype 4.3 contains below changes:

  • An updated UI
  • Our new cloud-based Group Chat experience
  • More reliable file transfer support when using multiple devices at once
  • Greater accessibility by blind and visually impaired users
  • PulseAudio 3.0 and 4.0 support
  • Lot of bug fixes
  • Skype 4.3 release note.

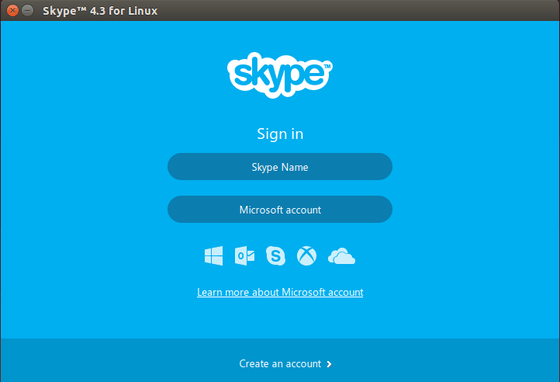
Skype 4.3 in Ubuntu 14.04

Install Skype 4.3 in Ubuntu or Linux Mint:

Canonical has finally made the latest Skype 4.3 into the partners repository, which means only do step a.), b.), and c.) will install Skype 4.3 in Ubuntu 14.04 and Ubuntu 12.04

At the moment, Skype for Linux 4.3 is not available in any Linux repository. Below steps will tell you how to install the official .deb package in Ubuntu 14.04, Ubuntu 12.04, and their derivatives.

1. Install required libraries (for 64-bit system)

Skype website only provides 32-bit package for Ubuntu 12.04 and higher. You’re unable to install it directly on 64-bit system due to dependencies issue.

However, install the old skype from Canonical partners repository will also install the required libraries we need for NEW skype.

a.) Press Ctrl+Alt+T on keyboard to open terminal. When it opens, run commands one by one to remove old skype and .skype folder:

sudo apt-get remove skype skype-bin

rm -rf ~/.skype

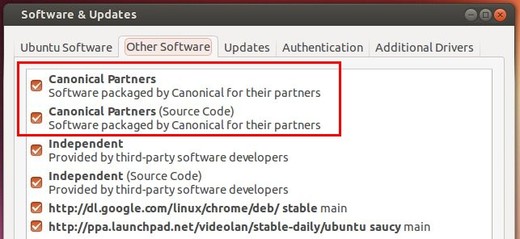
b.) Open “Software & Updates” and enable Canonical partners repository under Other Software tab.

Enable canonical partners repository

c.) Press Ctrl+Alt+T on keyboard to open terminal. When it opens, run the commands below to install old skype:

sudo apt-get update; sudo apt-get install skype

UPDATE: Below steps are no longer required! Just do the above step a.), b.) and c.) will install Skype 4.3 in your system.

c.) Once installed, remove the old skype package:

sudo apt-get remove skype skype-bin

2. Download & install Skype 4.3

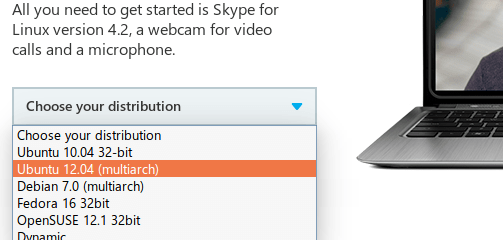
Download the “Ubuntu 12.04 (multiarch)” package from: www.skype.com/go/linux

Download Skype 4.3 for Linux

Click to install the package via Ubuntu Software Center. Or run command below in terminal (Ctrl+Alt+T):

cd ~/Downloads/ && sudo dpkg -i skype-ubuntu-precise_*.deb

Once installed, you’re able to open Skype 4.3 from Unity Dash result:

Skype 4.3 Ubuntu 14.04

Flickr App frogr in Ubuntu 14.04

Frogr, a Gnome desktop app for Flickr image/video hosting service, is updated to version 0.10 with bug fixes and new and updated translations.

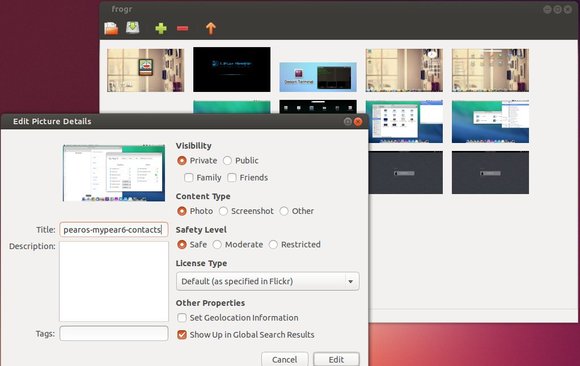
Frogr is a small application for the GNOME desktop that allows users to manage their accounts in the Flickr image hosting website. It supports all the basic Flickr features, including uploading pictures, adding descriptions, setting tags and managing sets and groups pools.

flickr management Ubuntu

The latest stable version of Frogr 0.10 (released on June 17, 2014) currently features a basic -yet effective- flickr uploader:

  • Allow to upload pictures and videos to flickr, specifying details such as title, description, tags, visibility, content type, safety level and whether to “show up on global search results”.
  • Allow uploading pictures and videos from remote machines, through different protocols (SMB, SSH, FTP…).
  • Allow loading/saving the work session from/to ‘project’ files.
  • Allow setting specific licenses and geolocation information for pictures right from the desktop.
  • Allow specifying sets and group pools for the elements to be added to after the upload process.
  • Allow to create sets right from frogr, opposite to just adding elements to already existing ones.
  • Command line interface and integration as MIME type handler for pictures.
  • Import tags from picture’s metainformation (if present) when loading.
  • Support for handling multiple Flickr accounts.
  • Support for specifying HTTP proxies manually.
  • Integrated with GNOME Shell and the Mac OS X desktops.
  • Translated to many languages (Check frogr’s module at l10n)

For the detailed changes in Frogr 0.10, check the news file.

Install Frogr 0.10 in Ubuntu:

The new release has been made into Ubuntu 14.10’s universe repository. For Ubuntu 14.04, Ubuntu 13.10, Ubuntu 12.04 and their derivatives, install Frogr 0.10 from PPA:

Press Ctrl+Alt+T on keyboard to open terminal. When it opens, run the commands below one by one:

sudo add-apt-repository ppa:mariospr/frogr

sudo apt-get update

sudo apt-get install frogr

install Eclipse Ubuntu

This quick tutorial is going to show you how to install the latest release of Eclipse, while the Ubuntu repositories has an very old version.

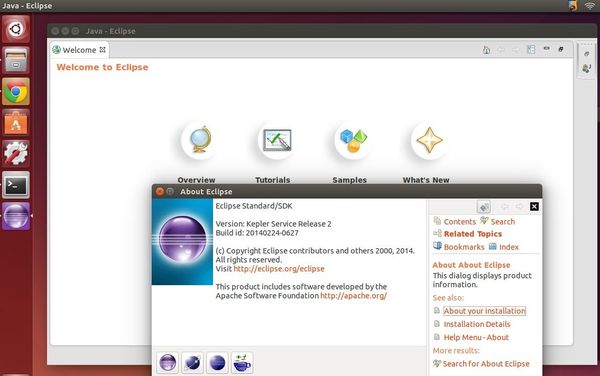
So far, the latest is Eclipse Kepler (4.3.2). You can follow below steps to install it on Ubuntu 14.04 or other Ubuntu releases.

Eclipse Kepler (4.3.2) in Ubuntu 14.04 Unity

This tutorial does no longer work since Eclipse Installer was rolled out, you may follow the new how-to-install

1. Install Java.

If you don’t have Java installed on your system. Click the link below to bring up Ubuntu Software Center and click install OpenJDK Java 7:

Click Install OpenJDK java 7

Or, install Oracle Java from this link.

2. Download Eclipse from its website

You may check out your OS Type 32-bit or 64-bit by going to System Settings -> Details -> Overview

Download Eclipse for Linux

3. Extract Eclipse to /opt/ for global use

Press Ctrl+Alt+T on keyboard to open the terminal. When it opens, run the command below to extract Eclipse to /opt/:

cd /opt/ && sudo tar -zxvf ~/Downloads/eclipse-*.tar.gz

You may replace “eclipse-*.tar.gz” (without quote) to the exact package name if the command does not work.

Don’t like Linux commands? You can do this by opening Nautilus file browser via root: Press Alt+F2 -> run gksudo nautilus.

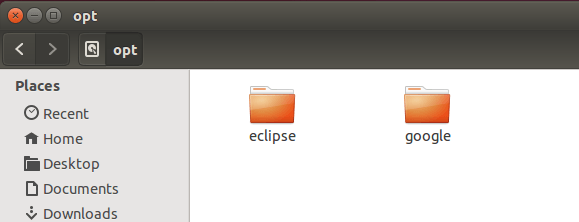
Once done, you should see the eclipse folder under /opt/ directory.

Eclipse in /opt/ for global use

4. Create a launcher shortcut for Eclipse

Press Ctrl+Alt+T, paste below command into the terminal and hit enter (install gksu from Software Center if below command does not work).

gksudo gedit /usr/share/applications/eclipse.desktop

Above command will create and open the launcher file for eclipse with gedit text editor.

Paste below content into the opened file and save it.

[Desktop Entry]
Name=Eclipse 4
Type=Application
Exec=/opt/eclipse/eclipse
Terminal=false
Icon=/opt/eclipse/icon.xpm
Comment=Integrated Development Environment
NoDisplay=false
Categories=Development;IDE;
Name[en]=Eclipse

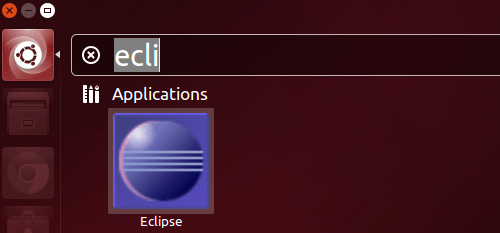
Finally open Eclipse from Unity Dash search results and enjoy!

launch eclipse in ubuntu 14.04

Not clear enough? See the youtube video:

full-screen writer app ubuntu

Full-screen writing program FocusWriter updated to version 1.5.0 with many exciting new features and improvements.

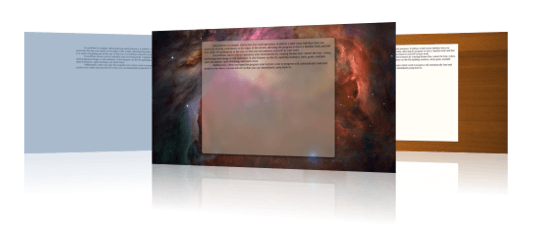
FocusWriter is a simple, distraction-free writing environment. It utilizes a hide-away interface that you access by moving your mouse to the edges of the screen, allowing the program to have a familiar look and feel to it while still getting out of the way so that you can immerse yourself in your work.

focuswriter screen

FocusWriter features:

  • TXT, basic RTF, and basic ODT file support
  • Timers and alarms
  • Daily goals
  • Fully customizable themes
  • Typewriter sound effects (optional)
  • Auto-save (optional)
  • Live statistics (optional)
  • Spell-checking (optional)
  • Multi-document support
  • Sessions
  • Portable mode (optional)
  • Translated into over 20 languages

The latest release 1.5.0 was released one hour ago on June 17th, 2014 with following new features and improvements.

  • Added daily progress dialog
  • Added default themes
  • Added blurring behind text area
  • Added drop shadow behind text area
  • Added duplicating themes
  • Added keyboard shortcuts to move between paragraphs
  • Added option to disable byte order mark
  • Added basic support for Office Open XML files
  • Added Windows installer
  • Include dictionaries on Windows
  • Improved theme dialog
  • Improved background color when loading theme
  • Stopped clearing document cache across runs
  • Synchronized location for open and save dialogs
  • Switched to hunspell
  • Switched to QtZip
  • Refactored daily progress
  • Refactored document cache
  • Refactored spell checking code

Install FocusWriter 1.5.0 in Ubuntu:

Press Ctrl+Alt+T on keyboard to open the terminal. When it opens, run the commands below one by one will install the writing app from its official PPA:

sudo add-apt-repository ppa:gottcode/gcppa

sudo apt-get update

sudo apt-get install focuswriter

Works on Ubuntu 14.10, Ubuntu 14.04, Ubuntu 13.10, Ubuntu 12.04 and their derivatives.

For Othe Linux, Window, and Mac OS, go to FocusWriter website.

Wallch Fixes for Ubuntu 14.04

Wallch 4.12 was finally released with various bug fixes, including the crash when clicking the start button under ‘Wallpaper’. Now it is works like a charm in Ubuntu 14.04 Trusty!

Wallch is a free and open source wallpaper changer for Linux desktops. Besides changing your desktop background automatically, it features:

  • a live picture of earth updated every 1/2 hour
  • Picture of The Day (wikipedia).
  • Wallpaper Clocks – combine beautiful wallpapers with the time and date.
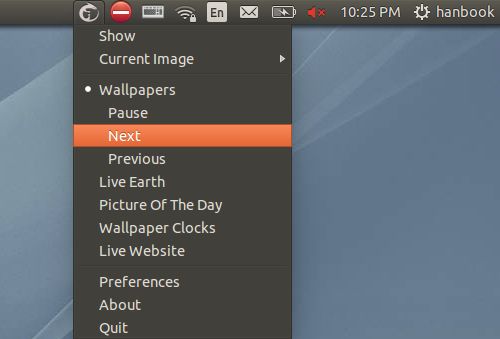
  • an Unity indicator to control the app from menu
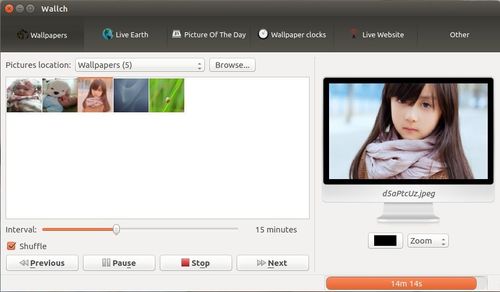
Wallch automatically change desktop background with selected Picture folder

Wallch automatically change desktop background with selected Picture folder

Control wallch via an Unity indicator

Control wallch via an Unity indicator

The latest release fixed below bugs:

  • Fixed bug of application crashing on ‘Wallpapers’ when button start was pressed
  • Fixed bug of window not being able to resize
  • Fixed bug on wallpaper clocks were the background was always one minute behind system’s time
  • Fixed bug were shortcuts like Ctrl+Q or Ctrl+P wouldn’t work
  • More fixes see the launchpad page.

Install Wallch 4.12 in Ubuntu 14.04:

First you may check out your OS type: 32-bit = i386, 64-bit = amd64 by going to System Settings -> Details -> OS type.

Then download the .deb package and click install via Ubuntu Software Center.

Download Wallch 4.12 for Ubuntu 14.04

Once installed, open it from Unity Dash result and enjoy!