Archives For September 30, 2013

Linux Kernel 3.11.5

The latest Linux Kernel 3.11.5 has been released. It fixed a security issue: ipv6 ipsec encryption bug in sctp_v6_xmit. Also there’re a lot of bugfixes and drivers udpates. See the changelog.

All users of kernel 3.11 series are urged to upgrade as soon as possible. Here’s how to upgrade in Ubuntu 13.10, Ubuntu 13.04, Ubuntu 12.04, Ubuntu 12.10 and Linux Mint 13/14/15/16.

Upgrade Linux Kernel 3.11.5:

At the moment of writing this tutorial, the kernel PPA is not ready for this kernel. I’ll update this post once the PPA updated.

Press Ctrl+Alt+T on your keyboard to open terminal. When it opens, follow the steps below:

1. Download the kernel Debs:

For 32-bit system:

wget http://kernel.ubuntu.com/~kernel-ppa/mainline/v3.11.5-saucy/linux-headers-3.11.5-031105-generic_3.11.5-031105.201310132235_i386.deb

wget http://kernel.ubuntu.com/~kernel-ppa/mainline/v3.11.5-saucy/linux-headers-3.11.5-031105_3.11.5-031105.201310132235_all.deb

wget http://kernel.ubuntu.com/~kernel-ppa/mainline/v3.11.5-saucy/linux-image-3.11.5-031105-generic_3.11.5-031105.201310132235_i386.deb

For 64-bit system:

wget http://kernel.ubuntu.com/~kernel-ppa/mainline/v3.11.5-saucy/linux-headers-3.11.5-031105-generic_3.11.5-031105.201310132235_amd64.deb

wget http://kernel.ubuntu.com/~kernel-ppa/mainline/v3.11.5-saucy/linux-headers-3.11.5-031105_3.11.5-031105.201310132235_all.deb

wget http://kernel.ubuntu.com/~kernel-ppa/mainline/v3.11.5-saucy/linux-image-3.11.5-031105-generic_3.11.5-031105.201310132235_amd64.deb

2. Install the debs:

sudo dpkg -i linux-headers-3.11.5*.deb linux-image-3.11.5*.deb

3. Restart your computer and done!

4. If you have problem with this kernel. Run command to remove Linux Kernel 3.11.5:

sudo apt-get purge linux-image-3.11.5-*

frostwire 5.6.6

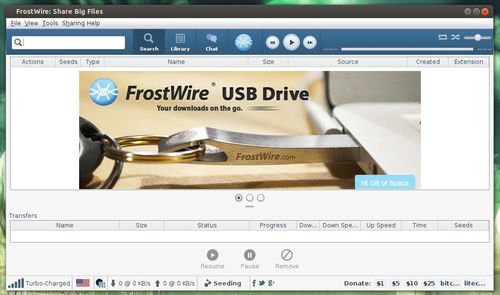
The free & open-source BitTorrent client FrostWire has released v5.6.6 with important bugfixes on meta search. It’s highly recommended to update.

See what’s new in FrostWire 5.6.6:

frostwire (5.6.6) stable; urgency=high

  • Fixes ExtraTorrent meta search.
  • Polish translation 100% updated.
  • New support for anonymous user experience statistics.

Download FrostWire for Ubuntu / Linux Mint

Because FrostWire depends on Java, so you need to install OpenJDK from Ubuntu Software Center. Or install oracle Java via PPA. Then double-click on downloaded package to install via pop-up Ubuntu Software Center.

FrostWire Bittorrent client 5.6.6

Linux Kernel 3.10.16

The Linux Kernel 3.10 LTS series has reached v3.10.16, all users of this series are urged to upgrade as soon as possible. Here’s how to upgrade in Ubuntu 13.10, Ubuntu 13.04, Ubuntu 12.04, Ubuntu 12.10 and Linux Mint.

Linux Kernel 3.10.16 fixed a security issue: ipv6 ipsec encryption bug in sctp_v6_xmit, updated drivers as well as other bug fixes. See changelog.

Upgrade Linux Kernel 3.10.16:

Press Ctrl+ALt+T on your keyboard to open terminal. When it opens, follow the steps below:

1. Download the DEBs.

For 32-bit:

wget http://kernel.ubuntu.com/~kernel-ppa/mainline/v3.10.16-saucy/linux-headers-3.10.16-031016-generic_3.10.16-031016.201310131935_i386.deb

wget http://kernel.ubuntu.com/~kernel-ppa/mainline/v3.10.16-saucy/linux-headers-3.10.16-031016_3.10.16-031016.201310131935_all.deb

wget http://kernel.ubuntu.com/~kernel-ppa/mainline/v3.10.16-saucy/linux-image-3.10.16-031016-generic_3.10.16-031016.201310131935_i386.deb

For 64-bit:

wget http://kernel.ubuntu.com/~kernel-ppa/mainline/v3.10.16-saucy/linux-headers-3.10.16-031016-generic_3.10.16-031016.201310131935_amd64.deb

wget http://kernel.ubuntu.com/~kernel-ppa/mainline/v3.10.16-saucy/linux-headers-3.10.16-031016_3.10.16-031016.201310131935_all.deb

wget http://kernel.ubuntu.com/~kernel-ppa/mainline/v3.10.16-saucy/linux-image-3.10.16-031016-generic_3.10.16-031016.201310131935_amd64.deb

2. Install the Debs:

sudo dpkg -i linux-headers-3.10.16*.deb linux-image-3.10.16*.deb

3. Restart your computer and done.

4. If you have problem with this new kernel, run command below to remove Linux Kernel 3.10.16:

sudo apt-get purge linux-image-3.10.16-*

ubuntu tweak 0.8.6

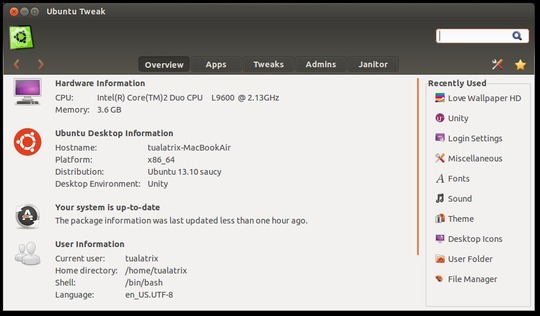
The popular Ubuntu configuration tool Ubuntu Tweak has released v0.8.6, which adds support for Ubuntu 13.10 Saucy Salamander and remove support for Ubuntu 11.10 Oneiric.

See what’s new in Ubuntu Tweak 0.8.6:

  • Add support for Ubuntu 13.10 Saucy Salamander, drop support for Ubuntu 11.10 Oneiric
  • Improve the old kernels clean up, now it will find out more old kernels
  • Disable appcenter and sourcecenter, they are no longer maintained
  • Fixed modules show error with “expected string or buffer”
  • Fixed Ubuntu Tweak crached in logo in GNOME 3.8
  • Fixed Ubuntu Tweak crashed while processing override
  • Fixed problem showing error dialog if dest path contains special characters e.g. “ö”
  • Fixed LovewallpaperHD failed to load

Read official announcement on developer’s English & Chinese blogs.

Install / Upgrade Ubuntu Tweak 0.8.6:

Download the Deb: ubuntu-tweak_0.8.6-1_all.deb

The PPA is ready for Ubuntu 13.10, Ubuntu 13.04, Ubuntu 12.04, Ubuntu 12.10 and their derivatives, such as Linux Mint 13/14/15/16, Elementary OS. Run below commands one by one in terminal:

sudo add-apt-repository ppa:tualatrix/ppa

sudo apt-get update

sudo apt-get install ubuntu-tweak

ubuntu tweak 0.8.6 ubuntu 13.10

This tutorial is going to show you how to install the latest Spotify client from its official repository in Ubuntu 13.10 Saucy Salamander & Linux Mint 16 Petra.

Spotify is a very popular music streaming service. Its client works on Android, iOS, Windows Phone, Blackberry, web browser, Mac, Windows, and Linux.

The Spotify client for Desktop has reached v0.9.4 with following changes:

  • A new app for messages!
    this is gradually rolling out, so don’t fret if you don’t see a change right away
  • When re-starting Spotify your last playlist position will now be available
  • More languages!
  • Proxy authentication support for views
  • Linux only: Media key support in Gnome
    Coming soon!
  • Stability and performance fixes
  • Fixed a lot of crashes, especially on shutdown/log out
  • Fixed crash when adding tracks to large playlists
  • Spotify Client ubuntu 13.10

    Install Spotify in Ubuntu 13.10:

    The Spotify client for Linux can be installed on Ubuntu 13.10, Ubuntu 13.04, Ubuntu 12.04, Ubuntu 12.10, Linux Mint 13/14/15/16, Elementary OS Luna. Below steps show you how:

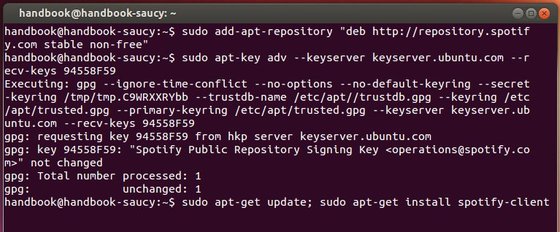
    1. Press Ctrl+Alt+T on your keyboard to open terminal. When it opens, copy and paste below command to add spotify repository:

    sudo add-apt-repository "deb http://repository.spotify.com stable non-free"

    2. Add the key:

    sudo apt-key adv --keyserver keyserver.ubuntu.com --recv-keys 94558F59

    3. Now you can install spotify in Ubuntu Software Center after checking for updates. Or you can run below commands instead:

    sudo apt-get update; sudo apt-get install -y spotify-client

    install spotify ubuntu 13.10

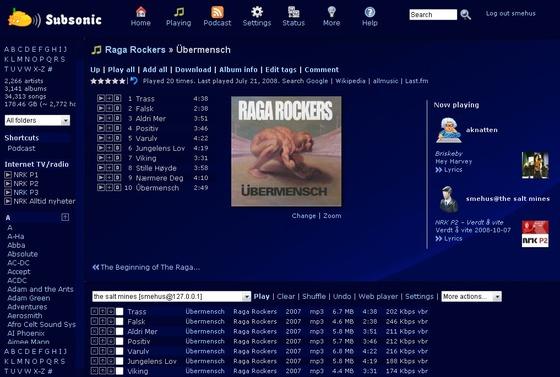
    This quick tutorial is going to show you how to install Subsonic music streamer 4.8 in Ubuntu 13.10 Saucy Salamander & Linux Mint 16 Petra via getdeb repository.

    As you may know, Subsonic is a free, web-based media streamer, providing ubiquitous access to your music. Use it to share your music with friends, or to listen to your own music while at work. You can stream to multiple players simultaneously, for instance to one player in your kitchen and another in your living room.

    Subsonic is designed to handle very large music collections (hundreds of gigabytes). Although optimized for MP3 streaming, it works for any audio or video format that can stream over HTTP, for instance AAC and OGG. By using transcoder plug-ins, Subsonic supports on-the-fly conversion and streaming of virtually any audio format, including WMA, FLAC, APE, Musepack, WavPack and Shorten.

    subsonic ubuntu 13.10

    Install Subsonic:

    1. Press Ctrl+Alt+T on your keyboard to open terminal. When it opens, run 2 commands to add getdeb repository:

    wget http://archive.getdeb.net/install_deb/getdeb-repository_0.1-1~getdeb1_all.deb
    
    sudo dpkg -i getdeb-repository_0.1-1~getdeb1_all.deb

    For Linux Mint, there’s an option under ‘Software & Sources -> Additional repositories’ allows to easily enable / disable this repository.

    2. Use synaptic package manager to install Subsonic. Or run commands below instead:

    sudo apt-get update; sudo apt-get install -y subsonic

    How to install Songbird in Ubuntu 13.10 Saucy

    Last updated: April 4, 2019

    songbird ubuntu 13.10

    This quick tutorial is going to show beginners how to install songbird music player in Ubuntu 13.10 Saucy Salamander & Linux Mint 16 Petra.

    Songbird for Linux has discontinued, but the v2.0 is still available in GetDeb repository for Ubuntu 13.10 Saucy and its derivatives.

    To get started installing this web player, first click the link below to download the DEB:

    Download GetDeb package

    Then double-click to install the package via pop-up Ubuntu Software Center. It’ll add the get repository to your system.

    For Linux Mint 16, there’s an option in ‘Software & Sources -> Additional repositories’ to enable the repository.

    After added the repository, use synaptic package manager to install Songbird. Or run below commands in terminal (Ctrl+Alt+T):

    sudo apt-get update; sudo apt-get install songbird

    Create system restore point in Ubuntu via TimeShift

    Last updated: December 10, 2022

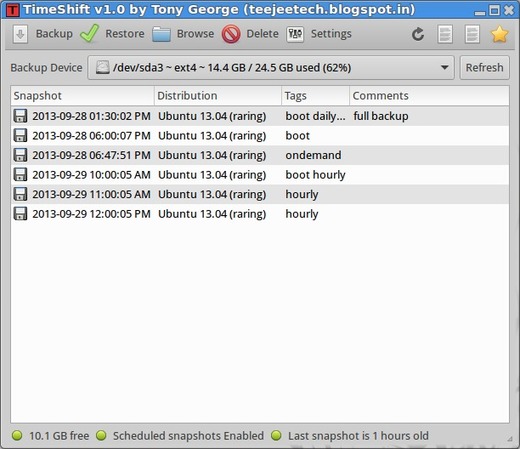
    Want to create a Windows like system restore point? Well, TimeShift is the tool, which protects your system by taking incremental snapshots of the file system at regular intervals. These snapshots can be restored later to bring your system to the exact state it was in at the time when the snapshot was taken.

    TimeShift is designed to protect only system files and settings. User files such as documents, pictures and music are excluded.

    create system restore point

    Features:

    • TimeShift requires very little setup. Just install it, run it for the first time and take the first snapshot. A cron job will be enabled for taking automatic snapshots of the system at regular intervals. The backup levels can be selected from the Settings dialog.
    • Snapshots are saved by default on the system (root) partition in path /timeshift. Other linux partitions can also be selecte
    • Boot snapshots provide an additional level of backup and are taken 30 minutes after the system is started.
    • Hourly, daily, weekly and monthly levels can be enabled if required.
    • TimeShift runs at regular 30-minute intervals but takes snapshots only when needed.
    • Applications like rsnapshot rotate a snapshot to the next level by creating a hard-linked copy. Creating a hard-linked copy may seem like a good idea but it is still a waste of disk space. This is because only files can be hard-linked and not directories. The duplicated directory structure can take up as much as 100 MB of space. TimeShift avoids this wastage by using tags for maintaining backup levels. Each snapshot will have only one copy on disk and is tagged as “daily”, “monthly”, etc. The snapshot location will have a set of folders for each backup level (“Monthly”, “Daily”, etc) with symbolic links pointing to the actual snapshots tagged with the level.
    • Snapshots can be restored either from the running system or from a live CD. Restoring backups from the running system requires a reboot to complete the restore process.
    • You can also TimeShift across distributions. Let’s say you are currently using Xubuntu and decide to try out Linux Mint. You install Linux Mint on your system and try it out for a week before deciding to go back to Xubuntu. Using TimeShift you can simply restore the last week’s snapshot to get your Xubuntu system back. TimeShift will take care of things like reinstalling the bootloader and other details. Since installing a new linux distribution also formats your root partition you need to save your snapshots on a separate linux partition for this to work.

    Install TimeShift via PPA:

    The PPA is ready for Ubuntu 20.04, Ubuntu 22.04, Ubuntu 22.10 and their derivatives, such as Linux Mint, Elementary OS.

    Press Ctrl+ALt+T on your keyboard to open terminal. When it opens, run below commands one by one:

    sudo apt-add-repository -y ppa:teejee2008/timeshift
    sudo apt-get update
    sudo apt-get install timeshift

    wayland 1.3

    Wayland is a protocol that specifies the communication between the display server (called Wayland compositor) and its clients. It is intended as a simpler replacement for X.

    Wayland and Weston 1.3 has been released a few hours ago. See what’s new in this release:

    • More pixel formats for wl_shm (Tomeu Vizoso). We can now create RGB565 (and many more) shm surfaces and a compositor can indicate which ones it supports.
    • Doc work (Peter Hutterer, Bryce Harrington, Aaron Faanes). Much work on the doc build system from Peter and general wording and grammer improvements all around.
    • Multi resource support (Rob Bradford). Rob added support for dealing with lsits of resources which the weston side multi-resource fix builds on.
    • Support for language bindings (Jason Ekstrand). After a long time and many detours into fixing other parts of Wayland and Weston, Jason finally landed the language binding support. This feature lets you bind a higher level language to libwayland-client/server by providing custom dispatch functions.
    • Release requests for wl_pointer, wl_keyboard and wl_touch (Rob Bradford). We don’t have a way for a client to deregister its interest in receiving input events, we just drop them on the client side when the client destroys the proxy. With the release requests, we now have a way to stop the server from sending them in the first place.
    • Install the wayland.xml protocol defintion (Jason Ekstrand). We now install the core Wayland XML protocol definition in a public location. Language bindings can parse this to generate code or bind dynamically. This also introduces a well known protocol directory where other projects can install protocol files.
    • Very few bug fixes in this release. There was only a couple of actual bug fixes this time around, which again is a sign that core wayland is settling down.

    See official announcement.

    Download source tarball: weston-1.3.0.tar.xz.

    Check out Wayland download page: wayland.freedesktop.org/releases/

    Cinnamon 2.0

    Cinnamon Desktop 2.0 has been announced today. It will be featured in Linux Mint 16 “Petra” planned for the end of November and will then be backported to LMDE and Linux Mint 13 LTS.

    What’s New in Cinnamon 2.0:

    Cinnamon features a lot of bug fixes but also brand new features and many improvements:

    • Windows can now be tiled to corners and resized:
      • tiled windows no longer need to occupy half of the screen, they do so by default when tiled but you can now resize them.
      • in addition to the Left, Right, Top and Bottom edge of the screen, you can now also tile into the 4 corners of the screen.
      • when you drag a window near a tiling zone Cinnamon shows that zone to you. This is called the HUD
    • Edge-Snapping:

      Inspired by the Snap functionality of Xbox One, it is similar to Edge-Tiling but with one key difference: Maximized windows do not cover snapped windows.

      To snap a window in Cinnamon 2.0, drag it with the mouse towards an edge or a corner while pressing the “Control” key.

    • Cinnamon is now able to play sounds when you perform common events such as closing windows, switching workspaces etc…
    • Added ‘Users & Groups’ utility for system administrators
    • improved MIME handling in Nemo
    • System tray support for file operations
    • Nemo looks better and acts faster than before.
    • Better compatibility and portability in Linux Mint 13/15, Fedora 19.

    See the official annoucement for more details.

    Install / Upgrade Cinnamon 2.0 in Ubuntu & Linux Mint:

    IMPORTANT NOTE: Cinnamon 2.0 Corrupts Unity on Ubuntu 13.10. Don’t install it if you want to keep Unity Desktop.

    As the developer said, the unofficial Mint backports for Cinnamon 2.0 is ready (Cinnamon stable PPA) in coming days for Ubuntu 13.10 Saucy, Ubuntu 13.04 Raring, Ubuntu 12.04 Precise, Ubuntu 12.10 Quantal and Linux Mint 13, 14, 15.

    When it’s ready, press Ctrl+Alt+T on your keyboard to open terminal. Run below commands one by one to upgrade:

    sudo add-apt-repository ppa:gwendal-lebihan-dev/cinnamon-stable
    
    sudo apt-get update
    
    sudo apt-get dist-upgrade

    Or run sudo apt-get install cinnamon to install the DE.