Archives For November 30, 2017

KDE Plasma 5.10

The first bug-fix release for KDE Plasma 5.12 LTS was released a day ago. And it can be installed in (K)Ubuntu 17.10 via PPA.

Plasma 5.12.1 adds a one week’s worth of new translations and fixes from KDE’s contributors. The bugfixes are typically small but important and include:

  • System Settings: Fix crash when searching.
  • Fixed mouse settings module crashing on Wayland.
  • Show a beautiful disabled icon for updates.

How to Install Plasma 5.12.1 in (K)Ubuntu 17.10:

Kubuntu backports PPA has just built the packages for (K)ubuntu 17.10.

1. Open terminal via Ctrl+Alt+T or by searching for “Terminal” from start menu. When it opens, run command to add the PPA:

sudo add-apt-repository ppa:kubuntu-ppa/backports

Type in your password when it prompts and hit Enter.

kubuntu backports ppa

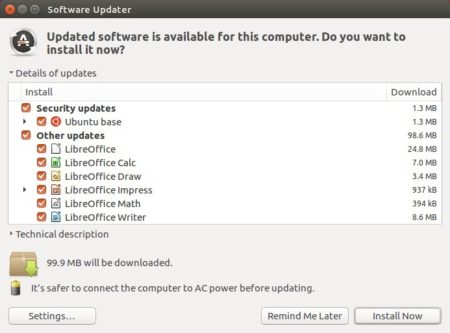
2. Then upgrade your system to get the latest Plasma Desktop via either Update Manager or command:

sudo apt update && sudo apt full-upgrade

After the upgrade process has completed, and assuming everything went well, reboot your computer.

For non-Kubuntu user, you may first install the kubuntu-desktop package either from Ubuntu Software or by running below command before doing the upgrade.

sudo apt update && sudo apt install kubuntu-desktop

How to Uninstall:

To undo the changes and restore to the stock version of Plasma Desktop in your main Ubuntu repository, purge the PPA via command:

sudo apt install ppa-purge && sudo ppa-purge ppa:kubuntu-ppa/backports

Install TuxGuitar 1.5 in Ubuntu 16.04 & Higher

Last updated: February 13, 2018

TuxGuitar, a free and open-source guitar tablature editor, reached the 1.5 release recently.

After more than one year of development, TuxGuitar 1.5 brings following new features:

  • String count range moved to 1 – 25
  • New Oxygen Dark skin created for dark themes
  • New synth host plugin with FX support
  • Native VST support (only for Windows/GNULinux) for the new synth host plugin.
  • Zomm in/out support

Install TuxGuitar 1.5 via Snap

The 1.5 release is available as snap, the universal Linux app packaging format.

1. For Ubuntu 16.04, open terminal (Ctrl+Alt+T) and run command if first time installing a snap:

sudo apt-get install snapd snapd-xdg-open

2. Then install the snap either from Ubuntu Software:

Or by running single command:

snap install tuxguitar-vs

It’s large in the installation file size since it comes with all required libraries bundled.

Download / Install TuxGuitar via official DEB:

If a previous release was installed, remove it before doing following steps.

The DEB binaries for TuxGuitar 1.5 are available for download at:

Download TuxGuitar 1.5 (.deb)

Grab x86.deb for 32-bit system or x86_64.deb for 64-bit system.

And run command command in terminal (Ctrl+Alt+T) to install it:

sudo dpkg -i ~/Downloads/tuxguitar*.deb; sudo apt-get -f install

For those who stuck at installing OpenJDK-9-jdk, run following command to manually fix it:

sudo apt-get -o Dpkg::Options::="--force-overwrite" install openjdk-9-jdk

Uninstall:

To uninstall the deb package, run command in terminal:

sudo apt-get remove --autoremove tuxguitar

HP Linux Imaging and Printing

I’ve bought a cheap laptop HP 246 G6 recently. As expect, Fn + function keys are not working after installing Ubuntu 16.04 on it.

So below is the quick fix how to enable the Fn keys on this laptop which may work also on other HP essential laptops.

1. First open terminal either via Ctrl+Alt+T or by searching for ‘terminal’ from app launcher. When it opens, run command:

sudo -H gedit /etc/default/grub

Input your password (no visual feedback) when it prompts and hit Enter.

2. The command opens the grub configuration file with gedit text editor.

There find out the line says:

GRUB_CMDLINE_LINUX_DEFAULT="quiet splash"

and change it into:

GRUB_CMDLINE_LINUX_DEFAULT="quiet splash acpi_osi="

3. After saving the changes. Update grub bootloader via command and reboot:

sudo update-grub

4. If F1 to F12 function keys are working even without pressing Fn:

Restart and press F10 to go to BIOS, disable “Action Keys Mode” in System Configuration tab.

Yarock Music Player 1.3.1 Released (Ubuntu PPA)

Last updated: February 11, 2018

Yarock 1.3.1, a Qt audio player designed to provide an easy and pretty music collection browser based on cover art, was released a few hours ago with some bug-fixes.

The new release fixed Qt4 compile issue. The unofficial PPA now is maintaining the latest Yarock packages again for Ubuntu 16.04 LTS.

Bugs that are fixed in Yarock 1.3.1:

  • Fix Qt4 compile issue.
  • Fix that writing rating to file causes file corruption
  • Fix player tool bar save/restore
  • Fix playqueue track rating minor issue

Yarock Track View

How to Install Yarock 1.3.1 in Ubuntu:

The new release is available in PPA for Ubuntu 16.04, Ubuntu 17.10, Ubuntu 18.04, and derivatives. Due to requirement of Qt5 >=5.6, Ubuntu 16.04 build is now compiled against Qt4.

1. Open terminal either via Ctrl+Alt+T or by searching for “terminal” from app launcher. When it opens, run command to add the PPA:

sudo add-apt-repository ppa:ubuntuhandbook1/apps

Input your password (no visual feedback while typing) when it prompts and hit Enter.

2. After adding the PPA, upgrade the player from an existing release with Software Updater.

Or run commands one by one in terminal to install it:

sudo apt-get update

sudo apt-get install yarock

Uninstall:

To remove the PPA, launch “Software & Updates” utility and navigate to “Other Software” tab.

To remove Yarock music player, either use synaptic package manager or run command:

sudo apt-get remove --autoremove yarock

VLC 3.0 Released! Install it is Quite Easy Now

Last updated: February 10, 2018

VLC media player reached new major 3.0 release a day ago. Now you can directly install the latest VLC in Ubuntu Software utility.

VLC 3.0 “Vetinari” features:

  • VLC 3.0 activates hardware decoding by default, to get 4K and 8K playback!
  • It supports 10bits and HDR
  • VLC supports 360 video and 3D audio, up to Ambisoncics 3rd order
  • Allows audio passthrough for HD audio codecs
  • Can stream to Chromecast devices, even in formats not supported natively
  • Can play Blu-Ray Java menus: BD-J
  • VLC supports browsing of local network drives and NAS

How to Install VLC 3.0 in Ubuntu:

VLC 3.0 is available as snap, the universal Linux app packaging format, for Ubuntu 16.04, Ubuntu 17.10, Ubuntu 18.04.

Never installed a snap package? Ubuntu 16.04 (and Ubuntu 14.04, not sure if VLC snap works in 14.04. I don’t have trusty desktop running on may machine.) user need to install snapd daemon first.

Open terminal (Ctrl+Alt+T) and run command:

sudo apt-get install snapd snapd-xdg-open

Open Ubuntu Software utility, search for and install VLC, though there are two versions available.

As an alternative, you can run command in terminal to install the snap:

snap install vlc

The snap is kinda large in file size since it contains all required run-time libraries.

Uninstall traditional VLC package:

If you’ve a previous version of VLC media player installed, you’ll have two launcher icons and two VLC options in video files’ open with menu.

So you may want to remove the old traditional VLC package via Synaptic Package Manager, Ubuntu Software, or by running command:

sudo apt-get remove --autoremove vlc

LibreOffice 5.3.4

LibreOffice office suite reached the 6.0 release more than a week ago. Now it’s finally made into LibreOffice Fresh PPA for Ubuntu 16.04, Ubuntu 17.10, Ubuntu 18.04.

Though LibreOffice offers .deb binaries for downloading in its website, it’s recommended to install the PPA packages which are well integrated with Ubuntu desktop.

LibreOffice 6.0 release highlights:

  • Better compatibility with Microsoft Office documents
  • Support for standards-compliant PDF forms within Writer
  • Experimental Notebookbar and other user-interface improvements
  • OpenPGP can now be used to sign ODF documents
  • OOXML interoperability improvements
  • Ability to save documents as ePub ebook files
  • And many more other changes, see the announcement for details.

How to Install LibreOffice 6.0 via PPA in Ubuntu:

Open terminal either via Ctrl+Alt+T keyboard shortcuts, or by searching for “terminal” from application launcher. When it opens, do:

1. Run command to add the LibreOffice Fresh PPA:

sudo add-apt-repository ppa:libreoffice/ppa

Input your password (no visual feedback while typing) when it prompts, and read terminal output for PPA description and hit Enter to continue.

LibreOffice PPA

2. Then you’ll see the upgrade available in Software Updater after checking for updates.

The LibreOffice upgrading process may be kept back. If so, run following commands instead in terminal after added the PPA:

sudo apt-get update

sudo apt-get dist-upgrade

Uninstall:

You can restore to stock version of LibreOffice in Ubuntu main archive by running command in terminal:

sudo apt-get install ppa-purge && sudo ppa-purge ppa:libreoffice/ppa

Visual Studio Code IDE

Visual Studio Code reached the 1.20 release a few days ago. Here’s how to install it in Ubuntu.

Visual Studio Code 1.20 release highlights:

  • Explorer multi-selection – Perform actions on multiple files at once.
  • Improved Settings search – Easily find the right setting with natural language search.
  • Errors & warnings in Explorer – Quickly navigate to errors in your code base.
  • Save large and protected files – Save Admin protected and >256M files within VS Code.
  • Git submodule support – Perform Git operations on nested Git repositories.
  • Global snippets – Create snippets you can use across all file types.
  • Image preview zoom – Zoom in and out of images with your mouse, scroll wheel or track pad.
  • Terminal screen reader support – Integrated Terminal now has “Screen Reader Optimized” mode
  • Debugging support for multi-root workspaces – Manage configurations across multiple projects.
  • Quick Fix all for JavaScript/TypeScript – Apply the same Quick Fix to all occurrences in a file.
  • New Node.js deployment tutorials – Deploy your Node.js app with Docker or Azure App Service.

How to Install VS Code 1.20 in Ubuntu:

The official .deb package for Debian/Ubuntu is available for download at the link below:

Download VS Code (.deb)

Grab the deb and install it via either Gdebi package manager or command (Ctrl+Alt+T):

sudo dpkg -i ~/Downloads/code_*.deb; sudo apt -f install
Visual Studio also available as snap package, you can easily install it via this tutorial.

For those who want to receive updates for VS Code via Software Updater utility, add the Microsoft repository via following steps (64bit only):

1. Open terminal (Ctrl+Alt+T) and run command to add the repository:

sudo sh -c 'echo "deb [arch=amd64] https://packages.microsoft.com/repos/vscode stable main" > /etc/apt/sources.list.d/vscode.list'

2. Download and install the repository key via commands:

curl https://packages.microsoft.com/keys/microsoft.asc | gpg --dearmor > microsoft.gpg

sudo mv microsoft.gpg /etc/apt/trusted.gpg.d/microsoft.gpg

Uninstall Visual Studio Code:

To remove the code editor, either use Synaptic Package Manager or run command:

sudo apt-get remove --autoremove code

And remove the Microsoft repository by launching Software & Updates utility and navigating to Other Software tab.

VidCutter, a simple Qt5 video cutting and joining software, reached 5.5.0 release earlier today with most requested feature media stream support.

VidCutter 5.5.0 release highlights:

  • Media stream support for use when clips are all derived from the same source media OR media files added manually all share the same codecs, formats, etc.
  • Migrated main toolbar buttons from QToolBar + QActions to new custom widget VCToolBarButton handling QPushButton with attached.
  • Tools section added to settings for setting paths to three main tools used by VidCutter
  • Ability to set clip index list to the left or right (default) of main window.
  • Support for WTV (.wtv – Windows Recorded TV Show) media files
  • Required dependency of PyOpenGL for users on slightly older Ubuntu, Fedora
  • Fullscreen mode rewrite for Qt 5.10 changes + better support in wayland.
  • OpenGL helpers added to X11 and Wayland based Linux platforms
  • Updated keyboard shortcuts to include some added keyboardand mouse based shortcuts.

How to Install VidCutter 5.5.0 in Ubuntu:

For Ubuntu 16.04, Ubuntu 17.10, Ubuntu 18.04, the new release can be installed via its official PPA.

1. Open terminal either via Ctrl+Alt+T or by searching for ‘terminal’ form app launcher. When it opens, run command:

sudo add-apt-repository ppa:ozmartian/apps

Input your password (no visual feedback while typing) when it prompts and hit Enter.

2. Then install Vidcutter either via your system package manager or run commands:

sudo apt-get update

sudo apt-get install vidcutter

For other Ubuntu editions and Linux distributions, an executable file Appimage (make executable in file Properties -> Permissions) is available for download in the above link.

Uninstall:

To remove the PPA, open ‘Software & Updates’ utility and navigate to Other Software tab.

To remove the video cutting software, either use your system package manger or run command:

sudo apt-get remove --autoremove vidcutter

Foobar2000, the popular music player for Windows platform, now can be easily installed in Ubuntu via snap, the universal Linux app packaging format.

This is a Wine based snap package maintained by an open-source project. With it, you can simply install it either via Ubuntu Software or by running a single command.

1. For Ubuntu 16.04 users never installed a snap package, open terminal (Ctrl+Alt+T) and run command to install snapd:

sudo apt install snapd snapd-xdg-open

2. Then install foobar2000 via command:

snap install foobar2000 --classic

--classic flag is required to be able to access files outside the installation directory.

3. To make it work, you still need to run following 3 commands one by one:

sudo snap connect foobar2000:hardware-observe core:hardware-observe

sudo snap connect foobar2000:process-control core:process-control

sudo snap connect foobar2000:cups-control core:cups-control

Finally launch the music player from application launcher (may need re-login) and enjoy, though the UI is kinda age-old.

Uninstall:

To remove foobar2000 snap package, either use Ubuntu Software or run command in terminal:

snap remove foobar2000

Xtreme Download Manager 2018 7.1.2 Released

Last updated: February 4, 2018

Xtreme Download Manager 7.1.2, the second release for XDM 2018, was released a few hours ago.

Xtreme Download Manager (XDM) is a powerful tool to increase download speed up-to 500%, save streaming videos from YouTube, Metacafe, DailyMotion, Google Video or any other website, resume broken/dead downloads and schedule downloads.XDM seamlessly integrates with Microsoft Edge, Firefox, Chrome, IE, Opera, Safari and all popular browsers, to take over downloads and saving streaming videos from web.

Changes in XDM 2018-7.1.2 include::

  • Video converter now supports 100+ devices, HEVC encoding and new batch conversion feature.
  • Enhanced video downloader, now its possible download entire youtube playlist.
  • XDM by default uses systems Tcp Window size, user can also tweak and optimize network setting.
  • Downloads will goto separate folder for Music, Video, Apps etc.
  • Improved video capturing.
  • Added batch download from clipboard
  • Now its possible to preview video in browser.
  • Configurable temporary folder.
  • Refresh link page now allows to enter url manually.
  • XDM now allows to set minimum size of video which will be captured.
  • Now there is an option to start download automatically, instead of asking for confirmation before download
  • User can now configure to retrieve file modification time from server
  • XDM provides an option to overwrite extisting file
  • New option added to disable transparency
  • XDM now shows option to delete files from disk
  • Several minor bugfixes and improvements

How to Install Xtreme Download Manager in Ubuntu:

Download the xdm Linux packages from the link below:

Download XDM

Select download x86 (for 32-bit) or x64 (for 64-bit) package and extract tarball.

Right-click the source folder and open it in terminal:

Then you can easily install the download manager by running command:

sudo ./install.sh

Uninstall:

The software offers an uninstall script in the installation directory. Simply open terminal (Ctrl+Alt+T) and run command to remove the software:

sudo /opt/xdman/uninstall.sh