Archives For May 31, 2021

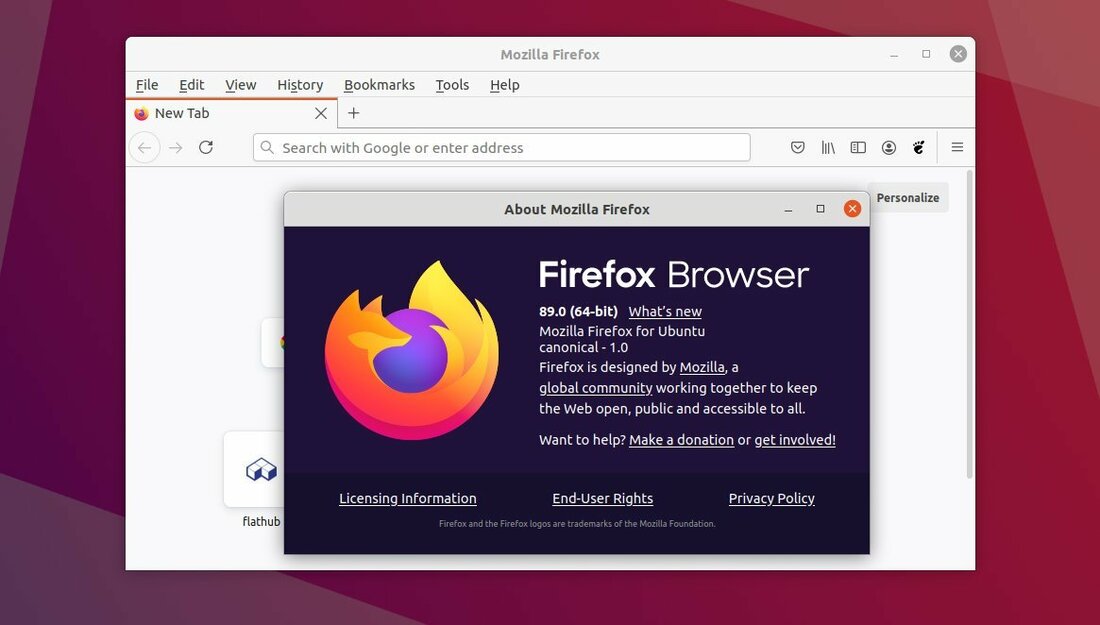
Since version 89, the free and open-source Firefox web browser makes use of the new ‘Proton’ UI design.

For those who do not like the new Firefox appearance, the configuration options to re-enable the old style interface is still available in the 89 release.

Revert to old UI Design in Firefox 89:

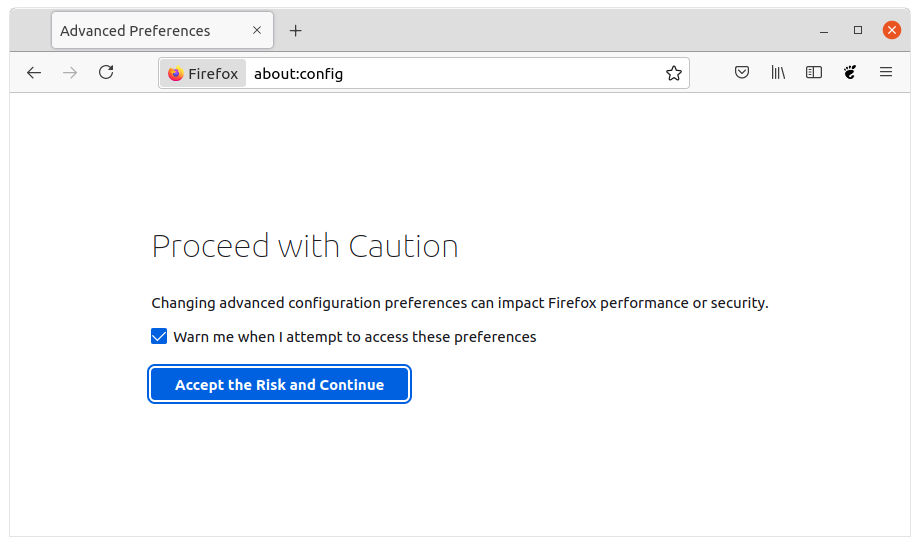
Firstly, type about:config in the address bar and hit Enter. Click on the ‘Accept the Risk and Continue‘ button when it prompts.

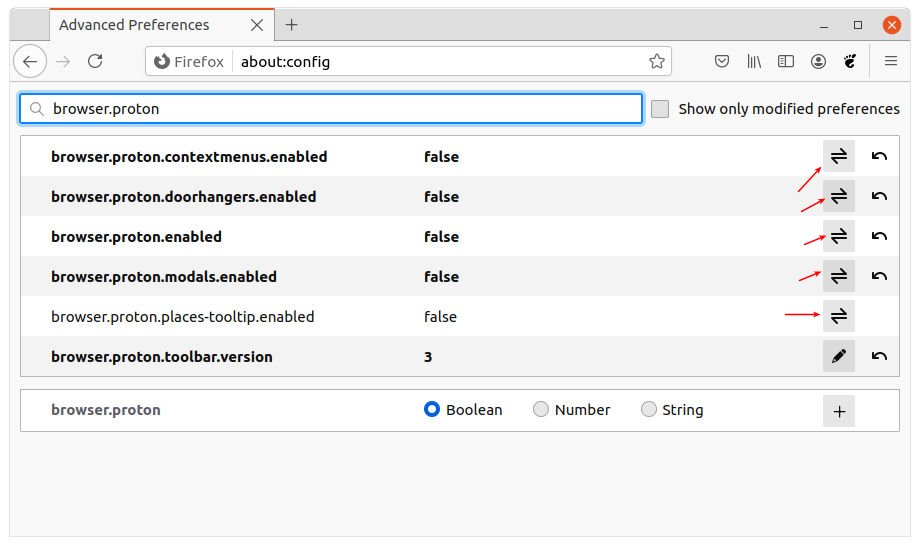
Next type browser.proton in the search box. Then click on the double arrow icons to disable the values of:

  • browser.proton.contextmenus.enabled
  • browser.proton.doorhangers.enabled
  • browser.proton.enabled
  • browser.proton.modals.enabled

The Firefix UI will change immediately after the settings. And you can reset these settings to get back the new ‘Proton’ UI design.

In addition, the previous settings is going to be removed in next release according to this bug. So using a browser theme could be a good choice for long time solution.

Working with PDF files regularly in Ubuntu Linux? QPDF Tools is a nifty tool to manage your PDF documents.

It’s a free and open-source software, easy to use Qt based user interface for Ghostscript and Stapler, with ability to compress, split, merge and rotate your pdf documents.

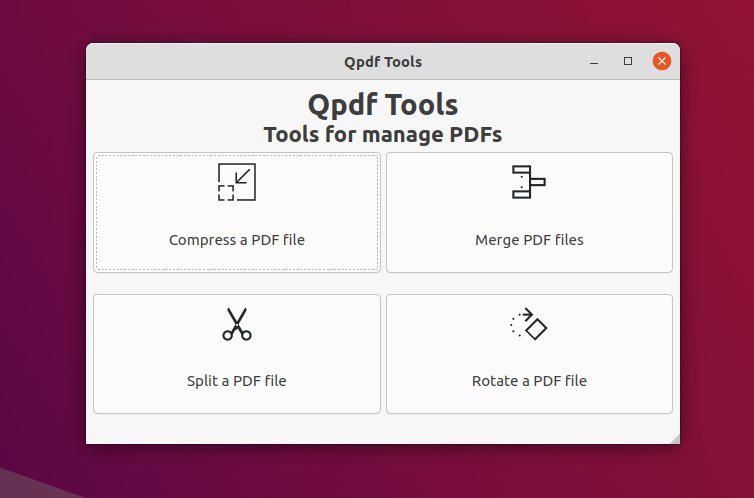
The main window is simple and works with 4 buttons. Click the action you want to do for the PDF documents. Then select the PDF along with a few options and click the button to go.

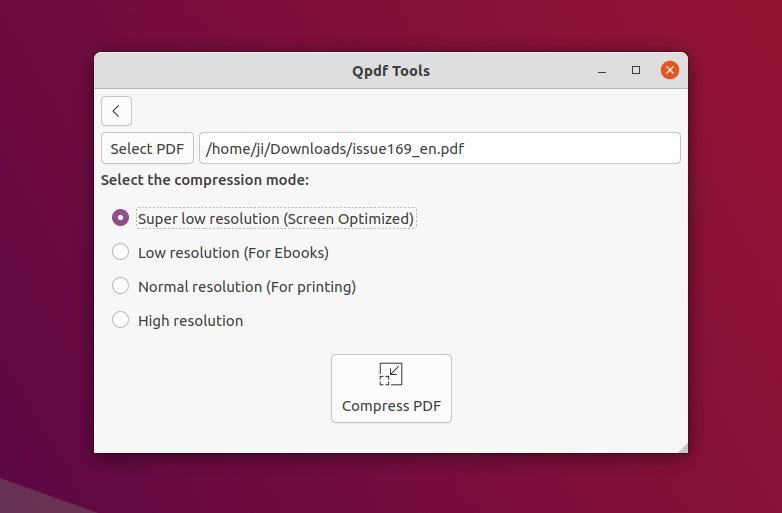
The Compress a PDF file option will change the resolution for printing, Ebooks, or screen optimized. It also reduce the file size depends on the option you choose.

It however may stuck a few seconds when you clicking ‘Save‘ button on exporting file dialog.

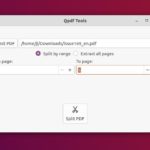
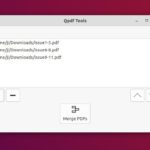
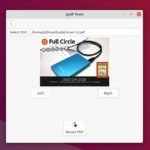
While ‘Merge PDF files‘ option allows to add multiple PDF files, arrange them, and convert them into single, the ‘Spile a PDF file‘ option allows to extract all PDF pages or export from one page to another. And ‘Rotate a PDF file‘ can rotate left or right with live preview.

How to Install QPDF Tools:

The DEB package for Ubuntu, Debian, Linux Mint, as well as the source tarball are available to download at the link below:

The software developer also maintains an Ubuntu PPA that support all current releases, e.g., Ubuntu 18.04, Ubuntu 20.04, Ubuntu 20.10, and Ubuntu 21.04. The packages for old releases, e.g., Ubuntu 12.04, Ubuntu 14.04, and Ubuntu 16.04 are also available.

1.) Open terminal from system app launcher. When it opens, run command to add the PPA:

sudo add-apt-repository ppa:silash35/qpdftools

2.) Then refresh package cache (optional for Ubuntu 20.04 & higher) and install the tool via commands:

sudo apt update
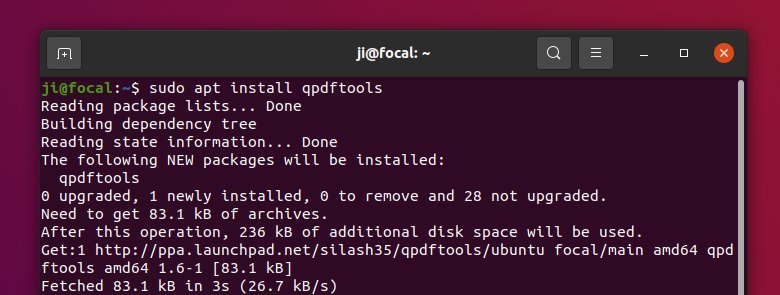
sudo apt install qpdftools

Once installed, open the tool from your system application launcher and enjoy!

Uninstall QPDF Tools

While the Ubuntu PPA is used to install or upgrade the software package, you can safely remove it either by running command in terminal:

sudo add-apt-repository --remove ppa:silash35/qpdftools

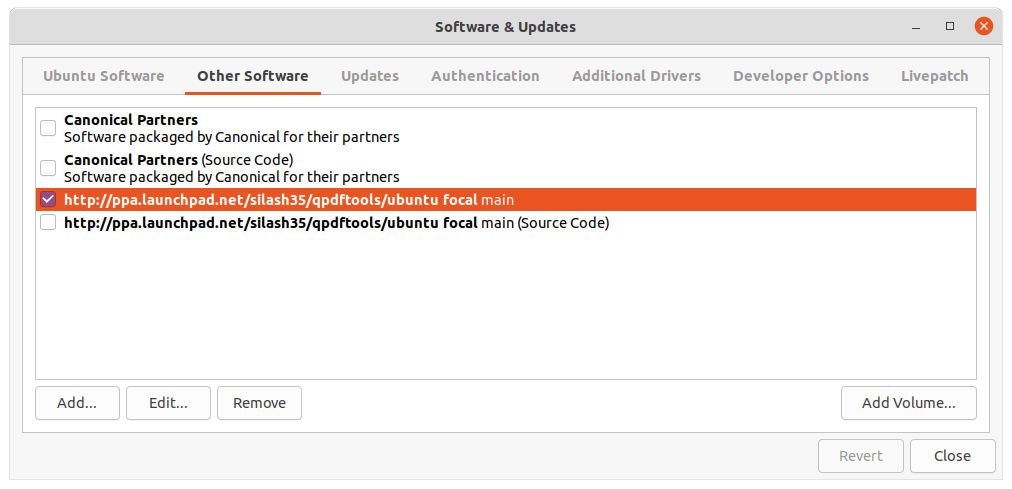
Or by going to ‘Software & Updates’ -> ‘Other Software’, and remove the relevant line.

To remove the software, either use Synaptic Package Manager or run command:

sudo apt remove --purge qpdftools

This simple tutorial shows how to install the NVIDIA proprietary driver in Ubuntu 22.04 and switch between dedicated and integrated GPU.

Since Ubuntu provides the proprietary driver packages via its restricted repositories, user may install NVIDIA driver as easy as a few clicks.

Install NVIDIA Driver

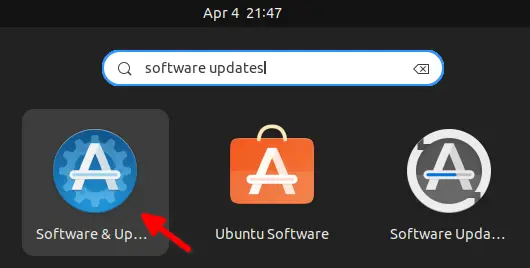
1.) Firstly, click on top-left corner ‘Activities‘, and then search for and open ‘Softwre & Updates’ utility.
When the tool opens, make sure the “Proprietary drives for devices (restricted)” is enabled.
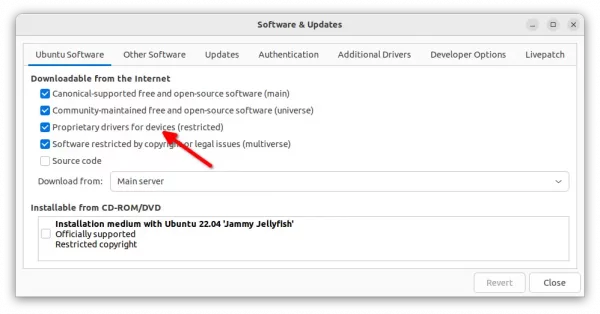
Make sure ‘restricted’ repository enabled

2.) Next, navigate to ‘Additional Drivers‘ tab. There it should list all available graphics drivers.

If it shows nothing, press Ctrl+Alt+T to open terminal and run command sudo apt update to refresh package cache. Then re-launch the ‘Software & Updates’ utility.
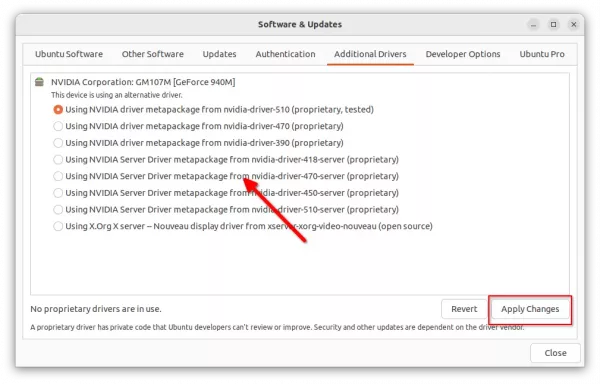
Choose one of the drivers from the list and click on ‘Apply Changes‘ to install it. There will be a little bar indicates the installing process. When done, restart your computer!

Switch between NVIDIA and Intel Graphics:

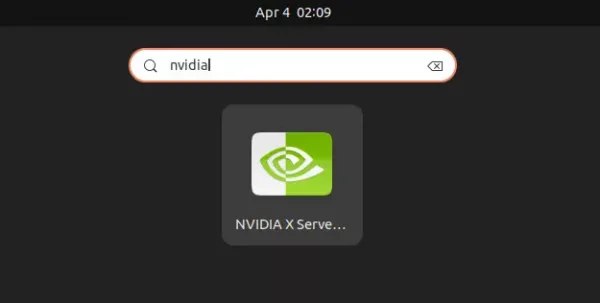
After restart, your machine will be on performance mode with the dedicated GPU. To switch GPU mode, search for and open ‘NVIDIA X Server Settings‘.
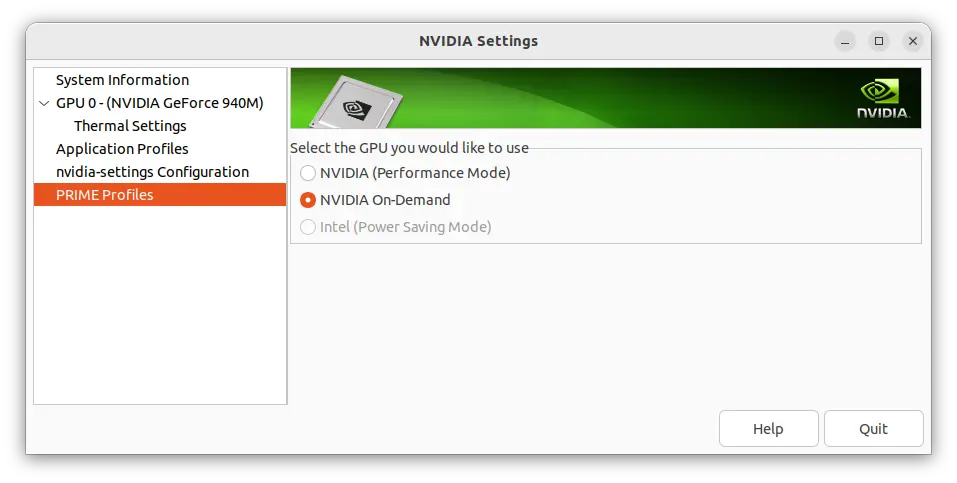
When the app opens, navigate to ‘PRIME Profiles‘. Then you’ll see three options available in the right:

  • NVIDIA (Performance Mode) – use dedicated NVIDIA GPU to render Ubuntu desktop.
  • NVIDIA On-Demand – use integrated graphics to render desktop, but possible to offload specific apps via dedicated GPU.
  • Intel (Power Saving Mode) – use integrated graphics to render Ubuntu desktop.

In my case, the “Intel (Power Saving Mode)” is somehow grayed out. As a workaround, choose Intel graphics card by running sudo prime-select intel in terminal.
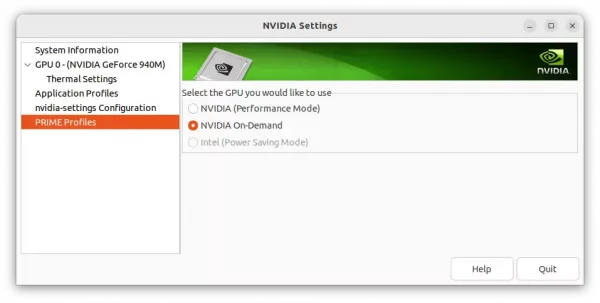
Changing GPU mode however needs log out and back in to apply changes.

Run certain apps via NVIDIA GPU while rendering desktop via integrated graphics

By setting GPU mode to “NVIDIA On-Demand”, you may run certain apps via NVIDIA GPU, while others handled by the integrated GPU.

1.) For CUDA apps, you need to run command in terminal (Ctrl+Alt+T) to install the nvidia-cuda-toolkit package.

sudo apt install nvidia-cuda-toolkit

Then there’ll be application-specific menu to tell it which device to use.

2.) For other apps, just use the following environment variables.

__NV_PRIME_RENDER_OFFLOAD=1
__GLX_VENDOR_LIBRARY_NAME=nvidia

You can do this by launching apps from command line. For example, launch SuperTuxkart (a kart racing game) via command:

__NV_PRIME_RENDER_OFFLOAD=1 __GLX_VENDOR_LIBRARY_NAME=nvidia supertuxkart

Or, edit the application’s .desktop file which is usually under “/user/share/applications” directory. And, change the line of ‘Exec’ to:

Exec=env __NV_PRIME_RENDER_OFFLOAD=1 __GLX_VENDOR_LIBRARY_NAME=nvidia supertuxkart

Add System Menu option to Switch CPU

To make it easy to switch between your GPUs, there’s a Gnome Extension available to add options into system tray menu.
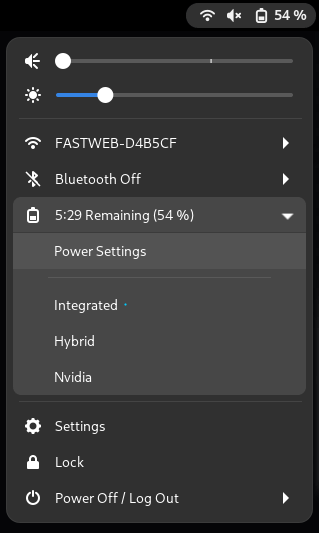
1.) To get the menu option, you need to first install the open-source EnvyControl tool. Press Ctrl+Alt+T on keyboard to open terminal, and run the command below one by one:

  • Use git command to grab the source:
    git clone https://github.com/geminis3/envycontrol.git
  • Navigate to the source folder, and install it for global use via pip package manager:
    cd envycontrol && sudo pip3 install .

If the pip3 command does not exist, run sudo apt install python3-pip command to install it.
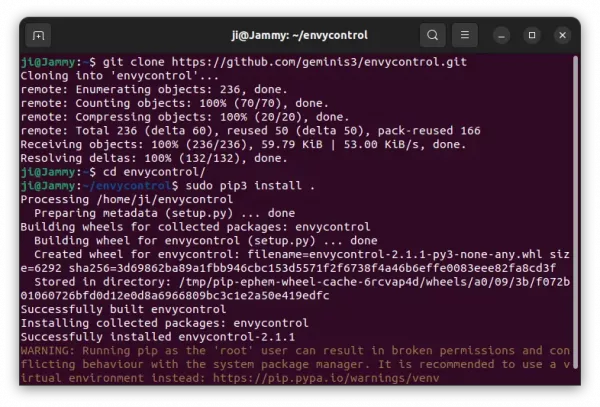
As the project page mentioned, users have to run the following 2 commands one by one to prevent Ubuntu’s own gpu-manager from interfering:

sudo prime-select on-demand
sudo systemctl disable gpu-manager.service

2.) Next, run command to make sure you have the agent packages installed for installing Gnome Extensions:

sudo apt install chrome-gnome-shell gnome-shell-extension-prefs
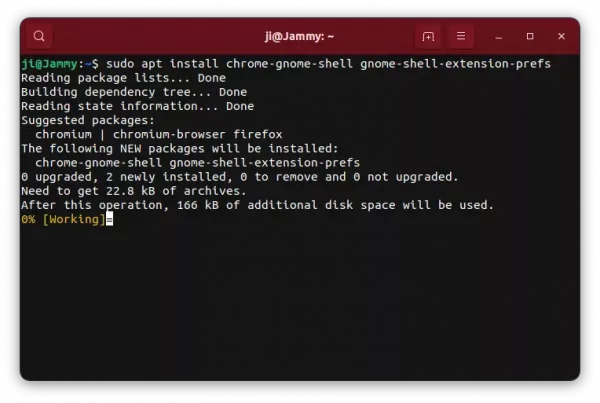
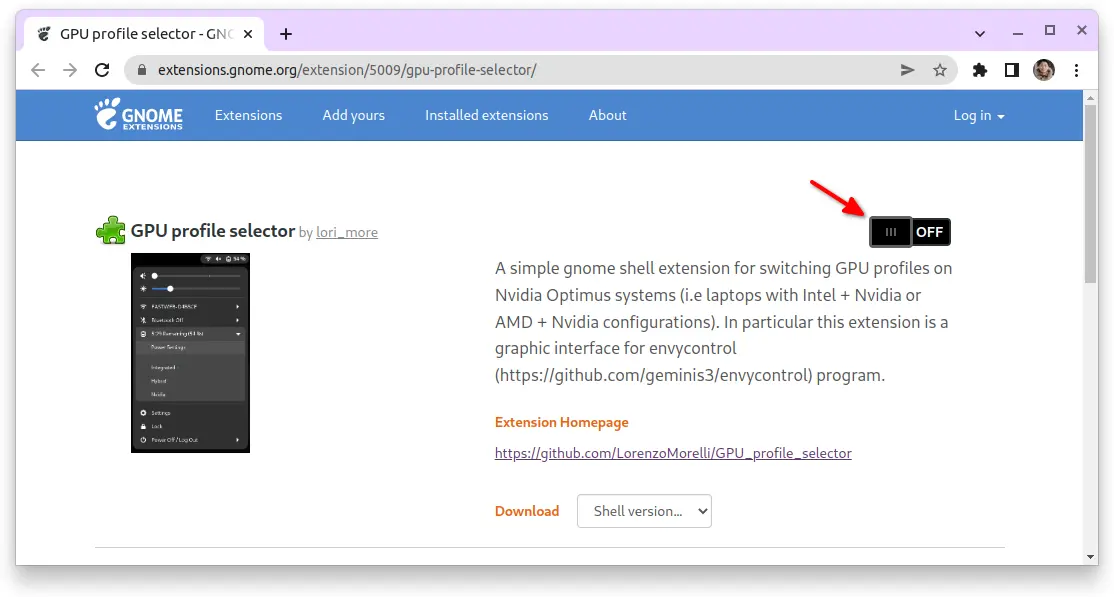
3.) Finally, go to the extension page and turn on the slider icon to install it:

NOTE 1: The pre-installed Firefox does not support this stuff so far! Use another browser, or install back Firefox as classic deb package.

NOTE 2: If you don’t see the on/off switch in that page, click the ‘click here to install browser extension‘ to install extension for your web browser and refresh the page.
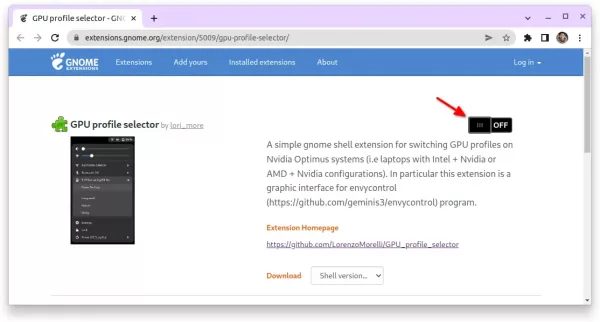
The menu option should appear immediately after successfully installed the extension. If not, press Windows (Super) key on keyboard or click “Activities” on top panel, and then search for and open the “Gnome Extensions” app to manage your extension.

OBS Studio, the free and open-source software for video recording and live streaming, released version 27.0.0 a few days ago. Here’s how to install it in Ubuntu 18.04, Ubuntu 20.04, Ubuntu 21.04 via PPA.

OBS Studio 27.0.0 features native Wayland support, includes new PipeWire capture source for Ubuntu 21.04+. Also, it adds undo/redo support either from ‘Edit’ menu or via Ctrl+Z /Ctrl+Shift+Z keyboard shortcuts.

Other changes in the release include:

  • Display Capture on laptops now allows for capturing displays on different GPUs
  • Added a missing files warning when loading scene collections
  • Added service integration and browser dock support to macOS and Linux
  • (Windows only) Added support for NVIDIA Noise Removal in the Noise Suppression filter
  • Added a Track Matte mode to stinger transitions
  • Added support for SRGB texture formats

How to Install OBS Studio 27.0 via PPA:

The official Ubuntu PPA has made the packages for Ubuntu 18.04, Ubuntu 20.04, Ubuntu 20.10, Ubuntu 21.04, and their derivatives.

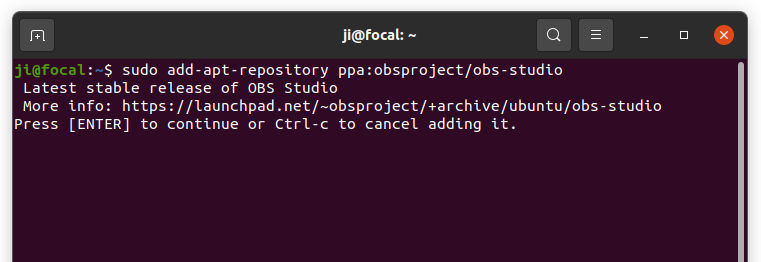
1. Open terminal either by pressing Ctrl+Alt+T on keyboard or by searching for “terminal” from app launcher. When it opens, run command to add the PPA:

sudo add-apt-repository ppa:obsproject/obs-studio

Type user password (no asterisk feedback) when it prompts and hit Enter.


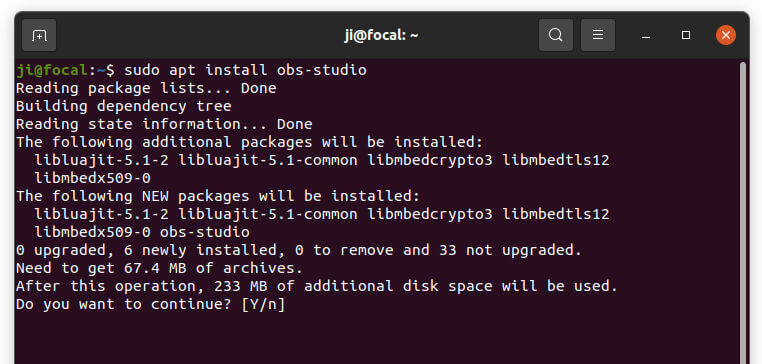
2. Then either upgrade OBS Studio from an existing version using Software Updater, or run command in terminal to install the software:

sudo apt-get update

sudo apt-get install obs-studio

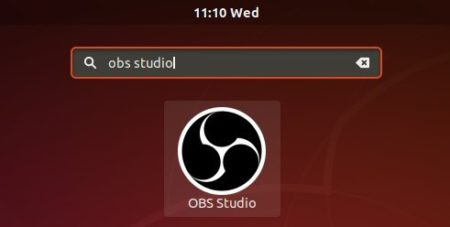
Once installed, launch the software from your system application launcher and enjoy!

Uninstall:

To remove the software, either use Synaptic package manager or run command in terminal:

sudo apt-get remove --autoremove obs-studio

To remove PPA repositories, launch Software & Updates and navigate to ‘Other Software’ tab, then remove the relevant line from the list.

I used to create bootable Ubuntu USB installer with UNetbootin, then with Ubuntu’s built-in USB creator. Now Ventoy is a good choice that I use often to try different operating systems.

Why Ventoy:

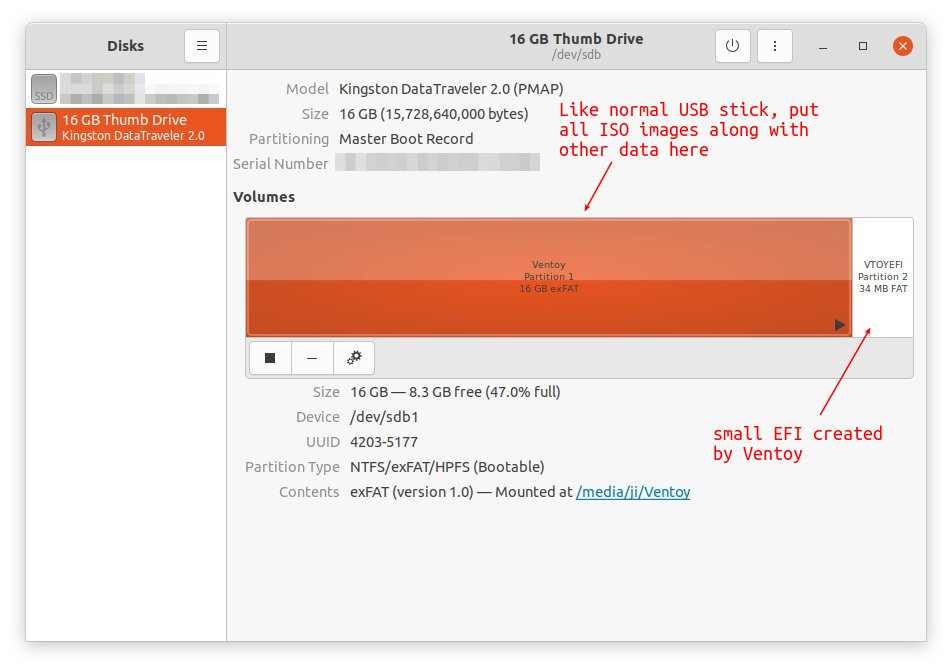
Different to other USB creators, you don’t need to format your USB stick again and again to write data from ISO images. With Ventoy, it just format your USB one time, create a small (34 MB in my case) EFI partition, and leave all other spaces free in another partition.
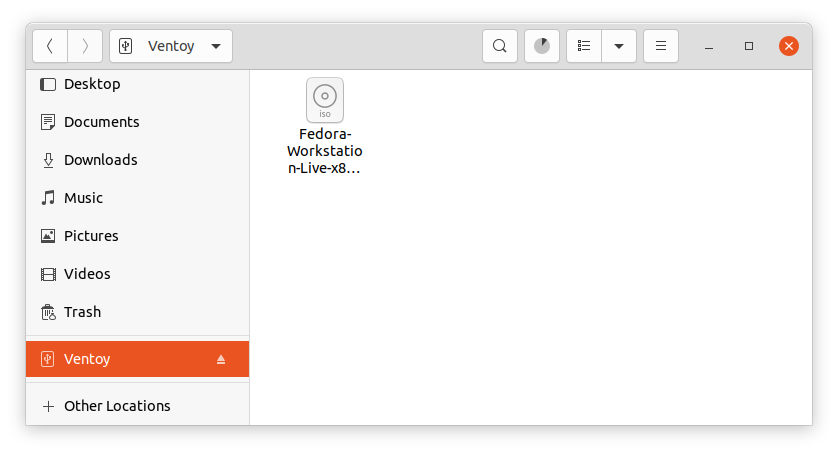
Without extracting, just drag and drop to move ISO images into USB drive, and it will boot them! Like normal USB drive, you can put your photos and other data along with ISO images. Ventoy will find what to boot and show them all in startup menu.

Ventoy features:

Ventoy is a free and open-source tool written mainly in C. It features:

  • Just copy ISO to USB and boot it! No extraction needed.
  • Mutil-boot support. As many ISO images as your USB stick can store.
  • Save all other data along with ISO images, just like a normal USB driver.
  • 700+ ISO files supported (Windows, Linux, WinPE, Unix, Vmware, Xen).
  • Windows auto installation supported
  • Also support Local Disk, SSD, NVMe, SD Card
  • and more.

How to Install Ventoy:

The software provides ISO image as well as installers for Windows and Linux. Download them from the link below:

a.) using Ventoy’s graphical app for Linux:

The software now provides graphical user interface for Linux since version 1.0.52. Both GTK and Qt are supported. And it runs in either modern 64-bit PC, old 32-bit machine, ARM64 OS like Phytium/Kunpeng, and mips64el Loongson 3A MIPS OS.

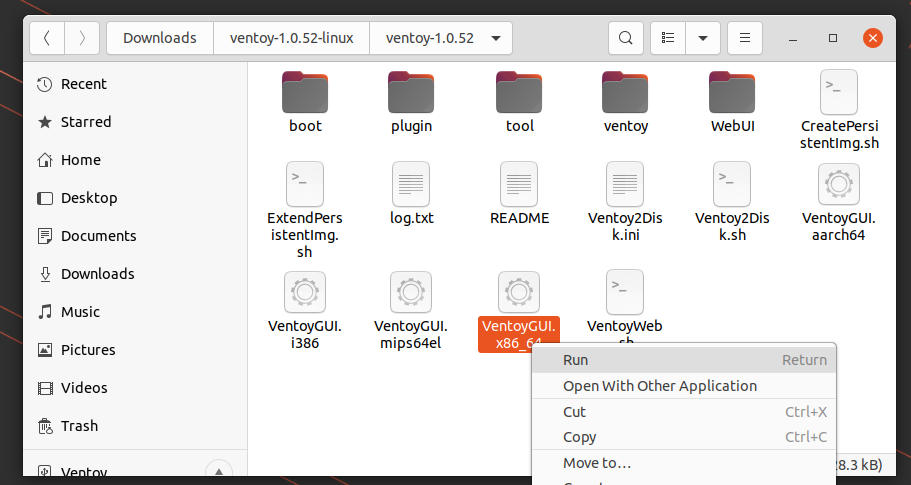
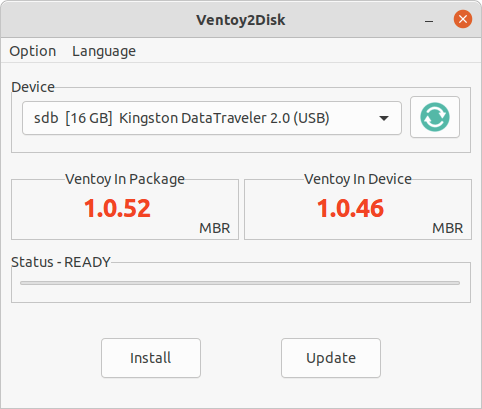
Simply download the “linux.tar.gz” tarball from the above button, extract, and right-click on the executable to “Run” it will bring up the UI:

Same to the Windows app and Web UI, plug your USB into computer and select it from the app window (click Refresh if you don’t find it). And use either “Install” or “Update” button to install /upgrade Ventoy to the USB drive.

From the “option” menu, it’s possible to enable Secure Boot support, select partition to MBR for compatibility or GPT for most modern PCs. You may also preserve some space at the end of the disk.

NOTE: Installing Ventoy will format the USB stick. All data will be lost. Make a backup before getting started!

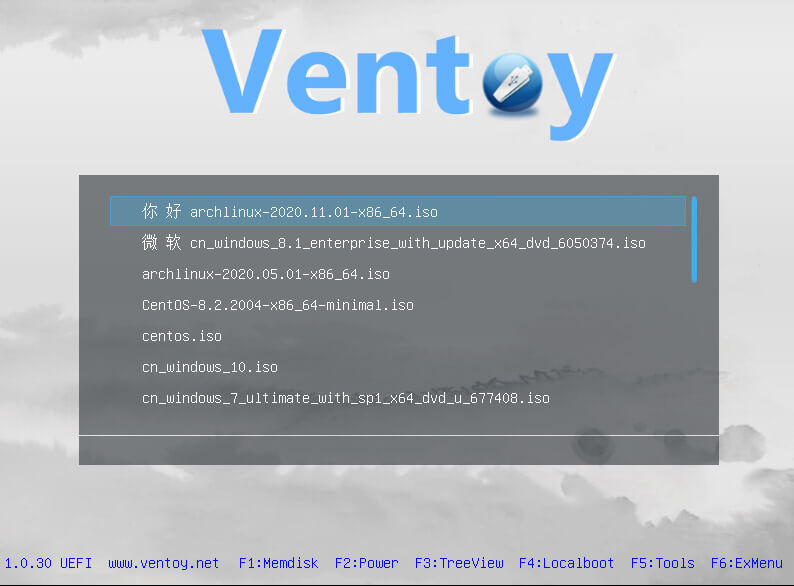
After installation, copy and paste some system discs (iso images) into the USB stick. Then start or re-start your machine, and select boot the USB. It will bring you into menu of iso image entries, like the picture shows:

b.) Install Ventoy in Linux from command line:

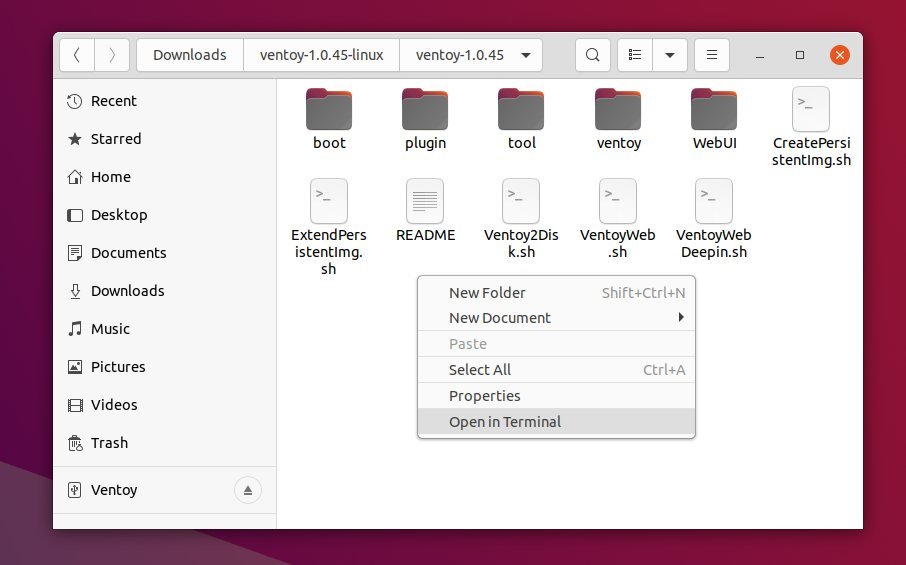
Also download the “linux.tar.gz” tarball. Then extract, and right-click on blank area in generated folder to open the directory in terminal via ‘Open in Terminal’ menu option.
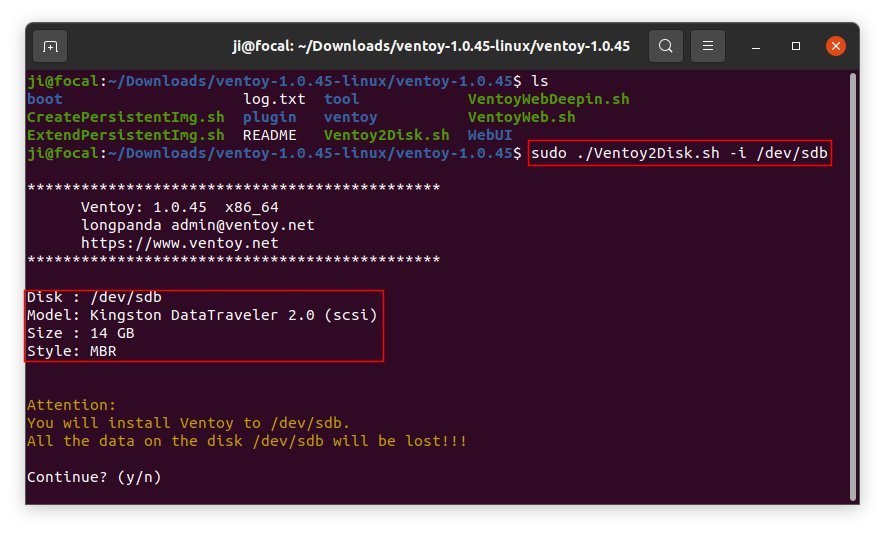
When terminal opens, copy and paste the command below into it and hit Enter to install Ventoy to USB:

sudo ./Ventoy2Disk.sh -i /dev/sdb

If your machine boot with UEFI mode, also add -s flag for secure boot support, so the command will be:

sudo ./Ventoy2Disk.sh -i -s /dev/sdb

Though the device name of your USB stick is mostly “/dev/sdb”, check the terminal output, or use gparted, mount command, etc to confirm.

If you want to use GTP partition table instead of MBR, add “-g” flag, so the command will be sudo ./Ventoy2Disk.sh -i -g /dev/sdb.[/ac-box]

Type ‘y’ to confirm twice. If everything’s done successfully, it will prompt ‘Install Ventoy to /dev/sdb successfully finished.

c.) Install Ventoy in Windows or Linux via Web UI

The software also has a Web UI which has same appearance to the Windows app.

As the previous step did, download ‘linux.tar.gz‘, extract and go to source folder. Then right-click on blank area to select ‘Open in Terminal‘.

When terminal opens, run command to start the Web UI service:

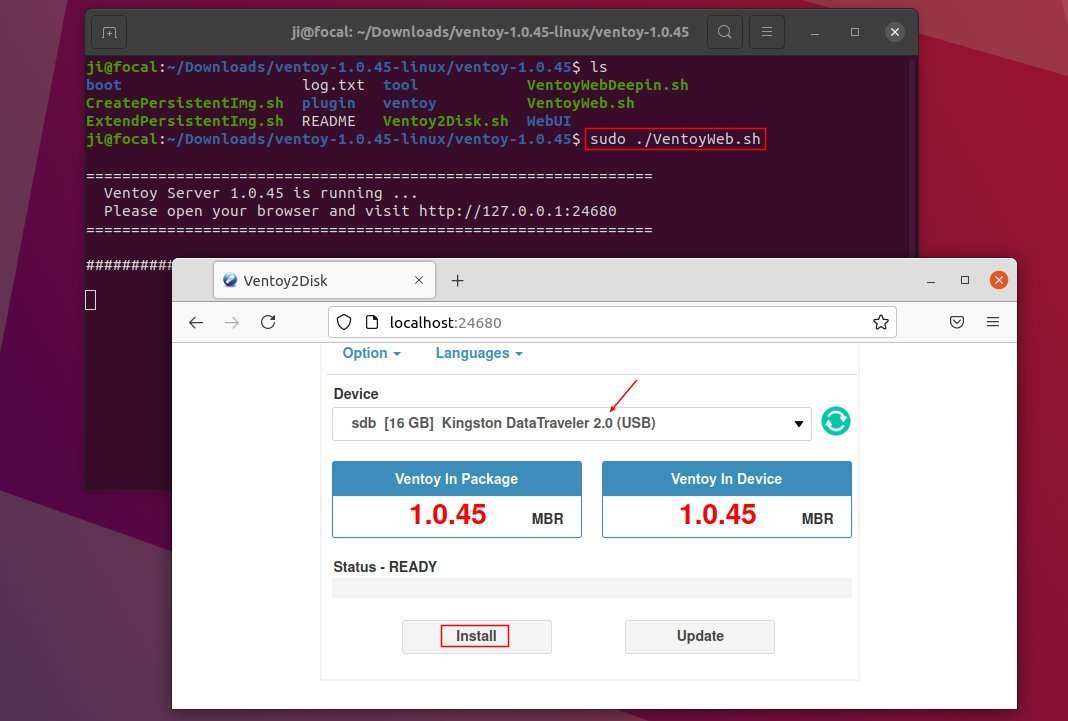
sudo ./VentoyWeb.sh

Next in web browser go to “http://127.0.0.1:24680” will open the web installation page:

In the web UI, select your USB device and click ‘Install’. Also for UEFI mode enable ‘Secure Boot‘ under options.

When everything’s done, you’ll find the USB driver mounted with name “Ventoy”, put ISO images into it and boot it when required. As mentioned, you may treat it as normal USB disk by storing photos, documents, etc, along with disc images.

Mozilla Firefox 89.0 was officially released today with the focus on redesigned and modernized user interface.

Firefox 89 has a simplified browser chrome and toolbar. It uses floating tab design with rounded corners for active tab. Less toolbar buttons present, and bookmarks, history and downloads are merged into single menu button.
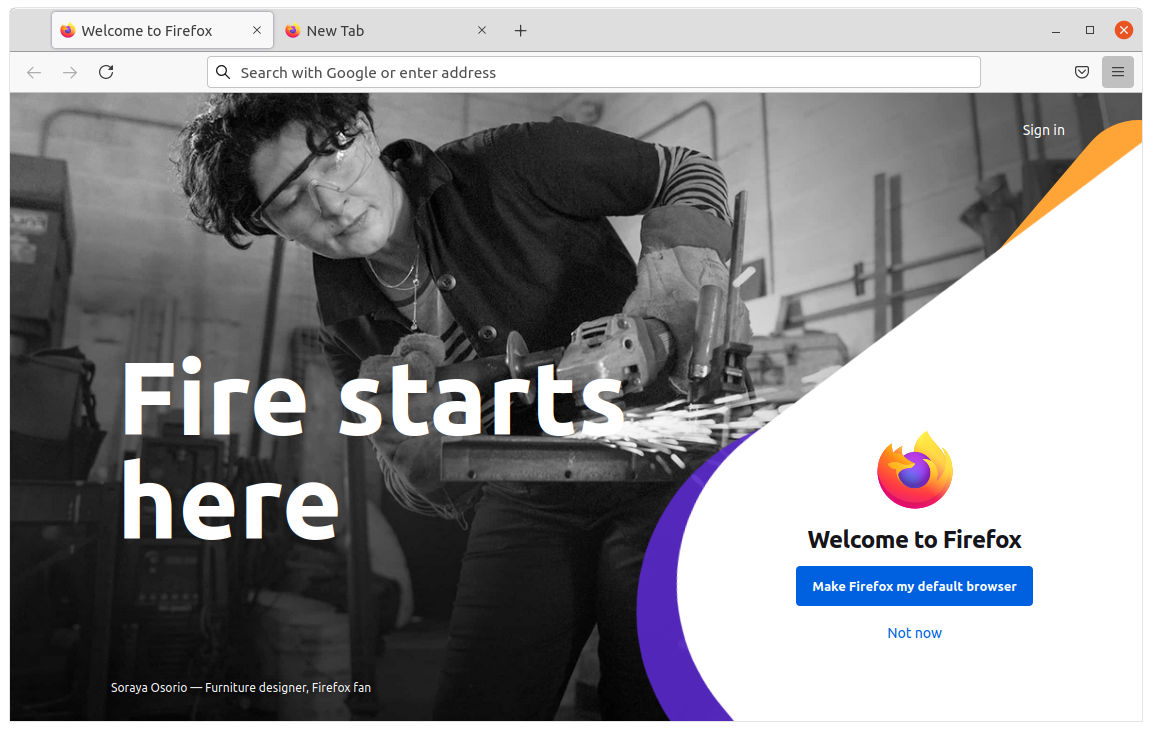
The main menu content has been reorganized and prioritized. Menu items no longer have icons at beginning.

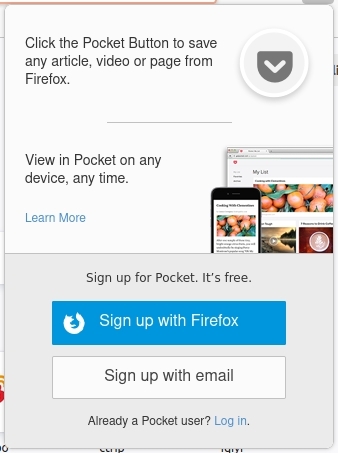
The new release also introduced new ‘Pocket’ icon in left side of the menu button. It allows to save any archive, video or page from Firefox. And it provides buttons to sign in/up pocket, so to view your saved content on any device any time.

Other changes in Firefox 89.0 include:

  • Native context menus on Mac OS with dark mode support.
  • Reduced number of alerts and messages, so you can browse with fewer distractions.
  • Update private browsing mode with even more privacy.
  • Smart Zoom support via double-tap with two fingers, or single finger on your Magic Mouse.
  • Various security and other fixes.
  • Event Timing API Support.

How to Get Firefox 89:

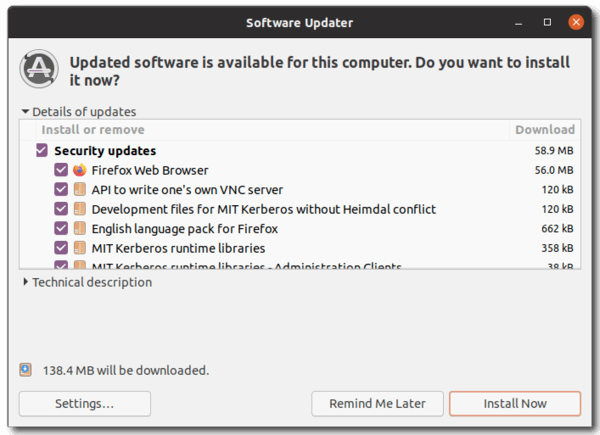
As usual, Ubuntu will publish the Firefox 89 packages through the security & updates repositories in next few days.
You can just wait until it being available to update in Software Updater:

Alternatively, see the release note and download the portable package from Firefox website: