This is a step by step guide shows how to install the Eclipse IDE in Ubuntu 24.04, Ubuntu 22.04, Ubuntu 22.04, and their based systems, such as Linux Mint 22/21.
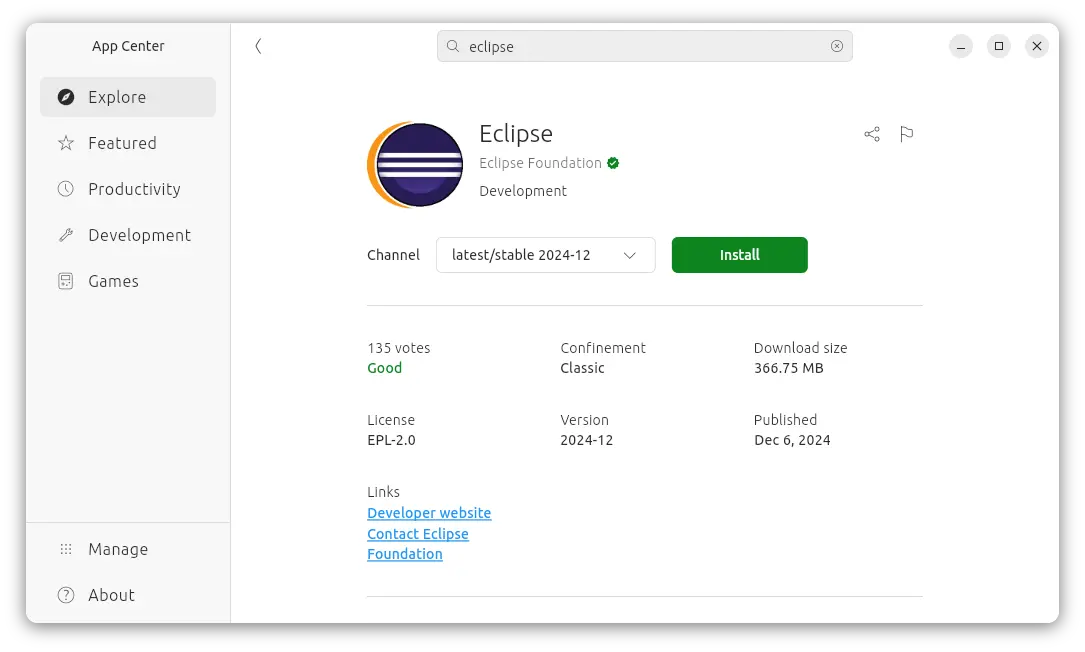
For Java developers, Eclipse is easy to install in Ubuntu through Snap package from either App Center or Ubuntu Software (for 22.04 and earlier). Though it runs in sandbox environment.
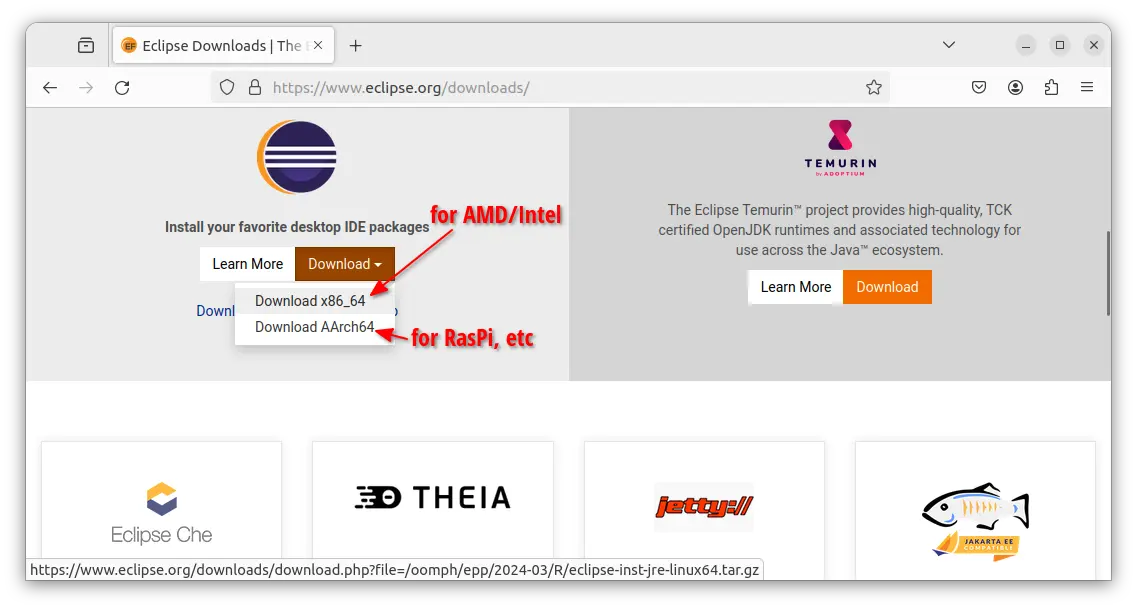
If you want to use Eclipse for C/C++, PHP, or other language developing, or you don’t like running in sandbox, then you may use the official installer.
1. Download & start Eclipse Installer:
Firstly go to the official download page, and grab the installer:
Then extract the tarball, and navigate into the result folder. Right-click and select “Run” the eclipse-inst file to start the installer.
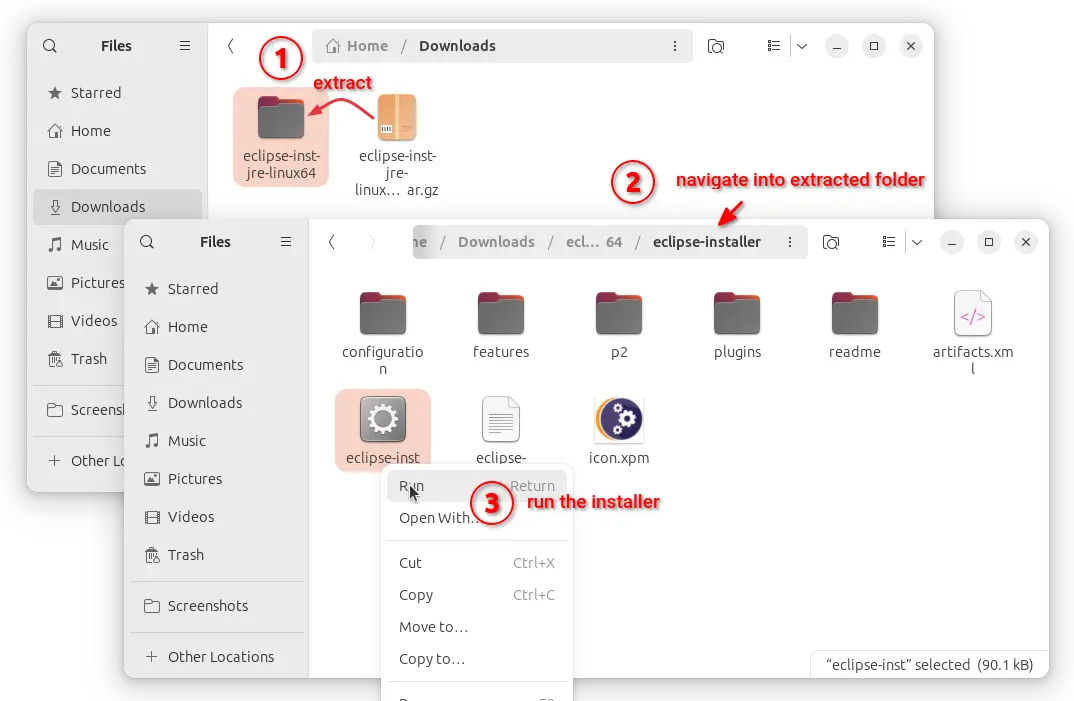
For choice, you may right-click on blank area in that folder and select “Open in Terminal“, then run ./eclipse-inst command in the pop-up terminal instead:
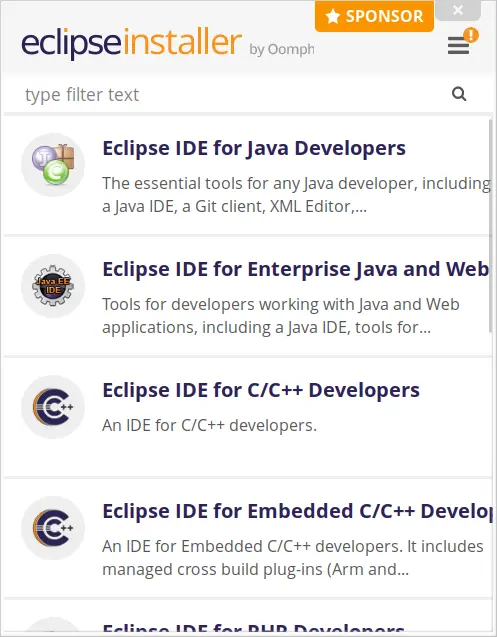
2. Install Eclipse:
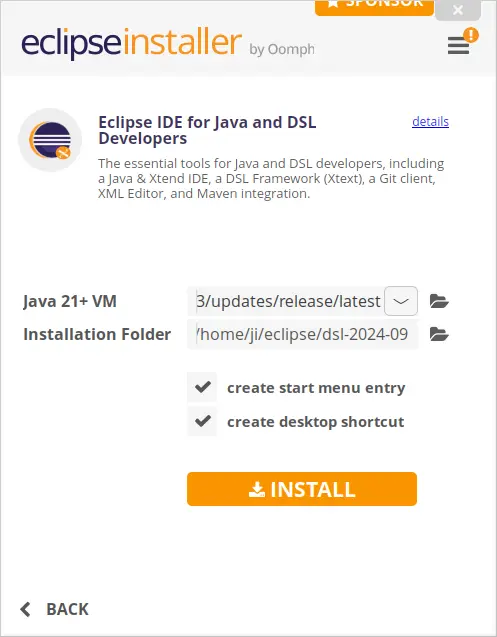
When the installer wizard opens, choose “Eclipse for Java Developers”, “Eclipse for C/C++ Developers”, or other options depends on which you want to install.
Next, choose either a local Java VM (if installed) or select download one from web, and change installation folder if you want (default selections are OK). Finally, click on “Install” button, and accept the license to start installing the IDE:
The software is by default installed to the user home folder for single user use. Once installed, you can launch it either from system application launcher or the desktop shortcut (need to first right-click and choose “Allow Launching”).

How to Remove Eclipse Completely:
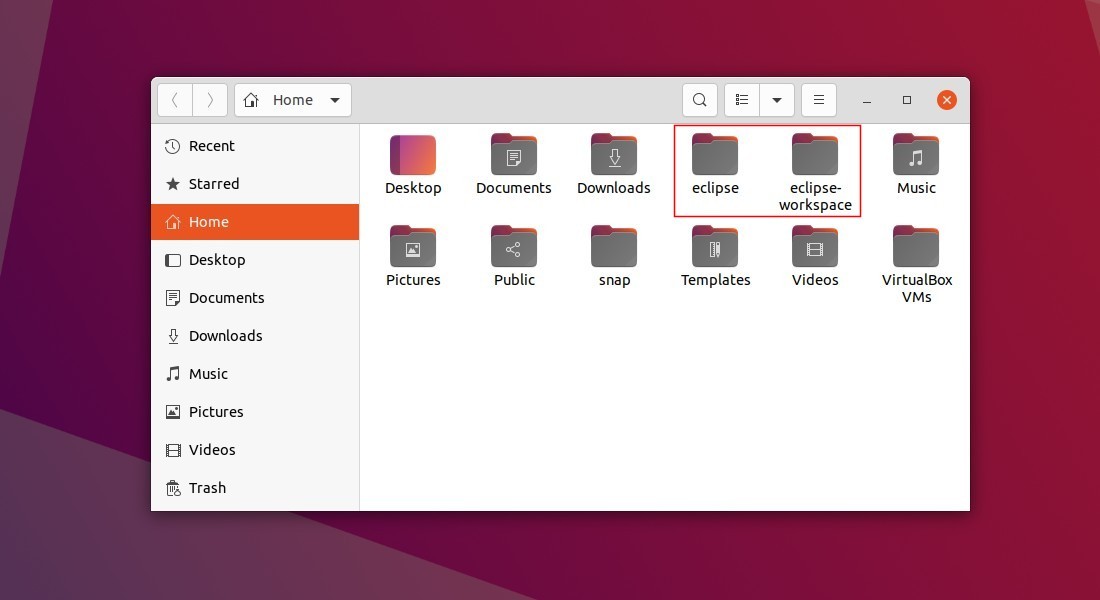
The software is installed by default in user’s home directory. Simply open the file manager, and remove the eclipse folder and eclipse-workspace folder.
For the desktop shortcut, just move it to trash. For the app icon in start menu, press Ctrl+Alt+T to open terminal and run commands:
- navigate to app shortcut folder for local user:
cd .local/share/applications/
- remove all Eclipse related desktop entry files:
rm *eclipse*.desktop epp*.desktop
![]()