Looking for screen capturing application for your Ubuntu desktop? Here are 7 popular graphical tools you can try.
1. Gnome Screenshot
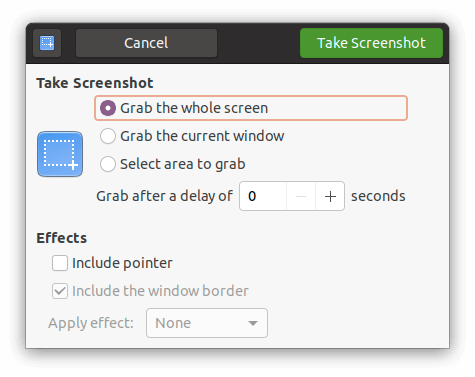
GNOME Screenshot is no longer default since GNOME 40 (meaning Ubuntu 22.04 and higher). Install it either from Ubuntu Software or by running sudo apt install gnome-screenshot command in terminal.
First of first, if you just want to take a screenshot. use the default screenshot tool by pressing PrintScreen, Alt + PrintScreen, or Shift + PrintScreen on keyboard to take screenshot of whole screen, focused app window, or selected area.
You can also launch the tool by searching for screenshot from system application launcher.
2. Flameshot
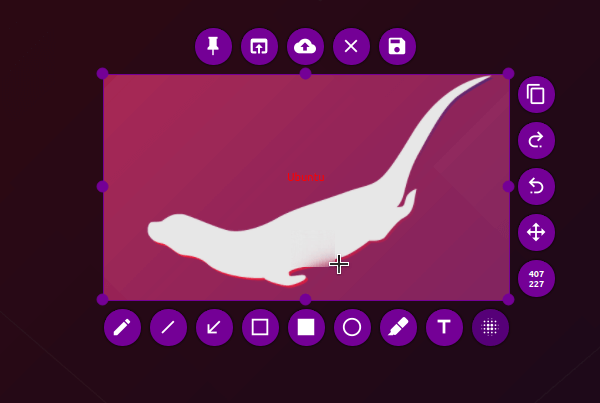
Flameshot is a powerful yet simple to use screenshot software. It starts as indicator applet with option to capture selected rectangular area.
The software features editing tools around screenshot selection area. As well, it supports for uploading to Imgur, and commands.
To install Flameshot, either search for and install it via Ubuntu Software or run command in terminal:
sudo apt install flameshot
3. Shutter
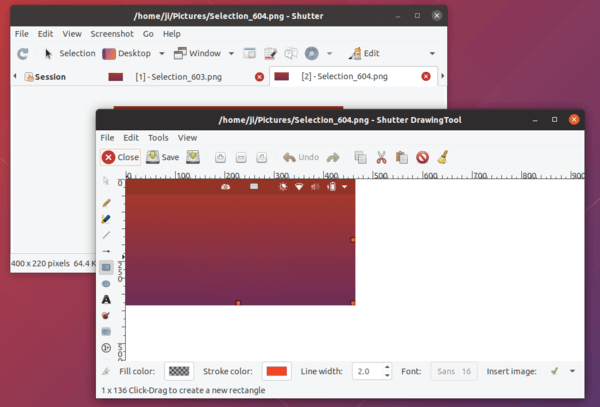
Shutter is a feature-rich screenshot application with a built-in editor.
It’s one of must installed applications on my Ubuntu. The software features:
- Capture rectangular area.
- Capture active window, or select an app window to capture.
- whole screen, workspaces.
- Capture app child window.
- Capture menu or cascading menus from an app.
- Capture tooltips.
- Upload to Dropbox, Imgur, etc.
- Edit with built-in editor, or auto-open with other system image editor.
Ubuntu removed Shutter from its universe repositories due to old Gnome 2 dependency libraries. Now, the project is working on removing old libraries and getting back to Ubuntu main repositories.
To install Shutter, either install snap package, or run commands one by one to get it from PPA:
sudo add-apt-repository ppa:shutter/ppa

sudo apt update

sudo apt install shutter
4. Screencloud
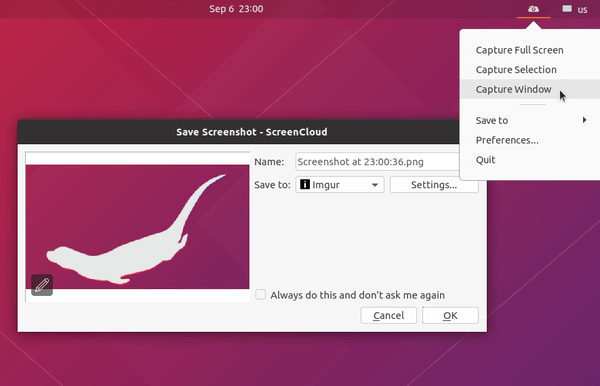
Screencloud is a screenshot sharing software that works on Linux, Windows, and Mac OS.
It starts as an indicator applet offers menu options & keyboard shortcuts to take screenshot of selection, full-screen, and window.
Screenshot URL is automatically copied to clipboard, if you have pre-defined settings, for easy sharing with your friend. Supported online services include: Dropbox, Imgur, Google Drive, OneDrive, FTP/SFTP, Shell Script.
The software is available as Snap, so you can easily install it from Ubuntu Software. For choices, an Appimage is also available to download in the link below:
Screencloud in Github
Grab the .appimage package, make it executable in file “Properties -> Open With” dialog, and finally run it to launch the tool.
5. GIMP
If you edit images regularly with GIMP image editor, try its built-in screenshot function by going to menu File -> Create -> Screenshot ….
You’ll see a child window with options to capture window, full-screen, and selected area. And screenshot will be opened in a new GIMP window automatically.

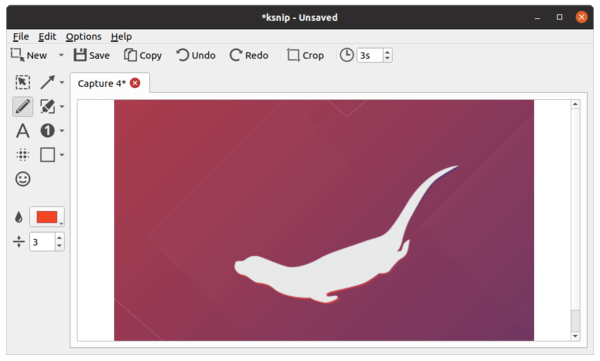
6. Ksnip
Ksnip is a Qt-based screen capture with a built-in editor. It works on X11 and Gnome / Plasma Wayland.
It includes most features that other screenshot tools have (e.g, upload to Imgur, hotkeys, etc), and can be a great alternative to Shutter. Although it’s not perfect at the moment, the development is updating regularly.
7. Kazam
Kazam is a simple screencast application which also include features to capture screenshots. Similar to the default Gnome screenshot, it only offers basic options to capture, full-screen, window, and selection area.

To install Kazam, either use Ubuntu Software, or run command in terminal:
sudo apt install kazam
Summary:
There are also many other screenshot tools (e.g., KDE Spectacle, Deepin screenshot, xfce4-screenshooter, lximage-qt) that are either not desktop independent, or not working good in my case.
So the previous 7 tools are the best for Ubuntu so far in 2020 in my private opinion.