Linux 5.4 Kernel was released today. Here’s how to install it in Ubuntu and Linux Mint.
Linus Torvalds announced the 5.4 Kernel on lkml.org:
“Not a lot happened this last week, which is just how I like it. And as expected, most of the pull requests I got were for the 5.5 merge window, which I’ll obviously start working through tomorrow.”
Linux 5.4 Kernel brings a lot of new hardware support,including AMD Arcturus GPU, Navi 12 and Navi 14 GPUs, AMD Dali and Renoir APU support,Intel Tiger Lake “Gen 12” graphics,Qualcomm Snapdragon 855 SoC, Intel Ice Lake Thunderbolt support. The new release also features Logitech Linux LOCKDOWN LSM, Lightspeed receiver support, Microsoft exFAT support, and a plethora of other new features and improvements.
How to Install Linux Kernel 5.4 in Ubuntu:
The
mainline kernels do not include any Ubuntu-provided drivers or patches. They are not supported and are not appropriate for production use
The mainline kernel packages for Linux 5.4 are available for download at the link below:
Download Kernel 5.4
Depends on your OS type, download and install the packages in turns:
- linux-headers-5.4.0-xxxxxx_all.deb
- linux-headers-5.4.0-xxx-generic(/lowlatency)_xxx_amd64.deb
- linux-modules-5.4.0-xxx-generic(/lowlatency)_xxx_amd64.deb
- linux-image-xxx-5.4.0-xxx-generic(/lowlatency)_xxx_amd64.deb
Select generic for common system, and lowlatency for a low latency system (e.g. for recording audio), amd64 for 64bit system, i386 for 32bit system, or armhf, arm64, etc for other OS types.
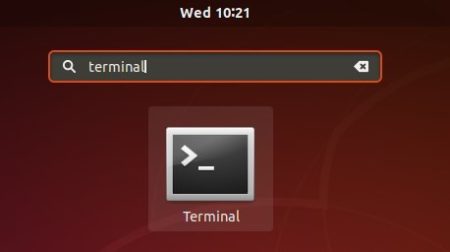
Alternatively you can download and install the kernel binaries via terminal commands ( open terminal via Ctrl+Alt+T):
For 64-bit OS:
cd /tmp/

wget -c https://kernel.ubuntu.com/~kernel-ppa/mainline/v5.4/linux-headers-5.4.0-050400_5.4.0-050400.201911242031_all.deb

wget -c https://kernel.ubuntu.com/~kernel-ppa/mainline/v5.4/linux-headers-5.4.0-050400-generic_5.4.0-050400.201911242031_amd64.deb

wget -c https://kernel.ubuntu.com/~kernel-ppa/mainline/v5.4/linux-image-unsigned-5.4.0-050400-generic_5.4.0-050400.201911242031_amd64.deb

wget -c https://kernel.ubuntu.com/~kernel-ppa/mainline/v5.4/linux-modules-5.4.0-050400-generic_5.4.0-050400.201911242031_amd64.deb

sudo dpkg -i *.deb
No 32-bit packages so far as build for 32-bit failed.
Once installed, restart your computer and enjoy!
Uninstall Linux Kernel 5.4:
Restart your machine and select boot with the previous kernel in boot menu ‘Grub2 -> Advanced Option for Ubuntu’. Then run command to remove Linux Kernel 5.4:
sudo dpkg --purge linux-image-unsigned-5.4.0-050400-generic