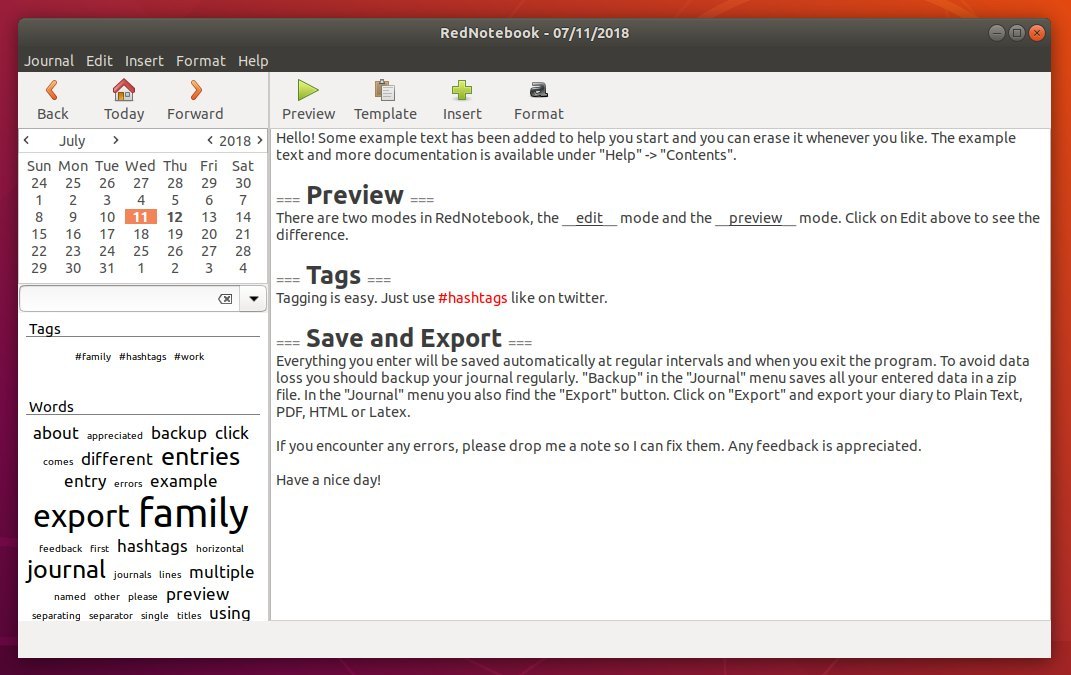
Archives For jimingkui

Due to legal reasons, Ubuntu does NOT include multi-media codecs out-of-the-box for audio and video playback. It’s however easy to install them via a single command.

During the Ubuntu installing process, it provides an option “Install third party software for graphics and Wi-Fi hardware and additional media formats” in the wizard. If you didn’t enable it, Ubuntu refuses to play movie and sound via the default Totem media player and Rhythmbox music player.

Without installing third-party player with bundled codecs, you can simply install the ubuntu-restricted-extras package to fix the issue. The package does not contain anything, but tells to install the following packages for you:

  • ttf-mscorefonts-installer – Install Microsoft TrueType core fonts.
  • unrar – non-free package enables ability to extract rar package in Ubuntu.
  • libavcodec-extra – FFmpeg library with encoder / decoder for audio and video codecs.
  • chromium-codecs-ffmpeg-extra – FFmpeg codecs for Chromium based web browser.
  • And a few gstreamer1.0 plugins for audio / video playback, recording and editing.

How to Install Media Codecs in Ubuntu:

Firstly, open a terminal window either by searching from the ‘Activities‘ overview screen or by pressing Ctrl+Alt+T on keyboard.

When terminal opens, copy and paste the command below into it and hit Enter:

sudo apt update && sudo apt install ubuntu-restricted-extras

Type your password (no visual feedback for security reason) when it prompts and hit Enter

For Ubuntu flavors, e.g, KUbuntu, and LUbuntu, there are relevant package to install the commonly used media codecs and fonts.

For KUbuntu users, open terminal emulator from start menu and run the command below instead:

sudo apt update && sudo install kubuntu-restricted-extras

And for LUbuntu, open terminal from start menu and run the command:

sudo apt update && sudo install lubuntu-restricted-extras

That’s all. Enjoy!

Virtualbox

Oracle VirtualBox reached the new major 5.2 release series with great new features and various bug-fixes and improvements.

New Features in VirtualBox 5.2:

  • export VM to Oracle Cloud.
  • Unattended guest installation, similar to VMware’s “Easy Install”
  • Overhauled VM selector GUI (improved tools VM / global tools handling, new icons)
  • Added experimental audio support for video recording
  • Fixed warning about “XSAVE consistency problem”.
  • Virtual Media Manager and Snapshot Pane rework
  • Ability to enable/disable audio input/output, and more audio settings.
  • Better EFI video mode handling, and support custom video modes
  • See changelog for more.

How to Install Virtualbox 5.2 in Ubuntu:

1. Open terminal via Ctrl+Alt+T or from application launcher. Remove old Virtualbox via command:

sudo apt-get remove virtualbox virtualbox-5.1

2. Download & install the latest Virtualbox package from the link below:

Download VirtualBox for Linux

3. If you’ve added the Oracle VBox repository, you can directly install the 5.2 release from Synaptic Package Manager or via apt command, after removing the old version.

To add the repository, do:

Open terminal (Ctrl+Alt+T) and run command to add the repository:

sudo sh -c 'echo "deb http://download.virtualbox.org/virtualbox/debian xenial contrib" >> /etc/apt/sources.list.d/virtualbox.list'

Depends your Ubuntu edition, replace xenial (for Ubuntu 16.04) with trusty (for 14.04, Mint 17.x, eOS 0.3), or zesty (for Ubuntu 17.04).

Virtualbox Official Linux repository

Setup the keyring so to trust the updates from the repository:

wget -q https://www.virtualbox.org/download/oracle_vbox_2016.asc -O- | sudo apt-key add -

wget -q https://www.virtualbox.org/download/oracle_vbox.asc -O- | sudo apt-key add -

Finally install virtualbox 5.2 via commands:

sudo apt-get update

sudo apt-get install virtualbox-5.2

With the repository added, you can simply install the future 5.2 series updates via Software Updater.

Ubuntu 17.10

Ubuntu 17.10 Artful Aardvark will be released soon today. Here’s how you can upgrade from the Ubuntu 17.04 desktop.

Ubuntu 17.10 replaces Unity with Gnome Shell as its default desktop environment. It’s powered by 4.13 Kernel and runs Gnome on Wayland by default. Xorg is also available for choice.

A fresh install of Ubuntu 17.10 is recommended. But for those who want to upgrade from Ubuntu 17.04, do:

1. First is always backup your important data, bookmarks, and other user documents.

2. Launch Software & Updates utility from application launcher,

  • in first tab, choose “Download from” Main server
  • in Other Software tab, remove/disable all third-party repositories.
  • in Additional Drivers tab, choose an open-source driver if a proprietary one is in use.

3. Remove other desktop environments (KDE, Cinnamon, etc). Upgrading desktop packages may take a few more minutes in the upgrading process.

4. Make you system up-to-date by running command in terminal (Ctrl+Alt+T):

sudo apt update && sudo apt upgrade

5. Finally launch Software Updater to get the upgrade option. Or run following command (-d is required before it’s officially announced):

sudo update-manager -d

Click the Upgrade button and confirm in the next release note dialog to start the upgrading wizard.

Note: while the upgrading process, you need a few clicks to confirm installing or removing some packages.

MESA 17.2.2 Is Now Available for Ubuntu 16.04 LTS

Last updated: October 17, 2017

The latest release of Mesa graphics library 17.2.2 is now available for users of Ubuntu 16.04 to install via PPA.

Mesa 17.2.2 is a bug-fix release for the 17.2 series. It was released two weeks ago and finally available in the “Ubuntu-X” team PPA for Ubuntu 16.04.

Mesa 17.2 contains many RADV/ANV Vulkan driver improvements, Vulkan and OpenGL performance improvements, more work towards OpenGL 4.6 compliance, and a wealth of other open-source driver improvements.

How to Install Mesa 17.2.2 in Ubuntu 16.04 via PPA:

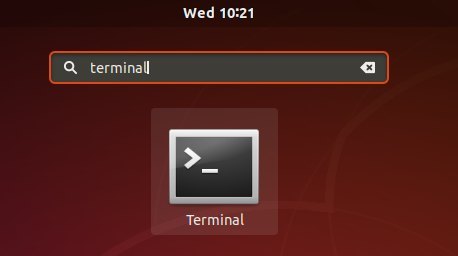
1. Open terminal either via Ctrl+Alt+T keyboard shortcuts or by searching for “terminal” from application launcher. When it opens, run command to add the PPA:

sudo add-apt-repository ppa:ubuntu-x-swat/updates

Input your password (no visual feedback while typing) when it prompts and hit Enter.

Mesa ppa

2. Then refresh your system and install upgrades via commands:

sudo apt-get update

sudo apt-get install dist-upgrade

3. To check result, run command:

glxinfo | grep "OpenGL version"

How to Restore:

To revert back to the original Mesa 3D graphics library in Ubuntu, get into command console and run command:

sudo apt install ppa-purge && sudo ppa-purge ppa:ubuntu-x-swat/updates

HP Linux Imaging and Printing

HPLIP, an open-source HP developed Linux drivers for HP printers, has reached the 3.17.10 release. Two new scanners and Debian 9.1 are supported in the release.

New scanners supported in HPLIP 3.17.10:

  • HP Scanjet Enterprise Flow N9120 fn2 Document Scanner
  • HP Digital Sender Flow 8500 fn2 Document Capture Workstation

Download / Install HPLIP 3.17.10:

To install the software, download the package “hplip-3.17.10.run” from the link below:

HPLIP Download Page

Then open terminal via Ctrl+Alt+T or search for “terminal” from app launcher. When it opens, run command:

cd ~/Downloads/ && chmod +x hplip-3.17.10.run && ./hplip-3.17.10.run

Input your password (no visual feedback while typing) when it prompts and hit Enter.

install hplip 3.17.10

Then follow the terminal outputs, answer some questions to build and install HPLIP on your system. When everything is done, plug/re-plug your printers and enjoy!

FFMPEG

The FFmpeg multimedia library 3.4 “Cantor” was released earlier today. Here’s how to install it in Ubuntu 14.04, Ubuntu 16.04 via PPA.

Click to see what’s new in FFmpeg 3.4:
  • deflicker video filter
  • doubleweave video filter
  • lumakey video filter
  • pixscope video filter
  • oscilloscope video filter
  • config.log and other configuration files moved into ffbuild/ directory
  • update cuvid/nvenc headers to Video Codec SDK 8.0.14
  • afir audio filter
  • scale_cuda CUDA based video scale filter
  • librsvg support for svg rasterization
  • crossfeed audio filter
  • spec compliant VP9 muxing support in MP4
  • remove the libnut muxer/demuxer wrappers
  • remove the libschroedinger encoder/decoder wrappers
  • surround audio filter
  • sofalizer filter switched to libmysofa
  • Gremlin Digital Video demuxer and decoder
  • headphone audio filter
  • superequalizer audio filter
  • roberts video filter
  • The x86 assembler default switched from yasm to nasm, pass --x86asmexe=yasm to configure to restore the old behavior.
  • additional frame format support for Interplay MVE movies
  • support for decoding through D3D11VA in ffmpeg
  • limiter video filter
  • libvmaf video filter
  • Dolby E decoder and SMPTE 337M demuxer
  • unpremultiply video filter
  • tlut2 video filter
  • floodfill video filter
  • pseudocolor video filter
  • raw G.726 muxer and demuxer, left- and right-justified
  • NewTek NDI input/output device
  • Some video filters with several inputs now use a common set of options: blend, libvmaf, lut3d, overlay, psnr, ssim. They must always be used by name.
  • FITS demuxer and decoder
  • FITS muxer and encoder
  • add --disable-autodetect build switch
  • drop deprecated qtkit input device (use avfoundation instead)
  • despill video filter
  • haas audio filter
  • SUP/PGS subtitle muxer
  • convolve video filter
  • VP9 tile threading support
  • KMS screen grabber
  • CUDA thumbnail filter
  • V4L2 mem2mem HW assisted codecs
  • Rockchip MPP hardware decoding
  • vmafmotion video filter
  • use MIME type “G726” for little-endian G.726, “AAL2-G726” for big-endian G.726

How to Install FFmpeg 3.4 via PPA in Ubuntu:

Not recommended to upgrade from distribution build of FFmpeg, unless you need the latest version for special reasons. And some FFmpeg based applications may need to be re-built after following steps.

1. Open terminal via Ctrl+Alt+T or by searching for “Terminal” from the dash. When it opens, run command to add the PPA repository (unofficial):

sudo add-apt-repository ppa:jonathonf/ffmpeg-3

Type in password (no visual feedback due to security reason) and hit Enter.

2. (For Ubuntu 14.04 only), you also need to add another PPA for the dependencies:

sudo add-apt-repository ppa:jonathonf/tesseract

3. Then upgrade FFmpeg using Software Updater:

upgrade ffmpeg

Or simply run command:

sudo apt update && sudo apt upgrade

How to Restore:

To undo the changes and restore to the stock version of FFmpeg in main Ubuntu repositories, purge the PPA via command:

sudo apt install ppa-purge && ppa-purge ppa:jonathonf/ffmpeg-3

Found that your desktop screen recording applications do not launch in Ubuntu 17.10 default Wayland session?

Well, try Green Recorder, the first desktop program to support Wayland display server on GNOME session.

Green Recorder is a GTK+ 3 application written in Python that features:

  • Record audio and video on almost all Linux interfaces.
  • Support mkv, avi, mp4, wmv, gif and nut (only WebM for Wayland)
  • A play button to play last recorded video.
  • Right-click system tray icon to stop recording.
  • Choose the audio input source from list.
  • Run command after recording.

How to Install Green Recorder in Ubuntu 17.10:

The latest Green Recorder 3.0.5 features a lot of small fixes and restrcutered UI. You can install it in Ubuntu 17.10, and Ubuntu 16.04, Ubuntu 14.04, Ubuntu 17.04 via its official PPA.

1. Open terminal either via Ctrl+Alt+T or by searching ‘terminal’ from app launcher. When it opens, run command to add the PPA:

sudo add-apt-repository ppa:fossproject/ppa

Input your password (no visual feedback while typing) when it prompts and hit Enter.

2. Then run commands to check repository packages and install the recorder:

sudo apt-get update

sudo apt-get install green-recorder

Uninstall:

To remove the desktop screen recorder, simply run following command in terminal:

sudo apt-get remove --autoremove green-recorder

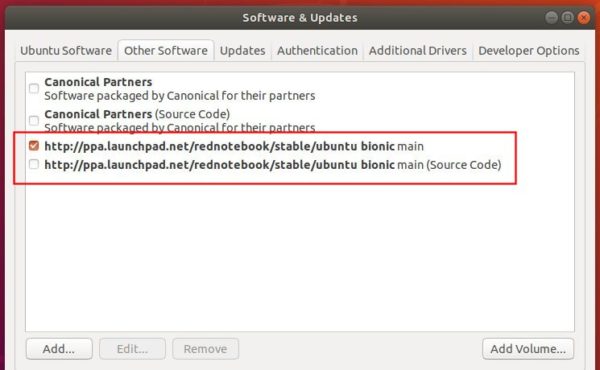
And remove the PPA via Software & Updater utility under Other Software tab.

Ubuntu 17.10 uses Wayland in the default session and Xorg for optional. However, many graphical applications need to run as root so far does not launch in Wayland.

You’ll get following similar errors while running graphical applications via root:

  1. For some applications, e.g., Synaptic Package Manager, Grub Customizer, Gparted, and Ubuntu Tweak, they does not launch in Wayland.

    Or you may get following error when trying to launch them via gksu command:

    Failed to run *** as user root. Unable to copy the user’s Xauthorization file.

  2. Starting graphical application via sudo in terminal window will get error:

    No protocol specified. Gtk-WARNING **: Cannot open display: :0

The most straightforward workaround is to use xhost to temporarily allow the root user to access the local user’s X session.

To do so, run command:

xhost si:localuser:root

After running the command, these graphical applications can be launched from app launcher or via sudo, gksu, pkexec commands until you log out.

To make this work automatically at login, search for and launch Startup Applications utility, click the “Add” button to run the command at startup:

  • name: whatever
  • command: xhost si:localuser:root
  • comment: whatever

QupZilla 2.2, the final release series of the cross-platform Qt web browser, is now available.

QupZilla will now get only bug-fix releases, and next major release will be named Falkon as a KDE project.

QupZilla 2.2.0 release highlights:

  • added back print element background option
  • added back print preview dialog
  • added session manager
  • tab icon is now hidden when page has no icon
  • improved locationbar completer with search suggestions
  • improved handling of downloading dependencies in GreaseMonkey scripts
  • various improvements in TabManager extension
  • Linux: PulseAudio streams now have QupZilla app name and icon

QupZilla 2.2.0

Install QupZilla 2.2.0 in Ubuntu:

QupZilla 2.2.0 requires Qt 5.9.2. It can’t be built with default Qt libraries in all current Ubuntu releases.

At the moment, you can only download the Appimage, non-install single executable file, from the link below:

Download QupZilla 2.2.0 Appimage

Then make it executable via its Properties window, and run the file to launch QupZilla:

QupZilla 2.2 Appimage

Don’t see the “Run” option even after made the appimage executable? Go to file manage menu Edit -> Preferences -> Behavior -> Choose the option says ‘Run executable text files when they are opened’.

Rhythmbox music player

Rhythmbox, Ubuntu’s default music playing application, got a new release update after a year of development.

Besides removing visualization plugin, Rhythmbox 3.4.2 features responsiveness improvements during media player sync, better network buffering when crossfading is enabled, and various bug-fixes (or feature request) including:

  • Critical Assertion Errors
  • Add --version command option.
  • Rhythmbox crashed with SIGSEGV during import
  • Expand playing icon column in entry view
  • Import hangs for special file
  • Playqueue UI improvements
  • Memory leak in error handling of utimes on podcast-timestamp
  • Open settings crashes the app
  • build failure with gcc 7.1.1
  • Keyboard navigation with tab is broken by search entry widget

How to Install Rhythmbox 3.4.2 in Ubuntu:

The project leader for Ubuntu Budgie, fossfreedom, was maintaining PPA with Rhythmbox package and its plugins, though they are not updated for a period of time.

So I uploaded Rhythmbox 3.4.2 into the PPA, available for Ubuntu 16.04, Ubuntu 17.04, and Ubuntu 17.10.

1. Open terminal via Ctrl+Alt+T and run command to add the PPA:

sudo add-apt-repository ppa:ubuntuhandbook1/apps

Input your password (no visual feedback while typing) when it prompts and hit Enter.

2. Then upgrade the music playing application via Software Updater:

or upgrade your system via command:

sudo apt-get update && sudo apt-get upgrade

How to remove:

To revert back to stock version of Rhythmbox in your Ubuntu, purge the PPA as well as downgrade the player via command:

sudo apt-get install ppa-purge && sudo ppa-purge ppa:ubuntuhandbook1/apps

If it’s working good, you may still remove the PPA repository via Software & Updates utility under Other Software tab.