![]()
LXQt, the next generation of LXDE, has just reached release 0.8.0, which brings full Qt 5 compatibility, two beautiful new themes, and a lot of new features.
LXQt is the Qt port and the upcoming version of LXDE, the Lightweight Desktop Environment. It is the product of the merge between the LXDE-Qt and the Razor-qt projects.
According to the release note, LXQt 0.8.0 brings below changes:
- Full Qt 5 support. Run cmake with -DUSE_QT5 to enable it.
- New component: lxqt-admin. This brings an optional set of basic admin tools such as configuration for date & time as well as users and groups.
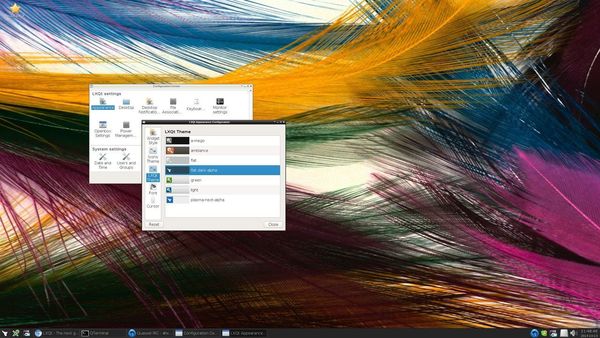
- New theme: Plasma Next. Based on KDE Plasma Next theme.
- New theme: Dark Alpha, by Inti Alonso.
- Much improved support for multiple displays.
- Support for RGBA transparency if compositing is available.
- lxqt-config-randr has been removed. It has been replaced by lxqt-config-monitor.
- pcmanfm-qt: Support single-click to activate items
- pcmanfm-qt: Support drag & drop on the desktop
- pcmanfm-qt: Implement integration with the ark archive manager
- pcmanfm-qt: Improve readability in icon view
- lxqt-panel: Support reordering of taskbar buttons
- lxqt-panel: Support “urgency” hint
- lxqt-panel: Add support for OSS in volume control, if available
- lxqt-powermanagement: Improved compatibility with systemd/logind
- Integrate with compton if available (disabled by default)
- Add support for setting a default UI font
- Lots of performances improvements.
- Lots and lots of bugfixes.
How to install LXQt in Ubuntu:
A daily build PPA is available in ppa:lubuntu-dev/lubuntu-daily, so far it supports Ubuntu 14.10, Ubuntu 14.04 and derivatives.
Press Ctrl+Alt+T to open terminal and run below commands one by one to add the PPA and install LXQt session:
sudo add-apt-repository ppa:lubuntu-dev/lubuntu-daily

sudo apt-get update

sudo apt-get upgrade

sudo apt-get install lxqt-metapackage lxqt-session lxsession
Once installed, log out or restart. When you’re at the Unity Greeter choose log in with a LXQt session.
(Optional) To remove this Desktop Environment, run below command in terminal:
sudo apt-get remove lxqt-metapackage lxqt-session && sudo apt-get autoremove