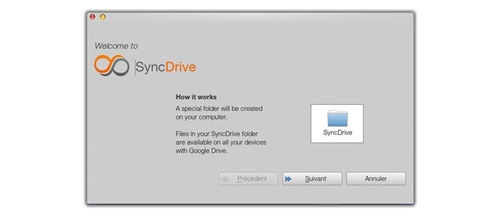
Archives For jimingkui

Want to use Google Calendar in Ubuntu? Well, here I’ll show you how to install an indicator which provides Google Calendar integration on Ubuntu and Linux Mint desktop.

The calendar indicator is an open-source applet allows to add, edit and delete Google Calendar events as well as to create new calendars.

Google Calendar Indicator

Once you installed this indicator, you can login your Google Account and set the automatic synchronization time in its Preferences window.

access google calendar

After that, you can click ‘Show Calendar’ in the indicator menu to dispay your calendar.

Google Calendar Ubuntu

Install Google Calendar Indicator

The developer has added the packages to his PPA repository. So far, it supports Ubuntu 13.04 Raring, Ubuntu 12.10 Quantal, Ubuntu 12.04 Precise, and Linux Mint 13, 14, 15.

To add the ppa, press Ctrl+Alt+T on your keyboard to open terminal and then run below commands:

sudo add-apt-repository ppa:atareao/atareao

After that, update the package lists and install Google Calendar:

sudo apt-get update; sudo apt-get install calendar-indicator

This quick tutorial is going to show you how to add a folder to Nautilus file browser ‘Places’ sidebar in Ubuntu 13.04 Raring Ringtail, Ubuntu 13.10 Quantal.

add folder to nautilus sidebar

Actually this will add your folders to a new column called Bookmarks. You can add a user folder, system folder, mounted folder to sidebar by going into the directory in Nautilus and then click the “gear” button and click Bookmark this Location

nautilus add bookmarks

If you’re on Ubuntu 12.04 Precise with Nautilus 3.4.x, use menu Bookmarks -> Add Bookmark instead.

Gdebi is a lightweight deb packages installer which was the default in Ubuntu Desktop. Now Ubuntu uses Ubuntu Software Center which is slow and frequently gives me ‘The package is of bad quality’ error.

You can easily install Gdebi package installer (default in Linux Mint) and set it as default deb installer by this tutorial.

Go to Ubuntu Software (or App Center for Ubuntu 24.04 and higher), search for and install GDebi Package Installer (gdebi) package:

install gdebi package installer

Then, open your file manager and go to Properties window of one deb package by right-clicking on it. Under open with tab, highlight Gdebi package installer and click Set as default button.

set default package installer

That’s it. Enjoy!

PAC is a free alternative to SecureCRT and Putty. It provides a GUI to configure connections: users, passwords, EXPECT regular expressions, macros, etc.

PAC manager in ubuntu

PAC Manager works on Debian/Ubuntu, and RPM based linux platforms. All you need to do is download and install the installer package and fix denpendencies.

Features:

  • Unique linux app to implement SecureCRT’s functionality (more or less!)
  • Remote and local macros
  • Remotely send commands with EXPECT regexp
  • Cluster connections!! Connections on same cluster share keystrokes!!
  • Scripting support! (vía Perl code)
  • Serial/tty connection via cu/tip/remote-tty connections!!
  • Pre/post connections local executions
  • TABS OR WINDOWS for connections!!
  • Proxy support
  • KeePass integration!
  • Wake On LAN capabilities
  • Possibility to split terminals in the same TAB!
  • Quick acces to configured connections via tray menu icon
  • Best linux GUI for ssh, telnet, sftp, rdesktop, vnc, cu, remote-tty, ftp, etc
  • DEB, RPM & .TAR.GZ packages available!!
  • More to come (ASA I find time!)
  • FREE (GNU GPLv3)
  • To get started, download the .deb package from SourceForge.

    Then press Ctrl+Alt+T to open terminal. When it opens, run blow commands to install the package:

    sudo dpkg -i ~/Downloads/pac-*all.deb

    Fix dependency problem if any:

    sudo apt-get -f install

    Install the indicator support for Unity Desktop:

    sudo apt-get install libgtk2-appindicator-perl

    When everything is done, open PAC Manager from the Unity Dash.

    install transmission ubuntuTransmission is a lightweight Bittorrent Client comes by default with Ubuntu. While Canonical only provides critical updates, here I’ll show you how to install / upgrade the latest Transmission in Ubuntu via its PPA. Supports Ubuntu 13.10 Saucy, Ubuntu 13.04 Raring, Ubuntu 12.04 Precise and Ubuntu 12.10 Quantal.

    UPDATE 2024: The tutorial is outdated! If you’re looking for most recent Transmission PPA, see this one instead.

    At the moment of writing this tutorial, the latest release is Transmission 2.8.2. It brings a lot of bug fixes and a few improvements.

    • Fix webseed crash
    • Fix crash when adding UDP trackers whose host’s canonical name couldn’t be found
    • Fix crash when sending handshakes to some peers immediately after adding a magnet link
    • Fix crash when parsing incoming encrypted handshakes when the user is removing the related torrent
    • Add safeguard to prevent zombie processes after running a script when a torrent finishes downloading
    • Fix “bad file descriptor” error
    • Queued torrents no longer show up as paused after exiting & restarting
    • Fix 2.81 compilation error on OpenBSD
    • Don’t misidentify Tixati as BitTornado?
    • Fix bug that had slow download speeds until editing preferences for Mac Client
    • Fix crash that occurred in some cases after using Torrent > Set Location
    • Fix crash where on_app_exit() got called twice in a row
    • Fix 2.81 compilation error on older versions of glib
    • Can now open folders that have a ‘#’ in their names
    • Silence gobject warning when updating a blocklist from URL
    • Add Qt5 support

    To get started, press Ctrl+Alt+T to open terminal. When it opens, run below command to add the Bittorrent PPA:

    sudo add-apt-repository ppa:transmissionbt/ppa

    After that, run blow command to install Bittorrent. Or use Synaptic Package Manager to upgrade the package.

    sudo apt-get update; sudo apt-get install transmission

    That’s it. Enjoy!

    Use Unity Webapps with Google Chromium in Ubuntu

    Last updated: August 10, 2013

    unity webapps in chromiumThis quick tutorial is going to show you how to use Unity Webapps with Google Chromium browser in Ubuntu 13.04, Ubuntu 13.10.

    As the default is Mozilla Firefox, you can manage to get unity webapps working in Chromium by installing a plugin.

    To install this plugin, go to Ubuntu Software Center. Search for and install the unity-chromium-extension package.

    NOTE: The default version in Software Center is 2.4.6 for Ubuntu 13.04. I recommend you install the latest version (2.4.7 so far) which is available for downloading from below link. This version fixes no gmail icon on Unity Launcher for Chromium 27 & 28.

    unity-chromium-extension

    Unfortunately, new mail counts and indicator integration is still not working. Probably best to wait some more days for a fix.

    As you may know, Intel has released intel driver update utility for Linux and it’s available for Ubuntu 13.04, Ubuntu 12.04, Ubuntu 12.10 and Linux Mint from Intel Repository.

    intel driver update utility

    To add Intel Repository to Ubuntu, press Ctrl+Alt+T to open terminal. When it opens, run below commands:

  • For Ubuntu 12.04 Precise and Linux Mint 13 Maya:
    sudo sh -c 'echo "deb https://download.01.org/gfx/ubuntu/12.04/main Ubuntu 12.04" >> /etc/apt/sources.list.d/intel-graphics.list'
  • For Ubuntu 12.10 Quantal and Linux Mint 14 Nadia:
    sudo sh -c 'echo "deb https://download.01.org/gfx/ubuntu/12.10/main Ubuntu 12.10" >> /etc/apt/sources.list.d/intel-graphics.list'
  • For Ubuntu 13.04 Raring and Linux Mint 15 Olivia:
    sudo sh -c 'echo "deb https://download.01.org/gfx/ubuntu/13.04/main Ubuntu 13.04" >> /etc/apt/sources.list.d/intel-graphics.list'
  • Then download and install the GPG key via 2 commands:

    wget https://download.01.org/gfx/RPM-GPG-KEY-ilg -O - | sudo apt-key add -
    wget https://download.01.org/gfx/RPM-GPG-KEY-ilg-2 -O - | sudo apt-key add -

    Finally, install Intel Graphics Driver update utility via below command. Or update it to the latest via your favorite package manager.

    sudo apt-get update; sudo apt-get install intel-linux-graphics-installer

    intel driver update utility unity

    This simple tutorial shows you how to install TrueCrypt as well as its indicator applet in Ubuntu 13.04 Raring Ringtail.

    There’s a PPA which contains the TrueCrypt package with the tray icon replaced by a application indicator, so that you can get back the TrueCrypt indicator applet in Ubuntu 13.04 panel since the tray icons is no longer supported. The PPA also supports Ubuntu 12.04 Precise and Ubuntu 12.10 Quantal.

    truecrypt ubuntu 13.04

    To get started, press Ctrl+Alt+T to open terminal. When it opens, run below command to add the PPA:

    sudo add-apt-repository ppa:stefansundin/truecrypt

    Then update package lists and install TrueCrypt.

    sudo apt-get update; sudo apt-get install truecrypt

    truecrypt ubuntu 13.04 unity

    The indicator applet exits when the main window is closed if there’s no mounted volumes. To keep the indicator, go to TrueCrypt preferences -> Background Task tab, uncheck the box where it says “Exit when there are no mounted volumes”.

    If for some reason this ppa does not work properly for you, run below commands one by one to remove the ppa as well as the installed TrueCrypt.

    sudo apt-get remove truecrypt
    sudo apt-add-repository --remove ppa:stefansundin/truecrypt
    sudo apt-get update

    How to Install Ubuntu 13.10 From USB Stick

    Last updated: August 9, 2013

    install ubuntu from usb In this tutorial I’ll show you how to make Ubuntu bootable USB from iso and then install Ubuntu 13.10 Saucy Salamander on your computer from it.

    Ubuntu 13.10 is scheduled to be released on October 17th 2013. So far it’s in Alpha stage. The daily build iso can be downloaded at here, and final release will be available at this page.

    Requirements:

    • USB at least 1GB. Format it to FAT32 (uncheck ‘Quick Format’).
    • Computer running with any operating system.
    • Download Ubuntu 13.10 iso file from previous links

    1. Make Ubuntu 13.10 Bootable USB From ISO

    To get started, download Unetbootin, which is a simple tool that allows Windows / Linux / Mac OS users to create bootable Live USB drives for Ubuntu, Fedora, and other Linux distributions without burning a CD. It’s available for downloading at this page.

    Insert your USB stick into your computer and then open Unetbootin executable. Check “Diskimage” and choose the Ubuntu 13.10 iso file from your Computer. You USB drive should be selected automatically.

    create bootable usb via unetbootin

    Click on OK to start. When it is done, click Exit.

    2. Install Ubuntu 13.10 from the bootable USB

    Insert the USB stick into the target computer. Start the machine and choose to boot up via USB in BIOS. You’ll see the below screen:

    boot up ubuntu usb

    Choose “Install Ubuntu” and hit Enter, then you’ll get into live Ubuntu Desktop with the installation wizard. To continue, follow a step by step guide to install Ubuntu