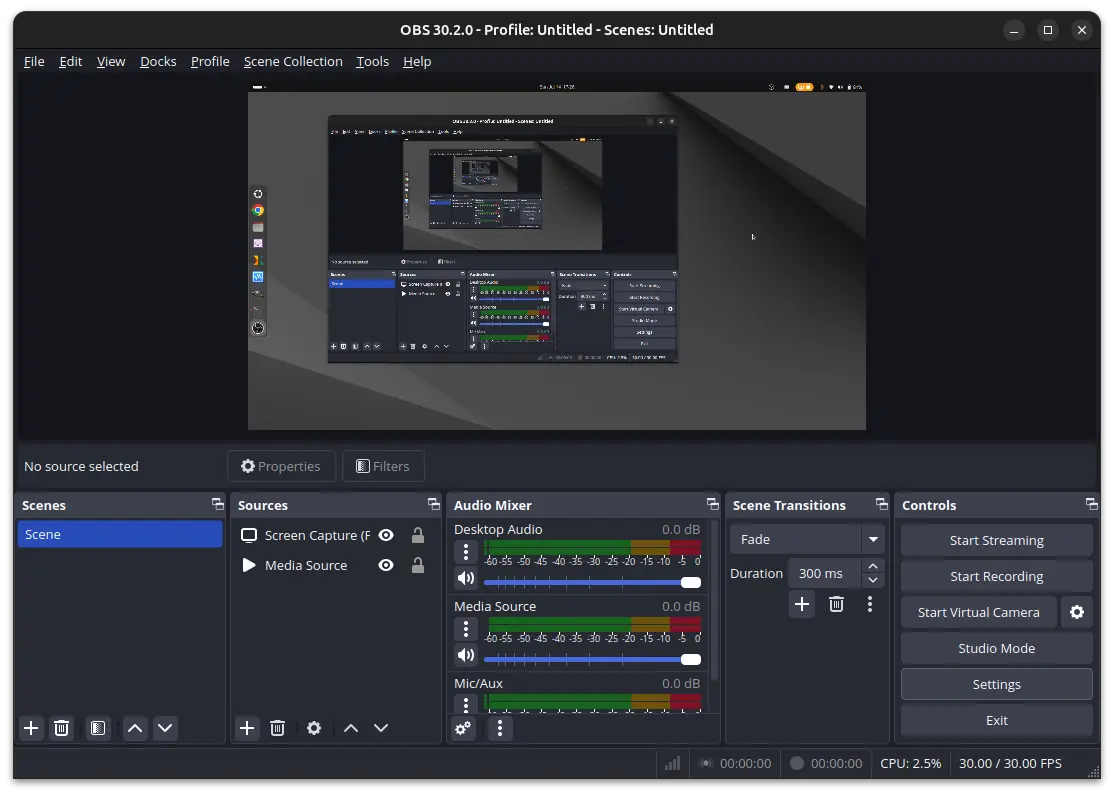
Archives For November 30, 1999

0 A.D., the free open-source RTS game of ancient warfare, got a new release update a few days ago.

It’s 0 A.D. Alpha 26, code-name ‘Zhuangzi’, features new civilization: The Han, which was the second imperial dynasty of China. It has beautiful new art, unique technologies, buildings, as well as new gameplay strategies to explore.

The release also introduced 2 new map: Tarim basin – an endorheic basin in Northwest China, Xinjiang region; and Yangtze (aka Chang Jiang) the longest river in Asia.

New civilization: The Han with new art, unique technologies, buildings

Other changes in the release include:

  • Units now have a slight acceleration
  • 26 new music tracks including two themed for the Han
  • Add player search to the lobby
  • option to share allies the parts of the map discovered.
  • New “Call to arms” button.
  • See the release note for more details.

How to Install 0 A.D. Alpha 26 in Ubuntu

For Ubuntu and their based systems, the official PPA repository has been updated with the new packages for Ubuntu 22.04, Ubuntu 20.04, and Ubuntu 18.04.

1. First, press Ctrl+Alt+T on keyboard to open a terminal window. Then, run the command below to add the PPA:

sudo add-apt-repository ppa:wfg/0ad

Type user password (no asterisk feedback) for sudo prompt and hit Enter to continue.

2. Old Ubuntu 18.04 and Linux Mint users have to manually refresh the package cache after adding the PPA, though it’s done automatically in Ubuntu 20.04+. And, this can be done by running command:

sudo apt update

3. Finally, either run the command below to install the game:

sudo apt install 0ad

Or launch “Software Updater” and update the game package if an old version was installed.

Uninstall:

To remove the game package, simply open a terminal window and run command:

sudo apt remove --autoremove 0ad

And, remove the Ubuntu PPA repository using command:

sudo add-apt-repository --remove ppa:wfg/0ad

For those looking for the native .deb package of OpenShot 3.1.0, here’s how to install it from PPA in Ubuntu 18.04, Ubuntu 20.04, Ubuntu 22.04, Ubuntu 22.10, and Ubuntu 23.04.

The official openshot PPA is back with the latest packages for all current Ubuntu releases and their derivatives, such as Linux Mint. User can now easily install the latest video editor package by following the steps below one by one.

Just found that the official openshot PPA seems not being updated for quite a period of time, when I was trying to get the latest package of this video editor today. Though, the software is still being developed.

So I tried building myself and uploaded into this unofficial PPA for those who prefer native .deb package to AppImage or Flatpak.

NOTE this unofficial PPA contains the packages for Ubuntu 22.04, Ubuntu 20.04, and Ubuntu 18.04, though has only minor tests in Ubuntu 22.04.

1. Add the PPA

First, press Ctrl+Alt+T on keyboard to open terminal. When it opens, paste the command below into terminal and hit Enter to add PPA:

sudo add-apt-repository ppa:openshot.developers/ppa

Type user password when it asks (no asterisk feedback) and hit Enter to continue.

2. Refresh package cache

Ubuntu 20.04 and higher will automatically refresh system package cache while adding PPA. Though old Ubuntu 18.04 and Linux Mint do not.

To manually update the cache, run command:

sudo apt update

3. Install/Update OpenShot

Finally, either install the video editor by running command in terminal:

sudo apt install openshot-qt python3-openshot

Or use ‘Software Updater’ to update it from an old version.

Uninstall:

To remove the Ubuntu PPA, either open “Software & Updates” and delete the source from ‘Other Software’ tab:

or run the command below in terminal:

sudo add-apt-repository ppa:openshot.developers/ppa

And remove the editor for choice by running command:

sudo apt remove --autoremove openshot-qt python3-openshot

Audacity audio editor got a new major update few days ago, features real-time effects and VST3 support.

In the new 3.2.0 release, there’s a new “Effects” button in the tracks menu, allowing to place realtime effects. However, it does not yet ship with any effect so far. User has to get effects via plugins, though only Audio Units (macOS only), VST3, LV2, and LADSPA formats are supported at the moment.

The release also merged the mixer bar with the meter bars. The device tool-bar has been replaced with a new Audio Setup button, though it can be re-enabled via “View -> Toolbars” menu.

As the screenshot above shows you, there also introduced a new “Share Audio” button, allowing to upload audio into audio.com either with login account or anonymously, then share the link with your friend.

Other changes in Audacity 3.2.0 include:

  • Apple Silicon (arm64) is now supported on macOS. Though, need arm64 versions of FFMPEG and plugins.
  • Add support for Wavpack
  • Possible to compile without JACK present in Linux.
  • Use XDG directories on Linux. Need to delete .audacity-data and .audacity folders in user home if exist.
  • Use mpg123 as mp3 importer instead of mad.
  • Update license to GNU General Public License V3, though most code files remain GPLv2 or later.
  • Update icons, remove Zoom tool and various bug-fixes.

How to Install Audacity 3.2.0 in Ubuntu Linux

There seems no native .deb package for the latest Audacity. User can however get the application via the universal AppImage, Snap, or Flatpak that works in most Linux.

Option 1: AppImage

For the non-install AppImage, go to the github releases page and grab the package under “Assets” section:

Then, right-click on the package and open “Properties” dialog. Add executable permission under ‘Permissions’ tab and finally click run the package to launch Audacity.

Audacity AppImage

Option 2: Flatpak

User can also install Audacity via universal Flatpak package that runs in sandbox.

First, press Ctrl+Alt+T on keyboard to open terminal in Ubuntu, then run command to make sure the daemon package is installed:

sudo apt install flatpak

Then install the audio editor as Flatpak by running command:

flatpak install https://dl.flathub.org/repo/appstream/org.audacityteam.Audacity.flatpakref

Like normal applications, search for and launch it from system start menu (‘Activities’ overview) after installation.

Option 3: Snap

Audacity is also available as Snap package that runs in sandbox. I put this method as last choice because it does not yet update to v3.2.0 at the moment of writing.

However, it’s quite easy to install for Ubuntu users. Simply open the Software App, search for and click install it:

Uninstall Audacity

Depends how you install the software package, uninstall the editor via:

  • For AppImage, just remove the package file.
  • For the Flatpak package, open terminal and run command:
    flatpak uninstall org.audacityteam.Audacity
  • And remove the snap package by either using Ubuntu Software or running command in terminal:
    sudo snap remove audacity

Got photo images in both light and dark style? There’s a super simple application to set them as dynamic wallpapers in GNOME 42+ desktop.

As you may know, GNOME 42+ support light and dark wallpapers that change automatically depends on system color scheme. Ubuntu 22.04 does not support the feature, but in upcoming Ubuntu 22.10 you may add your own ones into wallpaper selection dialog:

It’s easy to group your light and dark photo images as a single wallpaper selection. Just create a XML file under “.local/share/gnome-background-properties” (create folder if not exist), and write following rules:

<?xml version="1.0"?>
<!DOCTYPE wallpapers SYSTEM "gnome-wp-list.dtd">
<wallpapers>
  <wallpaper deleted="false">
    <name>TYPE_NAME_HERE</name>
    <filename>/PATH/TO/PICTURE_LIGHT</filename>
    <filename-dark>/PATH/TO/PICTURE_DARK</filename-dark>
    <options>zoom</options>
    <shade_type>solid</shade_type>
    <pcolor>#3465a4</pcolor>
    <scolor>#000000</scolor>
  </wallpaper>
</wallpapers>

It will then be available in the “Appearance” settings pages (Ubuntu 22.10 will merge ‘Background’ into ‘Appearance’).

To make life easier, a stupid simple application called “Dynamic Wallpaper” is created to do the job. With it, you may just type a name, select the 2 photo images and click “Create” button.

As mentioned above, it automatically creates a XML file with the name you typed, and saves to “.local/share/gnome-background-properties” directory. It also makes a copy of the photo images into “.local/share/backgrounds“, and refers to them in the XML file.

When done, you may go to “Appearance” in GNOME Control Center (aka “Settings” utility) to select that wallpapers.

How to Install the “Dynamic Wallpaper” app

The tool is available to install as Flatpak package, that works in Ubuntu 22.10+, Fedora 36+, Arch and Manjaro Linux with GNOME Desktop.

1. First, search for and open terminal from ‘Activities’ overview (or press Ctrl+Alt+T on Ubuntu). When it opens, run command to install Flatpak daemon:

sudo apt install flatpak

2. Next, run the command below to install the tool:

flatpak install https://dl.flathub.org/repo/appstream/me.dusansimic.DynamicWallpaper.flatpakref

If you’re first time installing a Flatpak package, there will be also hundred MB run-time libraries to install.

Finally, click the top-left corner ‘Activities’, then search for and open the application:

Uninstall:

To remove the tool, open terminal and run command:

flatpak uninstall --delete-data me.dusansimic.DynamicWallpaper

And clear useless libraries via flatpak uninstall --unused.

Oracle Java JDK 19 is out! Here are the new features and how to install instructions for Ubuntu users.

First, for Linux users the release now ported to support the RV64GV configuration of RISC-V, a general-purpose 64-bit ISA.

The release also introduced record patterns to deconstruct record values. Record patterns and type patterns can be nested to enable a powerful, declarative, and composable form of data navigation and processing. Though it’s a preview feature so far.

There are also 2 other preview features: a foreign function & memory API can interoperate with code and data outside of the Java runtime; a lightweight virtual threads that dramatically reduce the effort of writing, maintaining, and observing high-throughput concurrent applications; pattern matching for switch expressions and statements.

JDK 19 also introduced an API to express vector computations that reliably compile at runtime to optimal vector instructions, and an API for structured concurrency.

Other changes include:

  • New system properties for System.out and System.err.
  • upgrade Unicode support to 14.0
  • HTTPS channel binding support for Java GSS/Kerberos.
  • Support for PAC-RET protection on Linux/AArch64
  • Add a -providerPath option to jarsigner
  • New options for ktab to provide Non-Default salt
  • As well, there are removed and deprecated APIs and features. See release note details.

How to Install Java JDK 19 in Ubuntu Linux:

Oracle website provides the 64-bit DEB/RPM packages for Debian, Ubuntu, Fedora based systems. Just go download the package for your system from the link below:

In recent Linux systems, you can simply double-click on the package to install via system Software App. To set the Java home variable and use JDK 19 as default, see this step by step how to tutorial.

For Ubuntu 22.04, Ubuntu 22.10, Fedora 36/37 & other Linux with GNOME 42/43, there’s a new extension to enable more useful gadgets into top panel.

It’s “Aylur’s Widgets” extension that adds Dash, Workspace dots, Media playback control, Battery bar, Power menu in top-bar. All of them have ON/OFF switches, position option (left, center, right) as well as other settings.

Dash is a trigger to quickly access frequently used system settings, including Wi-Fi, Bluetooth, Settings, Shutdown Menu, Favorite Apps, Playback Control, Social Media websites, and have a glance at time & date, battery status, CPU usage, core temperature.

The button has configurable text and icon, and allows to replace the “Activities” button. With it enabled, user may also press Super + D on keyboard to trigger the menu. In case you use the shortcut key to show/hide desktop, you may assign another shortcut via Dconf Editor.

It also displays round dots on panel indicates all available desktop workspaces, and allows to quickly switch between them by clicking a single click. As well, there are music playback control, customizable date time format, battery bar and power button for choice.

How to Install Aylur’s Widget Extension

NOTE: the extension so far supports GNOME 42/43, which means you need Ubuntu 22.04|22.10, Fedora 36/37, Manjaro or Arch Linux with GNOME.

For Ubuntu, first search for and install “Extension Manager” from Ubuntu Software.

Install Extension Manager in Ubuntu 22.04

Then, search for and open the tool from ‘Activities’ Overview:

When it opens, navigate to ‘Browse’ tab, search for and install the ‘Aylur’s Widget’ extension:

After installation, go back ‘Installed’ tab, and click on gear button to configure the extension:

For other Linux, go to the extension page below and use the ON/OFF switch to install it:

And configure it using “Gnome Extensions” app which is available to install via GNOME Software or your system software manager.

For those prefer native .deb packages, LibreOffice 7.4 is finally available to install via LibreOffice Fresh PPA.

Major release packages always take longer time to be published into PPA. And it’s been almost one month for this new 7.4 release.

Features of LibreOffice 7.4 include:

  • WebP image format support
  • New remote grammar checker: LanguageTool API
  • EMZ/WMZ files support.
  • Writer supports clearing breaks from Word.
  • sparklines support for Calc.

Install LibreOffice 7.4 via PPA:

The office suite offers official Flatpak, Snap, and Deb packages for downloading in its website. However, all of them will install another copy, which causes duplicated shortcut icons in Ubuntu.

For all current Ubuntu releases (Ubuntu 22.04, Ubuntu 20.04, Ubuntu 18.04) and their based systems, the LibreOffice PPA is highly recommended. Since the PPA is maintained by Ubuntu community members, and it will upgrade the system built office packages instead of installing another ones.

1. Add the PPA

Firstly, press Ctrl+Alt+T on keyboard to open terminal. When it opens, run the command below to add the PPA:

sudo add-apt-repository ppa:libreoffice/ppa

Type user password (no asterisk feedback) when it asks and hit Enter to continue.

2. Upgrade LibreOffice

After adding the PPA, search for and launch “Software Updater” from Activities overview. Or, open ‘Update Manager’ (and refresh) depends on your system.

There you should see LibreOffice packages available to update. Just click install and wait until done.

For choice, you may run the command below in terminal to install or update to Libreoffice 7.4:

sudo apt update && sudo apt install libreoffice

How to Restore:

For any issue, you may restore the packages to stock version in system repository. To do so, press Ctrl+Alt+T on keyboard to open terminal, and run command:

sudo apt install ppa-purge && sudo ppa-purge ppa:libreoffice/ppa

This command will first install ppa-purge tool, and use it to purge the PPA which also downgrade all installed packages from that repository.

Looking for a color picker tool for Linux? Try Eyedropper, a new GTK4 application that looks native in modern GNOME desktop.

It’s a free and open-source tool written in Rust programming language. Which, provides an easy to use interface to pick a color and display in HEX, RGB, HSV, HSL, CMYK, XYZ and CIE-Lab formats, as well as handy “Copy to clipboard” icons to quickly copy the values.

User can either use the header-bar picker icon, or click on color bar to open the template for choosing colors. And, edit color by changing the HEX value.

The preferences dialog has options to toggle which color values to display. By setting “Alpha-Value-Position”, it can enable the alpha channel (opacity of a color). However, it’s only available by editing the HEX value so far.

Depends on Alpha-Value-Position option you set, either the first 2 or last 2 values in HEX code applies the color opacity. Though, the alpha channel so far does not work for other color formats!

How to install Eyedropper

The app is available to install in most Linux via universal Flatpak package.

1. First, follow the setup guide to enable Flatpak support. Ubuntu 20.04 | 22.04 can simply press Ctrl+Alt+T to open terminal and run command to enable it:

sudo apt install flatpak

2. Then, go to the Github releases page. Click expand “Assets” section of the latest release and select download the .flatpak package.

Finally, install the package via command:

cd ~/Downloads && flatpak install com.github.finefindus.eyedropper.flatpak

The app is also available in Flathub repository, so you can also run the command below in terminal to install the package:

flatpak install https://dl.flathub.org/repo/appstream/com.github.finefindus.eyedropper.flatpakref

After installation, search for and open it from ‘Activities’ overview just like native applications.

Uninstall Eyedropper

To remove the tool, open a terminal window and run command:

flatpak uninstall --delete-data com.github.finefindus.eyedropper

Also clean up useless run-time libraries (if any) via flatpak uninstall --unused.

KeePass2 password manager released version 2.52 a day ago. Here’s how to install it in Ubuntu 22.04, Ubuntu 20.04, & Ubuntu 18.04 via PPA.

The new release now allows importing 1Password 8.7 1PUX, and Key Folder 1.22 XML files, as well as groups and expiry dates when importing Sticky Password XML.

There are also other password manager files compatibility, such as support for the new encoding of double quotes when importing Steganos Password Manager CSV, and automatically convert time-based one-time password generator settings on Bitwarden JSON import.

KeePass2 2.52 also has some UI improvements, including ‘Copy Initial Password’ option in the tool menu of entry dialog; ‘Alt. item background color’ option that combines the previous ‘Use alternating item background colors’ and ‘Custom alt. item color’.

It now checks the ‘KeePass.exe.config’ file and shows a warning message when finding a problem. Which, causes the following pop-up on every start in my case. Though, it seems working without any issue.

I’m not user of KeePass, and don’t know what’s wrong with the default config file build from source tarball. If you know how to correct it, please leave comment below so I can fix it in the PPA package.

See more about KeePass 2.52 via the official release note.

UPDATE for the “/usr/lib/keepass2/KeePass.exe.config”:

Thanks to Ivan K and gilles, you may manually correct the version number to workaround the issue:

1. Open terminal (Ctrl+Alt+T) and run command to get the version number:

monodis --assembly /usr/lib/keepass2/KeePass.exe

2. Next, edit the config file via command:

sudo gedit /usr/lib/keepass2/KeePass.exe.config

Finally, change the “NewVersion” number to match the one you got in last command.

Install KeePass2 2.52 via PPA:

Though there are good native password managers such as KeePassXC for Linux, you can use KeePass2 for your choice. And, I uploaded the package into this unofficial PPA for easy installation.

1. First, press Ctrl+Alt+T on keyboard to open terminal. Then run the command below to add the PPA:

sudo add-apt-repository ppa:ubuntuhandbook1/keepass2

2. For old Ubuntu 18.04 & Linux Mint, you need to manually refresh package cache though it’s done automatically in Ubuntu 20.04+:

sudo apt update

3. Finally, either run the apt command below to install the package:

sudo apt install keepass2

Or use Software Updater (Update Manager) to update the package if an old version was installed on your system.

Uninstall KeePass2:

To remove the software package, also open terminal (Ctrl+Alt+T) and run command:

sudo apt remove --autoremove keepass2

And, remove the PPA, either by going to “Software & Updates -> Other Software” and remove the source line, or run the command below in terminal:

sudo add-apt-repository --remove ppa:ubuntuhandbook1/keepass2

Running Ubuntu 22.04 with the default Wayland session? You can switch your web browser’s backend to get even faster and smoother experience.

Firefox, Google Chrome and Chromium based web browsers do have native Wayland support, but they still use X11 as backend in Ubuntu desktop.

Since Ubuntu 22.04 by default logs into Wayland session, user can also change the web browser’s backend to get faster and smoother browsing experiences. I didn’t run any benchmark. But after switching to Wayland, my browser now has:

  • obviously better touchpad scrolling
  • 2-finger spread/pinch gestures to zoom in/out

Enable Wayland for Chrome/Chromium

For Google Chrome, Chromium and their based web browsers, e.g., Edge, Vivaldi, just type chrome://flags/ in address bar and hit Enter.

When the page opens, search for Preferred Ozone platform and use the dropdown menu to set it value to “Wayland“. Finally, click “Relaunch” button to apply change by restarting the web browser.

Chrome enable wayland

Native Wayland for Firefox

Since Firefox 121.0, it uses Wayland by default if available, but NOT for pre-installed Firefox Snap package in my case.

To enable it for Snap package, either open terminal and start Firefox with Wayland from terminal:

env MOZ_ENABLE_WAYLAND=1 /snap/bin/firefox

Or, open “Files” (Nautilus file browser), press Ctrl+H then find out and edit the .profile file.

When the file opens in text editor, add the line below in the end and save it.

export MOZ_ENABLE_WAYLAND=1

To apply the change, you need to log out and back in.