This simple tutorial shows how to install the latest PyCharm IDE (2025.3 updated) in Ubuntu 22.04, and Ubuntu 24.04.
The PyCharm Python IDE released version 2025.3 on December 9. The new release features:
- Unify Community and Professional Editions with single product.
- New default theme, and new welcome screen.
- Claude AI support.
- Use uv as default environment manager if available.
- New LSP tools, e.g., ty, Pyright, and Pyrefly.
- New dedicated Python Process Output tool window
- Support the asdf runtime version manager.
- Support for PEP 765 (Python 3.14+).
The new release is available to install in Ubuntu via different ways. They include Snap, Flatpak, official tarball, and Ubuntu PPA. Choose either one that you prefer.
Method 1: Install PyCharm via Snap package
JetBrains provides official Linux package through both Snap and tarball. Which is super easy to install for Ubuntu users.
The Snap package Features:
- Official package by JetBrains.
- Run in sandbox environment.
- amd64 (x86_64) and arm64 (aarch64) platforms support.
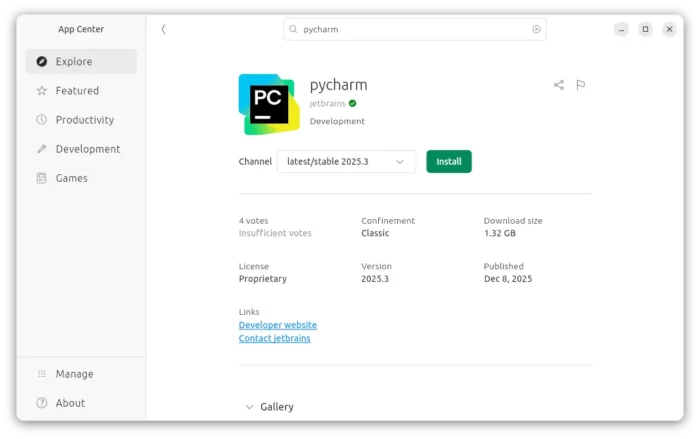
For all current Ubuntu releases, just launch Ubuntu Software (or App Center), then search and install pycharm.
Or, run command below in a terminal window (Ctrl+Alt+T) instead to install the package:
snap install pycharm --classic
The snap package installs updates automatically. To manually check (and install if any) updates, use command:
snap refresh pycharm
Method 2: Install PyCharm via Flatpak (Unofficial)
Another easy way to install PyCharm is using Flatpak package. Which works in most Linux, though also run in sandbox environment.
The Flatpak package Features:
- Community maintained.
- Run in sandbox environment.
- amd64 (x86_64) and arm64 (aarch64) support.
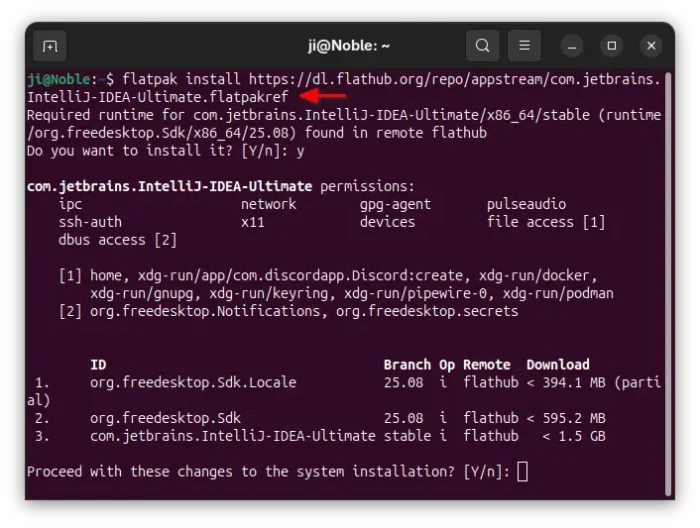
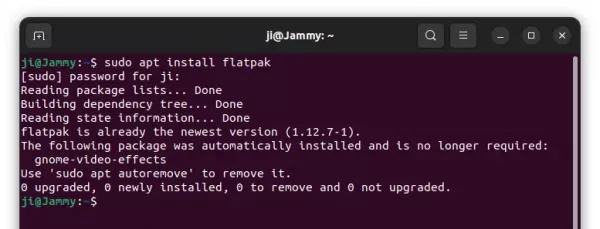
Ubuntu users just need to press Ctrl+Alt+T on keyboard to open terminal. Then run the 2 commands below one by one to install the package.
- First, run command to install the Flatpak daemon:
sudo apt install flatpak
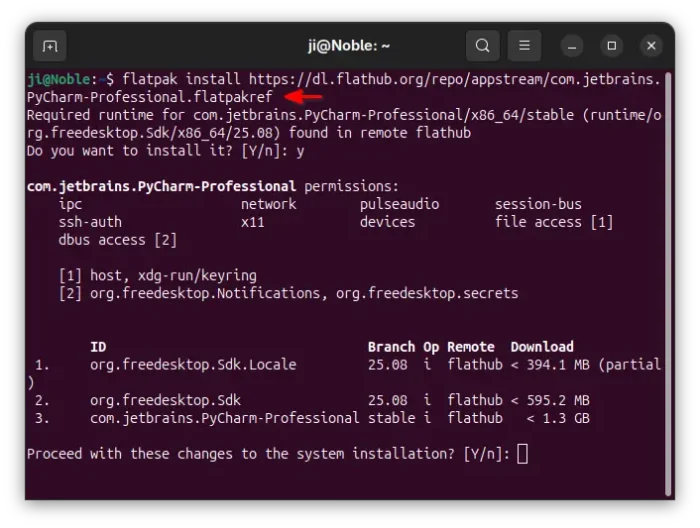
- Then, run the command below to install PyCharm as Flatpak:
flatpak install https://dl.flathub.org/repo/appstream/com.jetbrains.PyCharm-Professional.flatpakref
The Community version discontinued, instead it’s merged into an unified edition.
If you’re first time installing app as Flatpak, log out and back in for the app icon visible in system app launcher.
To update the Flatpak package, use command:
flatpak update com.jetbrains.PyCharm-Professional
Method 3: Install PyCharm via Official Tarball
If you don’t like or have issue for the IDE running in sandbox, then use the official Linux tarball instead!
The Linux Tarball Features:
- Official package by JetBrains.
- Portable, no installation required.
- amd64 (x86_64) and arm64 support.
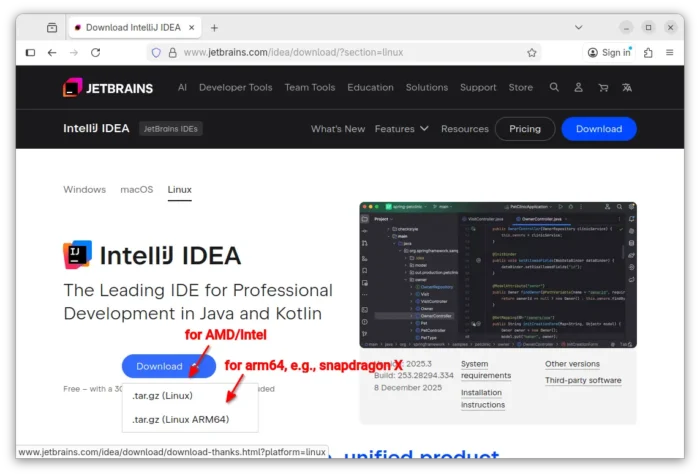
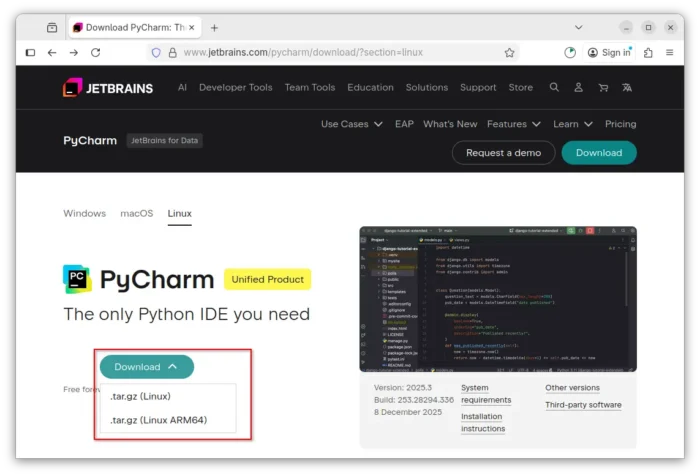
1. First, go to the official download page via the link below:
Then select download the “.tar.gz (Linux)” for AMD/Intel, or “.tar.gz (Linux ARM64) for arm64 processors, e.g., snapdragon X series.
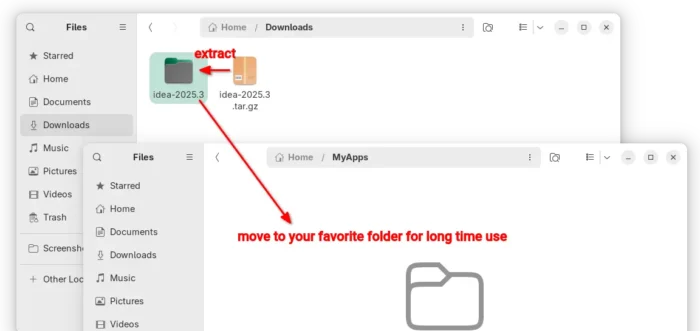
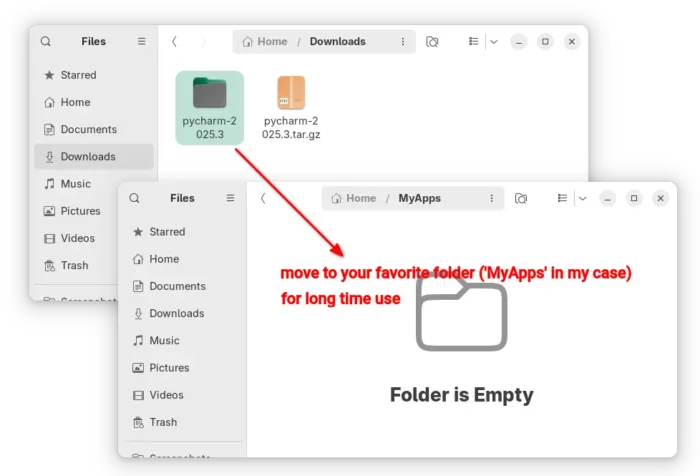
2. After downloaded the tarball, just extract and move the source folder to any location that you want for long time use.
In my case, I created a “MyApps” folder in user home, and put PyCharm source folder into it as sub-directory.
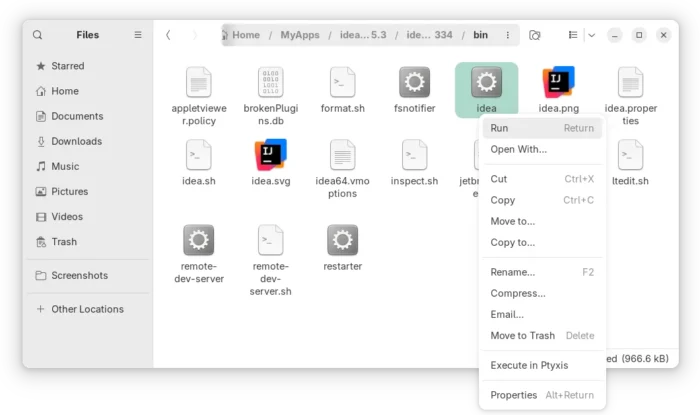
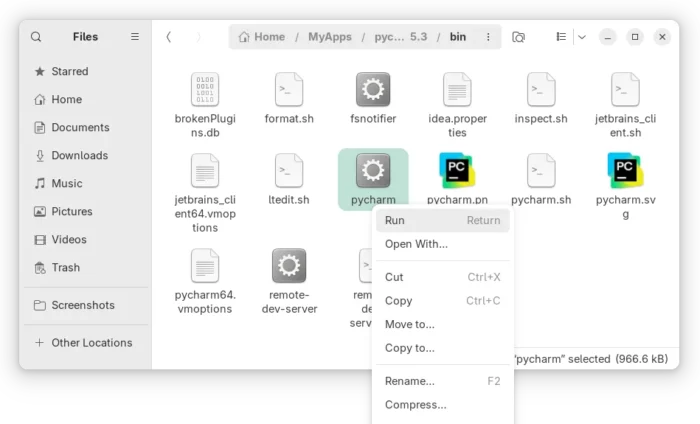
3. Without installation, you can now go to the ‘bin‘ sub-folder, right-click on “pycharm” and select “Run” to launch the Python IDE.
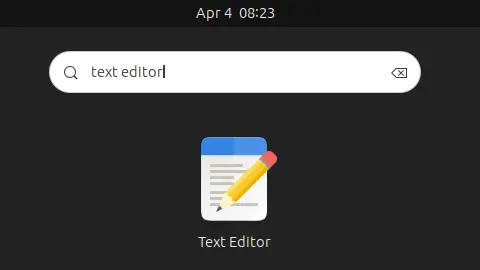
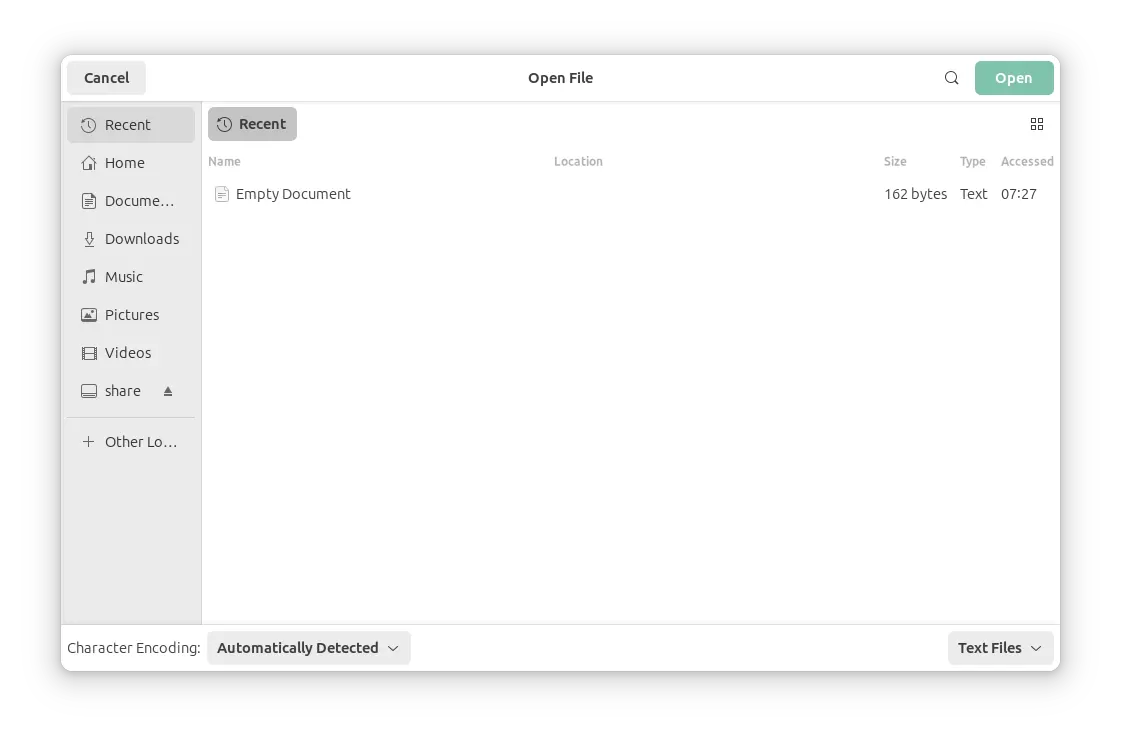
4. Create app shortcut, so to launch from start/application menu.
First, launch text editor and create an empty document. Then, paste following lines.
[Desktop Entry]
Name=PyCharm 25.3
Exec=/path/to/pycharm-executable-file
Icon=/path/to/pycharm-icon-file
Terminal=false
Type=Application
Categories=Application;Development;
Keywords=ide;python;charm;
StartupWMClass=jetbrains-pycharm
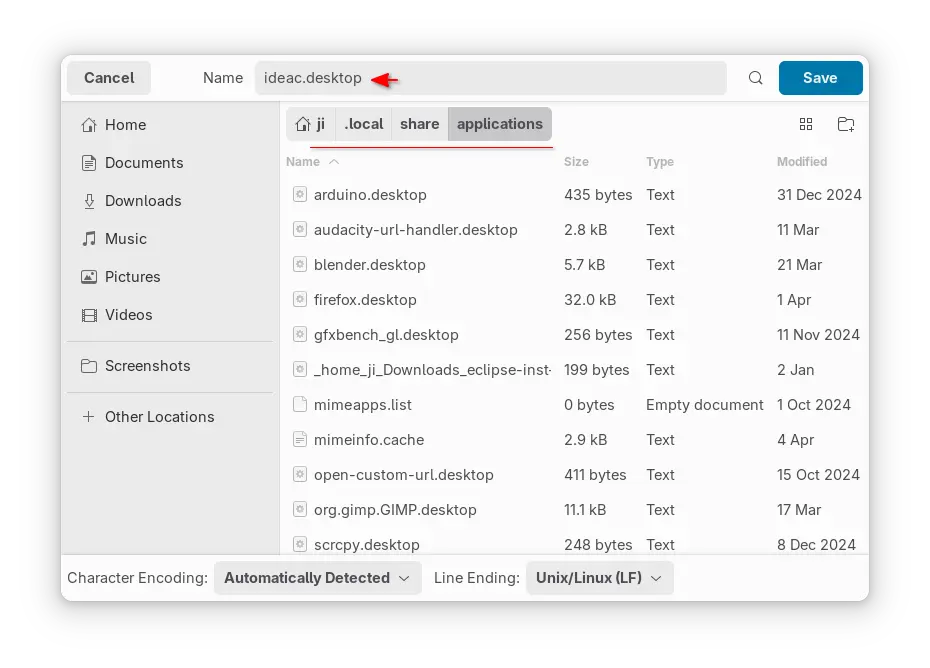
Here, replace the values of ‘Exec‘ and ‘Icon‘ according where you put the source folder. And, change ‘Name’ value for Professional edition.
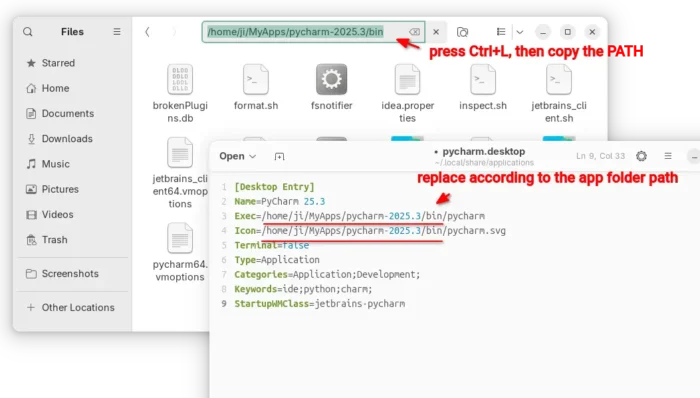
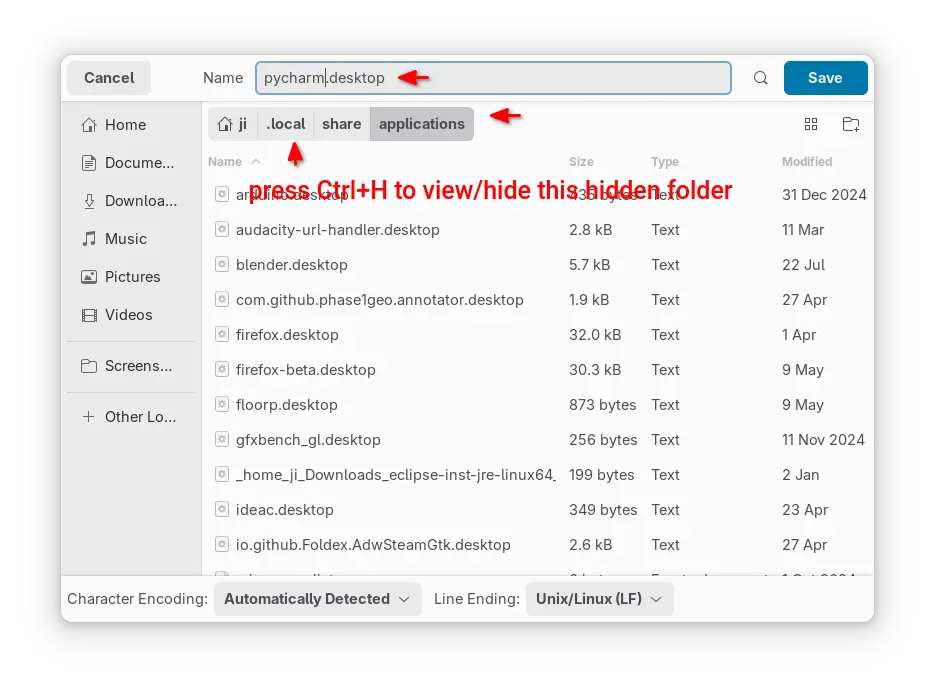
Finally, save the document as (Ctrl+Shift+S) ‘pycharm.desktop‘ into .local/share/applications directory. Here, .local is hidden by default, press Ctrl+H to view/hide in file/folder chooser dialog.

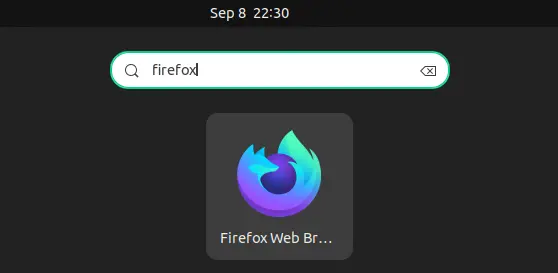
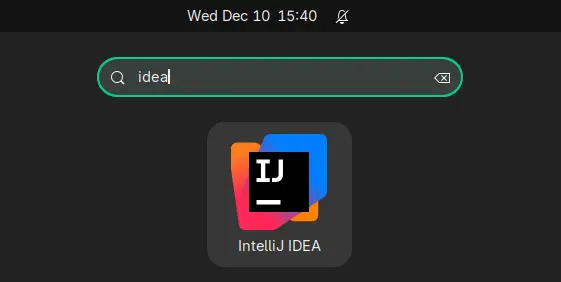
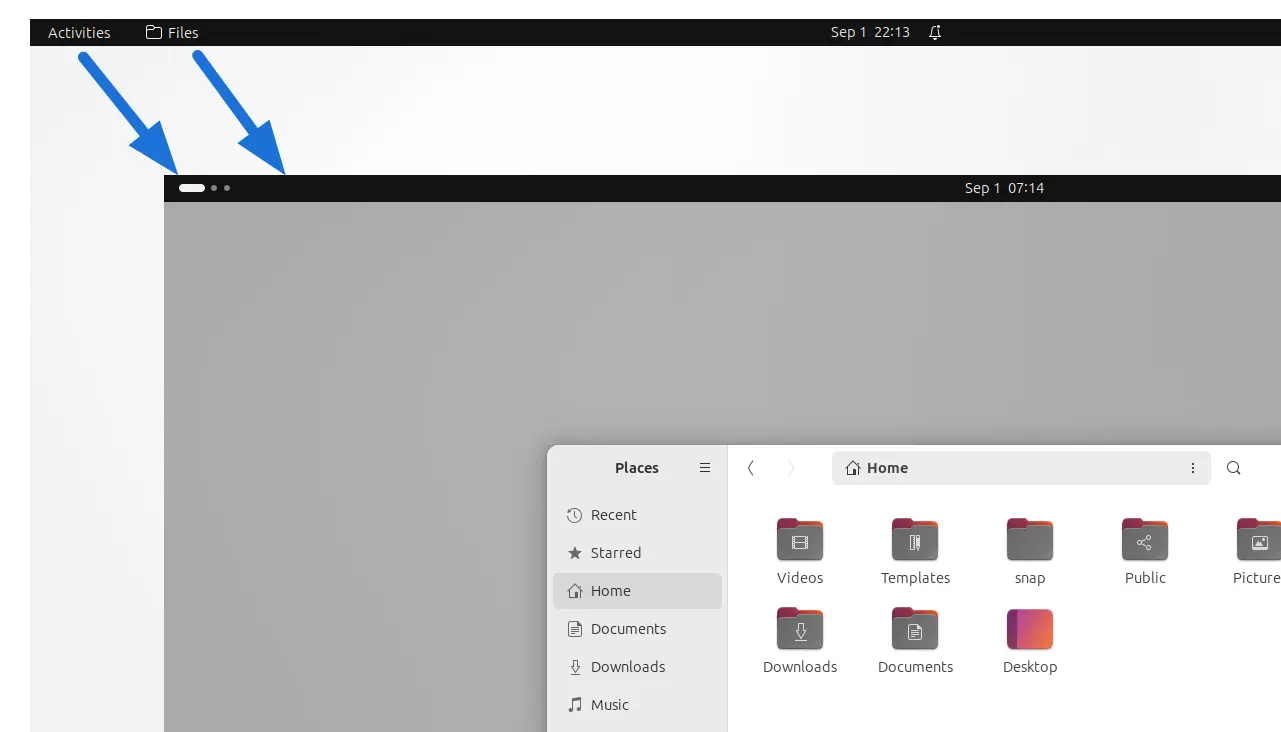
If everything’s done correctly, you can then search for and launch PyCharm from app launcher or the overview screen depends on your DE a few moments later:

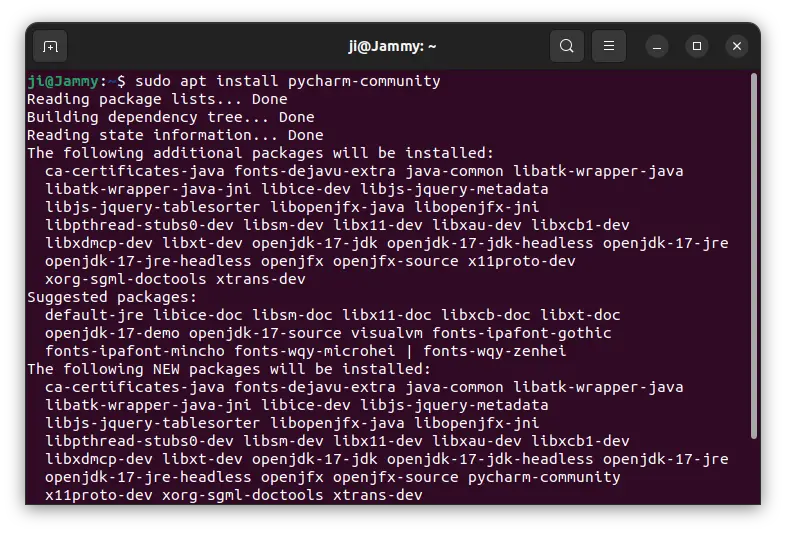
Method 4: Install PyCharm .deb package via unofficial Ubuntu PPA
Another choice to avoid Snap and Flatpak, is using an Ubuntu PPA. However, there are only third-party maintained PPAs.
The PPA package is still at v2025.2.5 at the moment:
- Third-party maintained.
- PyCharm Community only so far.
- amd64 (x86_64) only so far.
- supports Ubuntu 24.04, Ubuntu 25.04 only so far.
As far as I know, the xtradeb PPA is keeping updated with the most recent packages including PyCharm Community.
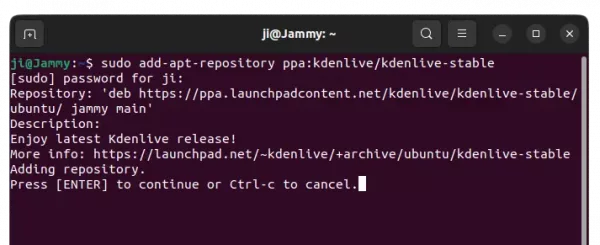
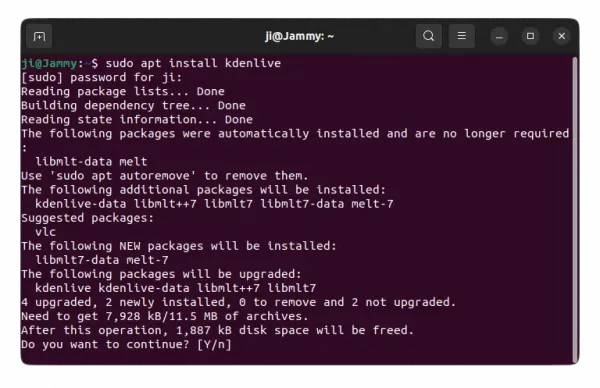
To install PyCharm from the PPA, press Ctrl+Alt+T on keyboard to open terminal. And, run commands below one by one:
NOTE: Linux Mint user needs to run sudo apt update after adding PPA to manually refresh system package cache.
Uninstall PyCharm
For the Snap package, just remove it from Ubuntu Software or App Center, or use command:
snap remove --purge pycharm
For the Flatpak package, open terminal (Ctrl+Alt+T) and run command to remove it:
flatpak uninstall --delete-data com.jetbrains.PyCharm-Professional
And, run flatpak uninstall --unused to remove useless run-time libraries.
For PyCharm installed via the official Tarball, just remove the source folder as well as .desktop file under .local/share/applications directory.
For the Ubuntu PPA package, open terminal and run command to remove it:
sudo apt remove --autoremove pycharm-community
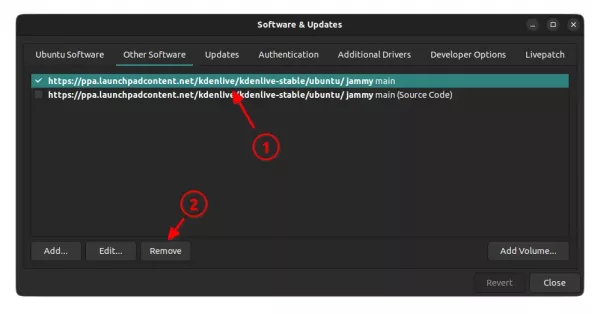
Also remove the Ubuntu PPA by running command:
sudo add-apt-repository --remove ppa:xtradeb/apps