Archives For Howtos

Kxstitch cross stitch

KXStitch 2.1.0, free and open-source cross stitch pattern software, was released a day ago. Here’s how to install it in Ubuntu via PPA.

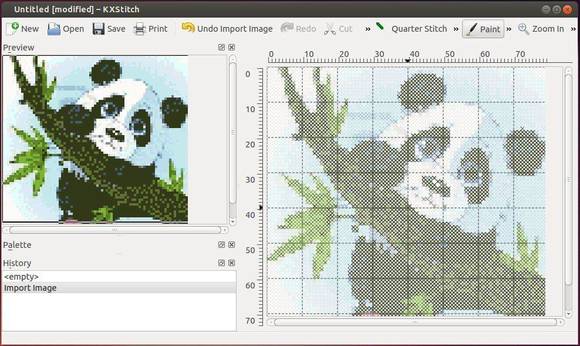
KXStitch is a cross stitch pattern editor by KDE. The software features:

  • Importing images
  • Multiple floss palettes
  • Multiple stitch types
  • Pattern libraries
  • Reads PCStitch files
  • Flexible printing options

The latest KXStitch 2.1.0 was released silently. No announcement, no changelog. If you want to know what changed, look over the project commits on github page.

KX Stitch PPA for Ubuntu

How to Install KXStitch 2.1.0 in Ubuntu:

For Ubuntu 16.04, Ubuntu 17.10, Ubuntu 18.04 users, it can be easily installed via the unofficial PPA.

1. Open terminal either via Ctrl+Alt+T or by searching for ‘terminal’ from app launcher. When it opens, run command:

sudo add-apt-repository ppa:ubuntuhandbook1/kxstitch

Input your password (no visual feedback while typing) when it prompts and hit Enter to add the PPA.

2. Then check updates and install the software either via Synaptic Package Manager or by running commands:

sudo apt-get update

sudo apt-get install kxstitch

Uninstall:

To remove KXStitch cross stitch software, either use Synaptic or run command in terminal:

sudo apt-get remove --autoremove kxstitch

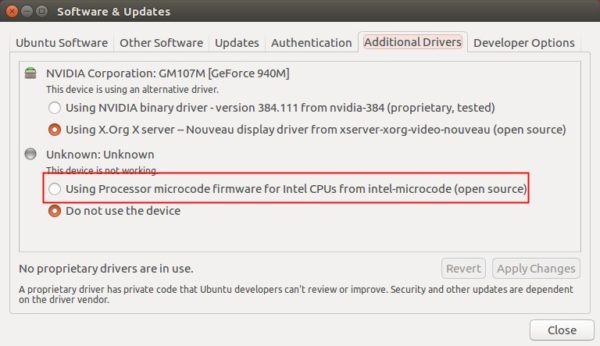
The PPA can be removed via “Software & Updates” utility under “Other Software” tab.

uGet download manager

uGet download manager has reached the new stable 2.2 release series. The new release features ability to download from Youtube.

“uGet respects the YouTube Policies so depending on the individual settings of a video it may not be possible to download video from YouTube. The vast majority of videos will be available for use in uGet. The reason this was done instead of using something youtube-dl is because this method allows uGet for Android to also download YouTube videos as well as not have to worry about the ever changing APIs of YouTube that consistently break alternative methods of downloading.” uGet team announced.

The “uGet Chrome Wrapper” browser extension is compatible with Firefox, Chromium, Google Chrome, Opera, and Vivaldi. It will be renamed in the near future to better reflect the functionality.

uGet 2.2.0 features:

  • Support for downloading from YouTube
  • Support for downloading from MEGA
  • Batch Downloading up to 3 Wildcard Ranges
  • Better support for Wayland
  • New Browser Extension: uGet Chrome Wrapper

How to Install uGet 2.2.0 in Ubuntu:

The new release has been made into uGet Stable PPA, available for Ubuntu 14.04, Ubuntu 16.04, Ubuntu 17.10, and Ubuntu 18.04.

1. Open terminal via Ctrl+Alt+T or from app launcher, and then run command to add the PPA:

sudo add-apt-repository ppa:plushuang-tw/uget-stable

Input your password (no visual feedback while typing) when it prompts and hit Enter.

uGet Stable PPA

2. Then upgrade the download manager from an existing release via Software Updater:

or you can run following 2 commands to check updates and install / upgrade uGet:

sudo apt-get update 

sudo apt-get install uget

How to Remove:

Run following command in terminal will remove the PPA and also downgrade to the stock version of uGet in your Ubuntu system:

sudo apt-get install ppa-purge && sudo ppa-purge ppa:plushuang-tw/uget-stable

If you want to remove uGet download manager, simply search for and remove it via “Ubuntu Software” utility.

Heard about Meltdown and Spectre, two severe hardware bugs that affect billions of devices?

Besides updating the Ubuntu Kernel via “Software Updater”, Intel has released an update processor microcode patch for Linux based operating systems to address the security vulnerabilities.

The patch has been made into Ubuntu repository. So FOLLOWING STEPS IS NOT REQUIRED any more!

Just update your system via Software Updater. Then launch Software & Updates -> Additional Drivers, and mark the line “Using Processor microcode firmware for Intel CPUs from intel-microcode” for installation if it’s not used.

1. Download the Intel Processor patch from the link below:

Intel Processor Micorcode Data File (.tgz)

Extract the file and you’ll get a new file folder with microcode.dat and intel-ucode directory.

2. To install the patch, open terminal via Ctrl+Alt+T or by searching for “terminal” from application launcher. When it opens, run command:

sudo cp -r ~/Downloads/microcode-*/intel-ucode /lib/firmware/

Then run:

sudo -i && echo 1 > /sys/devices/system/cpu/microcode/reload

Finally you need to reboot your machine to apply changes.

FileZilla Client 3.30.0 Released, How to Install

Last updated: January 9, 2018

FileZilla FTP Client

The FileZilla ftp client reached the 3.30.0 release a day ago with two new features and a few bug-fixes. Here’s how to install it in Ubuntu 16.04, Ubuntu 17.04, Ubuntu 17.10.

Changes in Filezilla 3.30.0 include:

  • In the search dialog local files can now be deleted or opened
  • The root node in the remote directory tree is now expanded by default
  • Fix uploading from search dialog
  • Fix formatting of filename in rename dialog
  • Fix Windows installer crash if an update installation is started with the updated version having been installed
  • Add additional logging if autoupdate mechanism fails

How to Install Filezilla 3.30.0 in Ubuntu:

So far the only to install the latest Filezilla client in Ubuntu is using the Flatpak package. And following steps will tell you how:

1. Open terminal via Ctrl+Alt+T or by searching for ‘terminal’ from app launcher. When it opens, do:

  • Run command to add the flatpak PPA:
    sudo add-apt-repository ppa:alexlarsson/flatpak

    Input your password (no visual feedback) when it prompts and hit Enter to continue.

  • Then run commands one by one to get the latest flatpak daemon:
    sudo apt-get update
    
    sudo apt-get install flatpak

2. After installed Flatpak, run following single command to install FileZilla client along with required Gnome platform.

flatpak install --from https://flathub.org/repo/appstream/org.filezillaproject.Filezilla.flatpakref

Uninstall:

To remove Filezilla installed via flatpak, run command:

flatpak uninstall org.filezillaproject.Filezilla

To remove flatpak, run command:

sudo apt-get remove --autoremove flatpak

To remove the PPA, open “Software & Updates” utility and navigate to “Other Software” tab.

This is quick tutorial shows you how to prevent Ubuntu desktop from being automatic turned off (or locked up) while you’re watching videos.

Although the “System Settings” utility offers “Power” page to change screen dimming, blank screen inactive time, etc, it will be convenient to have a panel indicator applet to toggle the settings.

And Caffeine shows an applet in system tray area allows to temporarily prevent the activation of both the screensaver and the “sleep” powersaving mode.

To install Caffeine in Unity or Other Desktops:

For non-Gnome users in Ubuntu 16.04, Ubuntu 17.10, and higher, just search for and install “caffeine” in Ubuntu Software:

Once installed, you can launch it from app launcher or let it launch automatically in next login.

To install Caffeine extension in Gnome Shell:

For Gnome Desktop, there’s an Caffeine extension available for install.

You can follow this tutorial to install the extension. Since Ubuntu 17.10 artful you can search for and install the extension via Ubuntu Software:

skip caffeine for xscreensaver which it not updated for a lone time.

Once installed, you should see the applet in system tray. And you can manage gnome extensions via “Gnome Tweaks” utility (Install it via Ubuntu Software if you don’t have it).

Sayonara, a Qt music player aims to be intuitive, easy usablility, and organizes even big music collections, reached the 1.0 release a few days ago.

Changes in Sayonara 1.0 include:

  • Choose covers between Google, Discogs and Last.fm servers.
  • Cover view: Reload covers, zoom and sorting
  • Multiple library support for Directories, Library.
  • Move/Copy/Rename operations and show Song info in Directories.
  • Removed date filter support
  • Add “Clear selection” button
  • Ability to choose system icons
  • Fast preference access
  • Lyric server updates
  • Removed MTP device support
  • Moved load/save to playlist tabs instead of plugin
  • Added proxy support
  • Set custom paths for stream recorder.
  • Added preferences options for Streams/Podcast

How to Install Sayonara 1.0 in Ubuntu:

To install the latest Sayonara 0.9.1 in Ubuntu 16.04, Ubuntu 17.04, Ubuntu 17.10, and their derivatives, do:

1. Open terminal (Ctrl+Alt+T) and add the official Sayonara PPA:

sudo add-apt-repository ppa:lucioc/sayonara

sayonara-player-ppa

2. Update and install the player via commands:

sudo apt update

sudo apt install sayonara

For those who don’t want to add PPA, grab .deb package from the PPA file archive.

3. (Optional) If you dislike the player, simply remove it via command:

sudo apt remove sayonara && sudo apt autoremove

And the PPA can be removed via Software & Updates utility under Other Software tab.

Avidemux video editor

The latest packages for Avidemux video editor 2.7.0 is available in GetDeb.net. However, the GetDeb repository is not updated for a few months, and there’s no packages for Ubuntu 17.10.

For those who don’t prefer the official Appimage (non-install) binary, I’ve uploaded Avidemux 2.7.0 packages into launchpad PPA (unofficial) to make it available for Ubuntu 17.10, Ubuntu 18.04. It also contains packages for Ubuntu 16.04, and Ubuntu 17.04.

Avidemux 2.7.0

UPDATE 201805: Rebuilt Ubuntu 18.04 packages due to updated system library. The plugin package now can be installed without dependencies issue.

1. To add the PPA, open terminal either via Ctrl+Alt+T or by searching for ‘terminal’ from app launcher. When it opens, run command:

sudo add-apt-repository ppa:ubuntuhandbook1/avidemux

Input your password (no visual feedback while typing) when it prompts and hit Enter.

avidemux ppa

2. Then install avidemux2.7-qt5 package either via Synaptic Package Manager or by running commands:

sudo apt-get update

sudo apt-get install avidemux2.7-qt5 avidemux2.7-plugins-qt5

It’s avidemux 2.7 though it contains ‘2.6’ in its name.

Uninstall:

For any reason remove the software via command:

sudo apt-get remove --autoremove avidemux2.7-qt5

To remove the PPA, launch ‘Software & Updates’ utility and navigate to ‘Other Software’ tab.

Stellarium, a free planetarium software, reached the 0.17.0 release with many new features, bug-fixes, and other changes.

The major changes in Stellarium 0.17.0:

  • Added support for nomenclature of planetary surface (SOCIS 2017 project)
  • Added improvements for AstroCalc tool
  • Added improvements for Oculars plugin
  • Added improvements for Exoplanets plugin
  • Added INDI support for Telescope Control plugin
  • Updated code and data

For the full changes, see the release note.

How to Install Stellarium 0.17.0 in Ubuntu:

The official Stellarium PPA has built the packages for Ubuntu 16.04, Ubuntu 17.04, Ubuntu 17.10, and Ubuntu 18.04.

1. Open terminal either via Ctrl+Alt+T or from app launcher. When it opens, run command to add the PPA:

sudo add-apt-repository ppa:stellarium/stellarium-releases

Input your password (no visual feedback while typing) when it prompts and hit Enter.

2. Then upgrade Stellarium from an existing release with Software Updater utility:

Or run following commands to install the software for the first time:

sudo apt-get update

sudo apt-get install stellarium

Uninstall:

To remove the software, either use your system package manager or run command:

sudo apt-get remove --autoremove stellarium

And remove the PPA via “Software & Updates” utility under Other Software tab.

The community has made Sublime Text 3 into the SNAP package. So far, it’s available for testing in candidate channel.

A snap is an universal Linux application comes with all its dependencies bundled. It runs in sandbox and is isolated from other system software.

If you just want to install latest stable Sublime Text 3 in Ubuntu. There’s an official apt repository and here’s how-to tips.

Install Sublime Text 3 via Snap:

Once the snap is published into stable channel, you can easily install or remove it in Ubuntu Software

Open terminal either via Ctrl+Alt+T or by searching for ‘terminal’ from application launcher. When it opens, run command:

snap install sublime-text-3 --classic

The command works in Ubuntu 16.04 and higher. And the --candidate flag is not required anymore since the snap is now in stable.

The snap package co-exists with traditional packages, you’ll have two launcher icons:

To make sure you’re running the snap app, you can launch it from the terminal command:

/snap/bin/sublime-text-3

Uninstall:

To remove the snap app for Sublime Text 3, run command:

snap remove sublime-text-3

PyCharm IDE

Jetbrains announced the release of its Python IDE, PyCharm 2017.3.2, a day ago. Here’s how you can install it in Ubuntu 16.04 and higher.

Changes in PyCharm 2017.3.2 include:

  • Type annotation ahead of time. You can’t put an inline type annotation when defining a variable in a for or a with statement, so you need to provide the annotation in a separate place, read more on the ticket. This is now supported in PyCharm.
  • ‘Show command line afterwards’ now works correctly for remote interpreters. And further fixes to this feature
  • Various SQL syntax fixes for PostgreSQL and Oracle (PyCharm Professional Edition bundles all DataGrip features)
  • React code completion improvements (PyCharm Professional Edition bundles all WebStorm features)
  • And more, see the release notes for details

How to Install PyCharm 2017.3.2 in Ubuntu:

You can easily run the new release in Ubuntu either via:

method 1: official Linux binaries. NON-INSTALL version, just extract and run executable file to launch the IDE:

Download PyCharm Linux binary

method 2: or install the Snap package. App run in sandbox. Support for Ubuntu 16.04 and higher:

Simply open terminal via Ctrl+Alt+T or by searching for ‘terminal’ from app launcher. When it opens, run command:

snap install pycharm-community --classic

For professional edition, run following command instead:

snap install pycharm-professional --classic

Once installed, launch the IDE from your application launcher and enjoy!

Uninstall:

To remove the snap packages, either use Ubuntu Software or run command in terminal:

sudo snap remove pycharm-community pycharm-professional

For those who prefer traditional Ubuntu PPA, keep an eye on the launchpad PPA.