Archives For Howtos

Spotify light theme

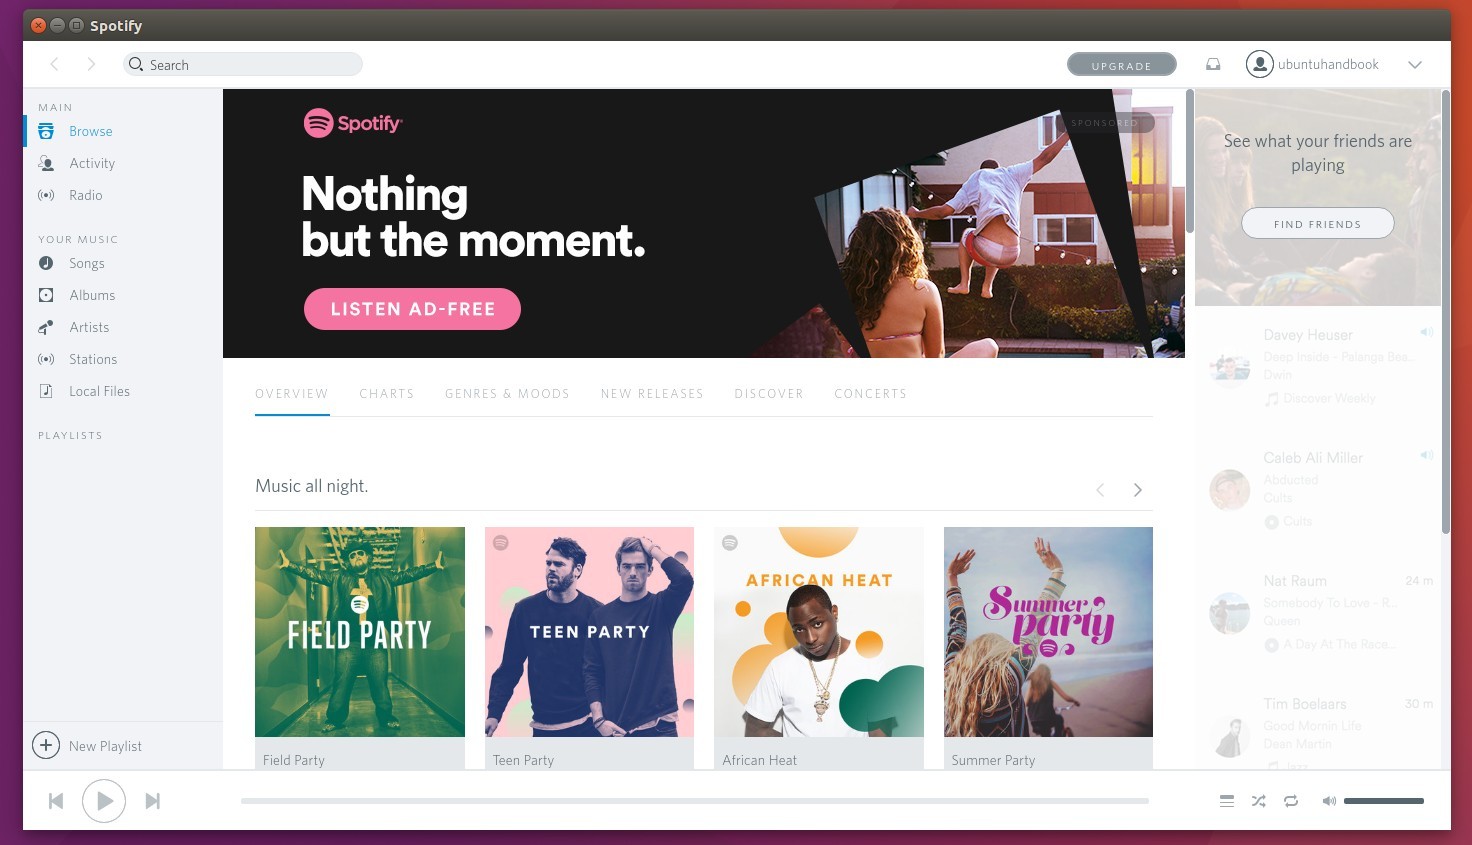
For those who prefer light skins in desktop applications, ‘spotio‘ is open-source project offers a proof-of-concept Rdio-inspired skin for Spotify desktop app.

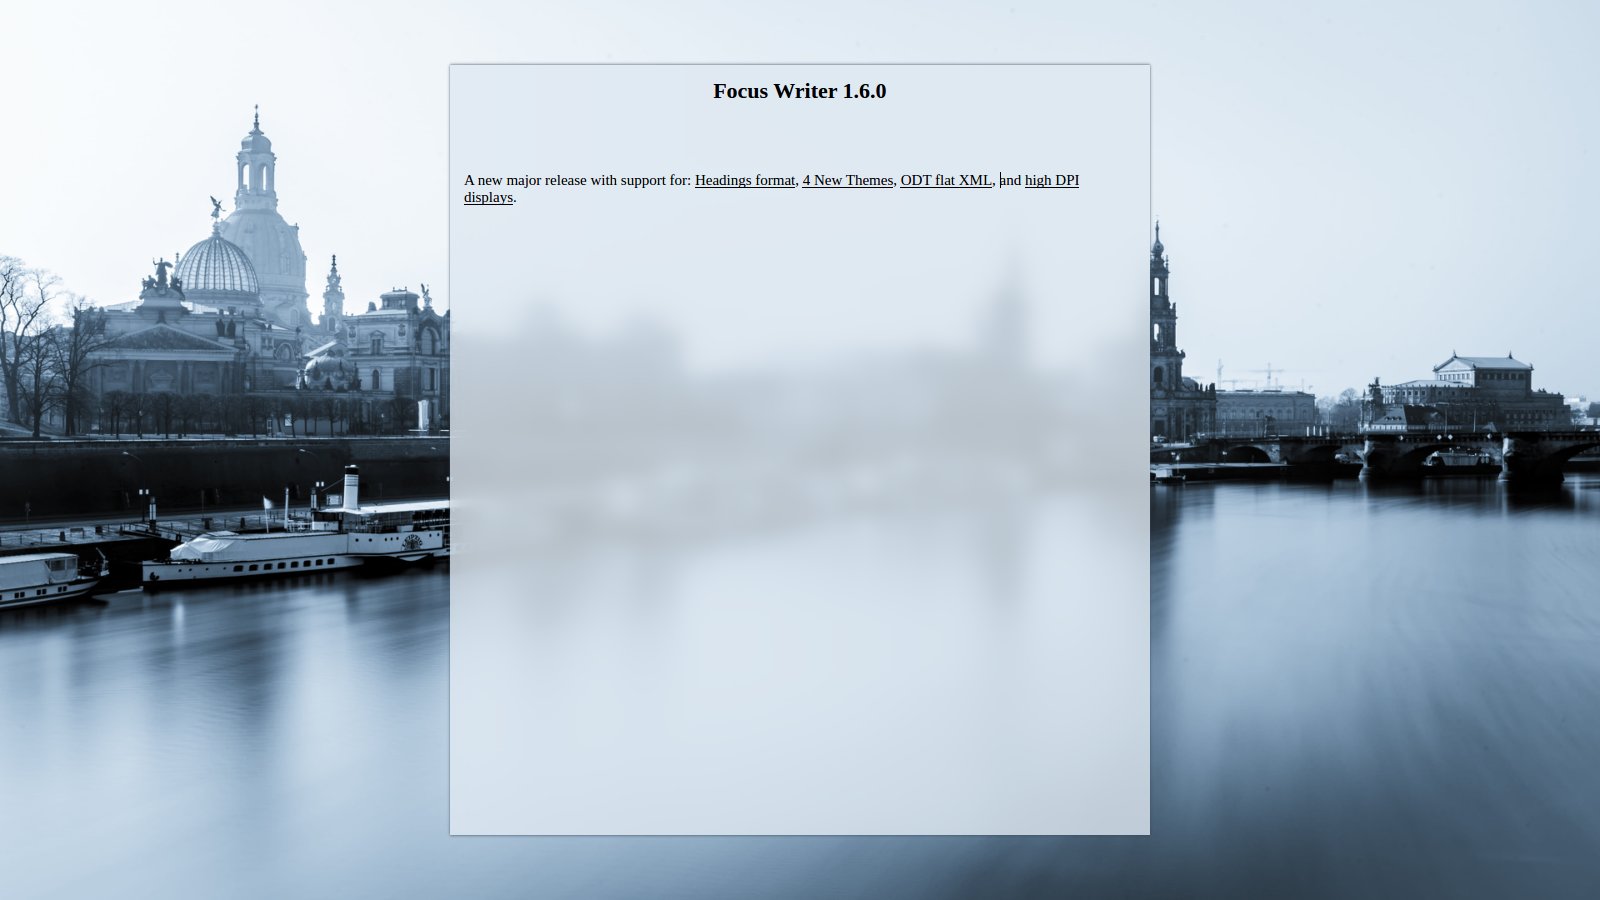
The project provides a setup script that automatically downloads the latest Spotify client binary from its official repository, extracts it, and rebuilds the package with Spotio theme so your Spotify app looks like:

spotify light theme

To get started:

1. Download Spotio from the link below:

Download Spotio master (.zip)

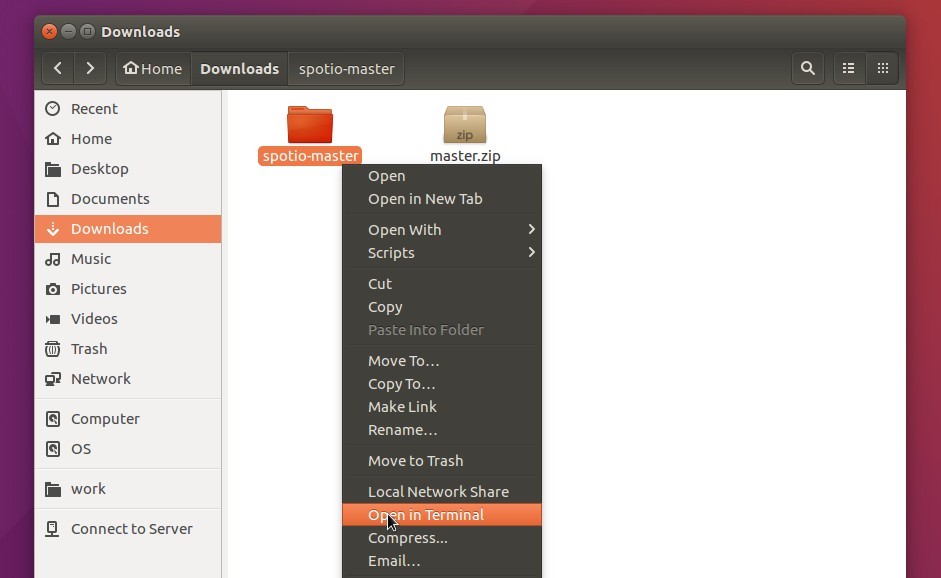
2. Extract the package, and go to the result directory in terminal by:

  • either right-clicking on the folder and choosing “Open in terminal”.
  • or launching terminal (Ctrl+Alt+T) and running cd ~/Downloads/spotio* command

spotio folder

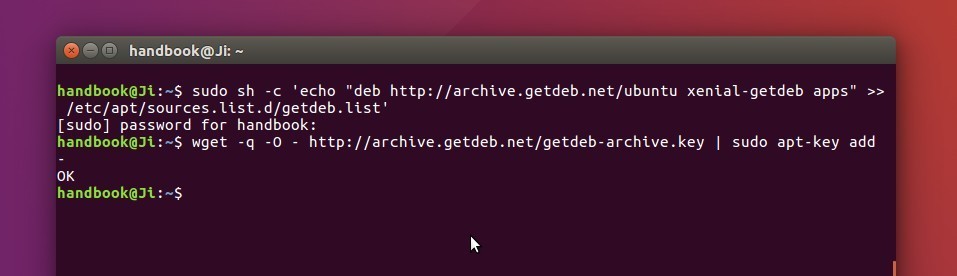
3. Now run the setup script to download Spotify for its official repository and repack it with spotio theme:

./setup-linux.sh

run-spotio-setup

4. The new package will be generated in dist/ folder and named spotio.deb, install it when done:

cd dist/ && sudo dpkg -i spotio.deb

install-spotio-package

It will replace previous Spotify version you installed.

Restore Spotify with Dark UI:

So far the easiest way to restore changes is to download and re-install the official package

converseen batch image resizer

Converseen, a free and open-source batch image resizer and converter, has reached the 0.9.5 a few days ago.

Converseen 0.9.5 is the first Qt5 port release written in C++. It works on Windows, Linux, and FreeBSD. With Magick++ image libraries it supports more than 100 image formats.

Features:

  • Convert an unlimited number of images
  • Create thumbnails to any of the most popular formats
  • Carry out a single or a multiple conversion
  • Resize, compress images.
  • Rotate and flip images.

Converseen 0.9.5

How to install Converseen 0.9.5 in Ubuntu 16.04, 14.04

While Ubuntu offers the 0.9.2 release in its main repository, you can install or upgrade Converseen from an third-party PPA.

1. Open terminal (Ctrl+Alt+T) and run command to add PPA:

sudo add-apt-repository ppa:ubuntuhandbook1/apps

converseen ppa

2. To upgrade from a previous release, launch Software Updater and install available updates after checking for updates:

upgrade converseen

Or just run the commands below in terminal to install or upgrade the software:

sudo apt update && sudo apt install converseen

For those who don’t want to add PPA, grab the .deb package from the file archive.

3. (Optional) To remove converseen image processor, run:

sudo apt remove converseen && sudo apt autoremove

And the PPA can be disabled or removed via Software & Updates utility in Other Software tab.

OpenShot Video Editor

OpenShot video editor finally reached the new major 2.1 stable release. Here’s how to install it in Ubuntu 16.04, Ubuntu 14.04 via PPA.

OpenShot 2.1 adds support for displaying audio waveforms on clips, improves property editing, provides a new selection dropdown, supports user-configurable keyboard mapping, Windows 64-bit support, timeline improvements, a new startup tutorial, performance gains for effects, improved transitions, and much more.

The OpenShot Stable PPA has made the 2.1 release packages (Qt5 built) for Ubuntu 16.04, Ubuntu 14.04. To install it, do:

1. Launch terminal (Ctrl+Alt+T) and run command to add PPA:

sudo add-apt-repository ppa:openshot.developers/ppa

openshot-stable-ppa

2. You may have both 1.4.3 and 2.1 releases installed on your system since the new release is built against Qt5 and uses different application icons.

Just run the commands below in terminal to update and install Shotwell 2.1:

sudo apt update

sudo apt install openshot-qt

And finally launch the video editor from Unity Dash and enjoy!

launch OpenShot video editor

OpenShot 2.1

KDE Connect 1.0

KDE Connect has officially reached the first stable 1.0 release after a year of development. And now it’s made into Kubuntu Backports Landing PPA.

KDE Connect is a project that aims to communicate all your devices. For example, with KDE Connect you can receive your phone notifications on your computer, or just use your phone as a remote control for your desktop.

New features in KDEConnect 1.0:

  • Trigger custom commands from your phone
  • Reply to SMS messages from your desktop
  • Receive desktop notifications on your phone
  • TLS encryption

For more details, read the official announcement.

KDE Connect 1.0

How to install KDE Connect 1.0 in Ubuntu 16.04:

Kubuntu Backports Landing PPA is a test repository for packages that will land in KUbuntu Backports PPA.

1. Don’t install it in Unity Desktop, the required Qt 5.6 library will break Unity Web Apps
2. For a stable system, please wait the packages to be landed in KUbuntu Backports PPA.

1. Open terminal and add the PPA

sudo add-apt-repository ppa:kubuntu-ppa/backports-landing

Kubuntu Backports Landing PPA

2. This build uses the old packaging, you need to remove the old kdeconnect-plasma package before installing the new release:

sudo apt remove kdeconnect-plasma

3. Update and install KDEConnect 1.0:

sudo apt update && sudo apt install kdeconnect

And also install the latest KDE Connect in Android device from Google Play.

Undo / Restore the changes:

To downgrade installed packages and libraries from that repository, run command the purge the PPA:

sudo apt install ppa-purge && sudo ppa-purge ppa:kubuntu-ppa/backports-landing

In addition, the maintainer offers a separate PPA with KDEConnect 1.0 packages for Ubuntu 16.10, and Ubuntu 16.04. However, the 16.04 build requires Qt5 core libraries >= 5.6.0.

FocusWriter

FocusWriter, a simple, feature-riched, and distraction-free word processor, has now reached the 1.6.0 release with some great enhancements and fixes.

FocusWriter 1.6.0 adds 4 new background themes, headings (h1 to h6) format, ODT Flat XML files and high DPI displays support.

Other Changes in FocusWriter 1.6.0:

  • Option to always show scrollbar, topbar, bottom bar.
  • Allow removing user-installed dictionaries
  • Add shortcut for typographical apostrophe
  • Switched to QSoundEffect
  • Update dictionaries
  • Bug fixes and translation updates:
    • Daily progress did not reset when run longer than a day
    • Printer margins were too big
    • Was replacing session files with command-line files
    • Did not add new default symbol shortcuts
FocusWriter 1.6.0 with Spy Games theme

FocusWriter 1.6.0 with Spy Games theme (fullscreen mode)

How to install FocusWriter 1.6.0 in Ubuntu:

The official Ubuntu PPA has been updated with Ubuntu 16.04 and Ubuntu 16.10 support, the new release also available for Ubuntu 14.04 and derivatives.

1. Open terminal (Ctrl+Alt+T) and add the PPA:

sudo add-apt-repository ppa:gottcode/gcppa

focuswriter-ppa

2. To upgrade from a previous release, just launch Software Updater and install the updates after checking for updates.

upgrade to focuswriter 1.6

Or you may install the program via command:

sudo apt update && sudo apt install focuswriter

For those who don’t want to add PPA, grab the latest .deb package directly from the PPA archive.

Avidemux video editor

Avidemux video editor has reached the 2.6.13 release recently with lots of bug-fixes and improvements. Here’s how to install it in Ubuntu 16.04 LTS via PPA.

Changes in Avidemux 2.6.13:

  • updated Toolchain for Win64 and OS X
  • Linux AppImage available (universal linux64 binaries)
  • Update to libav* 3.0.2
  • Improved copy mode for h264/h265 video
  • AAC/ADTS import/export
  • new video filter : ivtcDupeRemover to remove duplicate after 3:2 pulldown
  • Revamped refresh screen
  • ASS/SSA fixes
  • Improved logo filter with alpha channel
  • ShaderLoader, load your openGL shaders as filters
  • Compatibility with newer gcc
  • Partial filter available only for one in/one out video filters
  • Add go fwd/go backward 60 sec buttons

Install Avidemux 2.6.13 in Ubuntu 16.04:

The Qt and CLI version of Avidemux 2.6.13 has been made into the GetDeb Apps repository, available for Ubuntu 16.04 and Linux Mint 18. To install it, do below steps:

For those prefer the GTK version, wait Avidemux 2.6.13 to be made into Thanh Tung Nguyen’s PPA

1. Add GetDeb repository by opening terminal (Ctrl+Alt+T) and running the command:

sudo sh -c 'echo "deb http://archive.getdeb.net/ubuntu xenial-getdeb apps" >> /etc/apt/sources.list.d/getdeb.list'

2. Install the key so to trust the packages from that repository:

wget -q -O- http://archive.getdeb.net/getdeb-archive.key | sudo apt-key add -

GetDeb repository for Ubuntu 16.04

3. Finally update system package index and install Avidemux video editor:

sudo apt update && sudo apt install avidemux2.6-qt

4. (Optional) To remove Avidemux, use command:

sudo apt remove avidemux2.6-qt && sudo apt autoremove

And the GetDeb repository can be removed via Software & Updates utility (Other Software tab).

Shotwell Ubuntu 16.04

The Gnome photo management software, Shotwell 0.23.5, was released a few days ago with user experience improvements, bug fixes, and translation updates.

Shotwell 0.23.5 adds an option under View menu allows users to hide the bottom toolbar. Tags below the thumbnails now behave like hyperlinks, so that clicking it brings you to the page with all other photos with that tag.

Shotwell 0.23.5

Other changes in the 0.23.5 release:

  • Remove obsolete files
  • Plugins: Load icons and GtkBuilder files from GResource
  • Fix .desktop file generation
  • Use Gtk.MessageDialog’s printf-style API for strings
  • Add SQL indexes to PhotoTable
  • Add Language headers to po files
  • Update INSTALL file
  • Really remove reference to external hmac_sha1
  • Disambiguate strings for time ranges
  • Implement linked tags
  • Make it more clear that something failed if SSL conncetion was not possible
  • Add option to filter by saved search
  • Explicitly link plugins to their dependencies
  • Fix typo in GSettings schema
  • Re-add –disable-extra-plugins configure option
  • Fix settings migrator and thumbnailer path
  • Bump debian compat for proper –libexecdir parameter

How to install Shotwell 0.23.5 in Ubuntu 16.04:

For Ubuntu 16.04 LTS and derivatives, you can install or upgrade to Shotwell 0.23.5 using Jens Georg’s PPA.

1. Open terminal (Ctrl+Alt+T) and run command to add PPA:

sudo add-apt-repository ppa:yg-jensge/shotwell

shotwell-maintainer-ppa

2. Then updated package index and upgrade shotwell:

sudo apt update

sudo apt install shotwell

3. To restore the stock Shotwell 0.22 version, run command to purge the PPA:

sudo apt install ppa-purge && sudo ppa-purge ppa:yg-jensge/shotwell

Rhythmbox music player

Gnome’s default music player, Rhythmbox, has reached the 3.4 release. It has been made into the universe repository (to be default) for Ubuntu 16.10 Yakkety.

Rhythmbox 3.4 comes with a new remote web control plugin, allows users to control the basic music playback remotely via a web browser.

Other changes in Rhythmbox 3.4:

  • Grilo plugin now uses Grilo 0.3
  • Soundcloud plugin fetches more search results and allows pausing
  • No longer uses webkit (partly due to OpenBSD W^X enforcement)
  • Slightly better handling of keyboard shortcuts for playback
  • Core and some plugin data files compiled into binaries using GResources
  • Memory leak and plugin fixes, translation updates, etc.
  • See more in NEWS page.

Rhythmbox 3.4

rhythmbox 3.4 web control plugin

Install Rhythmbox 3.4 in Ubuntu 16.04

Besides building the new release from source, you can install Rhythmbox 3.4 in Ubuntu Gnome 16.04 via a third-party PPA repository.

Tried both official Rhythmbox 3.4 build in Ubuntu 16.10 daily and the PPA backports in Ubuntu 16.04, there are a few issues found in my case:

  • No menu (global or title bar menu) in Unity Desktop
  • new web control plugin does not work in my browser

If you intend to install Rhythmbox 3.4 via PPA, follow below steps:

1. Open terminal (Ctrl+Alt+T) and run command to add the PPA:

sudo add-apt-repository ppa:fossfreedom/rhythmbox

Add rhythmbox PPA

2. Update package index and install the 3.4 packages:

sudo apt update; sudo apt install rhythmbox rhythmbox-plugins

DO NOT use apt upgrade, because the PPA also contains GTK 3.20 backports you may not want.

3. Remove the PPA after installation, via either Software & Updates -> Other Software or the command below:

sudo add-apt-repository --remove ppa:vascofalves/gnome-backports && sudo apt update

4. (Optional) To revert back to Rhythmbox 3.3, purge the PPA via ppa-purge

sudo apt install ppa-purge && sudo ppa-purge ppa:fossfreedom/rhythmbox

Nvidia Linux driver

The Nvidia driver for Linux has reached the 370 series by releasing the 370.23 beta driver. TITAN X (Pascal) and GTX 1060 6GB are officially supported. Over- and under-clock GPUs feature added for GTX 1000 series and later.

Nvidia 370.23 also brings the “PixelShiftMode” MetaMode option, enabling support for 4K and 8K pixel shift displays.

TITAN X support

Other changes include:

  • a Vulkan bug fix revolving around X11 swap chains
  • fix a mode-setting regression from 367.35
  • fix OpennGL / OpenGL ES driver crash and CUDA device querying crash
  • enable persistence mode by default for all GPUs when the daemon is started
  • See the official announcement for more details.

How to install Nvidia 370.23 in Ubuntu 16.04, 14.04:

The Graphics Driver Team has made the new 370 driver series into PPA, available for Ubuntu 16.04, Ubuntu 14.04, Ubuntu 12.04, and also the next Ubuntu 16.10.

1. Open terminal (Ctrl+Alt+T) and run command to add PPA:

sudo add-apt-repository ppa:graphics-drivers/ppa

Type in password when it asks and hit Enter.

graphics driver ppa

2. Update system package index via:

sudo apt update

3. Finally launch Additional Drivers utility, select the nvidia-370 driver and click Apply changes.

install nvidia 370 driver

After installing the new driver, restart your computer to take effect.

Oracle Virtualbox 5.1.4 Available for Upgrade

Last updated: August 17, 2016

Virtualbox

The second maintain release for the Virtualbox 5.1 series, Virtualbox 5.1.4, now is available for upgrade in the official Virtualbox Linux repository.

Oracle has not yet announced the release of Virtualbox 5.1.4 at the moment. The changelog will be available once it’s ready in the wiki page, and Linux binaries will be available for download in the Linux download page.

Those who have enabled Virtualbox Linux repository, Virtualbox 5.1.4 is now available for upgrade in Software Updater:

Virtualbox 5.14 about

How to install Virtualbox 5.1.4 in Ubuntu

The new release is ready for upgrade for all current Ubuntu releases, include Ubuntu 16.04, Ubuntu 14.04, Ubuntu 12.04, and their derivatives.

1. For those who don’t have VBox Linux repository enabled, open terminal (Ctrl+Alt+T) and run command:

sudo sh -c 'echo "deb http://download.virtualbox.org/virtualbox/debian xenial contrib" >> /etc/apt/sources.list.d/virtualbox.list'

replace xenial with trusty or precise for Ubuntu 14.04 or Ubuntu 12.04 and their derivatives.

Virtualbox Official Linux repository

2. And setup the key via command:

wget -q -O - http://download.virtualbox.org/virtualbox/debian/oracle_vbox_2016.asc | sudo apt-key add -

For Ubuntu 15.10 and older, use the old key:

wget -q https://www.virtualbox.org/download/oracle_vbox.asc -O- | sudo apt-key add -

3. After adding the official Virtualbox Linux repository, launch Software Updater and you will be able to upgrade Virtualbox after checking for updates:

upgrade Virtualbox 5.1.4