Archives For Howtos

As you may know, WinUSB is simple tool allows to create bootable Windows USB install stick from Ubuntu Linux. This tool supports Windows 7, 8, Vista, XP and can use either an ISO or a DVD as a source.

WinUSB Ubuntu

WinUSB Ubuntu

In the screen above, choose your ISO or DVD drive and plug in the USB stick and click Refresh to make it available. Click ‘Install’, WinUSB Maker will format your USB device before converting your ISO or Directory into a bootable image on your USB device. The whole process will take several minutes up to an hour. And you’ll get a pop-up to let your know when finished.

Install WinUSB in Ubuntu, Linux Mint via PPA:

There’s a PPA contains WinUSB package for Ubuntu 13.04, Ubuntu 12.10, Ubuntu 12.04, Ubuntu 11.10, Ubuntu 11.04, Ubuntu 10.04 and Linux Mint 15, 14, 13, 12, 11, 10.

Press Ctrl+Alt+T to open terminal. When it opens, copy below code via Ctrl+C and paste in terminal via Ctrl+Shift+V. Hit enter to run, it’ll add the PPA repository to your system:

sudo add-apt-repository ppa:colingille/freshlight

After that, update package lists and install WinUSB:

sudo apt-get update; sudo apt-get install winusb
WinUSB in Ubuntu Unity

WinUSB in Ubuntu Unity

Vuze Bittorrent ClientThe Vuze Bittorrent Client 5.1 has been released. Here I’ll show you how to install it in Ubuntu 13.04, Ubuntu 12.04, Ubuntu 12.10 and create a launcher for Unity.

Vuze 5.1 includes a number of updates to the client, providing an improved user interface (UI) with enhanced usability and efficiency, improved performance and some critical bug fixes (for example elimination of some deadlock conditions). Read the official release note.

Install Vuze in Ubuntu Linux

1.) Vuze depends on Java, so first install OpenJDK from Ubuntu Software Center, or install Oracle Java via PPA

2.) Download Vuze 5.1 from the official website. Below is the link:

VuzeInstaller.bar.bz2

3.) Open file browser, extract the downloaded package. Then move the result folder to /opt/. You’ll need to press Alt+F2 and type in gksudo nautilus to open file browser with root privilege.

Move Vuze to Opt

4.) Now you can launch Vuze via below command (Press Ctrl+Alt+T to open terminal):

sudo /opt/vuze/azureus

Create Launcher for Vuze

Install the required package by running below command in terminal:

sudo apt-get install gnome-panel --no-install-recommends

Now run command to bring up Create Launcher dialog.

sudo gnome-desktop-item-edit /usr/share/applications/ --create-new

Type in:

name: Vuze
command: gksudo /opt/vuze/azureus
choose icon from /opt/vuze/ folder

Create Vuze Launcher

Now you’re able to launch Vuze from Unity Dash. Enjoy!

How to Install Skype 4.2 in Elementary OS Luna

Last updated: August 14, 2013

This simple tutorial shows you how to install Skype in the Elementary OS 0.2 Luna. As you may know, Elementary OS is a lightweight and beautiful Linux distribution based on Ubuntu 12.04 Precise. So that you can easily install Skype in it via the Canonical Partners repository.

Skype in Elemantary OS

To get started, start the Software Center from dock, navigate to Edit -> Software Sources…

Elementary software sources

In next window, go to Other Software tab. Check the boxes to enable Canonical Partners repository:

elementary enable canonical partners repository

After that, press Ctrl+Alt+T to open a terminal window. Run below commands to update package lists and install Skype:

sudo apt-get update; sudo apt-get install skype

Install skype in Elementary OS

Once done, you can open Skype from the top-left Applications menu.

Besides Unity Webapps, Fogger is a good alternative to turns your web apps into regular desktop apps on Ubuntu or Linux Mint.

Fogger acts as a bridge between web applications and the linux desktop. It exposes an easy to use JS API to webapps which can be used to interact with the host desktop environment. It can also be used to write basic desktop apps for linux in pure web style.

Bring Integrated Web Apps to Ubuntu

This tutorial will show you how to install Fogger in Ubuntu 13.10, Ubuntu 13.04, Ubuntu 12.04, Ubuntu 11.10 and Linux Mint via PPA.

To get started, press Ctrl+Alt+T to open terminal. When it opens, run commands to add PPA:

sudo add-apt-repository ppa:loneowais/fogger

add fogger ppa ubuntu

After that, run commands to update package lists and install Fogger:

sudo apt-get update; sudo apt-get install fogger

Once done,

fogger ubuntu unity

Want to install Wunderlist 2 on Ubuntu or Linux Mint Desktop? Well, here I’ll show you how to do it via fogger, which will install the Wunderlist 2 web app on your desktop.

Wunderlist 2 in Ubuntu

UPDATE: It seems that the Wunderlist 2 is not working properly with fogger now, you may use Wunderlist 2 with your web browser by visiting http://www.wunderlist.com/.

Fogger is a simple application which turns your web apps into into regular Linux desktop apps. It’s kinda similar to Unity Webapps. Fogger uses WebKitGtk as its web interface. It acts as a bridge between web applications and the linux desktop. It exposes an easy to use JS API to webapps which can be used to interact with the host desktop environment. It can also be used to write basic desktop apps for linux in pure web style.

Install Fogger:

Fogger is available for Ubuntu 13.10, Ubuntu 13.04, Ubuntu 12.04 and Linux Mint 13, 15, 16 via its PPA.

Press Ctrl+Alt+T on your keyboard to open terminal. When it opens, run below 3 commands one by one. Copy the codes via Ctrl+C and paste in terminal via Ctrl+Shift+V:

sudo add-apt-repository ppa:loneowais/fogger

sudo apt-get update

sudo apt-get install fogger

Install Wunderlist 2

Search fog app from Unity Dash home and open Create a new fog app,

Create Wunderlist 2 desktop app

Copy and paste below line into URL, and type Wunderlist in Name area.

https://www.wunderlist.com/#/lists/inbox

Click Create. After that, you can launch Wunderlist 2 from Unity Dash Home. For first time, you need to type username and password to login.

Wunderlist in Ubuntu Unity

install transmission ubuntuTransmission is a lightweight Bittorrent Client comes by default with Ubuntu. While Canonical only provides critical updates, here I’ll show you how to install / upgrade the latest Transmission in Ubuntu via its PPA. Supports Ubuntu 13.10 Saucy, Ubuntu 13.04 Raring, Ubuntu 12.04 Precise and Ubuntu 12.10 Quantal.

UPDATE 2024: The tutorial is outdated! If you’re looking for most recent Transmission PPA, see this one instead.

At the moment of writing this tutorial, the latest release is Transmission 2.8.2. It brings a lot of bug fixes and a few improvements.

  • Fix webseed crash
  • Fix crash when adding UDP trackers whose host’s canonical name couldn’t be found
  • Fix crash when sending handshakes to some peers immediately after adding a magnet link
  • Fix crash when parsing incoming encrypted handshakes when the user is removing the related torrent
  • Add safeguard to prevent zombie processes after running a script when a torrent finishes downloading
  • Fix “bad file descriptor” error
  • Queued torrents no longer show up as paused after exiting & restarting
  • Fix 2.81 compilation error on OpenBSD
  • Don’t misidentify Tixati as BitTornado?
  • Fix bug that had slow download speeds until editing preferences for Mac Client
  • Fix crash that occurred in some cases after using Torrent > Set Location
  • Fix crash where on_app_exit() got called twice in a row
  • Fix 2.81 compilation error on older versions of glib
  • Can now open folders that have a ‘#’ in their names
  • Silence gobject warning when updating a blocklist from URL
  • Add Qt5 support

To get started, press Ctrl+Alt+T to open terminal. When it opens, run below command to add the Bittorrent PPA:

sudo add-apt-repository ppa:transmissionbt/ppa

After that, run blow command to install Bittorrent. Or use Synaptic Package Manager to upgrade the package.

sudo apt-get update; sudo apt-get install transmission

That’s it. Enjoy!

As you may know, Intel has released intel driver update utility for Linux and it’s available for Ubuntu 13.04, Ubuntu 12.04, Ubuntu 12.10 and Linux Mint from Intel Repository.

intel driver update utility

To add Intel Repository to Ubuntu, press Ctrl+Alt+T to open terminal. When it opens, run below commands:

  • For Ubuntu 12.04 Precise and Linux Mint 13 Maya:
    sudo sh -c 'echo "deb https://download.01.org/gfx/ubuntu/12.04/main Ubuntu 12.04" >> /etc/apt/sources.list.d/intel-graphics.list'
  • For Ubuntu 12.10 Quantal and Linux Mint 14 Nadia:
    sudo sh -c 'echo "deb https://download.01.org/gfx/ubuntu/12.10/main Ubuntu 12.10" >> /etc/apt/sources.list.d/intel-graphics.list'
  • For Ubuntu 13.04 Raring and Linux Mint 15 Olivia:
    sudo sh -c 'echo "deb https://download.01.org/gfx/ubuntu/13.04/main Ubuntu 13.04" >> /etc/apt/sources.list.d/intel-graphics.list'
  • Then download and install the GPG key via 2 commands:

    wget https://download.01.org/gfx/RPM-GPG-KEY-ilg -O - | sudo apt-key add -
    wget https://download.01.org/gfx/RPM-GPG-KEY-ilg-2 -O - | sudo apt-key add -

    Finally, install Intel Graphics Driver update utility via below command. Or update it to the latest via your favorite package manager.

    sudo apt-get update; sudo apt-get install intel-linux-graphics-installer

    intel driver update utility unity

    How to Install Ubuntu 13.10 From USB Stick

    Last updated: August 9, 2013

    install ubuntu from usb In this tutorial I’ll show you how to make Ubuntu bootable USB from iso and then install Ubuntu 13.10 Saucy Salamander on your computer from it.

    Ubuntu 13.10 is scheduled to be released on October 17th 2013. So far it’s in Alpha stage. The daily build iso can be downloaded at here, and final release will be available at this page.

    Requirements:

    • USB at least 1GB. Format it to FAT32 (uncheck ‘Quick Format’).
    • Computer running with any operating system.
    • Download Ubuntu 13.10 iso file from previous links

    1. Make Ubuntu 13.10 Bootable USB From ISO

    To get started, download Unetbootin, which is a simple tool that allows Windows / Linux / Mac OS users to create bootable Live USB drives for Ubuntu, Fedora, and other Linux distributions without burning a CD. It’s available for downloading at this page.

    Insert your USB stick into your computer and then open Unetbootin executable. Check “Diskimage” and choose the Ubuntu 13.10 iso file from your Computer. You USB drive should be selected automatically.

    create bootable usb via unetbootin

    Click on OK to start. When it is done, click Exit.

    2. Install Ubuntu 13.10 from the bootable USB

    Insert the USB stick into the target computer. Start the machine and choose to boot up via USB in BIOS. You’ll see the below screen:

    boot up ubuntu usb

    Choose “Install Ubuntu” and hit Enter, then you’ll get into live Ubuntu Desktop with the installation wizard. To continue, follow a step by step guide to install Ubuntu

    Nvidia DriverNvidia has released the new display driver 325.15 (certified) for Linux. It’s easy to install or upgrade in Ubuntu 13.04 Raring, Ubuntu 12.04 Precise, Ubuntu 12.10 Quantal and Linux Mint.

    Nvidia driver 325.15 supports new GPUs: GRID K340, GRID K350, NVS 315, Quadro K500M (full list of supported GPUs). It brings a lots of bug fixes and some improvements.

  • Changed the default PCIe interrupt delivery method from virtual-wire to MSI. Note that if the NVIDIA Linux driver fails to initialize with an error indicating that it is not receiving interrupts, MSI can be disabled by setting the module parameter “NVreg_EnableMSI=0” when loading the NVIDIA kernel module.
  • Removed support for Linux 2.4 kernels. The NVIDIA Linux driver now requires Linux 2.6.9 or later.
  • Improved the rendering performance of complex gradients.
  • Added support for configuring SLI Mosaic and Base Mosaic in the “X Server Display Configuration” page of nvidia-settings.
  • Updated nvidia-installer to look for the following files:
    /usr/lib/nvidia/alternate-install-available
    /usr/lib/nvidia/alternate-install-present

    These files may be provided by NVIDIA driver installers other than the official .run package maintained by NVIDIA, to alert nvidia-installer to the presence or availability of an alternative installation method. See the nvidia-installer(1) manual page for more information.
  • Generate a BadMatch error when applications attempt to create GLX pixmaps using glXCreatePixmap() or glXCreateGLXPixmapWithConfigSGIX() and the pixmap’s depth doesn’t match that of the specified GLXFBConfig.
  • Updated nvidia-settings to explicitly specify the direction of rotation for configuring per-display rotation configuration
  • Honor a GPU UUID as the GPU qualifier for X configuration options that allow GPU qualifiers (e.g. “MetaModes”).
  • Report GPU UUIDs in the X log when verbose logging is enabled in the X server.
  • Enabled conformant glBlitFrameBuffer() scissor test behavior by default. A driver-provided application profile enables the previous non-conformant behavior for applications that load libcogl, to work around a bug in older versions of libcogl.
  • Install Nvidia Driver 325.15:

    NOTE: Ubuntu by default uses the open source video driver Nouveau for your NVIDIA graphics card, you can enable it from Software & Updates -> Additional Drivers. This may interact better, and you may want to use this rather than NVIDIA’s official package.

    To get started, first download the driver from the Nvidia website. Here’s the link:

    Download Nvidia 325.15 for 32-bit Linux

    Download Nvidia 325.15 for 64-bit Linux

    You may check you system type (32-bit or 64-bit) by System Settings -> Details.

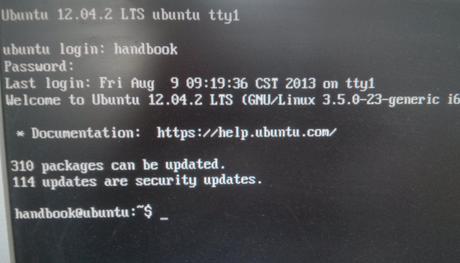
    To install it, you have to press Ctrl+Alt+F1 to switch to command console. Login with your username and password. When you’re in, follow below steps:

    Command Console

    1.) Stop graphical session:

    sudo stop lightdm

    2.) Give executable permission for your downloaded package:

    chmod a+x ~/Downloads/NVIDIA-Linux-*-325.15.run

    3.) Run the installer and follow the on screen prompts to start installing Nvidia Driver:

    sudo sh ~/Downloads/NVIDIA-Linux-*-325.15.run

    4.) Restart your computer via below command:

    sudo restart

    If for some reason the new drivers do not work properly, run below commands in Ctrl+Alt+F1 command console to remove Nvidia Driver:

    sudo stop lightdm
    
    sudo ~/Downloads/NVIDIA-Linux-*-325.15.run --uninstall
    
    sudo restart

    Enjoy!

    bittorrent syncThis tutorial shows how to install BitTorrent server and desktop packages in Ubuntu 13.10 Saucy, 13.04 Raring, 12.10 Quantal, 12.04 Precise, 10.04 Lucid and Linux Mint via PPA repository.

    As you may know, BitTorrent Sync is a proprietary peer-to-peer file synchronization tool available for Windows, Mac, Linux, and Android. It can sync files between devices on a local network, or between remote devices over the Internet via secure, distributed P2P technology.

    Now there’s PPA repository offers ready to use server and desktop packages of the BitTorrent Sync application for Ubuntu and Linux Mint users.

    Install BitTorrent Sync Server:

    Press Ctrl+Alt+T to open terminal. When it opens, run below command to add the PPA:

    sudo add-apt-repository ppa:tuxpoldo/btsync

    Then run below commands to update package lists and install the server package:

    sudo apt-get update; sudo apt-get install btsync

    While the installation, you’ll get the configuration promts to setup download rate, listening ip and port, username and password to access the server.

    bittorrent sync configuration

    When everything is done, you can access it in your PC or Mobile Phone by going to http://ipaddress:8888/gui/

    bittorrent sync client