Archives For Howtos

rabbitVCS As you may know, RabbitVCS is a graphical front-end for version control systems available on Linux. It integrates into file managers to provide file context menu access to version control repositories.

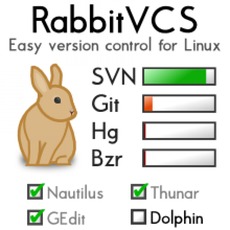
The project was originally called NautilusSvn, but due to the desire to support file managers in addition to Nautilus and more version control systems, it was renamed to RabbitVCS (Version Control System). The interface was inspired by TortoiseSVN, recognisable by the file manager shell integration, which is available on Nautilus and Thunar in the case of RabbitVCS. It can also integrate into Gedit or run independently on the command line.

Install RabbitVCS via PPA:

The RabbitVCS PPA supports Ubuntu 13.04, Ubuntu 12.04, Ubuntu 12.10, Ubuntu 11.10, Ubuntu 10.04 and their derivatives, such as Linux Mint and Elementary OS.

Press Ctrl+Alt+T on your keyboard to open terminal. When it opens run commands to add the PPA:

sudo add-apt-repository ppa:rabbitvcs/ppa

Then update system package lists via:

sudo apt-get update

Install the packages:

sudo apt-get install rabbitvcs-nautilus3 rabbitvcs-thunar rabbitvcs-gedit rabbitvcs-cli

That’s it. Enjoy!

This simple and brief tutorial shows you how to install Hulu Desktop client in Ubuntu 13.04, Ubuntu 12.04, Linux Mint and Elementary OS.

hulu desktop in ubuntu

It’s easy to install Hulu Desktop App in Debian / Ubuntu based systems, because the official website provides the DEB package for downloading.

Before gettings started, you may check your system type (32-bit or 64-bit) by System Settings -> Details.

Press Ctrl+ALt+T on your keyboard to open terminal. When it opens, run command to download Hulu Desktop client:

  • 64-bit Systems
    wget http://download.hulu.com/huludesktop_amd64.deb
  • 32-bit systems:
    wget http://download.hulu.com/huludesktop_i386.deb
  • Now, install the deb package:

    sudo dpkg -i huludesktop_*.deb

    hulu desktop in uninty

    Vim 7.4 has been released. Since 7.3 more than a thousand improvements have been made. Also a lot of bugs has been fixed. This simple tutorial will show you how to install or upgrade Vim 7.4 in Ubuntu 12.10, Ubuntu 13.04, Ubuntu 12.04 via PPA.

    Vim 7.4

    NOTE: The PPA contains the unofficial builds of fresh Vim development versions. Use it at your own risk!

    To get started, press Ctrl+Alt+T on your keyboard to open terminal. When it opens, run command to add the PPA:

    sudo add-apt-repository ppa:nmi/vim-snapshots

    Then update and install Vim:

    sudo apt-get update; sudo apt-get install vim

    Once installed, you can do “:help version7.4” while using vim editor to check all changes.

    To remove / downgrade Vim, run below commands:

    sudo apt-get install ppa-purge; sudo ppa-purge ppa:nmi/vim-snapshots

    Upgrade FileZilla in UbuntuFileZilla has reached 3.7.x. This tutorial shows you how to install or upgrade in Ubuntu 13.04, Ubuntu 12.04, Ubuntu 13.10, Ubuntu 12.10 via PPA.

    FileZilla 3.7 brings a lot of bug fixes and improvements. Here are some of them:

  • Show total transfer speed as tooltip over the transfer indicators
  • List supported protocols in tooltip of host field in quickconnect bar
  • Use TLS instead of the deprecated term SSL
  • Reworded text when saving of passwords is disabled, do not refer to kiosk mode
  • Improved usability of Update page in settings dialog
  • Improve SFTP performance
  • When navigating to the parent directory, highlight the former child
  • When editing files, use high priority for the transfers
  • Add label to size conditions in filter conditions dialog indicating that the unit is bytes
  • Ignore drag&drop operations where source and target are identical and clarify the wording in some drop error cases
  • Trim whitespace from the entered port numbers
  • Slightly darker color of inactive tabs
  • Ignore .. item in the file list context menus if multiple items are selected
  • Display TLS version and key exchange algorithm in certificate and encryption details dialog for FTP over TLS connections.
  • Install / Upgrade FileZilla 3.7.x

    Press Ctrl+Alt+T on your keyboard to open terminal. When it opens, run below commands one by one to install it from PPA. So far, it supports Ubuntu 13.10, Ubuntu 13.04, Ubuntu 12.10, Ubuntu 12.04 and their derivatives.

    sudo add-apt-repository ppa:yofel/ppa
    
    sudo apt-get update; sudo apt-get install filezilla

    Being a PPA also contains updated versions of other programs that you may not want, my advice is to remove the PPA after the installation of Filezilla 3.7.x:

    sudo add-apt-repository-r ppa: yofel/ppa

    That’s it. Enjoy!

    Double Commander logoAs you may know, Double Commander is an open-source two panel file manager. Here I’ll show you how to install it in Ubuntu and its derivatives, such as Linux Mint and Elementary OS.

    Double Commander is a cross platform open source file manager with two panels side by side. It is inspired by Total Commander and features some new ideas.

    Here are some key features of Double Commander:

  • Unicode support
  • All operations working in background
  • Multi-rename tool
  • Tabbed interface
  • Custom columns
  • Internal text editor (F4) with syntax hightlighting
  • Built in file viewer (F3) to view files of in hex, binary or text format
  • Archives are handled like subdirectories. You can easily copy files to and from archives. Supported archive types: ZIP, TAR GZ, TGZ, LZMA and also BZ2, RPM, CPIO, DEB, RAR.
  • Extended search function with full text search in any files
  • Configurable button bar to start external programs or internal menu commands
  • Total Commander WCX, WDX and WLX plug-ins support
  • File operations logging
  • And more…
  • Install Double Commander:

    The Double Commander PPA provides the latest packages for Ubuntu 13.04, Ubuntu 12.10, Ubuntu 12.04 and their derivatives. It also contains a little old versions for Ubuntu 10.04, Ubuntu 11.10, Ubuntu 11.04.

    Press Ctrl+Alt+T to open terminal. When it opens, run commands to add the PPA:

    sudo add-apt-repository ppa:alexx2000/doublecmd

    install double commander in ubuntu

    Then update and install the file manager:

    sudo apt-get update; sudo apt-get install doublecmd-qt

    double commander in ubuntu

    My Weather Indicator is a simple applet that displays weather information on panel and widget on desktop. Here’s how to install in Ubuntu 13.10, Elementary OS, Linux Mint 16 via PPA.

    my weather indicator ubuntu

    The supported weather services are Open Weather Map, wunderground.com, YAHOO!, world weather online. My Weather Indicator supports two locations and displays temperature, pressure, visibility, wind velocity, rain gauge, snow gauge, and local time. It also displays a widget on your desktop.

    Install My Weather Indicator:

    You can install My Weather Indicator in Ubuntu 13.10, Ubuntu 13.04, Ubuntu 12.10, Ubuntu 12.04, Ubuntu 10.04 and their derivatives.

    Press Ctrl+Alt+T to open terminal. When it opens, run below command to add the ppa:

    sudo add-apt-repository ppa:atareao/atareao

    add my weather indicator ppa

    Then update and install the indicator:

    sudo apt-get update; sudo apt-get install my-weather-indicator

    Touchpad Indicator Ubuntu 13.10The touchpad indicator applet, which shows the status of the touchpad, and to enable and disable the touchpad, now is available in Ubuntu 13.10 Saucy. Here I’ll show you how to install it in Ubuntu, Linux Mint, and Elementary OS using the developer’s PPA repository.

    So far, the PPA provides the latest packages for Ubuntu 13.10, Ubuntu 13.04, Ubuntu 12.04, Ubuntu 12.10 and the derivatives. Also there are old versions for Ubuntu 10.04, Ubuntu 11.04, Ubuntu 11.10 and derivatives.

    Tutotiral Objectives

    • Install Touchpad Indicator in Ubuntu 13.10 Saucy
    • Enjoy!

    To get started, press Ctrl+Alt+T to open terminal. When it opens, run below commands to add the Touchpad Indicator PPA:

    sudo add-apt-repository ppa:atareao/atareao

    add touchpad indicator ppa

    Then you can install the indicator via below commands:

    sudo apt-get update; sudo apt-get install touchpad-indicator

    install-touchpad-indicator

    Once installed, search for and open it from Unity Dash.

    touchpad indicator in ubuntu unity

    Install Latest XnView 0.61 in Ubuntu and Linux Mint

    Last updated: September 1, 2013

    XnView UbuntuXnView MP has reached version 0.61. Since the default is version 0.51 in Ubuntu Software Center, the latest XnView brings a lot of bug fixes and improvements. With this tutorial, you can always get the latest version of XnView in Ubuntu and Linux Mint.

    Changes since XnView MP 0.51:

  • Batch convert: Watermark, stretch image
  • remember item selection in information panel
  • 8bf 64bits plugin can be used with XnViewMP 64bits version
  • XMP-photoshop:Location not more written
  • JPEG arithmetic decoding support
  • Change timestamp can create EXIF date
  • Show always selection information
  • JPEG2000 Export
  • Print in view mode
  • Clean DB can remove files with categories
  • Database has been improved, PLEASE make an backup of it before to install this version
  • Linux, better way to delete files/folders
  • Fix XMP/IPTC import problem
  • Download & Install XnView MP:

    First you may check OS type 32-bit or 64-bit by System Settings -> Details.

    Then press Ctrl+Alt+T to open terminal:

    For 32-bit system, download and install XnView via below 2 commands:

    wget http://download.xnview.com/XnViewMP-linux.deb
    
    sudo dpkg -i XnViewMP-linux.deb; sudo apt-get -f install

    For 64-bit system, run blow commands instead:

    wget http://download.xnview.com/XnViewMP-linux-x64.deb
    
    sudo dpkg -i XnViewMP-linux-x64.deb; sudo apt-get -f install

    WebcamStudio is a virtual webcam software that can be used with Skype or a flash website like UStream, to create a professional looking broadcast, including banners, animations, transit animations and icons, etc.

    This tool is not meant as a video editor but as a live video mixer giving you the possibilities to change the look of the broadcast on the fly.

    Some of the features include:

  • Switch webcams on a single click
  • Show an IRC channel in your video broadcast
  • Broadcast your desktop for creation of nice HOWTO’s
  • Be creative and put animations and banners
  • Display what song is currently played by Rhythmbox
  • Co-host a remote friend, show his webcam inside your output (PicInPic)
  • Connect to WeatherBug and display your current weather
  • Apply some fancy effects on each source
  • Have a green wall, then why not use the ChromaKey effect to do the same as the weather man on the news network
  • Use all kinds of devices as webcamera like a MiniDV, your iPhone, etc.
  • Install WebcamStudio from GetDeb:

    The getdeb repository provides the latest version for Ubuntu 13.04, Ubuntu 12.04 and a little old version of Ubuntu 10.04, Ubuntu 11.10, Ubuntu 12.10, and Linux Mint.

    For Ubuntu users, download and double-click the below package to add the GetDeb repository:

    download getdeb package

    For Linux Mint users, enable the repository from Start menu -> Software Sources -> Additional Repositories

    enable getdeb repository

    After that, install the WebcamStudio via your package manager. Or run below command in terminal (press Ctrl+Alt+T to open it):

    sudo apt-get update; sudo apt-get install webcamstudio

    amarok 2.8.0Amarok music player has reached version 2.8.0. This simple tutorial will show you how to install it in Ubuntu 13.04 Raring, Ubuntu 12.04 Precise and Linux Mint 13, 15.

    According to the developers of Amarok, users can now add the Tracks from the Recently Played List widget directly to the application, the Jamendo service now uses a higher quality MP3 format instead of Ogg Vorbis, the player now depends on Qt 4.8.3, and much more. Read full changelog

    Install Amarok 2.8.0 via PPA:

    The Kubuntu Backports PPA has updated for Ubuntu 13.04 and Ubuntu 12.04 users. Press Ctrl+Alt+T to open terminal. When it opens, run command to add the PPA:

    sudo add-apt-repository ppa:kubuntu-ppa/backports

    Then update and install:

    sudo apt-get update; sudo apt-get install amarok

    Amarok 2.8.0