For those looking for Google Keep or Windows Sticky Notes style desktop noting app, Linux Mint’s “sticky” is a good choice for Ubuntu Linux.
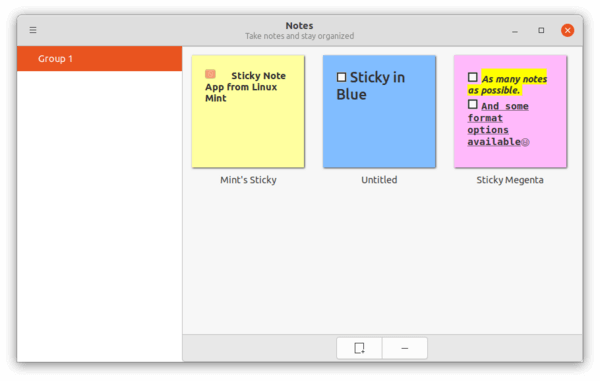
Linux Mint maintains some great apps. Sticky is one of them that sticks an electronic version of Post-it Note on your desktop. It’s GTK3 app written in Python3 and works on most desktop environments.
With it, you may create as many notes as possible on desktop. And, it allows to set different color palette for each note: Blue, Green, Magenta, Orange, Purple, Red, Teal, and Yellow.
By right-clicking on header, it allows to set title for your note, and make it “Always on Top”. And, it supports format options including: Bold, Italic, Fixed Width, Underline, Strikethrough, Highlight, Header, toggle Checklist and Bullets. There are many other features, e.g., emoji, language, undo and redo support!
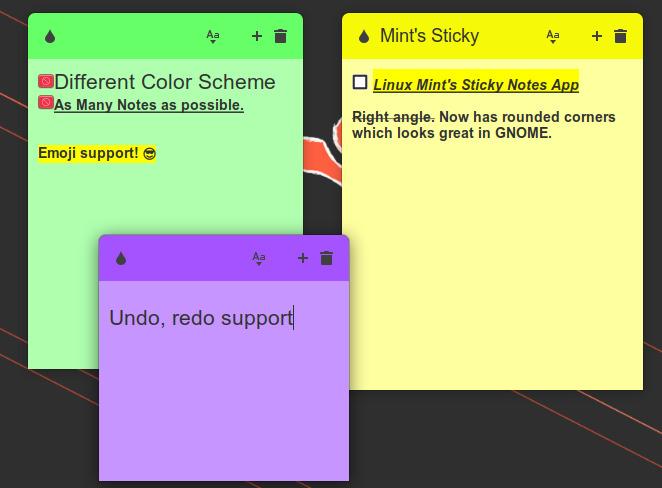
Linux Mint apps used to have right angles which are a little bit ugly in GNOME desktop. Now, it’s switching to rounded title-bar corners which looks native in Ubuntu, though it still lacks an indicator applet.
The app starts as group dialog with button in the bottom to add / remove notes, though each note itself has the new and delete buttons.
How to Install Linux Mint’s Sticky Notes in Ubuntu:
Besides adding Linux Mint repository and managing package priority, this unofficial PPA maintains useful Linux Mint apps, so far for Ubuntu 18.04, Ubuntu 20.04, Ubuntu 21.04, and Ubuntu 21.10.
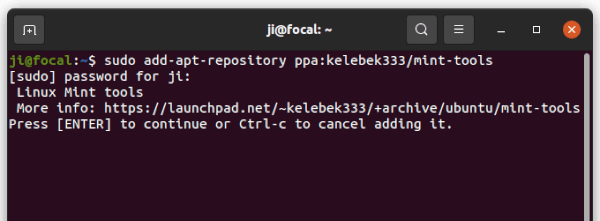
1. Add Ubuntu PPA:
Press Ctrl+Alt+T on keyboard to open terminal, then run command to add the PPA:
sudo add-apt-repository ppa:kelebek333/mint-tools
Type user password (no asterisk feedback) when it asks and hit Enter to continue.
2. Update package cache.
Next, refresh system package cache by running command below in terminal, though it’s done automatically since Ubuntu 20.04 while adding PPA.
sudo apt update
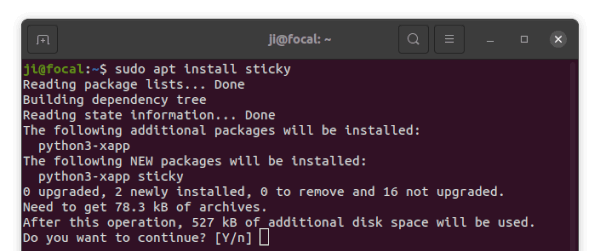
3. Install sticky:
Finally, install the sticky notes app via command:
sudo apt install sticky
Once installed, search for and open ‘Sticky’ from activities overview screen and enjoy!
How to remove Sticky Notes App:
To remove the app, open terminal (Ctrl+Alt+T) and run command:
sudo apt remove sticky --autoremove
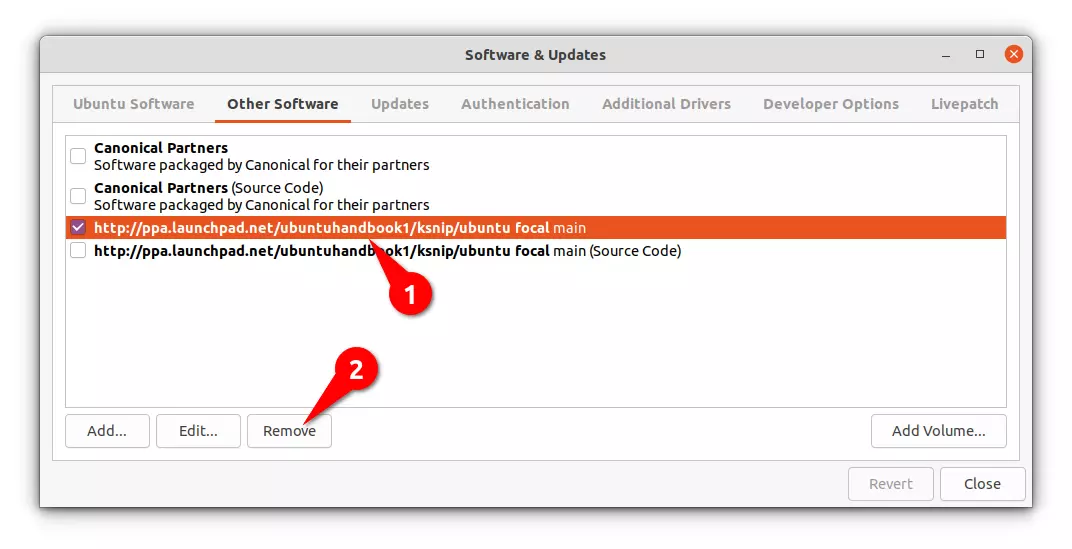
And, remove the Ubuntu PPA either using “Software & Updates” app under “Other Software” tab or by running command:
sudo add-apt-repository --remove ppa:kelebek333/mint-tools