Archives For November 30, 1999

The free and open-source planetarium software Stellarium 0.21.0 was released today. Here’s how to install it in Ubuntu 21.04, Ubuntu 20.10, Ubuntu 20.04, Ubuntu 18.04 via PPA.

The new release completed the work on accurate planet axes, including Lunar libration. It also features visualisation of Earth shadow for Lunar eclipses, the latest algorithms for planet magnitudes. Planets are now scalable and Solar glare switchable for didactic applications.

Other changes include:

  • Better texture for the Lunar surface.
  • Enhanced Calendars plugin.
  • Replaced “arabic” by more accurate “al-Sufi” skyculture.
  • Added lines for the Invariable Plane and Projected Solar Equator.
  • Added solar altitude to planetary feature nomenclature.
  • Added new 4k texture for the Moon (required re-balancing planet shader brightness)
  • Added more cardinal points.
  • Added a new sky culture based on Al-Sufi “Book of Fixed Stars” written ~ 964 AD.
  • Added Old Hindu calendars
  • Added Islamic (algorithmic) and Hebrew calendar.
  • Added French Revolution calendar (arithmetic version)
  • Added Persian (arithmetic) calendar
  • And much more other changes, see the release note for details.

How to Install Stellarium 0.21.0 via PPA:

The Stellarium developers team maintains an official Ubuntu PPA with the latest packages for all current Ubuntu releases.

1. Open terminal either by pressing Ctrl+Alt+T on keyboard or by searching for ‘terminal’ from application menu. When it opens, run command to add the PPA:

sudo add-apt-repository ppa:stellarium/stellarium-releases

Type user password (no asterisk feedback) when it prompts and hit Enter.

2. Then either upgrade Stellarium from an old version with Software Updater utility:

Or run following commands to install or upgrade the software from terminal:

sudo apt update

sudo apt install stellarium

Uninstall:

To remove the software, either use your system package manager or run command:

sudo apt-get remove --autoremove stellarium

And remove the PPA via “Software & Updates” utility under Other Software tab.

GNU Emacs text editor 27.2 was released as a new maintenance release.

Emacs 27.2 is a bug-fix release with no new features. According to the changelog, it changed the behavior of the user option ‘resize-mini-frames‘. If set to a non-nil value which isn’t a function, resize the mini frame using the new function ‘fit-mini-frame-to-buffer’ which won’t skip leading or trailing empty lines of the buffer.

Emacs now ignores modifier keys when IME input is used. By default, pressing Ctrl, Shift, and Alt keys while using IME input will no longer apply the modifiers to the produced characters, as there are IMEs which use keys with modifiers to input some characters. Customize the variable ‘w32-ignore-modifiers-on-IME-input’ to nil to get back the old behavior.

And the user option ‘tramp-completion-reread-directory-timeout’ is now obsolete.

How to Install Gnu Emacs in Ubuntu:

For those prefer the classic apt repository, keep an eye on the Kevin Kelley’s PPA, though it’s not been updated at the moment of writing.
For those do not like Flatpak and Snap packages, here’s also a step by step guide building Emacs from source tarball.

Emacs is also available as the containerized Snap package, which is however at version 27.1 at the moment.

The community maintained Flatpak package has built Emacs 27.2 for Linux users. Ubuntu 20.04 and higher users can open terminal and run following commands one by one to install it:

  • Install flatpak framework if you don’t have it:
    sudo apt install flatpak

  • Add flathub repository which hosts the flatpak packages:
    flatpak remote-add --if-not-exists flathub https://flathub.org/repo/flathub.flatpakrepo

  • Finally install Emacs flatpak package:
    flatpak install flathub org.gnu.emacs

(Optional) To remove the flatpak package, simply run command in terminal:

flatpak uninstall org.gnu.emacs

qBittorrent

The free and open-source BitTorrent client qBittorrent 4.3.4 was released. Here’s how to install it in Ubuntu 20.04, Ubuntu 20.10 via PPA.

qBittorrent 4.3.4 reworked the sorting logic. To get the old sorting order for the “queue number” column, first sort on the “Completed On” column and then sort on the “#”(queue number) column.

The new release now requires Qt >= 5.12. Ubuntu 18.04 is no longer supported via the official PPA due to outdated system libraries. You can however get it via the flatpak package since it gets most run time libraries bundled.

Changes in qBittorrent 4.3.4 include:

  • Add ability to prioritize selected items by shown file order.
  • Allow tab to escape the text box in “Edit trackers” dialog.
  • Support sub-sorting in Transferlist.
  • Expose ToS setting from libtorrent.
  • Improve tracker entries handling.
  • Enlarge “speed limit” icon slightly.
  • Don’t prevent system sleep due to errored torrents.
  • Use stable sorting in transfer list.
  • Apply “Hide zero/infinity values” to “Time Active”, “Down/Up Limit” and ETA columns.
  • Fix potential out-of-bounds access.
  • Add a 3-Hour graph.
  • Add option to disable icons in menus.
  • Improve detection of filename extension of audio/video files.
  • Various drawing improvements of progress bar.
  • Raise minimum libtorrent version to 1.2.12, Qt version to 5.12.

How to Install qBittorrent 4.3.4 via PPA:

The official qBittorrent PPA has built the new release packages for Ubuntu 20.04 and Ubuntu 20.10.

1. To add the PPA, open terminal by either pressing Ctrl+Alt+T on keyboard or searching for “Terminal” from application menu. When it opens, run command:

sudo add-apt-repository ppa:qbittorrent-team/qbittorrent-stable

Type user password (no asterisk feedback) when it prompts and hit Enter to continue.

2. If an old version was installed on your system, upgrade it via Software Updater,

upgrade qBittorrent

or run following commands to install /upgrade qBittorrent in terminal:

sudo apt update

sudo apt install qbittorrent

Uninstall:

To remove qBittorrent PPA, either go to Software & Updates -> Other Software, or run command in terminal:

sudo add-apt-repository --remove ppa:qbittorrent-team/qbittorrent-stable

To remove the bittorrent client, either use your system package manager or run command:

sudo apt-get remove --autoremove qbittorrent

Firefox 55

Mozilla Firefox 87.0 was released today with further efforts on improving user privacy.

Firefox 87 introduced SmartBlock, a new intelligent tracker blocking mechanism for Private Browsing and Strict Tracking Protection Mode. By providing local stand-ins for blocked third-party tracking scripts, you’ll encounter less website breakage while fully protected from trackers.

As today’s web is on the way to becoming https-only and browsers are taking steps to improve user privacy, the 87 browser release introduced new default HTTP Referrer policy instead of ‘no-referrer-when-downgrade’.

It’s ‘strict-origin-when-cross-origin‘ which will trim user sensitive information like path and query string in the URL to protect privacy.

Other changes in Firefox 87 include:

  • New locale: Silesian (szl)
  • Improved “Highlight All” feature on Find in page.
  • Full support for macOS built-in screen reader, VoiceOver.
  • Disable the Backspace key for browsing back.
  • Various security fixes.

How to get Firefox 87 in Ubuntu:

For all current Ubuntu releases, the new Firefox package will be published in Ubuntu security & updates repositories in the next few days.

At that time, you can easily update the web browser through Software Updater (Update Manager)

For those who can’t wait, go to the release page which also includes a download button:

Firefox 87 Release Note

The Vivaldi web browser 3.7 was released a few days ago. Features performance improvements and Apple M1 machines support.

Vivaldi 3.7 gets a series speed boost. By testing on Ubuntu 18.04 PC with 2 GHz Intel Core i3 CPU and 4 GB RAM, the browser tabs open twice as fast, and new windows open 26% faster compare to the previous version.

The new release also adds native support for Apple computers using the new ARM-based M1 processors.

Besides, there are more new features including:

  • Add support for Kabyle
  • Add support for configurable document menus
  • Support Periodic Reload in web panels
  • Periodic Reload in Web Panels
  • Declutter a crowded Tab Bar in two clicks
  • Search highlight priority options
  • Silent update support for Windows.
  • Import bookmarks for Chromium Edge

How to Install Vivaldi 3.7 in Ubuntu:

The official Ubuntu .DEB package is available to download at the link below:

Download Vivaldi (DEB)

Grab the deb matches your OS, then install it via either Ubuntu Software install or Gdebi package installer. Or run command in terminal:

sudo apt install ./Downloads/vivaldi-stable*.deb

Vivaldi also has an official apt repository, with it you can install the browser and get future updates through Software Updater utility.

Open terminal either via Ctrl+Alt+T keyboard shortcut or by searching for terminal from application menu. When it opens, run following commands one by one:

1. Download and install the repository key:

wget -qO- https://repo.vivaldi.com/archive/linux_signing_key.pub | sudo apt-key add -

Typer user password when it prompts and hit Enter to continue.

2. Add Vivaldi repository via command:

sudo add-apt-repository 'deb https://repo.vivaldi.com/archive/deb/ stable main'

3. Finally check updates and install the web browser via command:

sudo apt update && sudo apt install vivaldi-stable

Or upgrade from an old version via Software Updater utility.

(Optional): To remove Vivaldi apt repository from you system, launch Software & Updates and navigate to Other Software tab.

The Audacity audio editor 3.0.0 was release as a new major update a day ago.

Audacity 3.0.0 features .aup3 project format. The audio project was previously saved as large number of small data files, with an ‘.aup’ file to coordinate the lot. Now it saves project as the new all-in-one-file aup3 file format.

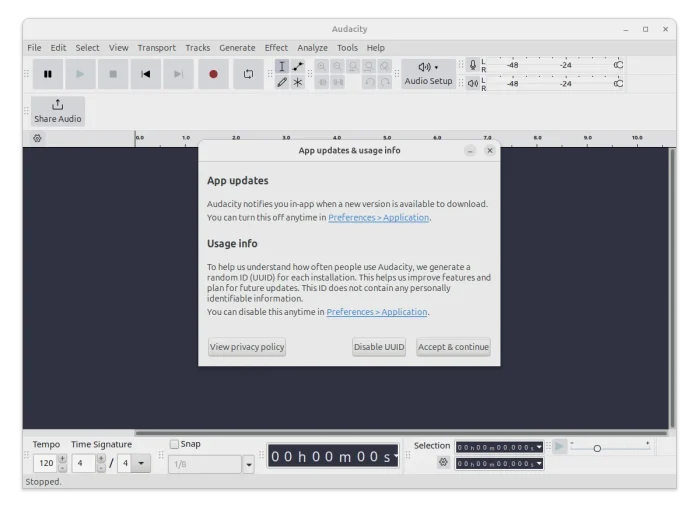
According to the Privacy Notice, Audacity may COLLECT personal data necessary for law enforcement, litigation and authorities. And it dissuade those under 13 years old from using the App.

It is incompatible with the GPL license. USE IT AT YOUR OWN RISK!

Working with the new .aup3 projects editing audio should be a little faster than before, however, finishing and closing a project at the end can be quite a lot slower.

You can open your older .aup projects in the new version, where they will be converted to the new .aup3 format.

Other changes in the Audacity 3.0.0 include:

  • Improved ‘Noise Gate’ effect
  • Add new analyzer ‘Label Sounds’ to label sounds and silences.
  • Import and export macros
  • New commands for using the last used tool or analyzer
  • Over 160 bug-fixes since version 2.4.2.

Download Audacity 3.0.0 for Linux:

No binary package for Ubuntu at the moment of writing, only the source tarball is available to download at the link:

Download Audacity Source

And you can follow this guide to build it on Linux.

Wine 6.4 Released with DTLS Protocol Support

Last updated: March 13, 2021

Wine Stable

The Wine team announced the new development release Wine 6.4 with new features and various bug-fixes.

Wine 6.4 added support for the DTLS protocol. Datagram Transport Layer Security (DTLS) is a protocol designed to secure data over UDP and is used for applications such as media streaming, VOIP, and online gaming for communication.

Other changes in the release include:

  • Fontset support in DirectWrite.
  • Dialog for editing Access Control entries.
  • Theming support for a few more common controls.
  • Support for Korean Wansung encoding.

And there are various bug-fixes to Windows applications including RTG Bills 2.x, Acrobat Reader XI, Soldiers of Anarchy, The Witcher 3, and more.

How to Install Wine 6.4 in Ubuntu:

The new release package will be available in next a few days for Ubuntu 18.04, Ubuntu 20.04, and Ubuntu 20.10.

Open terminal either by pressing Ctrl+Alt+T on keyboard, or by searching for ‘terminal’ from system application menu. When it opens, run following steps one by one.

Install Wine Development version via following commands will replace the latest stable Wine release package if installed.

1.) Run command to enable 32 bit architecture (if you don’t have it):

sudo dpkg --add-architecture i386

Type user password (no asterisk feedback) when it asks and hit Enter to continue.

2.) Install the repository key by running command:

wget -O - https://dl.winehq.org/wine-builds/winehq.key | sudo apt-key add -

3.) Add wine repository via command:

sudo apt-add-repository 'deb https://dl.winehq.org/wine-builds/ubuntu/ focal main'

IMPORTANT: In this command, you have to replace focal with:

  • focal for Ubuntu 20.04, Linux Mint 20.x
  • groovy for Ubuntu 20.10.
  • bionic for Ubuntu 18.04 and Linux Mint 19.x

Don’t know your system edition? Run lsb_release -a command in terminal to check out.

4.) For Ubuntu 18.04 and Linux Mint 19.x only, libfaudio0 library is required to install from a third-party repository by running command:

sudo add-apt-repository ppa:cybermax-dexter/sdl2-backport

5.) Finally install Wine 6.4 via command:

sudo apt update && sudo apt install --install-recommends winehq-devel

If you get unmet dependency issue, try aptitude command instead:

sudo apt install aptitude && sudo aptitude install winehq-devel

Uninstall wine:

You may remove the PPA by launching Software & Updates utility and navigating to Other Software tab.

To remove wine 6.4, run command in terminal:

sudo apt remove --auto-remove winehq-devel

Photoflare, simple but powerful image editor inspired by PhotoFiltre, released version 1.6.7 with translation updates and paint tool improvements.

Photoflare is an open-source cross-platform image editor written in C++ with Qt5 framework. It has a PhotoFiltre style user interface, and features basic image editing capabilities, paint brushes, image filters, colour adjustments and more advanced features such as Batch image processing.

The new 1.6.7 was released with new translations: Indonesian and Spanish. And it removed incorrect image extension check, instead it now shows the actual file type in the Image Properties dialog.

And the new version added offsets to the Paint Bucket tool and the Color picker tool. Previously, they select from the center of the cursor location.

Color Picker Before 1.6.7

Color Picker after

How to Install Photoflare in Ubuntu:

The official Ubuntu PPA has made the latest packages for Ubuntu 20.04, Ubuntu 20.10, and Linux Mint 19.x / 20.

1.) To add the PPA, open terminal from system application launcher and run command:

sudo add-apt-repository ppa:photoflare/photoflare-stable

2.) After adding PPA, update system package cache and install the image editor via commands:

sudo apt update

sudo apt install photoflare

Uninstall Photoflare:

To remove Photoflare image editor, either use your system package manager or run command in terminal:

sudo apt remove photoflare

And remove the PPA either via Software & Updates under Other Software tab, or by running command:

sudo add-apt-repository --remove ppa:photoflare/photoflare-stable

The free open-source Avidemux video editor 2.7.8 was released with many new features. Here’s how to install it in Ubuntu via PPA.

The new release features many new video filters. A dedicated MOV muxer is available to replace MOV muxing mode within the MP4 muxer; A subset of color info relevant for HDR support is retained in copy mode when both input and output video are stored in Matroska / WebM containers.

The indexer in the MPEG-TS demuxer now detects resolution changes in MPEG-2 and H.264 streams.

YUV varieties of the lossless Ut Video codec are supported via bundled FFmpeg library. Multi-threaded video decoding is now available for the bundled FFmpeg.

Other changes include:

  • Uncompressed 24-bit audio support.
  • Limited support for 7.1 channel layout.
  • Decode and stream copy support for XLL substream in DTS audio tracks.
  • Audio properties updated on resuming playback.
  • An option to keep the identity of markers A and B instead of swapping them automatically
  • Maximum resolution support increased to 8192×8192
  • FFmpeg bundle updated to 4.2.4
  • MP4 muxer accepts now MPEG-1 and MPEG-2
  • Extended Python interface, and more.

How to Install Avidemux 2.7.8 in Ubuntu:

The editor offers official non-install .appimage package, which is available to download at the link below

Download Avidemux

Grab the appimage, go to file Properties -> Permissions and make it executable, finally right-click and run the file to launch the Avidemux video editor.

For those prefer the classic apt method, I’ve uploaded the .deb packages into the unofficial PPA, available for Ubuntu 18.04, Ubuntu 20.04, and Ubuntu 20.10.

1.) Open terminal and run command to add the PPA:

sudo add-apt-repository ppa:ubuntuhandbook1/avidemux

Type user password (no asterisk feedback) and hit Enter to continue.

2.) Then refresh system package cache and install the editor:

sudo apt update

sudo apt install avidemux2.7-qt5 avidemux2.7-plugins-qt5 avidemux2.7-jobs-qt5

Uninstall:

To uninstall the PPA, run command:

sudo add-apt-repository --remove ppa:ubuntuhandbook1/avidemux

To uninstall the video editing software, run:

sudo apt remove --autoremove avidemux2.7-qt5 avidemux2.7-plugins-qt5 avidemux2.7-jobs-qt5

Free interior design software SweetHome3D 6.5 was released a few day ago. Here’s how to install it in Ubuntu 20.04, Ubuntu 20.10, Linux Mint 19.x, and 20.x.

According to the release note, SweetHome3D 6.5 features:

  • Azul OpenJDK 11.0.10 bundle for 64-bit Windows to get better HiDPI support.
  • Azul OpenJDK 15.0.2 bundle for Mac OS X ≥ 10.9, which supports notarization and the Apple new M1 processor.
  • JOGL library updated to 2.4 RC 20210111
  • Display Java runtime and Java 3D version in About dialog.
  • New options in Furniture and Textures Library Editors
  • Add a new example to the gallery, shows a house with pillars built on a small hill along a lake.

How to Install Sweet Home 3D 6.5 in Ubuntu:

First the software offers Linux portable as well as jar package in sourceforge page.

Sweet Home 3D is also available to install and keep updated via Flathub repository.

1. Setup Flatpak framework in Ubuntu:

First open terminal from system application launcher. When it opens, run command to install flatpak:

sudo apt install flatpak

Then add the flathub repository by running command:

flatpak remote-add --if-not-exists flathub https://flathub.org/repo/flathub.flatpakrepo

2. Install Sweet Home 3D flatpak package:

To install the package, run command in terminal:

flatpak install flathub com.sweethome3d.Sweethome3d

To update the flatpak package, run command:

flatpak update com.sweethome3d.Sweethome3d

Once installed, you can launch the software from ‘Show Applications’ menu and enjoy!

Uninstall:

To uninstall Sweet Home 3D flatpak package, run command in terminal:

flatpak uninstall com.sweethome3d.Sweethome3d