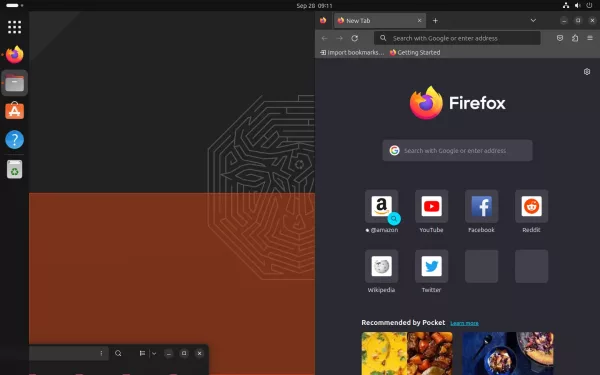
For people with dyslexia, scopic sensitivity, and related conditions, GNOME has an extension to adds a a translucent colored overlay over your desktop that may help.

It’s ‘ColorTint’ that adds an indicator applet in system tray area. User may click the drop down menu options to enable/disable the overlay, change the color via RGB slider bar, and adjust transparency via the Alpha slider.

How to Install ColorTint:

The extension works on GNOME 40 (Ubuntu 21.10) and GNOME 3.32 (Ubuntu 18.04), however lacks Ubuntu 20.04 support
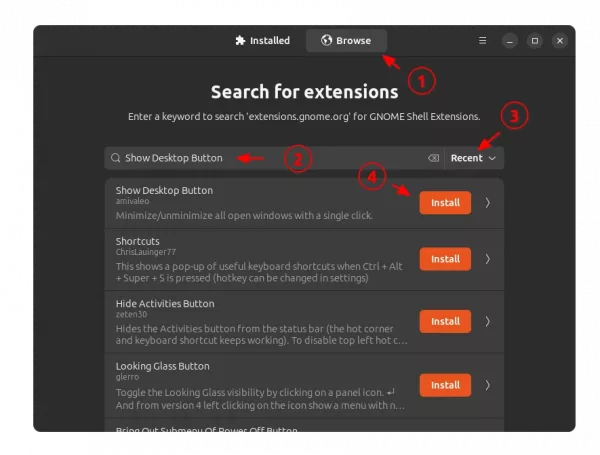
1.) Firstly, press Ctrl+Alt+T on keyboard to open terminal. When it opens, run command to install the ‘chrome-gnome-shell’ package to enable ability to install Gnome Extension via web broser:

sudo apt install chrome-gnome-shell

2.) Next, go to the link below and turn on the slider icon to install the extension:

Don’t see the toggle icon? Try installing the browser extension via the link in the page and then refresh it.

NOTE: The pre-installed Firefox in Ubuntu 21.10 is a Snap package that so far does not support for installing Gnome Extensions, use another browser or install Firefox as native Deb package via command:

sudo apt install firefox

And, to manage all installed extensions, install ‘Gnome Extensions‘ app either from Ubuntu Software or by running command in terminal:

sudo apt install gnome-shell-extension-prefs

That’s all. Enjoy!

Designers and website developers may sometimes need to check WCAG color contrast to make web content more accessible to people with disabilities.

Without using an online website each time, Linux has a stylish GTK4 app “Contrast” which allows to check whether the contrast between two colors meet the WCAG requirements.

The app has a simple user interface that displays one color as background and another as font color of the text. By clicking on the double arrow icon between two color codes, it reverses background color as text font and font color as background.

User may select color either by clicking on the circle icon before hex code (e.g., #F3F6F9), or by using the color picker tool after the code.

Contrast Select Color

The app will display color contrast result with text, such as “Awesome, Pretty Good, Not Bad, and Nope, along with short description tells whether the color combination will properly work.

It also displays a score bar tells that if the color contrast meets the 3 WCAG Levels: A, AA and AAA. And, a contrast ratio is displayed at the bottom.

Reversed colors

How to Install Contrast in Ubuntu Linux:

As a GTK4 app, Contrast so far only available to install as Flatpak which runs in sandbox.

1. Firstly, press Ctrl+Alt+T on keyboard and open terminal. When it opens, run command to install the Flatpak daemon:

sudo apt install flatpak

For Ubuntu 18.04 and Ubuntu 16.04, the flatpak PPA is required to get the package.

2. Next, run command to install the WCAG color contrast app:

flatpak install https://dl.flathub.org/repo/appstream/org.gnome.design.Contrast.flatpakref

Note: If you’re first time installing a Gnome app as Flatpak, it will install the required GNOME 41 platform as shared runtime libraries, which take hundreds of megabytes disk space.

Once installed, search for and open the app from activities overview screen.

How to Remove Contrast Flatpak app:

To remove the software package, press Ctrl+Alt+T and run command in terminal:

flatpak uninstall --delete-data org.gnome.design.Contrast

And use flatpak uninstall --unused command may remove useless run-times if any.

The beautiful Debian based Linux distribution Deepin 20.3 was released. Features Kernel 5.15, new features and optimizations for its core apps.

The stable Linux kernel has been updated to v5.15 with better support for Intel 12th Gen processors and NTFS file systems. Though the iso image by default boots with 5.10 LTS kernel, user have to select the new kernel to install from ‘Advanced’ menu in Grub boot-loader.

The Deepin screen capture can now take scrolling screenshots via the ‘Scrollshot‘ option. After selecting an app window to capture, a ‘Scrollshot’ option is available in tool-bar. By clicking on it, you may scroll the page to take a continuous screenshot with real-time preview. Also OCR is supported in this mode to extract text from image.

Deepin Scrollshot

In the extended mode, you may now set how to display the Dock on multiple displays via its right-click context menu.

Other changes in Deepin 20.3 include:

  • Video search, preview, and management in the Album app.
  • Add support for 2K hard decoding of OLAND chips.
  • Add shortcut for Global Search, which also supports searching markdown files.
  • Add the print entrance in Document Viewer.
  • Improve the file manager, movie, music, as well as other core apps.

Get Deepin 20.3

Compare to other Linux, Deepin somehow requires too much disk space now: 64 GB at least and 128 GB recommended. And it does not provide a live system to try out before installing into disk.

To get it, go to the link button above. And see the release note at this page.

Free and open-source clone of Paint.Net 3.0, Pinta, released version 1.7.1 a few days ago with improvements and bug-fixes.

The release is the final version based on GTK2, as the GTK3 / .NET 6 version is nearly ready!

Pinta 1.7.1 is a small release with minor new features to improve user experience. For image with large resolution (or zoomed in), you may use mouse wheel to scroll up / down. Now by holding Shift + mouse wheel, the canvas can be scrolled horizontally.

Same to GIMP, user may now press X to exchange background and foreground palette colors quickly in Pinta since v1.7.1. And, zooming in and out can now be done without pressing the Ctrl key

The release also improved the pop-up dialog when you trying to open an unsupported file format. The file open dialog by default shows only supported images, including ani, png, bmp, jpg, gif, icns, ico, jpeg, ora, pnm, qtif, svg, tga, tif, tiff, xbm, xpm. If you chose show “All files” and selected an unsupported file, it will prompt that file not support and show you all supported file formats.

Error when opening unsupported file and display all supported formats

Other changes in Pinta 1.7.1 include:

  • Use arrow keys to move per pixel in Move Selected Pixels and Move Selection tools
  • Use Shift to constrain to a uniform scale when scaling using Move Selected Pixels tool
  • Text in ‘About’ is selectable to copy version for use to report bugs.
  • Improve handling of memory allocation failures for large images
  • And various bug-fixes.

How to Install Pinta 1.7.1 in Ubuntu Linux:

Option 1: Install Pinta via Snap:

The app is easy to install in Ubuntu using the Snap package, by simply searching for and installing from Ubuntu Software (Snap Store):

Pinta Snap app in Ubuntu Software.

Option 2: Install Pinta via Ubuntu PPA:

NOTE: the PPA package crashes randomly due to outdated Mono library in Ubuntu. It’s highly to upgrade mono library if you want to install Pinta in native deb package.

The app has an official Ubuntu ppa that contains the latest packages for Ubuntu 18.04, Ubuntu 20.04, Ubuntu 21.04, and Ubuntu 21.10 so far.

Firstly, press Ctrl+Alt+T on keyboard to open terminal. Then run command to add the PPA:

sudo add-apt-repository ppa:pinta-maintainers/pinta-stable

Secondly, run command to update system cache if you’re still running Ubuntu 18.04:

sudo apt update

Finally, install Pinta via command:

sudo apt install pinta

Or, upgrade the app if an old version present in your system using Software Updater:

In addition, Pinta is also available to install as Flatpak package. Check in Flathub if you’re interested in it.

How to Remove Pinta from Ubuntu:

To remove Pinta installed via PPA package, run command in terminal (Ctrl+Alt+T):

sudo apt remove --autoremove pinta

And remove the PPA either via ‘Software & Updates‘ utility under Other Software tab, or by running command:

sudo add-apt-repository --remove ppa:pinta-maintainers/pinta-stable

For Pinta snap package, remove it either via Ubuntu Software or by using command:

snap remove --purge pinta

More and more apps today publish Linux packages as Flatpak. Though the run-time libraries take hundreds of megabytes disk space, some apps are really good and useful.

If you have some apps installed as Flatpak in Ubuntu or other Linux like me, then Flatseal may be useful to protect your privacy by managing permissions in per app basis.

Flatseal is a stylish GNOME app that displays all the installed Flatpak apps in the left pane. By selecting an app, it displays the basic information as well as permissions with toggle buttons. The app has an adaptive UI that works great on small screen size, e.g., Linux Phone.

With Flatseal, you may configure following permissions for your Flatpak apps:

  • Network access.
  • Sound server access.
  • GPU acceleration to reduce CPU usage.
  • System file or user file access.
  • Send notifications.
  • System bus and session bus.
  • Print system, smart card, webcam, bluetooth access, and more.

Note: some options (e.g., inter-process communications and X11/Wayland windowing system) may be required for the app to work. Switching those options off may cause function issues, though you may reset them easily afterwards.

As some options are not easy to understand, you may press F1 on keyboard to bring up the ‘help‘ window, which contains the descriptions for each toggle option. And, if permissions are removed and somehow no longer possible to reset, run command below (press Ctrl+Alt+T in Ubuntu to open terminal) to clear the changes and restart Flatseal.

rm ~/.local/share/flatpak/overrides/com.github.tchx84.Flatseal

How to install Flatseal in Ubuntu Linux:

The app itself is available to install as Flatpak package. To try it out, you must have already installed some apps as Flatpak. If not, you need to install the daemon first. For Ubuntu/Debian based systems, simply open terminal and run command:

sudo apt install flatpak

Next, install the Flatseal by running command in terminal:

flatpak install https://dl.flathub.org/repo/appstream/com.github.tchx84.Flatseal.flatpakref

Or use the command below if you already added the Flathub repository:

flatpak install flathub com.github.tchx84.Flatseal

As you see in picture, the app itself is about 683 KB, while run-time libraries take more than 700 MB. The run-times (e.g., GNOME platform) are shared libraries though that can be used for other Flatpak apps.

Uninstall Flatseal:

To remove the app, simply run command in terminal:

flatpak uninstall --delete-data com.github.tchx84.Flatseal

Note: removing Flatseal won’t reset the permission changes you made for the flatpak apps. You have to manually clear the config files under “~/.local/share/flatpak/overrides” directory to restore them.

Ghostwriter, free and open-source markdown text editor, released version 2.1.0 with some new features. Here’s what’s new and how to install in Ubuntu.

Ghostwriter is a cross-platform, aesthetic and distraction-free Markdown editor works on Linux, Windows, and MacOS. It comes with live HTML preview, dark and light mode, focus mode, hemingway mode, autosave, MathJax, and built-in Cheat Sheet in the sidebar (toggle via F1) in case you forgot some Markdown syntax.

By releasing v2.1.0, it now auto-saves untitled documents to a draft folder, and provides a button in ‘Preferences’ to open that folder (it’s user Documents folder in my case).

And, it loads the last opened file on startup while providing an option to toggle on/off this feature. The bottom status bar can now display a different statistic. By clicking on it, you may choose to display how many words, characters, pages, sentences, paragraphs, or read time, write time, wpm, etc.

How to Install The Latest Ghostwriter 2.1.0 in Ubuntu:

The text editor has an official PPA that so far supports for Ubuntu 20.04 and Ubuntu 21.04. The Ubuntu 21.10 package is somehow not updated at the moment, you may check the link page though.

1.) Add the PPA:

Press Ctrl+Alt+T to open terminal. When it opens, run the command below to add the PPA repository:

sudo add-apt-repository ppa:wereturtle/ppa

Type user password (no asterisk feedback) when it asks and hit Enter to continue.

2.) Refresh system package cache by running command in terminal. This is done automatically in Ubuntu 20.04 & higher while adding PPA, but some Ubuntu based systems may not.

sudo apt update

3.) Finally install ghostwriter via command:

sudo apt install ghostwriter

The software team also maintains Copr repository for Fedora 33/34/35 and rawhide users. Simply open terminal and run commands below one by one will install it in Fedora:

sudo dnf copr enable wereturtle/stable
sudo dnf install ghostwriter

Uninstall Ghostwriter:

To remove the markdown editor, open terminal and run command:

sudo apt remove --autoremove ghostwriter

And remove the Ubuntu PPA using “Software & Updates” utility under Other Software tab:

KGX is a simple and user-friendly terminal emulator for GNOME. It aims to be a “Core” app for GNOME and Phosh, graphical shell for mobile devices like Purism’s Librem 5.

Rather than replacing GNOME Terminal, it’s on target to serve casual Linux user who rarely needs a terminal to carry out simple command line tasks. Via libhandy library, the terminal adjusts nicely to small screen sizes and for touch usage.

KGX terminal emulator. Image from thisweek.gnome.org

The name KGX is the station code for King’s Cross, the London terminus of the East Coast Main Line. The app is available in Ubuntu repositories since Ubuntu 21.04, though the package version is lag behind.

The stock KGX in Ubuntu 21.10 has a semi-transparent app window and the UI looks kinda like Gnome terminal. Though it’s lightweight and has less features.

KGX in Ubuntu 21.10

Install KGX in Ubuntu 21.10 / 22.04:

For Ubuntu 21.04, Ubuntu 21.10 and next Ubuntu 22.04, it’s easy to try out this terminal emulator by pressing Ctrl+Alt+T on keyboard, and then run command in terminal to install it:

sudo apt install kgx

Then, search for and open the terminal emulator from activities overview.

While the stock package is always old, you may build it from source which is available at KGX project page.

Linux has quite a few image annotation tools. “Annotator” is the one designed for Elementary OS with specific features. Here’s how to install it in Ubuntu 20.04, Ubuntu 23.04, Ubuntu 22.04 via PPA.

Without using GIMP image editor, I sometimes uses Shutter to annotate image quickly. As well, Ksnip has some useful tools (e.g., drop shadow, invert color and add border) that I use regularly.

Annotator is an app looks kinda like MacOS Preview. Like other tools, it allows to add text, rectangle, ellipse, sequence number, line, arrow, blur effect, crop and resize image. What makes it different is the “Magnifier” tool. It adds a circle on your image and enlarge the area inside. By right-clicking on the circle, it offers option to change magnification.

Also, it allows to add stickers, such as industry, mobile and data icons, different type of arrows.

Install Annotator in Ubuntu:

Though the app is designed for Elementary OS, it works on other desktop environments. The developer team provides official package as Flatpak. Make sure the flatpak daemon is installed, you may then install the app via command:

flatpak install https://appcenter.elementary.io/com.github.phase1geo.annotator

However, the Flatpak package requires separated Elementary OS platform and SDK as run-time libraries. The run-times take about 700 MB space while the app itself is only a few hundred KB.

So I created this unofficial Ubuntu PPA for those want to try out this annotation tool with native DEB package. So far, Ubuntu 20.04, Ubuntu 23.04, and Ubuntu 22.04 are supported.

1. Add the PPA

Press Ctrl+Alt+T on keyboard to open terminal. When it opens, run commands to add the PPA:

sudo add-apt-repository ppa:ubuntuhandbook1/annotator

Type user password, no visual feedback, when it asks and hit Enter to continue.

2. Update package cache

Ubuntu 20.04 and higher refresh system package cache automatically while adding PPA, but some Ubuntu based systems may not. To do it manually, run command:

sudo apt update

3. Install Annotator:

Finally, install the app using command:

sudo apt install com.github.phase1geo.annotator

Once installed, search for and open it from start menu (activities overview) and enjoy!

Remove Annotator & Ubuntu PPA:

To remove the Ubuntu PPA, use command:

sudo add-apt-repository --remove ppa:ubuntuhandbook1/annotator

And remove the annotation tool via:

sudo apt remove --autoremove com.github.phase1geo.annotator

For spaceflight enthusiasts, there’s now a GTK4 app for Linux Desktop and Phone (e.g., PinePhone, Librem 5) to keep track of upcoming rocket launches.

It’s “Space Launch”, an open-source app gets data of the launches from spacelaunchnow.me. The app displays the next upcoming launches with information about the company and/or manufacturer, such as Rocket Lab and SpaceX. The location, date and time, and count down for the rocket launches.

Dark mode is supported and it may show more launches as schedule.

The app is currently in alpha release. More features will be added later. And it’s compatible with Linux Phone using Phosh.

Install Space Launch in Linux:

This app is available to install via Flatpak package. You may follow the steps below one by one to setup flatpak daemon and install Space Launch.

1.) Press Ctrl+Alt+T on keyboard to open terminal. When it opens, run command to install the Flatpak daemon:

sudo apt install flatpak

The old Ubuntu 18.04 and Ubuntu 16.04 may also install the app, though need to add Flatpak PPA first.

2.) Next, add the Flathub repository that hosts the packages via command:

flatpak remote-add --if-not-exists flathub https://flathub.org/repo/flathub.flatpakrepo

3.) Finally, install the app using command:

flatpak install flathub org.emilien.SpaceLaunch

The app package itself is about 75KB. Though, if you’re first time installing Gnome App as Flatpak, it may also install the run-time libraries take up a few hundred MB disk space.

After installation, search for and open the app from ‘Activities’ overview screen and enjoy!

How to Remove Space Launch:

To remove the app, simply run command in terminal:

flatpak uninstall --delete-data org.emilien.SpaceLaunch

And you may clear unused run-time libraries via command:

flatpak uninstall --unused

How to hide top-bar, remove left dock and ‘Activities’, as well as toggle visibility of a few other Gnome Panel items are often asked questions. I used to use a few extensions to do the jobs until met ‘Just Perfection’.

Just Perfection includes a list of options to toggle visibility of GNOME UI Elements, customize panel size, padding, and change the behavior.

Its settings page starts with a portrait of an old man (Sorry for my poor cultural knowledge, I don’t know who is he).

An old man in Just Perfection settings

Just scroll down, and you’ll see the options to:

  • override Gnome Shell theme to create a minimal desktop.
  • Hide top-bar.
  • Hide top-bar in overview screen.
  • Remove top left “Activities” button.
  • Disable (the focused) app-menu, clock, system tray menu (Aggregate menu).
  • Remove search box, workspace picker, close button & caption of selected app in overview
  • Disable the dock launcher, on screen display (when changing volume/brightness via Fn key).
  • Disable hot corner watermark animation.
  • Turn on/off icons for top-bar items.
  • Remove panel arrow (little triangle behind app-menu and battery icon).
  • Toggle hot corner, app gesture, type to search.
  • Customize panel position (top or bottom), clock position, panel size and button padding, animation speed, etc.

How to Install Just Perfection Extension:

The extension so far supports Gnome from v3.36 to v41, so Ubuntu 20.04 and higher may install it via following steps:

1.) Firstly, press Ctrl+Alt+T on keyboard to open terminal. When it opens, run command to install required libraries:

sudo apt install chrome-gnome-shell gnome-shell-extension-prefs

2.) Next, go to the extension web page and turn on the toggle icon to install it:

If you don’t see the toggle icon, click the link in the top to install browser extension and refresh the web page.

(NOTE: the default Firefox in Ubuntu 21.10 is a Snap app that does not support for installing Gnome Extensions.)

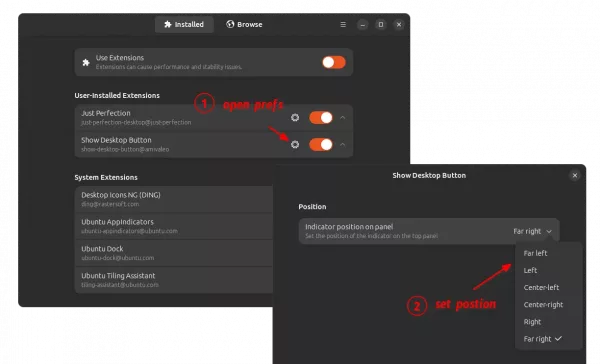
After installation, search for and open ‘Gnome Extensions‘ app from Activities overview screen and click the setting wheel for the extension to customize GNOME UI: