Archives For November 30, 1999

For Thunderbird users, there will be a thunderbird.tmp sub-folder in Downloads in Ubuntu 24.04. Here are the workarounds to get rid of it!

As you may know, the Thunderbird package in Ubuntu 24.04 is a Snap package that runs in sandbox! Due to this switch, the “thunderbird.tmp” sub-folder will be created on every launch (even after you deleted it) of the email client, in user’s Downloads folder.

According to this discussion page:

This is a tmp dir to store files you choose to open directly from Thunderbird. The snap can’t use the usual (insecure) /tmp location so had to choose something widely available so other apps can open the files if chosen.


Continue Reading…

For Thunderbird users who don’t like Snap package, here’s step by step guide shows how to replace the pre-installed snap version of the mail client with classic Deb package in Ubuntu 24.04 LTS.

Like Firefox, the Thunderbird Email Client in Ubuntu 24.04 has been replaced as Snap package that runs in sandbox! If you don’t like the change, then here are 2 other choices:

  • Mozilla Team PPA
  • Mozilla’s official Linux Tarball.

Continue Reading…

Can’t wait to try out the new Thunderbird 115, but hate Snap and Flatpak packages? Here’s how to install it from Ubuntu PPA!
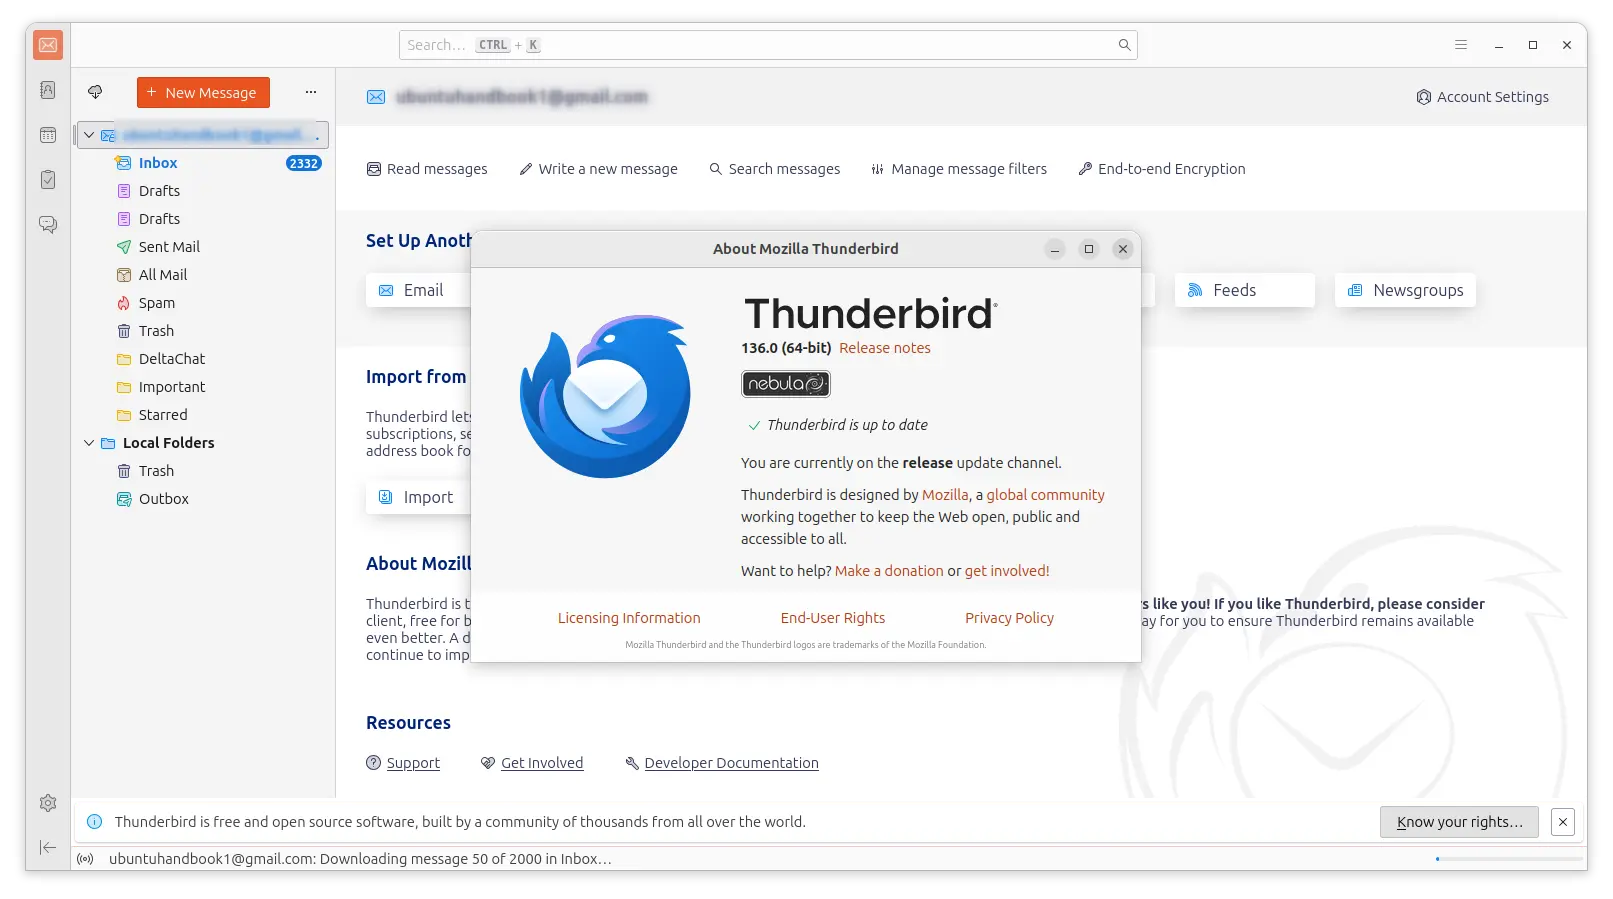
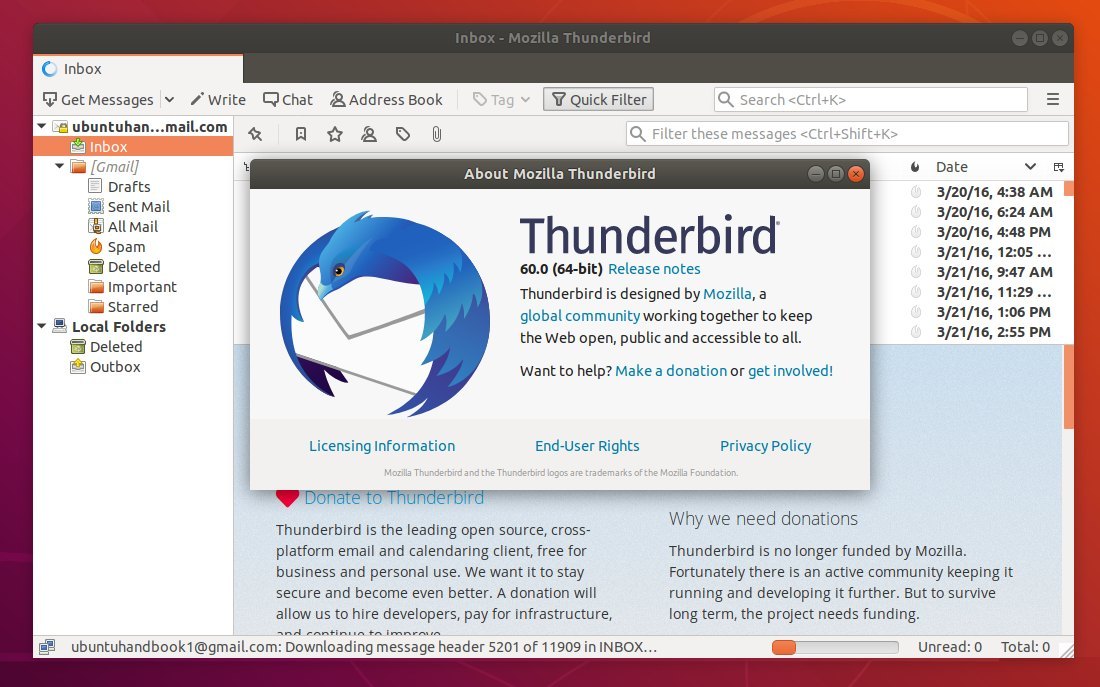
Thunderbird 115 is a new major release series with refined look and feel. It now uses GNOME CSD style header bar instead of the old title-bar. Which has a more compact header bar, that looks better in Ubuntu, Fedora, and other Linux with GNOME.

As well, it provides menu options to change the header-bar height to meet your need.

Besides the headerbar, menu, tool-bar, etc, are also redesigned to look better in today’s Linux desktop. As well, it takes use the new logo announced few months ago. See more about Thunderbird 115.

How to Install Thunderbird 115 via PPA

Ubuntu is most likely to build the new Thunderbird 115 package into system repository! Check this page for Ubuntu’s official package status.

Before that, user can easily search for and install Thunderbird Snap package from Ubuntu Software. Or, install the Flatpak package in Flathub repository. However, both are running in sandbox and support 64-bit X86 CPU architecture type only.

If you hate sandboxed applications, and/or running Ubuntu on ARM devices (e.g., Apple M1/M2, Raspberry Pi) or IBM POWER platform, then, there are Ubuntu PPAs for choice.

1. Add Ubuntu PPA

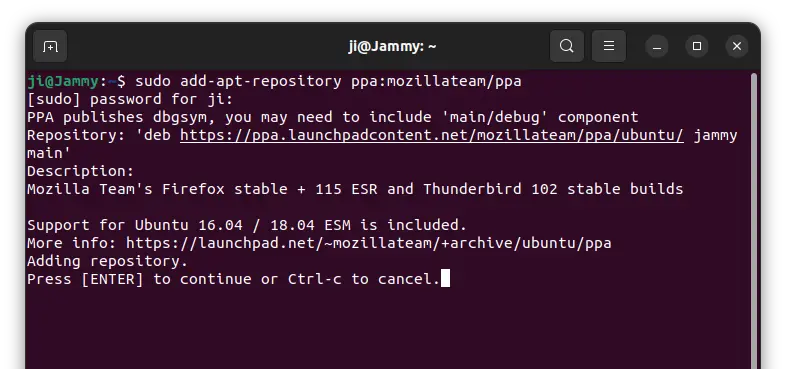
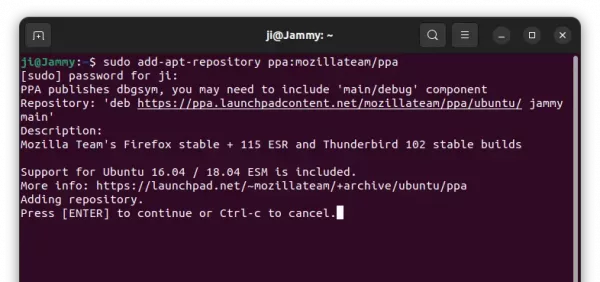
The Mozilla Team PPA has already built the packages for Ubuntu 20.04, Ubuntu 22.04, Ubuntu 23.04, and Ubuntu 23.10

First, press Ctrl+Alt+T on keyboard to open terminal. When it opens, run command to add the PPA:

sudo add-apt-repository ppa:mozillateam/ppa

Type user password (no asterisk feedback) when it asks and hit Enter to continue

2. Install/Update Thunderbird

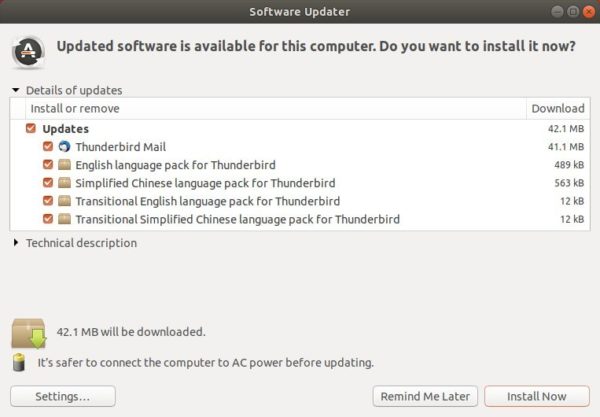
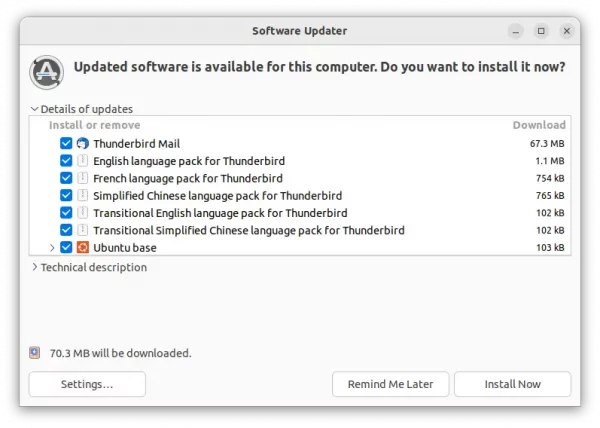
After adding the PPA, simply launch “Software Updater” and wait for checking for updates. Until done, install the updates to install Thunderbird 115.

Or, just run command in terminal to install/update the package:

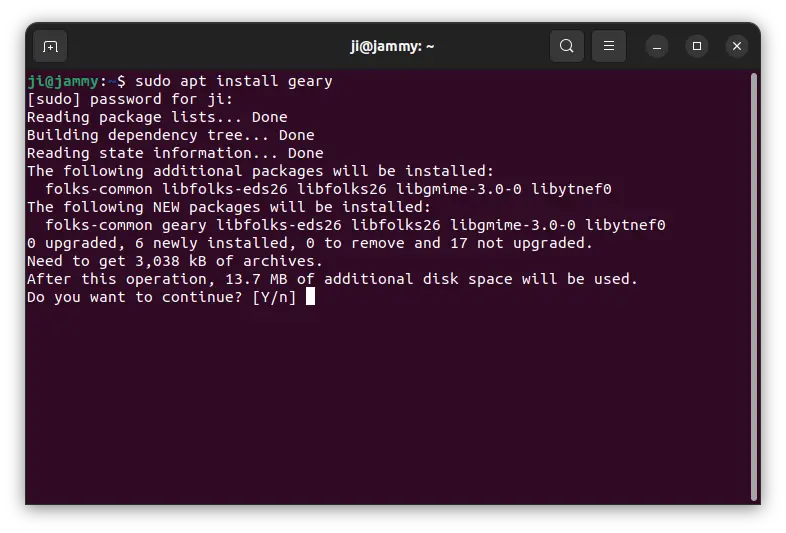
sudo apt install thunderbird

Linux Mint user need to run sudo apt update first to refresh package cache.

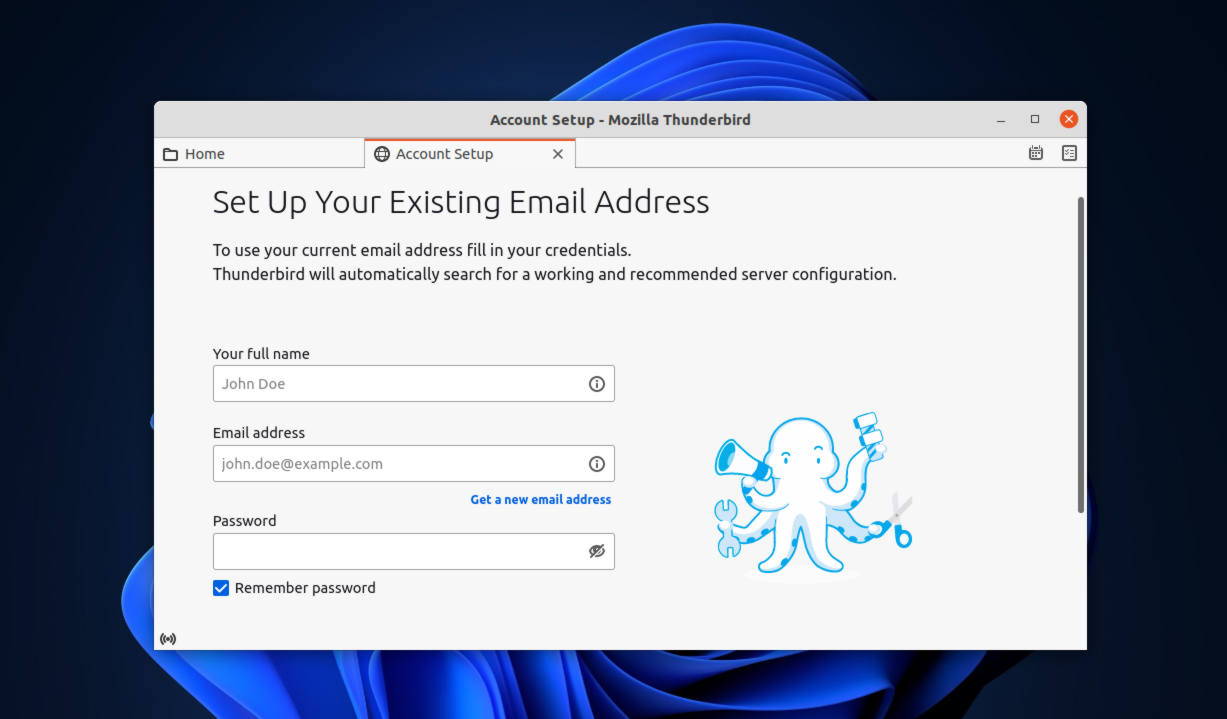
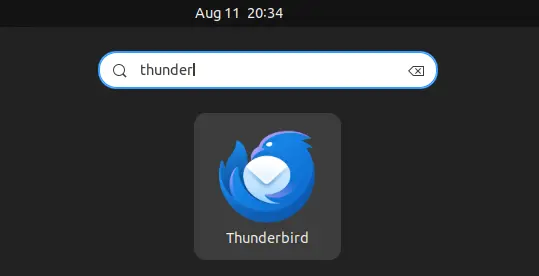
After installation, search for and launch the email client from ‘Activities’ overview or start menu depends on your desktop environment.

Uninstall Thunderbird.

If you have problem with the new release package, or Ubuntu updated the package in its official repository, then you can purge the Ubuntu PPA to switch back the stock version of Thunderbird package.

To do so, just open terminal (Ctrl+Alt+T) and run command:

sudo apt install ppa-purge && sudo ppa-purge ppa:mozillateam/ppa

If the command above failed, you may manually remove the PPA by running command:

sudo add-apt-repository --remove ppa:mozillateam/ppa

Then, remove the Thunderbird package installed from that PPA:

sudo apt remove --autoremove thunderbird

Mozilla Thunderbird email client released new major 91.0 version with many new features and improvements.

Thunderbird 91.0 now runs in multi-process (e10s) mode by default, which offers many advantages in responsiveness, stability, performance, and security.

For macOS users, the release adds native support for computers with Apple silicon CPUs. There are also Latvian language support, new user interface for adding attachments, etc.

The ‘Account Setup’ has a new look and finally move to new tab instead of a floating dialog. It also adds ability to detect and set up CalDAV calendars and address book during setup.

The new version also brings improvements to Calendar, such as remote calendar auto-detection, ‘Edit’ option in event context menu, double-click to open .ics files, and import filter and sort items.

And a warning popup will appear when either trying to spend a reply to a likely non-existant email address such as “[email protected]”, or public recipients of a message exceeds threshold.

Other changes in Thunderbird 91.0 include:

  • Beta-level support for Matrix servers chat.
  • Enable redirect of messages.
  • PDF.js viewer support.
  • Allow showing empty CC/BCC rows in compose window
  • Allow pinning folder views to the Folder Pane
  • And much more!

How to Get Thunderbird 91.0 for Ubuntu:

As the release note said, the release only is available as a direct download, and not as an upgrade from Thunderbird version 78 or earlier.

For Ubuntu Linux, it’s a tar.bz2 package. Once you get it, extract and right-click to run the executable to launch the client.

To create a shortcut icon for Thunderbird 91.0, you can open terminal (Ctrl+Alt+T) and run command to create & open a .desktop file:

gedit .local/share/applications/thunderbird91.desktop

Then paste following lines into the file. Replace “/PATH/TO/thunderbird with the executable file path, and finally save it.

If you don’t plan to move the source folder to another place for long time using, the file path should be: /home/USER_NAME/Downloads/thunderbird-91.0/thunderbird/thunderbird

[Desktop Entry]
Encoding=UTF-8
Name=Thunderbird 91.0
Comment=Send and receive mail with Thunderbird
Keywords=Email;E-mail;Newsgroup;Feed;RSS
Exec=/PATH/TO/thunderbird %u
Terminal=false
X-MultipleArgs=false
Type=Application
Icon=thunderbird
Categories=Application;Network;Email;
MimeType=x-scheme-handler/mailto;application/x-xpinstall;
StartupNotify=true
Actions=Compose;Contacts

[Desktop Action Compose]
Name=Compose New Message
Exec=/PATH/TO/thunderbird/thunderbird -compose
OnlyShowIn=Messaging Menu;Unity;

[Desktop Action Contacts]
Name=Contacts
Exec=/PATH/TO/thunderbird -addressbook
OnlyShowIn=Messaging Menu;Unity;

The Geary email client 40.0 was released a few days ago with UI enhancements.

Like Gnome core apps, Geary has the similar version system. After v3.38, Geary 40 was released days ago with adaptive user interface that supports for half-screen, portrait and small displays. So it finally has a Linux phone friendly UI.

Visual changes also include updated icons and improved performance for displaying large conversations.

Other changes in the release include:

  • Upgraded full-text search engine
  • Improved search for languages such as Thai and Chinese
  • Improved keyboard shortcuts
  • Improved server compatibility
  • Numerous user interface translation updates
  • Numerous bug fixes and user interface improvements

How to Install Geary 40 in Ubuntu:

The new release package so far is only available to install via flatpak package.

1.) Open terminal either from system application menu or by pressing Ctrl+Alt+T on keyboard. When it opens, run command to install the flatpak daemon if you don’t have it:

sudo apt install flatpak

2.) Add the flathub repository which hosts the flatpak package:

flatpak remote-add --if-not-exists flathub https://flathub.org/repo/flathub.flatpakrepo

3.) Finally run command to install Geary flatpak:

flatpak install flathub org.gnome.Geary

Already got an earlier version installed, you can update the package via command:

flatpak update org.gnome.Geary

NOTE: as the client may run in background, you need to kill the process or just reboot to apply updates.

(Optional) To remove the email client run command in terminal:

flatpak uninstall --delete-data org.gnome.Geary

How to Install Thunderbird 60 in Ubuntu 18.04, 16.04

Last updated: September 27, 2018

Thunderbird email client 60 stable is finally available via Mozilla Team Stable PPA for Ubuntu 18.04, Ubuntu 16.04, Ubuntu 14.04, Ubuntu 18.10, and their derivatives.

Thunderbird 60 was released one month and a half ago with following exciting new features:

  • New application logo
  • New “Photon” UI with rectangular tabs
  • Optional ‘light’ and ‘dark’ themes
  • Supports WebExtensions
  • New “Add-on Options” in Tools menu
  • Calendar events now display location
  • Native notifications on Linux
  • Improved email attachment UX
  • Compose window has button to delete email recipient(s)
  • Set the update interval for individual RSS feeds
  • OAuth2 authentication for Yahoo and AOL
  • FIDO U2F support

How to Install Thunderbird 60 in Ubuntu via PPA:

Open terminal either via Ctrl+Alt+T keyboard shortcut or by searching for ‘terminal’ from software launcher. When it opens, do following steps to add the Mozilla Team PPA and install Thunderbird 60.

1. Paste the command in terminal and hit run to add the PPA:

sudo add-apt-repository ppa:mozillateam/ppa

Type your password (no asterisks feedback) when it prompts and hit Enter.

2. Then launch Software Updater and you’ll see the software updates after checking for update.

Or run following command one by one to refresh repository cache and install software updates:

sudo apt-get update

sudo apt-get dist-upgrade

Uninstall:

To downgrade Thunderbird to the stock version in Ubuntu universe repository, run command to purge the PPA:

sudo apt-get install ppa-purge && sudo ppa-purge ppa:mozillateam/ppa

Geary email client reached the 0.12.2 bug-fix release earlier today. Here’s how to install it in Ubuntu 18.04, Ubuntu 16.04, Ubuntu 17.10.

Geary is a Gnome email client, which was originally developed by the Yorba Foundation. The latest release so far is Geary 0.12.2 that include following bug-fixes:

  • Fix being unable to remove attachments from a draft.
  • Ensure drafts are removed when composer from address changes accounts.
  • Workaround composer info label being too long.
  • Ensure embedded composer is always scrolled to when opened.
  • Don’t display quote expander buttons when printing a message.
  • Fix composer detach button position and visibility.
  • Actually fix second multipart/digest message body not being displayed.
  • Ensure gnome-control-centre knows in advance Geary uses notifications.
  • Fix gnome-shell notifications missing an icon under flatpak.
  • Fix message body quote button styling under WebKitGTK 2.20.
  • Don’t show unused header widgets when showing a message via notifications.
  • Work around present() not actually raising windows under Wayland.
  • Reduce CPU use when idle.
  • Fix some serious run-time memory leaks.

How to Install Geary 0.12.2 in Ubuntu:

The software has an official PPA repository contains the latest packages for Ubuntu 16.04, Ubuntu 17.10, Ubuntu 18.04.

1. Open terminal either via Ctrl+Alt+T or by searching for ‘terminal’ from app launcher. When it opens, run command to add the PPA:

sudo add-apt-repository ppa:geary-team/releases

There’s no visual feedback while typing your password due to security reason.

2. Then upgrade Geary from an existing release via Software Updater:

or run commands one by one in terminal to install or upgrade the email client:

sudo apt-get update

sudo apt-get install geary

Uninstall:

To remove Geary email client, simply run command in terminal:

sudo apt-get remove --autoremove geary

And open Software & Updates then navigate to Other Software tab to remove PPAs.

Geary, a modern email client for the Gnome 3 desktop, reached the 0.12 release a day ago.

Geary 0.12 features following changes according to the release history.

  • Insert images inline when composing rich text messages
  • Improved interface for inserting links in rich text messages
  • Choose multiple spell-checker languages when composing messages
  • Support message archiving for Yahoo! Mail and Outlook.com
  • Improved interface when displaying conversations
  • Improved interface when moving and labelling conversations
  • Improved support for right-to-left languages
  • Automatically unfold starred messages in a conversation
  • Support saving remote inline images
  • Improved keyboard navigation for conversations
  • Added in-application keyboard shortcut help (Ctrl + ?)
  • Support for distribution via Flatpak
  • Improved security when displaying messages
  • Numerous bug fixes and minor user interface improvements
  • Numerous user interface translation updates

How to Install Geary in Ubuntu:

Geary has an official PPA contains the latest packages for Ubuntu 16.04, Ubuntu 17.04, and Ubuntu 17.10, though Geary 0.12 is already available in Ubuntu Software for Ubuntu 17.10.

1. Add the PPA by launching terminal, either via Ctrl+Alt+T or by searching “terminal” from app launcher, and running command:

sudo add-apt-repository ppa:geary-team/releases

Input your password (no visual feedback while typing) when it prompts and hit Enter.

2. If you’ve a previous release installed, upgrade the email client via Software Updater:

or run following commands one by one to check updates and install (or upgrade) Geary:

sudo apt-get update

sudo apt-get install geary

Note that Gmail user need to update your Google Account settings to be able to connect via Geary.

Uninstall:

To remove the Geary email client, either use your system package manager or run command:

sudo apt-get remove --autoremove geary

And remove the PPA by launching Software & Updates utility and navigating to Other Software tab.