This quick tutorial shows how to share a folder in Virtualbox Ubuntu host and get access within Windows virtual machine.
One of the top things after installed a virtual machine via VirtualBox is how to transfer files between host OS and guest OS. And this can be done via Shared Folder feature.
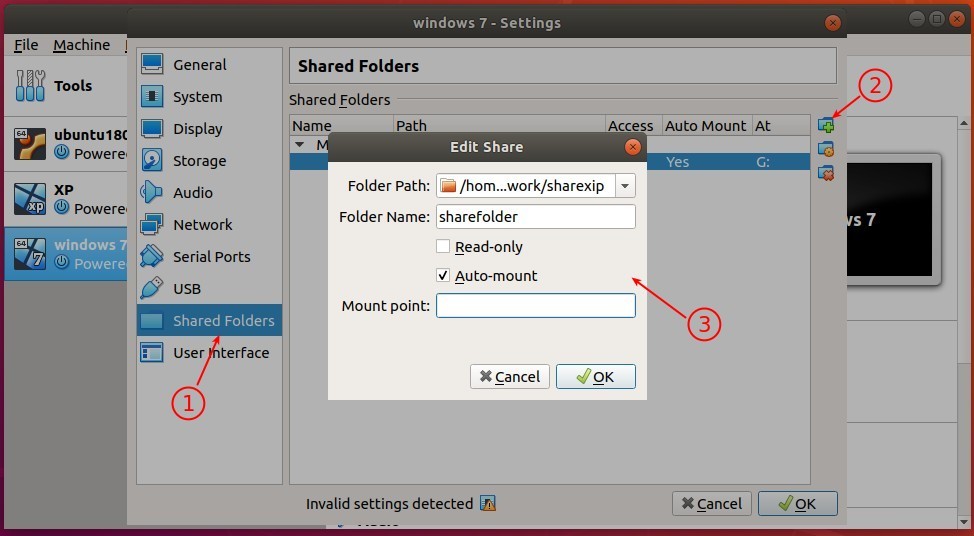
1. In Virtualbox (6.0.8 in the case), open Settings of the Windows Guest OS. Then do:
- Navigate to Shared Folders in left pane.
- Click ‘Adds new shared folder’ button in the right.
- In next pop-up dialog do:
- Folder Path, choose a folder in the Host OS to share with.
- Folder Name, auto generated after chosen folder.
- Enable ‘Auto-mount‘.
- Enable ‘Read-only’ if you DON’T want to add/edit the folder files in Guest.
- Mount point:, leave it empty.
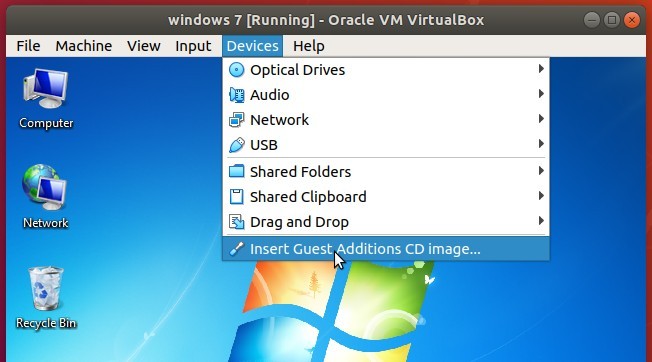
2. Boot up the Guest OS (Windows 7 in the case), and then go to menu Devices -> Insert Guest Additions CD image.
If you don’t see the Guest window menu, press right-Ctrl + C on keyboard.
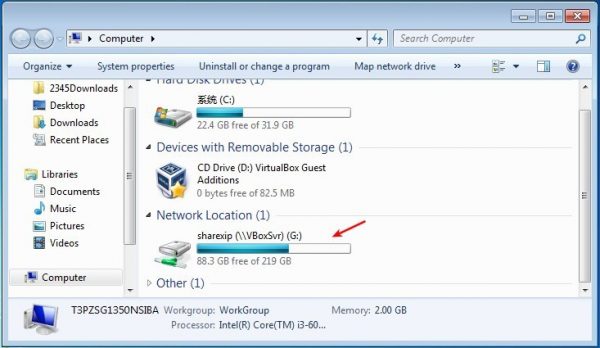
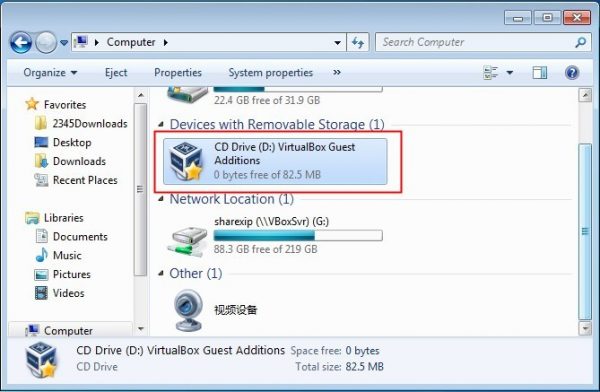
3. Open Computer, you’ll see CD Driver marked as ‘VirtualBox Guest’.
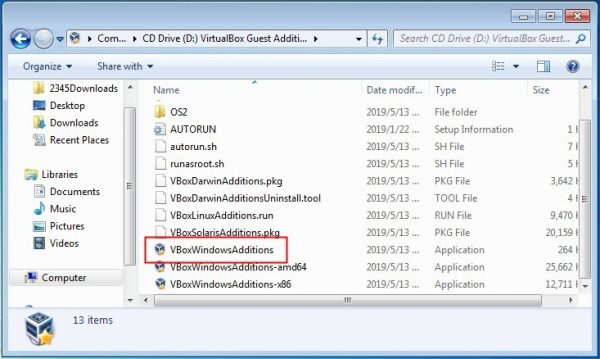
4. Go to the CD Driver and click install the exe file to bring up guest addition install wizard.
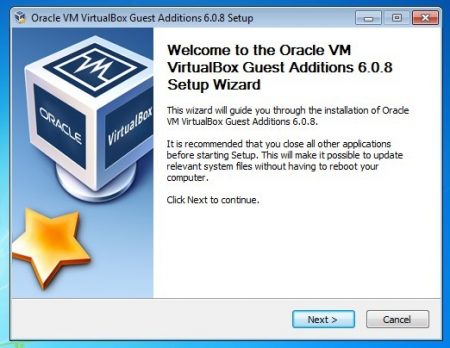
5. Follow the install wizard until done.
6. Finally reboot the Windows guest OS, and shared folder should be there in ‘Computer’