Archives For August 31, 2016

wireshark 2.2.0 PPA

Wireshark 2.2.0, new stable release of open-source network analyzer, is finally available for install or upgrade via PPA repository, in Ubuntu 16.04, Ubuntu 14.04, and Ubuntu 12.04.

Wireshark 2.2.0 new features:

  • “Decode As” support
  • support exporting packets as JSON
  • new file format decoding support
  • a wide range of new protocol support, including
    • Apache Cassandra
    • USB3 Vision Protocol
    • USIP protocol
    • UserLog protocol
    • Zigbee Protocol Clusters
    • Cisco ttag, and much more.

wireshark 2.2.0

How to install Wireshark 2.2 in Ubuntu:

For all current Ubuntu LTS: 16.04, 14.04, 12.04, Linux Mint 17/18, and the old Ubuntu 15.10, Ubuntu 15.04, you can install Wireshark 2.2 from its official PPA by following the steps below one by one:

1. Open terminal (Ctrl+Alt+T) and run command to add the PPA:

sudo add-apt-repository ppa:wireshark-dev/stable

Type in your password when it asks and hit Enter.

wireshark-official-ppa

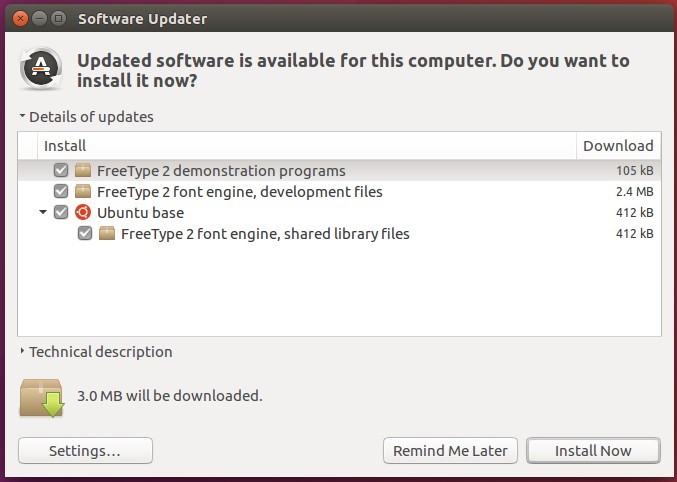
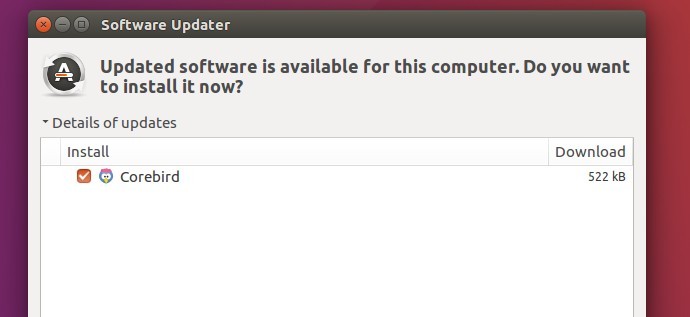
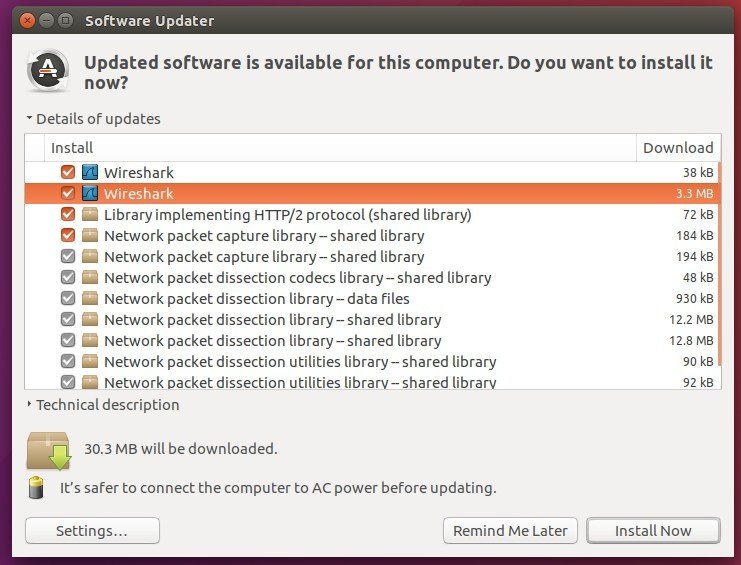
2. To upgrade from a previous release, launch Software Updater (or Update Manager for Mint) and install the software updates after checking updates.

upgrade wireshark 2.2

Or install / upgrade Wireshark 2.2 from command line:

sudo apt-get update

sudo apt-get install wireshark

Uninstall Wireshark 2.2.0:

To uninstall the new release to downgrade it to the stock version of Wireshark in Ubuntu repository, run command:

sudo apt-get install ppa-purge && sudo ppa-purge ppa:wireshark-dev/stable

How to install FreeType 2.7 in Ubuntu 16.04 via PPA

Last updated: September 12, 2016

FreeType

FreeType, a popular font rendering engine, has reached the 2.7 release with a new default mode for bytecode hinting: Subpixel hinting.

In case you are already using subpixel hinting (for example, by using the ‘Infinality patches’ as provided by some GNU/Linux or BSD distributions, or directly from bohoomil.com), be noted that the new mode might provide subtle differences; the code was simplified to make it much faster. If you are used to the old full-pixel hinting, you will see many rendering changes. If you really dislike them, you can disable them at compile time or using the new FREETYPE_PROPERTIES environment variable.

The new release also has improvements to its smooth rasterizer to make it about 20% faster, fixes to fuzzer, handling of raw CID fonts, and various other bug fixes and improvements. See details at FreeType.org.

Install FreeType 2.7 in Ubuntu 16.04:

The Ubuntu 16.04 build has been made into PPA, available for install/upgrade by following the steps below:

1. Open terminal (Ctrl+Alt+T) and run command to add the PPA repository:

sudo add-apt-repository ppa:no1wantdthisname/ppa

Type in your password (no visual feedback) when it asks and hit Enter.

freetype-ppa

2. To upgrade from a previous release, just launch Software Updater and you’ll see the new release available in the update list:

upgrade freetype

Or run the commands below to install or upgrade it from command line:

sudo apt update && sudo apt install libfreetype6

Undo:

Simply purge the PPA via ppa-purge will downgrade FreeType to the stock version in Ubuntu 16.04 repository:

sudo apt install ppa-purge && sudo ppa-purge ppa:no1wantdthisname/ppa

Ubuntu 16.10 Yakkety Yak

The default desktop wallpaper for Ubuntu 16.10 Yakkety Yak has been unveiled. PNG-8, PNG-24, and the same for greyscale, along with mobile formatted ones are available for download.

The new desktop wallpaper looks not all that different from the previous releases’ wallpapers:

Ubuntu 16.10 Wallpaper

Ubuntu 16.10 Wallpaper

Ubuntu 16.10 Wallpaper Gray version

Ubuntu 16.10 Wallpaper Gray version

Here are the old releases wallpapers:

Ubuntu 16.04 default wallpaper

Ubuntu 16.04 default wallpaper

Ubuntu 15.10 default wallpaper

Ubuntu 15.10 default wallpaper

Ubuntu 15.04 default wallpaper

Ubuntu 15.04 default wallpaper

Download:

All the Ubuntu 16.10 default wallpaper version, provided by Will Cooke, is available for download at Bug #1621413.

elementaryos-logo

The best-looking Linux distro, Elementary OS, has reached the 0.4 release, code name “Loki” and base on Ubuntu 16.04 package system.

The Elementary OS team announced the stable release of Loki last night:


After a little over a year of development, elementary is proud to announce the stable release of elementary OS Loki!

Loki is the newest version of elementary OS, a design-oriented and open source Linux-based operating system for desktops and laptops. It succeeds Freya which was released in April of 2015.

Elementary OS Loki

What’s new in Elementary OS Loki:

  • Linux Kernel 4.4 and Ubuntu 16.04 base
  • redesigned indicators change to be dark or light depending on your wallpaper.
  • redesigned audio indicator with more compact set of controls and large icons
  • new network indicator and redesigned network settings, bluetooth indicator
  • A new lid close setting and related behavior
  • Notification center now caches notifications and offers Do Not Disturb toggle
  • use Epiphany as new default web browser.
  • new app store
  • various other improvements, see the release note.

Download Elementary OS Loki at: elementary.io. (pay any dollar amount, or type 0 for free)

utorrent ubuntu 16.04

Quick tutorial for beginners how to install μTorrent (uTorrent) in Ubuntu 16.04, by setting up μTorrent server in Ubuntu so you can easily access and control your BitTorrent downloading any where (over LAN or internet) using a web browser.

1. Download μTorrent for Ubuntu:

The latest packages in Linux download page are said for Ubuntu 13.04, however, it works on all current Ubuntu releases including Ubuntu 16.04:

Download uTorrent server for Ubuntu 13.04

For Ubuntu server, grab the package via wget command:

Download utserver for 32-bit system:

wget http://download-new.utorrent.com/endpoint/utserver/os/linux-i386-ubuntu-13-04/track/beta/ -O utserver.tar.gz

Download utserver for 64-bit system:

wget http://download-new.utorrent.com/endpoint/utserver/os/linux-x64-ubuntu-13-04/track/beta/ -O utserver.tar.gz

2. Install uTorrent sever to /opt/, and create symlink

Open terminal (Ctrl+Alt+T) or login to Ubuntu server, and run command to extract the downloaded server to /opt/:

sudo tar -zxvf utserver.tar.gz -C /opt/

For Ubuntu Desktop user who downloaded uTorrent server package using a web browser, you may replace the command with:

sudo tar -zxvf ~/Downloads/utserver.tar.gz -C /opt/

Then you may change the ownership via command:

sudo chown root:root -R /opt/utorrent-server-alpha-v3_3/

And finally create a symlink to the executable via command:

sudo ln -s /opt/utorrent-server-alpha-v3_3/utserver /usr/bin/utserver

3. Install the required libssl library via command:

sudo apt-get install libssl1.0.0 libssl-dev

4. Finally start uTorrent server:

utserver -settingspath /opt/utorrent-server-alpha-v3_3/ &

Login μTorrent web client:

Open a web browser and go to http://server-ip-address:8080/gui or http://yourdomain.com:8080 to get into the login screen. (get you ip via ifconfig command).

For the first login, type admin as username and leave the password box empty.

  • username: admin
  • password: none

uTorrent Web UI

Once you’re in, go to Settings -> Web UI to change username and password, remote access IPs. And you may enable Remote Access to allow remote access from anywhere on the internet.

adobe-flash-icon245

By releasing the 23 Beta flash, Adobe announced that it starts supporting NPAPI Flash for Linux again.

Today we are updating the beta channel with Linux NPAPI Flash Player by moving it forward and in sync with the modern release branch (currently version 23). We have done this significant change to improve security and provide additional mitigation to the Linux community.

In the past, we communicated that NPAPI Linux releases would stop in 2017. This is no longer the case and once we have performed sufficient testing and received community feedback, we will release both NPAPI and PPAPI Linux builds with their major version numbers in sync and on a regular basis.

Adobe says it will release both the NPAPI and PPAPI (used in Chrome) versions of Flash Player for Linux. However, the NPAPI version will not support or add any advanced features and capabilities, like DRM, GPU acceleration, Stage 3D, etc.

Users who require this functionality are recommended to use Pepper (PPAPI) Flash for Linux.

About Flash 23

Install Adobe Flash 23 Beta for Firefox in Ubuntu:

Flash sucks! But since many websites still use it, we have to use flash to view the content.

So far only 32-bit and 64-bit binaries of the 23 release are available for download at the link below:

Flash Player 23 Beta for Linux (NPAPI)

For Linux, the binary is just a file called: libflashplayer.so. To use it, do:

1. Install Flash Player 11.2 from Canonical Partners repository:

  • Launch Software & Updates, and enable Canonical Partners repository in Other Software tab. Then close it.

    enable canonical partners

  • Open terminal (Ctrl+Alt+T) and run command to install Adobe-flashplugin:
    sudo apt update; sudo apt install adobe-flashplugin

2. Move the libflashplayer.so file you just downloaded to /usr/lib/adobe-flashplugin/ folder by running the command:

sudo mv ~/Downloads/libflashplayer.so /usr/lib/adobe-flashplugin/

Finally restart Firefox browser and check your flash version:

Adobe Flash 23 for Firefox

Twitter App Corebird 1.3.1 Released with some Fixes

Last updated: September 6, 2016

Corebird Twitter Client

The open-source desktop twitter client Corebird has reached the 1.3.1 release with some fixes to 1.3 release. For those who prefer this modern twitter app, it’s available for upgrade in my PPA (unofficial) for Ubuntu 16.04 and Ubuntu 16.10.

Changes in Corebird 1.3.1:

  • Fix muted and/or blocked tweets still showing up in timelines
  • Fix accounts not getting saved when first created
  • Fix retweets of the authenticating user not getting theiry correct seen status
  • Fix profiles descriptions containing ampersand characters and links
  • Fix profile banner fade-in transition
  • Fix doubly-escaped ampersands in link tooltips
  • Fix missing underlines in @screen_names in the profile popover
Corebird 1.3.1

Corebird with Numix GTK theme

How to install Corebird 1.3.1 in Ubuntu:

For Ubuntu 16.04, and/or Ubuntu 16.10, you can either download the .deb binary from the PPA file archive, or run the commands below one by one in terminal to add PPA and install Corebird:

sudo add-apt-repository ppa:ubuntuhandbook1/corebird

sudo apt update

sudo apt install corebird

Tip: The GetDeb repository also maintains Corebird packages for Ubuntu 16.04, now it contains Corebird 1.3 and the 1.3.1 release should be available soon.

With the PPA added, you can upgrade Corebird along with other system updates via Software Updater when a new release is out and uploaded into PPA.

upgrade corebird 1.3.1

And the PPA can be easily disabled or removed via Software & Updates utility under Other Software tab.

How to install Gambas 3.9.0 in Ubuntu 16.04, 14.04

Last updated: September 4, 2016

gamebas3-icon245

Gambas has recently reached the 3.9.0 release. Available in its official PPA repository for Ubuntu 16.04, Ubuntu 14.04, and Ubuntu 12.04.

Gambas 3.9.0 brings hundreds of new features, bug fixes and optimizations. The main feature is gb.web.form, a new component that allows to make the GUI of your web application from the Gambas IDE. Other features are:

  • gb.form.terminal, a new component providing a full-featured terminal emulation.
  • A new IDE output console based on the previous component.
  • A new and better project argument list interface.
  • Project creation is now based on project templates. Custom templates can be defined.
  • New library management system.
  • The Expression class is now inheritable and allows to customize the interpreter evaluator.
  • FileView and DirView controls automatically refresh themselves if your project uses the gb.inotify component.
  • TextEditor now can display thin vertical lines to emphasize indentation.
  • Menu can have a proxy, i.e. pop up the children of another menu.
  • Paint.StretchImage() is a new method that scales an image to fit a rectangle, keeping the image proportions.
  • gb.net.smtp component support PLAIN and CRAM-MD5 authentication.

Gambas 3.9.0

How to install Gambas 3.9.0 in Ubuntu via PPA:

1. Before installing Gambas 3.9.0, remove the previous release if installed:

sudo apt remove gambas3 && sudo apt autoremove

Type in your password when it asks and hit Enter

2. Add Gambas PPA via command:

sudo add-apt-repository ppa:gambas-team/gambas3

gambas3 ppa

3. Update and install the new Gambas 3.9.0 release via:

sudo apt update

sudo apt install gambas3

Revert to original Gambas in Ubuntu:

ppa-purge will not downgrade the software due to a package conflict. So to undo changes:

  • remove the current release via the command in step 1:
    sudo apt remove gambas3 && sudo apt autoremove
  • remove the PPA via command:
    sudo add-apt-repository --remove ppa:gambas-team/gambas3
  • finally reinstall the stock version of gambas in Ubuntu:
    sudo apt update && sudo apt install gambas3

Spotify light theme

For those who prefer light skins in desktop applications, ‘spotio‘ is open-source project offers a proof-of-concept Rdio-inspired skin for Spotify desktop app.

The project provides a setup script that automatically downloads the latest Spotify client binary from its official repository, extracts it, and rebuilds the package with Spotio theme so your Spotify app looks like:

spotify light theme

To get started:

1. Download Spotio from the link below:

Download Spotio master (.zip)

2. Extract the package, and go to the result directory in terminal by:

  • either right-clicking on the folder and choosing “Open in terminal”.
  • or launching terminal (Ctrl+Alt+T) and running cd ~/Downloads/spotio* command

spotio folder

3. Now run the setup script to download Spotify for its official repository and repack it with spotio theme:

./setup-linux.sh

run-spotio-setup

4. The new package will be generated in dist/ folder and named spotio.deb, install it when done:

cd dist/ && sudo dpkg -i spotio.deb

install-spotio-package

It will replace previous Spotify version you installed.

Restore Spotify with Dark UI:

So far the easiest way to restore changes is to download and re-install the official package