Archives For November 30, 1999

MuseScore, free open-source sheet music player and editor, released version 3.5.2 with bug-fixes.

MuseScore 3.5.2 release highlights:

  • Fix unexpected page stretching in “Edit style” dialog.
  • Fix an issue of harmony playback preferences.
  • Fix audio export (FLAC, OGG, WAV) on Windows
  • Fix a potential crash that could occur when resizing the Piano Roll.
  • Edits to system text/tempo marking after save and reload of score did not propagate to all parts.

Download / Install MuseScore 3.5.2 in Ubuntu:

Single executable Appimage package is available for download:

MuseScore Appimage

Right-click on the Appimage, then go to Properties -> Permissions, check the box ‘Allow executing file as program’. Finally run the Appimage to launch MuseScore 3.5.2 and enjoy!
Also MuseScore flatpak package has been updated, and you can install it via following commands.

1.) Open terminal and run command to install flatpak framework in Ubuntu:

sudo apt install flatpak

2.) Add the flathub repository which hosts the flatpak package:

flatpak remote-add --if-not-exists flathub https://flathub.org/repo/flathub.flatpakrepo

3.) Finally install MuseScore via command:

flatpak install flathub org.musescore.MuseScore

If an old version of this package installed, update it via command:

flatpak update org.musescore.MuseScore

(Optional) To remove MuseScore flatpak package, run command:

flatpak uninstall org.musescore.MuseScore

CopyQ, free open-source advanced clipboard managing software, released version 3.13.0 with new script function and command line options.

CopyQ 3.13.0 release highlights:

  • New focusPrevious() script function to activate window that was focused
    before the main window.
  • Export now write data to a temporary file before saving.
  • Display command are now also applied on item preview
  • New command line option “tray_menu_open_on_left_click” to check default mouse
    button behavior for tray icon.
  • New command line option “activate_item_with_single_click” to activate items
    with single click.
  • New command line options “filter_regular_expression” and “filter_case_insensitive” to change the item search behavior.
  • New command line option “native_menu_bar” to disable native/global menu bar.
  • Updated icons and various bug-fixes.

How to Install Copyq 3.13.0 in Ubuntu:

The official PPA repository has made the latest packages for Ubuntu 16.04, Ubuntu 18.04, Ubuntu 20.04, and Ubuntu 20.10.

1. To add the PPA, open terminal (Ctrl+Alt+T) from application menu and run command:

sudo add-apt-repository ppa:hluk/copyq

Type user password (no asterisk feedback due to security reason) when it prompts and hit Enter to continue.

2. Then install CopyQ either via Synaptic package manager or by running commands in terminal:

sudo apt update

sudo apt install copyq

Once installed, start the clipboard manager from application menu and you’ll see the icon in system tray area.

Uninstall:

To remove the software, either use Synaptic package manager or run command:

sudo apt-get remove --autoremove copyq

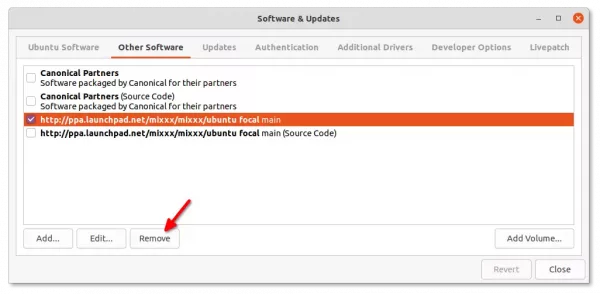
To remove PPA repositories, launch Software & Updates and navigate to Other Software tab.

Looking for an XMPP Jabber client for Linux? CoyIM is a free open-source GTK+ client that focus on safety and security.

CoyIM is written in Go programming language with GTK+ framework. It works on Linux, Windows, and Mac OS. The chat client has built-in support for Tor, OTR and TLS.

The Tor support allows users to become anonymous while chatting, OTR makes end-to-end encryption of communication possible, and TLS adds another layer of encryption for the communication with chat servers.

CoyIM features:

  • Support of the latest OTR.
  • Detection of Tor (if installed) and connection through it.
  • Use of Tor Onion Service for a known server.
  • Use separate Tor circuits for each account.
  • Insert random delays before connecting each account.
  • SRV lookup for the server over Tor if available.
  • Import from Pidgin, Adium, Gajim or xmpp-client.
  • Save all your configuration in an encrypted file.

How to Install CoyIM:

For Ubuntu 18.04 and Ubuntu 20.04, you can simply install the chat app from the universe repositories by running command in terminal:

sudo apt install coyim

For the latest release, as well as Windows / Mac OS packages, go to the official download page:

Download CoyIM

The Linux package is a single executable file. Simply add executable permission via file’s Properties > Permissions dialog and then run it to launch the software.

Vivaldi web browser released new stable 3.4 version that features configurable context menus, automatic reloading pages, and Vivaldia, the real 80s arcade-style game.

Vivaldi 3.4 release highlights:

  • Configurable context menus (right-click menus).
  • Add custom links to menus.
  • Automatic reload pages. Right-click on a tab, move over Periodic Reload menu entry and select reload interval.
  • Capture a screenshot directly into a new note.
  • New plus icon to select a custom image for non-synced profiles.
  • Drag’n’drop support creating Speed Dial folder
  • Vivaldia, a real 80s arcade-style game

How to Install Vivaldi 3.4 in Ubuntu:

The official Ubuntu .DEB packages are available for download at the link below:

Download Vivaldi (DEB)

Grab the deb matches your OS, then install it via Ubuntu Software or Gdebi package manager. Or run command in terminal:

sudo apt install ./Downloads/vivaldi-stable*.deb

Vivaldi also has an official apt repository, with it you can install the browser and get future updates through Software Updater utility.

Open terminal either via Ctrl+Alt+T keyboard shortcut or by searching for terminal from application menu. When it opens, run following commands one by one:

1. Download and install the repository keyring:

wget -qO- https://repo.vivaldi.com/archive/linux_signing_key.pub | sudo apt-key add -

Typer user password when it prompts and hit Enter to continue.

2. Add Vivaldi repository via command:

sudo add-apt-repository 'deb https://repo.vivaldi.com/archive/deb/ stable main'

3. Finally check updates and install the web browser via command:

sudo apt update && sudo apt install vivaldi-stable

Or upgrade from an old version via Software Updater utility.

(Optional): To remove Vivaldi apt repository from you system, launch Software & Updates and navigate to Other Software tab.

Pitivi video editor 2020.09 was released a few days ago. Here’s how to install it in Ubuntu 20.04, Ubuntu 18.04, and derivatives.

It’s been more than 2 years since the last stable release, Pitivi 2020.09 features a plugin system, easy Ken-Burns effect, developer console plugin, timeline markers, user-interface and workflow improvements, a refactored media library, new keyboard shortcuts, and much more.

How to Install Pitivi in Ubuntu:

The new release has been into Ubuntu 20.10 universe repository. For Ubuntu 18.04, Ubuntu 20.04, Linux Mint and other Linux, it can be installed via Flathub repository.

1. Open terminal from system application launcher, then run command to install Flatpak (if you don’t have it):

sudo apt install flatpak

For Ubuntu 18.04, you have to add the PPA first before installing the flatpak daemon:

sudo add-apt-repository ppa:alexlarsson/flatpak && sudo apt update

2. Then add the flathub repository by running command:

flatpak remote-add --if-not-exists flathub https://flathub.org/repo/flathub.flatpakrepo

3. Finally install Pitivi video editor:

flatpak install flathub org.pitivi.Pitivi

Uninstall Pitivi Flatpak package:

For any reason, you can remove the flatpak package easily by running command in terminal:

flatpak uninstall org.pitivi.Pitivi

Linux Kernel

Linux Kernel 5.9 was released a day ago. Linus Torvalds announced that:

Ok, so I’ll be honest – I had hoped for quite a bit fewer changes this last week, but at the same time there doesn’t really seem to be anything particularly scary in here. It’s just more commits and more lines changed than I would have wished for.

The bulk of this is the networking fixes that I already mentioned as being pending in the rc8 release notes last weekend. In fact, about half the patch (and probably more of the number of commits) is from the networking stuff (both drivers and elsewhere).

Linux 5.9 features initial Intel Rocket Lake graphics, NVMe zoned namespaces (ZNS) support, 32-bit x86 Clang build support, initial support for Radeon RX 6000 “RDNA 2” graphics cards, and more.

How to Install Linux Kernel 5.9 in Ubuntu:

The mainline kernels do not include any Ubuntu-provided drivers or patches. They are not supported and are not appropriate for production use.

For a graphical tool to install updated kernel package, try Mainline.

The mainline kernel packages for Linux 5.9 (64-bit) are now available for download at the link below:

Download Kernel 5.9

Select generic for common system, and lowlatency for a low latency system (e.g. for recording audio):

  1. linux-headers-5.9.0-xxxxxx_all.deb
  2. linux-headers-5.9.0-xxx-generic(/lowlatency)_xxx_amd64.deb
  3. linux-modules-5.9.0-xxx-generic(/lowlatency)_xxx_amd64.deb
  4. linux-image-xxx-5.9.0-xxx-generic(/lowlatency)_xxx_amd64.deb

Alternatively you can download and install the kernel binaries via terminal commands ( open terminal via Ctrl+Alt+T):

cd /tmp/

wget -c https://kernel.ubuntu.com/~kernel-ppa/mainline/v5.9/amd64/linux-headers-5.9.0-050900_5.9.0-050900.202010112230_all.deb

wget -c https://kernel.ubuntu.com/~kernel-ppa/mainline/v5.9/amd64/linux-headers-5.9.0-050900-generic_5.9.0-050900.202010112230_amd64.deb

wget -c https://kernel.ubuntu.com/~kernel-ppa/mainline/v5.9/amd64/linux-image-unsigned-5.9.0-050900-generic_5.9.0-050900.202010112230_amd64.deb

wget -c https://kernel.ubuntu.com/~kernel-ppa/mainline/v5.9/amd64/linux-modules-5.9.0-050900-generic_5.9.0-050900.202010112230_amd64.deb

sudo dpkg -i *.deb

Once installed, restart your computer and enjoy!
Uninstall Linux Kernel 5.9:

Restart your machine and select boot with the previous kernel in boot menu ‘Grub2 -> Advanced Option for Ubuntu’. Then run command to remove Linux Kernel 5.9:

sudo dpkg --purge linux-image-unsigned-5.9.0-050900-generic

Liferea Feed Reader

Liferea, Linux Feed Reader, released version 1.3.3 a few days ago with a lot of improvements. Here’s how to install it in Ubuntu 18.04, Ubuntu 20.04.

Liferea 1.3.3 release highlights:

  • Implement support for Webkits Intelligent Tracking Protection
  • Add Ctrl + 0 hotkey to reset zoom
  • Add debug printing of SAX parser errors
  • CSS color update on theme change without restart
  • Fixes view mode switch
  • Default to https:// instead of http://
  • Progress bar support when loading web pages
  • Drop CDF channel support
  • Drop PIE aka. Atom 0.2/0.3 support
  • Drop RSS namespace “blogChannel” support

Install Liferea 1.3.3 via PPA:

1.) Open terminal from application launcher and run command to add the unofficial PPA:

sudo add-apt-repository ppa:ubuntuhandbook1/apps

Type your password when it prompts and hit Enter to continue.

2.) Then check updates and install the news reader via commands:

sudo apt update

sudo apt install liferea

or update the old package (if installed) via Software Updater utility:

upgrade Liferea via Software Updater

Uninstall:

As the PPA also contains many other applications, you may remove the PPA either via Software & Updates > Other Software, or by running command:

sudo add-apt-repository --remove ppa:ubuntuhandbook1/apps

And remove the feed reader if want via command:

sudo apt remove liferea

Looking for a Linux music player to manage large local collections? Mpz is a new open-source player that does the job.

If you like to organize your music in folders, then this player might be for you. It doesn’t try to index all the files into a library, but rather treats your files and folders as a library and provides a convenient way to create playlists directly from folders. Similar to Foobar2000’s Album List, but it’s not an attempt to clone.

The main feature is 3-columns UI allows you to quickly create playlists from folders via middle-click and switch between playlists.

Other mpz features include:

  • Built with Qt/C++ with fast and responsive native UI;
  • Supports internet radio in m3u and pls playlists formats;
  • Supports CUE sheets;
  • Supports MPRIS on Linux for remote control;
  • Configuration in 2 yaml files
  • Supports global media keys and non-global shortcuts.

How to Install mpz in Ubuntu:

The software developer maintains binary packages for Ubuntu, Debian, CentOS, Fedora, openSUSE, etc, which are available to download at the link below:

Download MPZ

For Ubuntu, grab the deb package and install it either via Gdebi or apt command in terminal:

sudo apt install ./Downloads/mpz*.deb

(Optional) To remove the music player application, run command:

sudo apt remove mpz

Looking for an image editor similar to Windows Paint.Net or Mac OS PaintBrush? LazPaint is the open-source image editor that works on Linux.

LazPaint is an image editor with layers and transparency. It’s written in Lazarus (Free Pascal) and uses BGRABitmap library. With OpenRaster format support it can interoperate with MyPaint, Gimp and Krita.

Features include:

  • Read and write a variety of file formats, including layered bitmaps and 3D files.
  • Tools: many tools are available to draw on the layers.
  • Select parts of an image with antialiasing and modify the selection as a mask.
  • View: color window, layer stack window and toolbox window.
  • Command line support.
  • Keyboard shortcuts support.

How to Install LazPaint in Ubuntu:

The image editor offers .deb packages available to download at the link below:

LazPaint Releases

Just grab the latest deb package, and install it by running command in terminal:

sudo apt install ./Downloads/lazpaint*.deb

Once installed, open it from system application launcher and enjoy!

(Optional) To remove LazPaint simply run command in terminal:

sudo apt remove lazpaint

Familiar with Linux commands? You may already know many tips and tricks that will save you a lot of time.

Here are some that I have been using for a long period of time, including Tab auto-completion, when you type something in Linux terminal and hit Tab, it auto-completes the command or file path, or outputs all possible options.

And Ctrl+Shift+V will do paste text to terminal instead of Ctrl+V. Without copying to the clipboard, you can simply select / highlight the text and use mouse middle-click to paste into terminal.

Today I found a new terminal tips that I didn’t know before. Thanks to the reddit, I’m going to share it with you by following steps.

1. Drag and drop file or folder to paste the path into terminal.

Just drag and drop a file or folder into terminal, and you’ll see the full path pasted with single quotes. It’s useful if there’s special character in file path or you just don’t want to type …

2. Drag and drop a selection of text into terminal.

You can also drag and drop a selection of text into terminal, so you don’t need to do copy and paste with context menu clicks or keyboard shortcuts.