![]()
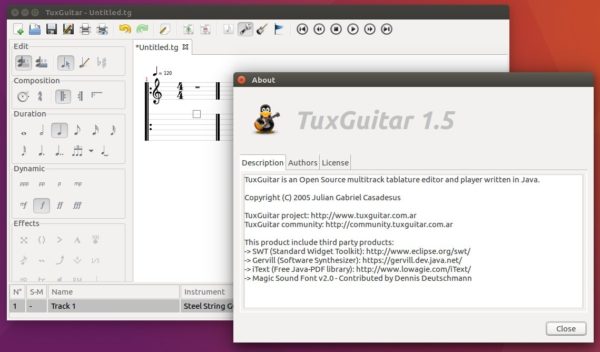
TuxGuitar, a free and open-source guitar tablature editor, reached the 1.5 release recently.
After more than one year of development, TuxGuitar 1.5 brings following new features:
- String count range moved to 1 – 25
- New Oxygen Dark skin created for dark themes
- New synth host plugin with FX support
- Native VST support (only for Windows/GNULinux) for the new synth host plugin.
- Zomm in/out support
Install TuxGuitar 1.5 via Snap
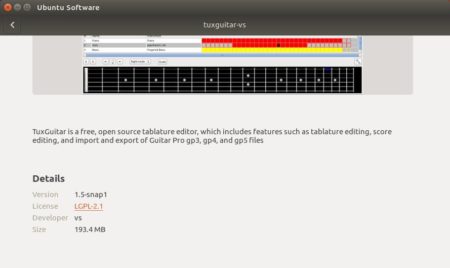
The 1.5 release is available as snap, the universal Linux app packaging format.
1. For Ubuntu 16.04, open terminal (Ctrl+Alt+T) and run command if first time installing a snap:
sudo apt-get install snapd snapd-xdg-open

2. Then install the snap either from Ubuntu Software:
Or by running single command:
snap install tuxguitar-vs
It’s large in the installation file size since it comes with all required libraries bundled.

Download / Install TuxGuitar via official DEB:
If a previous release was installed, remove it before doing following steps.
The DEB binaries for TuxGuitar 1.5 are available for download at:
Grab x86.deb for 32-bit system or x86_64.deb for 64-bit system.
And run command command in terminal (Ctrl+Alt+T) to install it:
sudo dpkg -i ~/Downloads/tuxguitar*.deb; sudo apt-get -f install

For those who stuck at installing OpenJDK-9-jdk, run following command to manually fix it:
sudo apt-get -o Dpkg::Options::="--force-overwrite" install openjdk-9-jdk

Uninstall:
To uninstall the deb package, run command in terminal:
sudo apt-get remove --autoremove tuxguitar