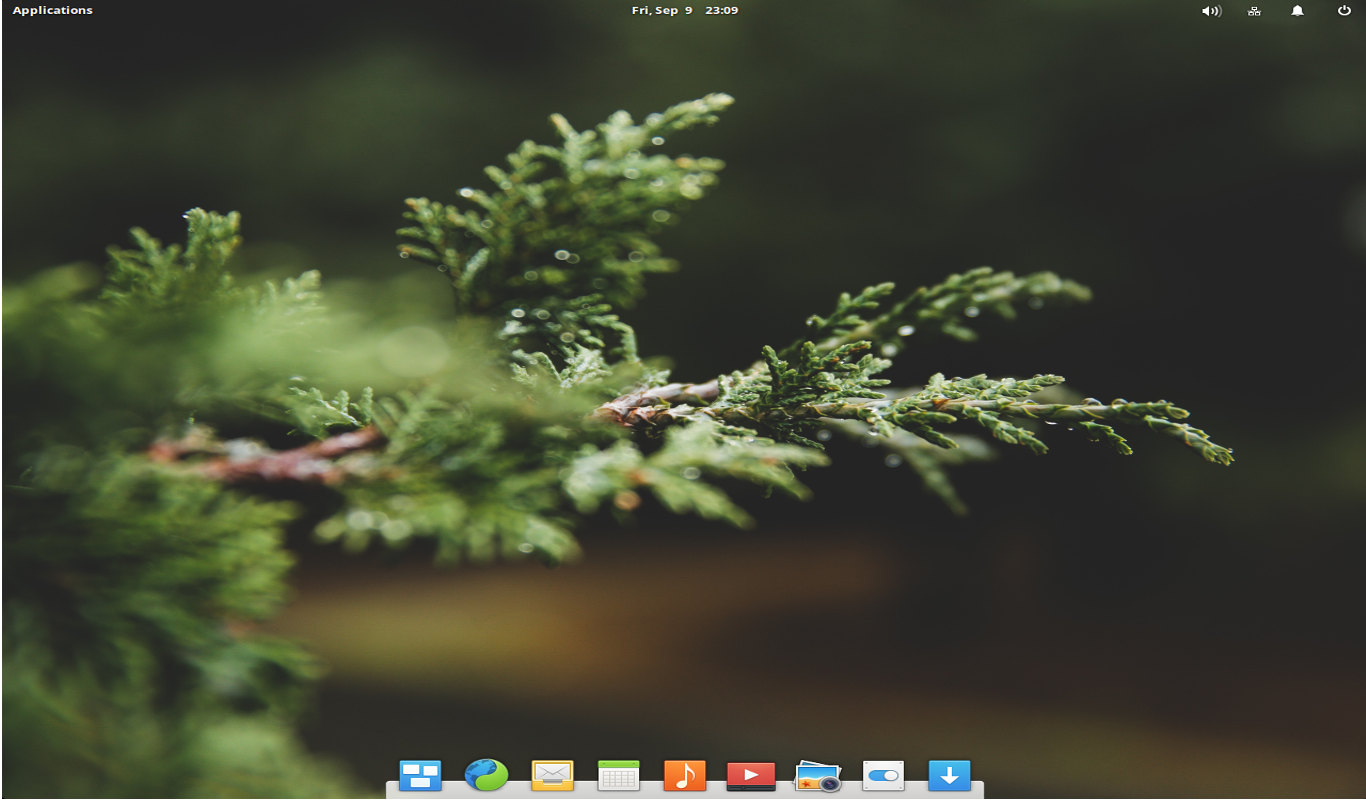
Archives For November 30, 1999

You know Pushbullet? Well, it’s a service that allows you to send links, files and more to your Android or iOS devices from desktop. It can show your Android phone’s notifications on your computer, enabling you to see who’s calling or texting without having to grab your phone!

Pushbullet does not have an official client for Linux desktop, you can only use it with a Chrome or Firefox extension. Fortunately, there’s now a Unity indicator for Pushbullet developed by atareao.es

pushbullet indicator for Ubuntu

Also a nautilus extension was developed (Seems not working for me at the moment):

pushbullet-nautilus

Install:

The developer has built the packages into his PPA for Ubuntu 14.04. Run the commands below one by one in a terminal (Ctrl+Alt+T) to install them:

sudo add-apt-repository ppa:atareao/atareao

sudo apt-get update

sudo apt-get install pushbullet-indicator nautilus-pushbullet

Yorba's California Calendar

Yorba team has introduced its calendar app ‘California’ two months ago. Now the first release California 0.1.0 (UNSTABLE) is available.

Yorba's California calendar

California is a new calendar application for GNOME 3. It’s currently under heavy development. It features:

  • Modern, clean interface
  • Quick setup (if any is required at all)
  • Uses EDS for calendar access, potentially other specialized backends
  • Quickly add events with natural-language parser
  • Desktop notification of events

If you’re using Google Calendar or web calendar (.ics), you can import them to California from its menu.

california-google-calendar

Install California:

NOTE: California is unstable and in active development at the moment. Use it at your own risk!

Press Ctrl+Alt+T on keyboard to open the terminal. When it opens, run the commands below one by one to install it from Yorba’s daily build PPA:

sudo add-apt-repository ppa:yorba/daily-builds

sudo apt-get update

sudo apt-get install california

Because the PPA also contains development versions of Geary and Shotwell, you may remove the PPA after:

sudo add-apt-repository -r ppa:yorba/daily-builds

sudo apt-get update

Or, download the California calendar directly from the PPA page.

Links:
Gnome wiki for california
California on Yorba blog
omgubuntu post

virtualbox repository

The latest Virtualbox 4.3.12 has been released just days ago on May 16, 2014. The new release brings various fixes on NAT, GUI, VMM, and hosts.

Virtualbox 4.3.12 is a maintenance release. The following items were fixed and/or added:

  • VMM: fixed an occasional Guru Meditation (Mac OS X hosts only)
  • VMM: fixed a rare condition that would fail to invalidate guest TLB entries or would invalidate them when not required (Windows hosts only)
  • VMM: fixed a VERR_NOT_SUPPORTED Guru Meditation seen with certain guests, e.g. OpenServer 5.0.7
  • VMM: more fixes for MSR emulation on certain hardware
  • GUI: fixed mouse positioning with mouse integration disabled and multiple guest screens (Windows hosts only)
  • GUI: fixed crash in VM manager
  • GUI: fixed crash under rare conditions on entering/exiting fullscreen/seamless mode
  • Shared Clipboard: don’t stop working after taking a snapshot
  • AHCI: fixed a crash under rare circumstances
  • API: fixed a hang during VM shutdown under rare conditions
  • NAT: fixed generation of malformed ICMP error datagrams (4.3.10 regression)
  • NAT: fixed potential crash in DNS proxy
  • NAT Network: don’t drop port forwarding rules after some time
  • NAT: fixed ARP cache corruption and network loss in Windows guest caused by iSCSI service activity
  • USB: improved check if a storage device is currently mounted to the host when the device is about to be attached to the VM (Mac OS X hosts only)
  • 3D support: several fixes, including better support for Ubuntu 14.04
  • VRDP: fixed a potential crash on client disconnect
  • VBoxSVC: fixed a race when a new client is started a few seconds after the last client terminated (Windows hosts only)
  • VBoxSVC: fixed VirtualBox.xml registry corruption after VM renaming
  • VBoxSVC: fixed a potential crash caused by incorrect USB device filter (Mac OS X hosts only)
  • Windows hosts: partly support 32-bit COM on 64-bit systems
  • Windows host installer: implemented merge module (msm) support
  • Linux hosts: fixed dependency of boot script on older Debian systems
  • Linux guests: fix symbolic link to shared folder helper
  • Linux Additions: don’t crash VBoxService during guest execute for users without a password
  • Linux Additions: fixed a bug in guest execution where the guest process terminated with VERR_INTERRUPTED to the host

How to install or upgrade:

You can either get the .deb installer from the link below:

Download Virtualbox for Linux

Or get it from the official Linux repository by running the commands below one by one in a terminal (Ctrl+Alt+T):

sudo sh -c 'echo "deb http://download.virtualbox.org/virtualbox/debian $(lsb_release -sc) contrib" >> /etc/apt/sources.list.d/virtualbox.list'

wget -q http://download.virtualbox.org/virtualbox/debian/oracle_vbox.asc -O- | sudo apt-key add -

sudo apt-get update

sudo apt-get install virtualbox-4.3

If you already have Virtualbox repository added in your system, just run the last two commands will do the job. That’s it enjoy!

intel graphics installer

Intel(R) Graphics Installer 1.0.5 for Linux has been released just days ago. The NEW release added support for Ubuntu 14.04 Trusty Tahr and Fedora 20.

What is Intel(R) Graphics Installer:

The Intel® Graphics Installer for Linux is a simple graphical tool that allows you to easily install the latest graphics and video drivers for your Intel graphics hardware. This allows you to stay current with the latest enhancements, optimizations, and fixes to the Intel® Graphics Stack to ensure the best user experience with your Intel® graphics hardware. The Intel® Graphics Installer for Linux is available for the latest versions of Ubuntu and Fedora.

intel driver update utility

Installation for Ubuntu:

Download the installer at the link below:

Download Intel Graphics Installer

You may check out your system type 32-bit or 64 bit by going to System Settings -> Details.

Once downloaded, double-click the package to install via Ubuntu Software Center. Or use Gdebi, which will automatically resolve and install required dependencies.

Gdebi DEB installer in Ubuntu

Gdebi DEB installer in Ubuntu

tv-maxe ubuntu 14.04

One of my readers was asking how to install Sopcast Player in Ubuntu 14.04. But Sopcast is not available at any PPA for Ubuntu 14.04 at the moment and it’s not easy to build it from source for normal users. So here’s how to install this good alternative TV-MAXE.

TV-MAXE is an application which provides the ability to watch TV stations and listen radio via different streams, such is SopCast. Currently it has a large number of channels, both romanian and international.

tv-maxe in ubuntu 13.04

Install TV-Maxe in Ubuntu 14.04:

Because the official PPA provides the latest packages for Ubuntu 14.04, Ubuntu 13.10, Ubuntu 12.10, and Ubuntu 12.04, you can easily install the app by running below commands in terminal (Ctrl+Alt+T) one by one:

sudo add-apt-repository ppa:venerix/pkg

sudo apt-get update

sudo apt-get install tv-maxe

That’s it. Enjoy!

stunt rally 2.3 ubuntu 14.04

Stunt Rally, a free and open-source game based on VDrift and OGRE, with Track Editor, now is at version 2.3. Here’s how to install Stunt Rally 2.3 in Ubuntu 14.04 Trusty LTS.

ChangeLog:

  • 153 tracks (7 new, 27 renamed)
  • Common
    • All tracks renewed, new look
    • Terrain
      • New textures, bigger 1k, with CC 0 license, more info in data/terrain/about.txt
      • Blendmap noise with many parameters
      • Fixed triplanar uv swap, also now max 2 layers can be picked
      • Emissive light, on few tracks
    • Grass
      • Channels – different setups for grasses (e.g. white grass in higher mountains)
      • Grass density is a RenderToTexture
    • Tracks tab: list sorting fix, more scenery colors, icons hiding, start position
    • Frames per second limitting option
    • Disabled parallax, broken
    • Updated Compiling Wiki, made Windows pre-built dependencies archive
  • Game
    • Dynamic camera bouncing, camera view angle sliders
    • Boost fuel depending on track length, more boost options
  • Editor
    • Pick window for terrain textures, grasses and vegetation models
      • Tab key show/hide, bigger list, mouse wheel on button picks next/previous
      • Fill settings (marked with .) from presets.xml (optional)
    • Game tab with track settings: gravity, wind, deny reversed, etc.
    • Terrain
      • Test blendmap F9
      • Faster terrain editing, blendmap is now a RTT with shader
      • Swap layer buttons
      • Enter – lock brush position (use for big brushes to avoid blur)
    • Fixed selected objects rotation (many) and copy
    • Start position rotation also global and roll
    • Update button on Layers, Grasses, Vegetation for faster update (same for F8)
    • Vegetation model info: count and real sizes [m]
    • Surface tab for terrain and road surface params (split from Layers tab)
    • Test SceneryID button, shows % difference

Install Stunt Rally:

The new release is available in PlayDeb repository for Ubuntu 14.04 and their derivatives.

To add the PlayDeb repository, press Ctrl+Alt+T on keyboard to open the terminal. When it opens, run:

sudo sh -c 'echo "deb http://archive.getdeb.net/ubuntu trusty-getdeb games" >/etc/apt/sources.list.d/playdeb.list'

Then get the key:

wget -q -O- http://archive.getdeb.net/getdeb-archive.key | sudo apt-key add -

Finally update packages lists and install the game:

sudo apt-get update; sudo apt-get install stuntrally

That’s it. Enjoy!

A Virtual Private Network (VPN) connection is an encrypted connection to a server. When you connect to a VPN server and type in a web address, the request is sent via an encrypted signal to the VPN server which then sends you back the web page.

Establishing a VPN connection will keep your ISP or government from recording your browsing history. It can also be used to visit sites that your network administrator has blocked (in some countries like China youtube is blocked). An OpenVPN connection is the most secure type of VPN, because not only is the connection encrypted by
a password, but also by three certificates.

There are many places online that sell VPN services. In this tutorial, I will use vpnbook.com’s service, because it is completely free, and runs entirely off donations.

PART 1: Get A Free OpenVPN Account

Please skip this part if you already have a VPN server set up.

1. Open up your web browser or just click the link to go to www.vpnbook.com.

2. Scroll down and click on the tab that says OpenVPN (as the picture shown below). Download one of the certificate bundles and also remember the username and password.

Download OpenVPN Account

3. Decompress the downloaded package. Create 3 new empty text files in the result folder and called them: ca.crt, certificate.crt, key.key.

openvpn key files

4. Open up one of the .ovpn files (All of the .ovpn files are the same, but with different configurations.) with gedit text editor, here I use vpnbook-us1-tcp443.ovpn as example.

5. In the .ovpn file, do following copy and paste things and finally save the changes.

Copy everything between <ca> </ca> tags and paste into ca.crt file.

Copy everything between <cert> </cert> tags and paste into certificate.crt file.

Copy everything between <key> </key> tags and paste into key.key file.

copy-keys

PART 2: Setup OpenVPN connection:

1. Press Ctrl+Alt+T on keyboard to open the terminal. When it opens, run the command below to install VPN plugin for network manager:

sudo apt-get install network-manager-openvpn

2. Go to system area network icon -> VPN Connections -> Configure VPN:

Configure VPN in Ubuntu 14.04

3. Click the Add button in next window and choose OpenVPN in drop-down menu as the connection type.

Add OpenVPN in Ubuntu 14.04

4. Now in VPN editing window, type in:

Connection name: type a name as you want
Gateway: the IP address in the vpnbook-us1-tcp443.ovpn file.
Type: Password with Certificates (TLS)
Username: see the picture under PART 1 -> step 2.
Password: see the picture under PART 1 -> step 2.
User Certificate: choose the certificate.crt file.
CA Certificate: choose the ca.crt file.
Private Certificate: choose the key.key file.
Private Key Password: leave it empty.

vpn-settings

5. NOTE: Advanced settings depend on the .ovpn file you selected in PART 1 (step 4), find the ip, port, cipher and so forth at the top of .ovpn file

Click the Advanced button. Check the boxes which say:

Use custom gateway port: 443
Use LZO data compression
Use a TCP connection

Under Security tab, set Cipher to AES-128-CBC

6. When everything is done, connect to the VPN from network menu:

connect-to-openvpn

You’re connected to the VPN if you see this message:

openvpn-connected

Enjoy!

Install Miro 6 in Ubuntu 14.04 via PPA

Last updated: October 24, 2014

Miro, formerly named Democracy Player or DTV, is an audio, video player and Internet television application. It integrates an RSS news aggregator and podcatcher, a BitTorrent client (based on libtorrent), and xine media player (or GStreamer) under Linux.

Miro is free software, released under the terms of the GNU General Public License. While Ubuntu repositories still have Miro 4, the latest release has reached Miro 6 which brings flash support for Linux and big speed improvements for launching the app, navigating, downloading, etc.

Miro 6 in Ubuntu 14.04

Install Miro 6 in Ubuntu 14.04:

I’ve made the packages for Miro 6 into my PPA, available for Ubuntu 14.04 Trusty Tahr. To install it, follow the steps below:

UPDATE: Sorry that I have moved the packages from the ppa:ubuntuhandbook1/apps repository to ppa:ubuntuhandbook1/ppa as a workaround , because someone copied my content (without even a link back) and got indexed by google before this post. So my post becomes duplicate in Google’s search result!

I’ve emailed the guy who copied my content to ask a link back, but with no luck. I feel so sad because hours of my hard work has been stolen. Please help me if you know what should I do.

1. Press Ctrl+Alt+T on keyboard to open the terminal. When it opens, run the command below to add the PPA:

sudo add-apt-repository ppa:ubuntuhandbook1/ppa

2. Because Ubuntu 14.04 started shipping the libav fork instead of FFmpeg, we also need the PPA for FFmpeg libraries.

sudo apt-add-repository ppa:djcj/vlc-stable

3. Finally update packages lists and install Miro 6 as well as dependencies:

sudo apt-get update

sudo apt-get install ffmpeg miro

That’s it. Enjoy!

free python ide

This quick tutorial is going to show you how to install Python 3.3.5 (or 3.4.0) and set as default in Ubuntu 14.04 and Ubuntu 12.04.

Python 3.3.5 was released on March 9th, 2014. It fixed:

  • a 3.3.4 regression in zipimport
  • a 3.3.4 regression executing scripts with a coding declared and Windows newlines
  • potential DOS using compression codecs in bytes.decode()

Python 3.4.0 was released one week later than 3.3.5 with below new features:

  • a “pathlib” module providing object-oriented filesystem paths
  • a standardized “enum” module
  • a build enhancement that will help generate introspection information for builtins
  • improved semantics for object finalization
  • adding single-dispatch generic functions to the standard library
  • a new C API for implementing custom memory allocators
  • changing file descriptors to not be inherited by default in subprocesses
  • a new “statistics” module
  • standardizing module metadata for Python’s module import system
  • a bundled installer for the pip package manager
  • a new “tracemalloc” module for tracing Python memory allocations
  • a new hash algorithm for Python strings and binary data
  • a new and improved protocol for pickled objects
  • a new “asyncio” module, a new framework for asynchronous I/O

Install:

A third party launchpad PPA contains older and newer Python version for Ubuntu. The two Python releases are available in the PPA for Ubuntu 14.04 and Ubuntu 12.04.

To add the PPA, press Ctrl+Alt+T on keyboard to open the terminal and run:

sudo add-apt-repository ppa:fkrull/deadsnakes

You may read the PPA description in the output and then:

Install Python 3.3.5 via:

sudo apt-get update; sudo apt-get install python3.3

Or install python 3.4.0 via:

sudo apt-get update; sudo apt-get install python3.4

To set your installed python as default, run the below commands one by one (You may change python3.3 to python3.4 in the code):

rm /usr/local/bin/python  

ln -s /usr/local/bin/python3.3 /usr/local/bin/python