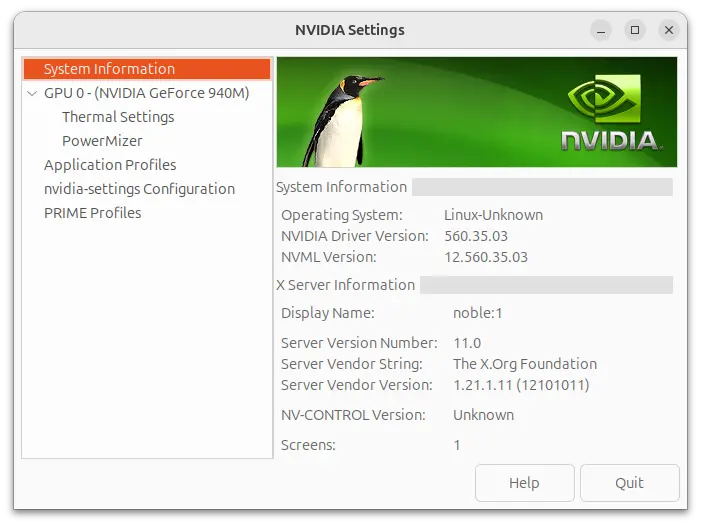
Archives For November 30, 1999

Ubuntu 22.10 Kinetic Kudu is out! Time to install the new system and do same configurations before ready for use. And, here are a list of things I can tell for you.

1. Update cache & install Media Codec

On a new Ubuntu system, user may need to refresh package index before being able to install software packages. And, this can be done easily by:

  • Launch ‘Software Updater’, and wait for automatically ‘checking for updates’ done.
  • Or, press Ctrl+Alt+T on keyboard to open terminal, and run command:
    sudo apt update

    type user password when it asks while no asterisk feedback.

Ubuntu does not include multimedia codec to play video and/or music with default applications out-of-the-box. It’s however quite easy to install them

  • Either open ‘Ubuntu Software’, search for and install ‘Ubuntu restricted extra’
  • Or, open terminal (Ctrl+Alt+T) and run command:
    sudo apt install ubuntu-restricted-extras

    While installing the MS fonts, it will prompt to accept licence, just press Tab to highlight OK and hit Enter.

For KUbuntu user, replace ubuntu-restricted-extras with kubuntu-restricted-extras in command.

2. Enable Flatpak & AppImage support

Ubuntu officially supports Snap and Deb package formats. But, we can avoid the popular Flatpak and AppImage software packages today in Linux.

AppImage requires libfuse2 which is NOT pre-installed since Ubuntu 22.04, due to switch to fuse3. The package is however still available in system repository.

  • Open terminal (Ctrl+Alt+T) and run command to enable AppImage support:
    sudo apt install libfuse2

Ubuntu also does not support Flatpak out-of-the-box, but it can be enabled by running a single command:

  • Enable Flatpak in Ubuntu:
    sudo apt install flatpak

After that, you may go to flathub.org to find out and install your favorite apps as Flatpak.

3. Hide USB/Mounted Disk from left Panel, Enalbe Minimize on click

The left (or bottom) panel shows the connected USB stick, mounted disk volume out-of-the-box. User can however hide them using the new ‘Ubuntu Dock’ settings.

  • First, go to top-right corner system tray menu, and click on ‘gear’ button to open settings.
  • When ‘Settings’ opens, navigate to the new ‘Ubuntu Dock‘ tab. Then, click on “Configure dock behavior” in button right
  • Finally, you may use the ON/OFF switch to show/hide the mounted drivers as well as trash can icon.

To enable the behavior that click the app icon on left (or bottom) dock panel to focus or minimize app window, open terminal (Ctrl+Alt+T) and run command:

gsettings set org.gnome.shell.extensions.dash-to-dock click-action 'minimize'

Ubuntu 22.10 introduced a new feature that when clicking app icon on dock, it goes to overview screen for easy switching this app if multiple windows opened. So, use the command below instead can be a better choice:

gsettings set org.gnome.shell.extensions.dash-to-dock click-action 'focus-minimize-or-appspread'

After that, clicking app icon on dock panel will either open/focus window, minimize or goes overview for switching window.

4. Enable ‘New Documents’ context menu

GNOME is now working to make it easy to create new documents in ‘Files’ (aka Nautilus file manager). Until then, user need to manually create an empty document in ‘Templates’ folder to enable this context menu option.

  1. First, click top-left ‘Activities’ to open overview screen. Then search for and open ‘Text Editor’.
  2. In text editor window, go to ‘≡’ menu and select ‘save as’ option (You don’t have to insert anything, just save as empty document).
  3. Finally, save the empty file as ‘Empty Document‘ into your ‘Templates‘ folder.

After that, right-click on blank area either in desktop or file manager window to see the ‘New Document’ option.

5. Install useful configuration tool

There are some useful configuration tools that you may need. Either install them via “Ubuntu Software” app or run the apt commands below in terminal.

  • Open terminal (Ctrl+Alt+T) and run command to install Gnome Tweaks:
    sudo apt install gnome-tweaks

GNOME Tweaks

  • Run command to install ‘Extension Manager’ for install & managing extensions:
    sudo apt install gnome-shell-extension-manager

Extension Manager

Install some cool Gnome Shell Extensions, (e.g. ‘Just Perfect’, ‘Blur my shell’), via extension manager app under ‘Browse’ tab.

Just Perfection with even more configuration options

6. Set light/dark photo images as wallpaper that switch automatically

GNOME 40 introduced adaptive wallpaper that changes automatically depends on system color scheme. It’s not available in Ubuntu 22.04 due to custom ‘Settings’ dialog. For Ubuntu 22.10, you can set your photo images with light and dark versions to wallpaper via following steps.

  1. First, open ‘Files‘ (nautilus file manager), then press Ctrl+H to show hidden files/folders.
  2. Then, navigate to .local/share and create a new sub-folder called ‘gnome-background-properties
  3. Finally, create a .xml file under that folder with whatever name, and insert following content (change path-to-file accordingly).
<?xml version="1.0"?>
<!DOCTYPE wallpapers SYSTEM "gnome-wp-list.dtd">
<wallpapers>
  <wallpaper deleted="false">
    <name>TYPE_NAME_HERE</name>
    <filename>/PATH/TO/PICTURE_LIGHT</filename>
    <filename-dark>/PATH/TO/PICTURE_DARK</filename-dark>
    <options>zoom</options>
    <shade_type>solid</shade_type>
    <pcolor>#3465a4</pcolor>
    <scolor>#000000</scolor>
  </wallpaper>
</wallpapers>

After that, open ‘Settings’ and navigate to ‘Appearance’ for the new adaptive wallpaper:

7. Get ‘Login Manager Settings’ to configure login screen

GDM Settings is a login screen managing tool for GNOME display manager. The application now is stable for daily use though it’s young project.

  1. First, go to project page below and select download the AppImage
  2. Right-click on the AppImage, go to ‘Properties‘, and then turn on the option for ‘Executable as Program
  3. Finally, right-click and click ‘Run’ to launch the configuration tool.
  4. There go to ‘Appearance’ -> Background -> Type ‘Image’ and select a photo image for login screen.
  5. Configure font, color, logo, disable user list,etc as you want and finally click ‘Apply’ button to make changes.

Configure Login Screen Appearance

8. Install Firefox as classic Deb package

For those prefer the classic Deb to Snap, open terminal (Ctrl+Alt+T) and run the commands below one by one to switch Firefox from Snap to DEB.

  • Backup your important data if any.
  • Remove commands below one by one to remove Firefox:
    sudo apt remove --autoremove firefox
    sudo snap remove firefox
  • Add Mozillateam PPA:
    sudo add-apt-repository ppa:mozillateam/ppa
  • Finally, install Firefox as deb form PPA:
    sudo apt install -t 'o=LP-PPA-mozillateam' firefox

To prevent Ubuntu from automatically updating Firefox to Snap again, you also need to set a higher PPA priority. See this tutorial for details.

9. Switch back to Xorg session

If you have some old applications that are still NOT running properly in the default Wayland session. Simply log out, click username and use the bottom right ‘gear’ button menu to switch back Xorg session, and finally login.

This simple tutorial shows how to change the computer name (aka hostname) in your Ubuntu (Ubuntu 24.04 Noble Numbat updated) without a system restart.

The methods here are universal ways that works in not only default Ubuntu release but also its flavors (e.g., KUbuntu, XUbuntu), and even other Linux.

NOTE: A hostname can be a single word or phrase, including letters, number, periods, or hyphen with 253 characters length limit, with NO space.

Change Computer Name for Temporary Use

If possible to change the name for temporary use. So, the new name will work until you restart the system.

  • To do so, simply open terminal or connect to command console and run command:
    sudo hostname NEW_NAME_HERE

Replace ‘NEW_NAME_HERE’ and type user password (no asterisk feedback) to authenticate. And, you may need to restart terminal or console to see effect.

Change Computer Name by Editing Config file

The classic way to permanently change your system hostname is just edit the configuration file!

So, here I’m going to use the universal nano command line text editor to open the configuration file.

  • To do so, open terminal and run command:
    sudo nano /etc/hostname

When file opens in terminal, delete the old name and type a new one. Finally, press Ctrl+X, type y and hit Enter to save change.

This method however need a system restart if you’re running with default Wayland session. If you switched back Xorg session, run the command below to make it work without restart.

sudo systemctl restart systemd-logind.service

Use ‘hostnamectl’ to change computer name

The hostnamectl command is a good choice today to permanently change your computer name without system start.

  • As easy as the first method, just run command in command/console:
    hostnamectl hostname NEW_NAME_HERE

The change takes effect immediately, though you may need to restart terminal window.

Use new name in ‘/etc/hosts’

To avoid network issues, it’s HIGHLY recommend to also edit ‘/etc/hosts’ and replace all old names with new ones.

  • Open terminal and run command to edit the file:
    sudo nano /etc/hosts

When file opens in terminal, delete all the old hostname and insert the new name you set. Also, press Ctrl+X, type y and hit Enter to save change.

Liferea finally announced the first release candidate for the next stable release line 1.14. Here’s the new features and Ubuntu PPA packages.

Linux Feed Reader, Liferea in short, is a GTK3 new reader for Linux. It’s in the 1.13 pre-release series for more than 2 years, until released 1.14 RC1 few days ago.

The new release fixed an annoying bug that certain desktop environments or themes may make the pane invisible and hard to restore.

Now Liferea will never allow the panes to be smaller than 5% in height or width regarding to there orientation. If a pane is smaller than 5% height/width it will be set to 30% width or 50% height on startup.

Other changes in Liferea 1.14 rc1 include:

  • Supports gtk-application-prefer-dark-theme based dark mode switching.
  • Add search rule to find items from a given author.
  • Exported OPML feed lists are now UTF-8 encoded for better readability.
  • Render <media:description> field for Youtube feeds
  • Updated default feed sources from HTTP to HTTPS.
  • Add new “podcast” search folder rule.
  • Also add enclosures when saving items to file.

Liferea with GNOME style header bar

How to Install Lifera 1.4 RC1 in Ubuntu:

For Ubuntu based user prefer the classic .deb package, here’s the unofficial PPA contains the new packages for Ubuntu 20.04 and Ubuntu 22.04.

1. First, press Ctrl+Alt+T on keyboard to open terminal. When it opens, run command below to add the PPA:

sudo add-apt-repository ppa:ubuntuhandbook1/apps

2. Next, either update the feed reader from an existing release via “Software Updater” or run command below to install it:

sudo apt install liferea

NOTE: Linux Mint user need to first run sudo apt update to refresh package cache manually.

NOTE: Liferea still shows v1.13.9 in about dialog for unknown reason. Unknown if it’s building issue or a software bug, and I’ve report it to the project page.

Uninstall:

For any issue, you may uninstall the PPA repository by running the command below in terminal:

sudo add-apt-repository --remove ppa:ubuntuhandbook1/apps

And remove the Liferea news reader either via your system package manager or by running command below in terminal:

sudo apt remove --autoremove liferea liferea-data

This simple tutorial shows how to enable and customize hot-corner actions in Ubuntu 22.04 LTS with default GNOME desktop.

Your system can do a custom action, when moving mouse corner to hit one of the 4 (top-left, top-right, bottom-left, and bottom-right) screen edges. That’s hot-corners function.

By default, the top-left hot-corner is enabled for triggering the overview screen. You can however enable all the 4 corners and specify custom actions via an extension in all GNOME based Linux.

Step 1: Install Extension Manager

For Ubuntu 22.04 & 22.10, it’s easy to install and manager extensions via “Extension Manager” tool. First, search for and install the tool from Ubuntu Software app.

Install Extension Manager in Ubuntu 22.04

After that, click on top-left ‘Activities’ button to open overview screen. Then search for and open the ‘Extension Manager’ app.

Step 2: Install Custom Hot Corners extension

Once ‘Extension Manager’ opens, navigate to ‘Browse’ tab. Then, search for and install ‘Custom Hot Corners – Extended‘ extension.

Install Hot Corners Extension via ‘Extension Manager’

After installed it, switch back ‘Installed’ tab and click on the gear button to configure hot-corners.

Open Hot Corners settings

Under ‘Monitor‘ tab, choose one of the 4 corners via first row icons. Then select an action to do via the drop-down menu right below.

As you see, it also support custom actions for “Ctrl + mouse hit hot-corner”, “mouse click or scroll on corner”, “Ctrl + click or scroll on corner”.

And you can specify following actions to do with the extension: Show Activities overview, show app grid, run custom command, launch screenshot UI, hide all app windows (current or all monitors), switch workspaces, navigate windows, toggle screen brightness, nightlight, video playback control and more.

The extension is a bit overloaded in my opinion as it also support adding keyboard shortcuts and custom menu for all supported actions, though you may just skip to leave them all disabled.

This simple tutorial shows how to easily setup OpenVPN in your Ubuntu 20.04 | 22.04 server and connect remotely in Windows or Linux with GNOME.

My PPTP and IKEv2 VPN server refused to work recently due to the Great Firewall (maybe). So I decided to setup OpenVPN in my Ubuntu VPS as a workaround.

DigitalOcean has a step by step setup guide, but it’s really long and complicated for beginners. Thankfully, there’s a free open-source script make things as easy as few commands.

Step 1: Install OpenVPN

As mentioned, there’s a script in the github to make things easy. It automatically detects your system, environment variable, IP address, and setup OpenVPN and firewall.

The script is totally safe in my own opinion, and you can view the code by yourself. Though, there’s always disclaimer that use it as your own risk!

1. First, connect to your Ubuntu/Debian server either via SSH or other method that you favorite. Then grab the script by wget:

wget https://git.io/vpn -O openvpn-install.sh

In case wget command does not exist, install via sudo apt install wget.

2. After downloaded the script, add executable permission via command:

chmod u+x openvpn-install.sh

3. Finally, run the script:

sudo bash openvpn-install.sh

It will ask you a few questions to confirm IP address if your server is running behind NAT, choose UDP or TCP, set which port to listen to, and select a NDS server. For lazy men, it’s OK hit Enter to use default for all previous questions.

But, you need to finally type a name for the client. It will create a .ovpn file with the name you just typed.

Default options are usually OK except the client name

After answering all the questions, hit any key to get start. It will do all the remained things, and generate a .ovpn file.

Step 2: Copy & paste the .ovpn to client machine

As the screenshot above shows you, it generates the .opvn file in /root directory in my case. In case you logged in via non-root user, copy the file to user’s home via:

sudo mv /root/*.ovpn ~/ && sudo chown $USER:$USER *.ovpn

Finally, you need to send the file to client machine, such as running the scp command below in your client PC (run this command in client/local machine):

scp -P 22 username@server-ip:~/*.ovpn ./

Replace * with the filename, though it works if there no other .ovpn files. And, change port number 22 if non-default SSH listening port in use.

Step 3: Connect to OpenVPN server in Ubuntu/Fedora

GNOME desktop has built-in client support for OpenVPN connection. Simply open Gnome Control Center (aka Settings) via the top-right corner system status menu.

Then, go to ‘network’ in left pane, and click on ‘+’ after VPN section. Finally, click ‘Import from file…’

In the pop-up file selection dialog, choose the .ovpn file you got from the server side. It will generate the VPN network automatically once you click open (see the screenshot below).

It automatically create the VPN network after selected the .ovpn file

The default configurations are OK, though you may click editing advanced options as you need. After clicking on ‘Add’ button, you can finally start connecting to the OpenVPN server either within Gnome Control Center or system status menu:

Connect from Windows & macOS:

OpenVPN website provides a client application for Windows and macOS users, simply download and install the app. Then, drop the .ovpn file into app window to create VPN connection.

Linux Kernel 6.0 was released hours ago! Here are the new features and how to install instructions for Ubuntu 22.04.

So, as is hopefully clear to everybody, the major version number change is more about me running out of fingers and toes than it is about any big fundamental changes.Linus Torvalds announced.

New Features in Linux Kernel 6.0

The new kernel introduced experimental support of Intel’s A750 and A770 graphics card, using i915 DRM kernel driver with “force_probe” option. PCI support for LoongArch CPU architecture from China and OpenRISC architecture.

The release also added audio driver for Intel Meteor Lake, AMD Raphael and Jadeite, V3D Direct Rendering Manager (DRM) driver for Raspberry Pi 4, and Intel Software Guard Extensions (SGX) support.

Other changes include:

  • Support Lenovo ThinkPad X13s Arm laptop
  • Low-memory mode support for F2FS file system.
  • Habana Labs Gaudi2 Support
  • XP-PEN Deco L Drawing Tablet support.
  • Fix touchpad & keyboard issues after suspend for many TUXEDO laptops

How to Install Linux Kernel 6.0 in Ubuntu:

NOTE: Mainline Kernel packages are neither officially supported and nor appropriate for production use. Install it only for testing or certain use.

Ubuntu builds the latest Kernel packages via Mainline Kernel PPA. For Linux Kernel 6.0, download the packages from the link below:

Select download amd64 packages for modern 64-bit PC/laptop, or armhf/arm64 for ARM devices such as Apple Silicon and Raspberry Pi. And, install them one by one in the turns below:

  1. linux-headers-6.0.0-060000_***_all.deb
  2. linux-headers-6.0.0-060000-generic_***.deb
  3. linux-modules-6.0.0-060000-generic_***.deb
  4. linux-image-unsigned-6.0.0-060000-generic_***.deb

To download & install the packages from command line, open terminal (or connect to console) and run the commands below one by one (for 64-bit only):

wget -c https://kernel.ubuntu.com/~kernel-ppa/mainline/v6.0/amd64/linux-headers-6.0.0-060000_6.0.0-060000.202210022231_all.deb

wget -c https://kernel.ubuntu.com/~kernel-ppa/mainline/v6.0/amd64/linux-headers-6.0.0-060000-generic_6.0.0-060000.202210022231_amd64.deb

wget -c https://kernel.ubuntu.com/~kernel-ppa/mainline/v6.0/amd64/linux-modules-6.0.0-060000-generic_6.0.0-060000.202210022231_amd64.deb

wget -c https://kernel.ubuntu.com/~kernel-ppa/mainline/v6.0/amd64/linux-image-unsigned-6.0.0-060000-generic_6.0.0-060000.202210022231_amd64.deb

sudo apt install ./linux-*.deb

After installing the Kernel packages, restart your machine and enjoy!

Uninstall:

To restore the previous Kernel, start or restart your machine. In the system boot-menu, go to “Advanced” and select booting the previous kernel.

After booting the old kernel, run command below to remove Linux 6.0:

sudo apt remove linux-headers-6.0.0* linux-modules-6.0.0* linux-image-unsigned-6.0.0*

After more than 20 years of development, the popular planetarium ‘Stellarium’ finally reached 1.0 release.

Stellarium 1.0 is the first released ported to Qt6 framework, though Qt5 is still supported! It features:

  • A new, much better skylight model, but MacOS and OpenGL ES2 not supported.
  • Many details around eclipses
  • Updated Observation List features
  • New features in AstroCalc tool
  • HiDPI improvements
  • Better dithering
  • Able to use Windows location service
  • New skyculture: Samoan
  • Updated several skycultures
  • Updates in Angle Measure, Satellites, Oculars, Remote Control, Pulsars plugins

See the release note for more about Stellarium 1.0.

How to Install Stellarium 1.0 in Ubuntu Linux

Stellarium is available to install in Ubuntu via Snap, AppImage, and PPA repository. They are built against Qt5 toolkit though.

Snap package

Snap is a software package runs in sandbox. Though it’s quite easy to install for lazy men. Simply, search for and install it from Ubuntu Software:

Stellarium Snap Package in Ubuntu Software app

Ubuntu PPA

For those who prefer the native .deb package, the official PPA has built the packages for Ubuntu 20.04, Ubuntu 22.04, and Ubuntu 22.10.

First, press Ctrl+Alt+T on keyboard to open terminal. When it opens, run the command below to add the PPA:

sudo add-apt-repository ppa:stellarium/stellarium-releases

Type user password when it asks (no asterisk feedback) and hit Enter to continue.

Linux Mint user may also run the command below to refresh package cache:

sudo apt update

Finally, install the planetarium software via command:

sudo apt install stellarium

AppImage

AppImage is a non-install portable package that can be run directly to launch software app.

First, make sure your system has enabled AppImage support by opening terminal (Ctrl+Alt+T) and run command:

sudo apt install libfuse2

Then, download the AppImage from github releases page (under ‘Assets’):

Finally, right-click on the package, go to ‘Properties’ and make it executable via the tick-box under ‘Permissions’ tab. Finally, click run it to launch Stellarium:

Uninstall Stellarium

Depends on which package you installed, uninstall Stellarium snap from Ubuntu Software, or remove AppImage file from file manager.

For the PPA package, open terminal (Ctrl+Alt+T) and run command to remove it:

sudo apt remove --autoremove stellarium

And remove the PPA repository either by running the command below:

sudo add-apt-repository --remove ppa:stellarium/stellarium-releases

or use ‘Software & Updates’ utility by removing the source line under ‘Other Software’ tab:

Ubuntu 22.10, code name ‘Kinetic Kudu’, is now in beta stage. The final release expected on October 20, 2022. See what’s new in the next release of the popular Linux distribution.

Ubuntu 22.10 features Linux Kernel 5.19 with new hardware support. The default desktop environment is GNOME 43, that features a new flat system menu.

Ubuntu 22.10 new system menu

The ‘Background’ settings tab has been removed from Gnome Control Center. Instead, user can choose wallpaper using the ‘Appearance’ tab. And, a new ‘Ubuntu Desktop’ tab is present for the dock and desktop icons settings.

New Ubuntu Desktop settings tab

Files app (aka Nautilus) has been ported to GTK4 plus LibAdwaita, so it has adaptive UI that show/hide left sidebar automatically according to app window size. In addition, the “undo” pop up has been moved to bottom in file manager, which no longer interrupt your workflow. Context (right-click) menu, file properties, and about dialog have been redesigned with touch-friendly UI.

Ubuntu 22.10 Desktop finally uses Pipewire as default sound server instead of Pulseaudio. WebP image format is supported out-of-the-box. And, gedit has been replaced with GNOME Text Editor.

Other changes in Ubuntu 22.10 include:

  • Files (Nautilus file manager) now support Undo/Redo actions.
  • Support light/dark wallpaper in Appearance settings page.
  • No longer pre-install GNOME To Do, and remove Gnome-books from system repository.
  • Click app icon on dock to switch windows if multiple instances opened.
  • New icon in top-right system menu to launch screenshot UI

Compare to Ubuntu 22.04 LTS, Ubuntu 22.10 runs apparently faster and smoother, especially when switching light and dark theme and accent colors. It however has only 9 months of life as a short term release.

Download Ubuntu 22.10:

Ubuntu 22.10 desktop and server .iso images are available to download at the link below:

Ubuntu 22.04 users can now upgrade to this Beta by following the official guide. Though, it’s recommended to disable third-party repositories, PPAs, and uninstall proprietary drivers before doing the upgrade process.

For more about Ubuntu 22.10, see the official release note.

Avidemux video editor released version 2.8.1 a few days ago. Here’s the new features and how to install instruction for Ubuntu 22.04 and Ubuntu 20.04.

The new release improved HiDPI displays support by updating the icon set, and using OpenGL for rendering on-the-fly preview in video filter dialog.

Avidemux 2.8.1 also introduced new filters: 3D LUT, Decimate, and Arbitrary Rotate, as well as new video encoder: VideoToolbox HEVC for macOS users.

It also added support for decoding 8-bit VP9 on Windows using DXVA2 and Linux using VDPAU with graphics card that features a VP9 decoder.

Avidemux Dark Theme

Other changes include:

  • Light and Dark themes in ‘View’ menu.
  • CTRL+F shortcut to add partial filters.
  • configurable compressor
  • 3-band equalizer
  • independent channel gain/delay options
  • channel remap options
  • new downmix options
  • audio track configuration up to 32 tracks
  • save volume settings on exit.
  • See release note for more details.

How to Install Avidemux 2.8.1 in Ubuntu Linux

Option 1: AppImage

The video editor software offers official Linux package via non-install AppImage, available to download at the link below:

Just grab the package, right-click and go to it’s “Properties” dialog, add executable permission and finally click run the package to launch the video editor.

Avidemux AppImage

Ubuntu 22.04 & Ubuntu 22.10 however does not support AppImage out-of-the-box. To enable it, open terminal (Ctrl+Alt+T) and run command:

sudo apt install libfuse2

Option 2: Ubuntu PPA

For those prefer the native .deb package format, the Avidemux website refers to this unofficial PPA.

1. First, press Ctrl+Alt+T on keyboard to open a terminal window. When it opens, run command to add the PPA:

sudo add-apt-repository ppa:xtradeb/apps

Type user password when it asks (no asterisk feedback) and hit Enter to continue.

The PPA however offers the latest packages for only Ubuntu 22.04. For Ubuntu 20.04 and old Ubuntu 18.04, you may use this one instead:

sudo add-apt-repository ppa:ubuntuhandbook1/avidemux

2. After adding the PPA, run the command below to update package cache for old Ubuntu or Linux Mint:

sudo apt update

3. Finally install the software by running the command below in terminal:

sudo apt install avidemux-qt

Uninstall Avidemux

For the video editor packages installed from Ubuntu PPA, remove it by running command in terminal:

sudo apt remove --autoremove avidemux-qt

And, remove the Ubuntu PPA either via command below:

sudo add-apt-repository --remove ppa:ubuntuhandbook1/avidemux

or by using ‘Software & Updates’ utility.

Pithos, native Linux client for Pandora Radio, got a new release update few days ago. Here’s how to install it in Ubuntu 22.04, Ubuntu 20.04 & Ubuntu 18.04 via PPA.

It’s been almost 2 years since the last release update. The new Pithos 1.6.0 now uses the GNOME style client-side decorations (CSD) for its header bar, instead of the old title bar. So, the app UI will look like the screenshot below:

Pithos 1.6.0

Plus rounded window corner extension, it now looks good in recent Ubuntu releases.

This release also adds Ctrl+r shortcut to open stations popover, removes access to host keyring when in flatpak. And, libappindicator is no longer required as dependency as it now supports status notifier directly.

How to Install Pithos 1.6.0 in Ubuntu:

For current 3 Ubuntu LTS releases and their based systems, I’ve uploaded the software package into this unofficial Ubuntu PPA.

1. First, press Ctrl+Alt+T key combination on keyboard to open terminal. When it opens, run the command below to add the PPA:

sudo add-apt-repository ppa:ubuntuhandbook1/apps

Type user password when it asks (no asterisk feedback) and hit Enter to continue.

2. Then, run command to fresh the package cache for old Ubuntu 18.04 and Linux Mint:

sudo apt update

3. Finally, install or update the lightweight Pandora Radio client to listen online music:

sudo apt install pithos

As the application does not update frequently, you may also download & install the .deb package directly from this page.

Uninstall Pithos

To remove the Ubuntu PPA, open terminal and run command:

sudo add-apt-repository --remove ppa:ubuntuhandbook1/apps

Or, open ‘Software & Updates’ utility and remove the source line under ‘Other Software’ tab.

To remove Pithos, use command:

sudo apt remove --autoremove pithos