This tutorial shows how to install the latest version of KeePassXC password manager (v2.7.9 so far) and keep it up-to-date in Ubuntu 24.04, Ubuntu 22.04, and Ubuntu 20.04

The popular KeePassXC password manager now is at 2.7.0 release series with many exciting new features. Here’s are some of them according to the release note:

  • Entry tagging
  • Unlock via Windows Hello and macOS Touch ID
  • Auto-Type overhaul.
  • Improvements to Secret Service integration (Linux)
  • Change the crypto backend from libgcrypt to Botan

KeePass 2.7 Entry tags

To get the most recent KeePass in Ubuntu, you have 4 choices:

  • Snap package – runs in sandbox environment.
  • AppImage – no installation required. Just run to launch the app.
  • Ubuntu PPA – contains native .deb package.
  • Flatpak package – runs in sandbox environment.

All of them are official! Choose one that you prefer.

Option 1: KeePassXC Snap package

Snap is the easiest way to install the app in Ubuntu, however, it runs in sandbox and so far it’s a bit lag behind. The snap is at v2.7.8 while the latest has reached v2.7.9.

To install it, just launch App Center (or Ubuntu Software), then search and click install KeePassXC filtered by Snap package.

Or, press Ctrl+Alt+T on keyboard to open terminal, and run command to install the package:

sudo snap install keepassxc

Snap package installs updates automatically, though you may run the command below to check updates manually:

sudo snap refresh keepassxc

Option 2: KeePassXC AppImage package

The software website provides Linux package via AppImage. It’s available to download via the link button below:

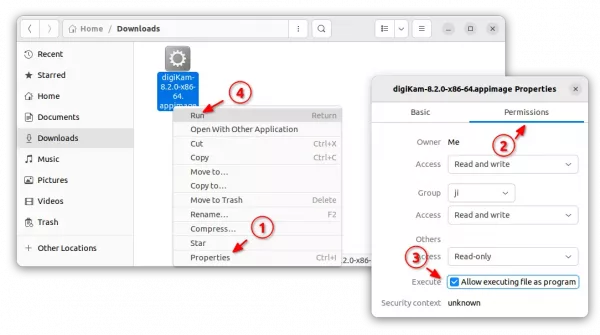
No installation required, after downloaded the AppImage, just go to its ‘Properties’ dialog, enable “Executable as Program” permission. Finally, click Run will launch the password manager.

NOTE: Ubuntu 22.04 and higher does NOT support AppImage out-of-the-box, due to miss libfuse2 library. Open terminal (Ctrl+Alt+T) and run command to get it:

sudo apt install libfuse2

Option 3: Install KeePassXC via Ubuntu PPA

For native .deb package, the official PPA contains the package for Ubuntu 20.04, Ubuntu 22.04, Ubuntu 24.04. So far, it supports amd64, arm64, armhf, and riscv64 CPU architecture types.

1. Add the PPA

Firstly, press Ctrl+Alt+T on keyboard to open terminal window. When it opens, paste the command below and hit Enter to add PPA:

sudo add-apt-repository ppa:phoerious/keepassxc

Type user password (no asterisk feedback) and hit Enter to continue.

2. Update package cache.

Ubuntu now automatically refresh package cache while adding PPA, but some Ubuntu based systems (e.g., Linux Mint) does NOT.

To manually refresh system package cache, run command:

sudo apt update

3. Install / upgrade KeePassXC

Finally, install the password manager by running command in terminal:

sudo apt install keepassxc

If you already have an old version of the package installed, then just launch “Software Updater” to check and install updates.

Option 4: Install KeePassXC via Flatpak package

Flatpak is another universal Linux package format that runs in sandbox. KeePassXC is available to install as Flatpak package through the Flathub repository. So far, it supports code>amd64, arm64 CPU architecture types.

For Linux Mint 21/22, and Fedora Workstation (with 3rd party repository enabled), simply search for and install the package from either Software Manager or GNOME Software.

While Ubuntu and other Linux can install the package by following steps below one by one:

  • First, open terminal (Ctrl+Alt+T) and run command to enable Flatpak support:
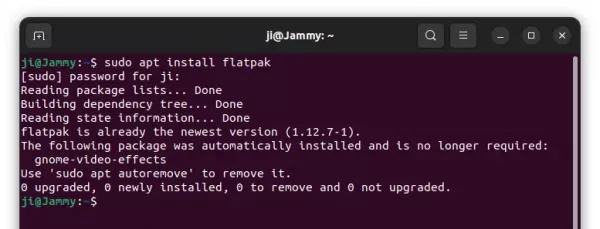
    sudo apt install flatpak

    Old Ubuntu 18.04 user may need to add this PPA first for most recent daemon package.

  • Then, add the Flathub repository which hosts the software package:
    flatpak remote-add --if-not-exists flathub https://dl.flathub.org/repo/flathub.flatpakrepo

    For other Linux, follow the official setup guide to enable Flatpak support.

  • Finally, run command to install the password manager as Flatpak package:
    flatpak install flathub org.keepassxc.KeePassXC

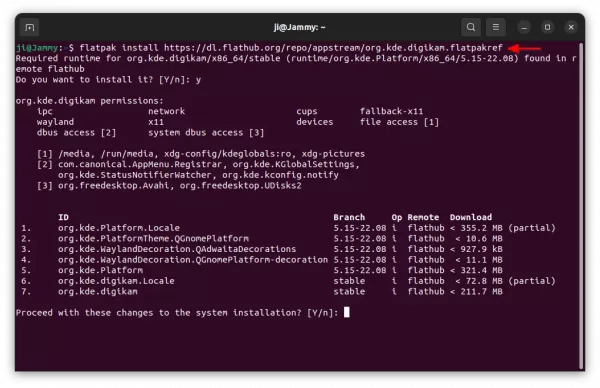
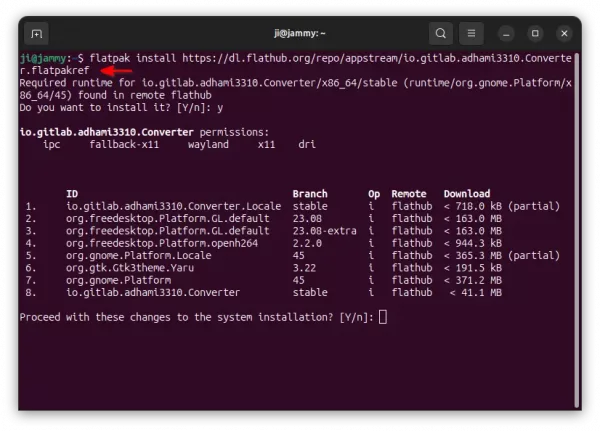
    As it runs in sandbox, it also needs lots of downloads for run-time libraries as the screenshot below shows you.

After installed the package, search for and launch the app from either start menu or GNOME overview depends on your desktop.


If app icon not visible, try either log out and back in, or run the command below instead to launch it:

flatpak run org.keepassxc.KeePassXC

And, to check updates for the Flatpak package, use command:

flatpak update org.keepassxc.KeePassXC

Uninstall KeePassXC:

For any reason, you may remove the password manager by running one of the commands below in terminal:

  • To remove the snap package, either use App Center (or Ubuntu Software) or run command in terminal:
    sudo snap remove --purge keepassxc
  • To remove the native .deb package, use command:
    sudo apt remove --autoremove keepassxc

    And, remove the Ubuntu PPA by using command:

    sudo add-apt-repository --remove ppa:phoerious/keepassxc
  • For the Flatpak package, use the command below instead to uninstall:
    flatpak uninstall --delete-data org.keepassxc.KeePassXC

    Also run flatpak uninstall --unused to clear useless runtime libraries.

Ubuntu 22.04 finally merged desktop icon settings into System Settings (Gnome Control Center). However, it only provides few options to toggle display ‘Home’ folder, change icon size and new icon position.

By right-clicking on desktop and select ‘Desktop Icons Settings’ from pop-up menu, it will bring up the ‘Appearance‘ settings page as the picture below shows:

Ubuntu 22.04 only provides few Desktop Icons options

What if you want to show the trash can, removable devices (e.g., USB drive) on desktop? They are hidden settings! Here I’m going to show you how to configure them in Ubuntu 22.04.

Single Command to Toggle Display Trash Icon on Desktop

The gsettings command is always the most efficient way to configure hidden settings in Ubuntu.

If you’re OK with Linux commands, press Ctrl+Alt+T on keyboard to open terminal and paste the command below into it.

gsettings set org.gnome.shell.extensions.ding show-trash true

By hitting enter, you should see the trash can desktop icon immediately!

To hide the icon again, simply run the command below to reset the key:

gsettings reset org.gnome.shell.extensions.ding show-trash

In addition, you may hide the Trash icon from left dock via command:

gsettings set org.gnome.shell.extensions.dash-to-dock show-trash false

Use Dconf Editor to toggle display Trash icon & more Desktop Icons Settings:

The ‘Dconf Editor‘ tool provides a graphical interface to configure these hidden settings in Ubuntu.

1.) Firstly, search for and install Dconf Editor in Ubuntu Software.

Ubuntu Software always sucks! It does not launch in my case at the moment of writing this tutorial. So, there’s no screenshot for it.

You may also run the command below in terminal to install the ‘Dconf Editor’ tool.

sudo apt install dconf-editor

2.) Search for and launch the tool from ‘Activities’ overview screen:

3.) When the app opens, navigate to org/gnome/shell/extensions/ding. Scroll down, and you’ll see the on/off switch for the ‘show-trash’ key, as well as many other settings for desktop icons.
That’s all. Enjoy!

This simple tutorial shows how to change the default terminal emulator from Gnome Terminal to the one that you prefer in Ubuntu.

The default Gnome Terminal is great, but there are many good alternatives (e.g., tilix). If you prefer to use another one and want to set it as default, so you may press Ctrl+Alt+T to open it.

Step 1: Create symbolic link to x-terminal-emulator

Ubuntu seems default to x-terminal-emulator, which is a virtual package by default links to Gnome Terminal.

By creating a group of alternatives to the package allows to switch which one to use at any time with a single command.

Firstly, open terminal and run command to create a symbolic link (replace /usr/bin/tilix with your terminal emulator):

sudo update-alternatives --install /usr/bin/x-terminal-emulator x-terminal-emulator /usr/bin/tilix 1

Some terminal emulators may already created the symbolic link automatically after installation, so you can just skip this step.

Step 2: Select your terminal to use as default:

Next, run the command below will output all available alternatives:

sudo update-alternatives --config x-terminal-emulator

Type the number for the one that you prefer and hit Enter will set it as default terminal.

In the case, I selected 5: ‘/usr/bin/tilix.wrapper’. It’s a Tilix wrapper with command line arguments that created automatically during installation. Step 1,

Restore and remove the alternative link:

To revert back to Gnome Terminal, just re-run the command in Step 2 and choose number 0 or 1.

And to remove the link created via Step 1, use command (replace ‘/usr/bin/tilix’ accordingly):

sudo update-alternatives --remove x-terminal-emulator /usr/bin/tilix

That’s all. Enjoy!

Linux Kernel 5.17 was finally released last night after 8 release candidates. Linus Torvalds announced that:
So we had an extra week of at the end of this release cycle, and I’m happy to report that it was very calm indeed. We could probably have skipped it with not a lot of downside, but we did get a few last-minute reverts and fixes in and avoid some brown-paper bugs that would otherwise have been stable fodder, so it’s all good.
The new kernel comes with

  • New AMD P-State driver for Zen 2 and newer systems with ACPI CPPC.
  • RISC-V sv48 Support to be able to handle more memory.
  • Sensor monitoring support for more ASUS motherboards.
  • CXL memory hotplug support.
  • Initial support for next-generation Raptor Lake S graphics.
  • Initial support for a Sierra XM1210 receiver.
  • Intel Alder Lake N audio support.
  • Real-Time clock driver for Nintendo GameCube / Wii / Wii U.

How to Install Kernel 5.17 in Ubuntu 22.04:

IMPORTANT: The Mainline Kernel packages do not include any Ubuntu-provided drivers or patches! You must know what you’re going to do!

The Mainline Kernel PPA has built the new kernel packages. It however requires libc >= 2.34 and libssl3. Which means only Ubuntu 22.04 user can try out the new Kernel packages. Though, Ubuntu 21.10 may try to meet the requirement via this tutorial.

Firstly, download the .deb packages from the link page below:

For modern 64-bit PC/laptop, download & install the packages below in turns:

  • linux-headers-5.17.0-051700_5.17.0-051700.202203202130_all.deb
  • linux-headers-5.17.0-051700-generic_5.17.0-051700.202203202130_amd64.deb
  • linux-modules-5.17.0-051700-generic_5.17.0-051700.202203202130_amd64.deb
  • linux-image-unsigned-5.17.0-051700-generic_5.17.0-051700.202203202130_amd64.deb

To make things easier, there’s a graphical tool called Mainline that allows to download & install mainline Kernels with few clicks.

And for Ubuntu 20.04 user insist on installing the new Kernel, keep an eye on this Ubuntu PPA (use it at your own risk)!

How to Remove Kernel 5.17:

Firstly, start or restart your PC and select an old kernel to boot from Grub boot-loader. After login with old Kernel, remove Kernel 5.17 via command:

sudo apt remove linux-headers-5.17.0* linux-modules-5.17.0* linux-image-unsigned-5.17.0*

Cawbird, the free open-source native Linux Twitter app, released version 1.5 few days ago.

There’s no big ones in the release. But if you have poor network connection like me, and any image failed to load in Cawbird, there’s now ‘reload image‘ button that could help to reload it.

The new release now cleanly and clearly handle “withheld” accounts, and hide withheld tweets. And, it fixed emoji chooser in non-English locales, added support paging of blocked profiles. For more, see the Github releases page.

How to install Cawbird in Ubuntu & Other Linux:

Cawbird twitter app is available to install via 3 ways: Native DEB/RPM, Snap, and Flatpak packages.

1. Native DEB / RPM

For Debian, Ubuntu, and Fedora based systems, the software developer offers official packages through OBS repository:

Just select your OS logo, click ‘Grab binary packages directory‘ and select download the native package for your system (amd64 for modern PC, arm64/armhf for arm processors).

Or, run the commands one by one to add repository and receive updates, by following the ‘Add repository and install manually’ link.

2. Cawbird Snap:

Ubuntu user may just search for and install the Snap package from Software Center. Though it’s not updated to v1.5 at the moment.

3. Cawbird Flatpak:

The app is also available to install via the universal Flatpak package. After set up the Flatpak daemon, user may grab the package from this page.

The development build of Ubuntu 22.04 LTS finally shifts to GNOME 42 (in Beta now) in recent update with many visible changes!

Firstly, the default wallpaper ‘warty-final-ubuntu.png‘ revealed. It’s no longer the old Ubuntu 21.10 wallpaper, but the brand new one:

Ubuntu 22.04 Wallpaper

The default Yaru theme has been updated. System menu, notification, and context menus look even better with more rounded corners and no border.

And, finally switching light and dark mode in ‘Appearance’ setting applies the full system colors! Though it seems to have a bug, which won’t work after selected a non-default accent color.

As you see in the picture above, Ubuntu 22.04 now supports for changing the accent color. Not only the highlight and check-box colors, but also the icons of ‘Ubuntu Software’ and folders follow the changes!

As well, the new Circle of Friends Ubuntu logo has been applied in the development release.

Thanks to GNOME 42, pressing PrintScreen on keyboard now open the new screenshot UI. It can take screenshots of selection area, app window, full screen, and record desktop or selection area.

New ScreenShot UI

Other changes in the Ubuntu 22.04 Dev update:

  • Stick to Gedit and Gnome Terminal, while Gnome 42 switched to Gnome editor and Gnome console.
  • Keep Gnome Screenshot app, though there’s built-in screenshot UI.
  • Avoiding GTK4, though Files (aka nautilus) and Image Viewer (aka Eye of Gnome) are now GTK4.
  • And more.

Known issues:

  • 1. Change wallpaper in ‘Background’ settings only apply for current system color (Light or Dark).
  • 2. As mentioned, use non-default accent color will make system menu, context menu of app icons on dock always light.

Playing video games or doing other tasks that need repeated mouse clicks in Linux? XClicker may help.

XClicker is a free open-source tool, allows to make ‘left.’, ‘right‘ or ‘middle‘ click (single or double) automatically in any area in your screen.

It provides an easy to use interface, allows to set the click interval in Milliseconds and/or seconds, choose click type (e.g., left, right, double click). By enabling ‘Custom Location’ then clicking on ‘Get’ button, user may then do single click anywhere in screen to set the x, y coordinate.

It as well provides ‘Repeat Only’ option in case you want to limit the repeat times. And, to prevent from unwanted behavior, there’s ‘Safe Mode’ option in settings page.

Other features include:

  • Randomize the click interval.
  • Start / Stop with a custom hotkey.
  • Dark / Light mode that follow system color.

As the app name indicates, the only DOWNSIDE is that XClicker works for X11 but not Wayland! Which means Ubuntu 21.10 and higher need to login with “Ubuntu on Xorg” session to make it works!

Install XClicker in Ubuntu / Linux Mint & Other Linux:

The app provides Linux packages in the ‘Assets’ section under Github releases page:

Most Linux user may grab the non-install .Appimage package, then add executable permission in file’s ‘Properties > Permissions’ dialog, and finally right-click run to launch the tool.

Ubuntu, Debian, and Linux Mint based systems may also grab the ‘xclicker_xxx_ amd64.deb‘ and double-click to install it. So, the app will available to launch from system start menu (9 grids ‘Show Applications’).

There’s a good NetSpeed indicator that shows the current download & upload speed in Ubuntu panel. For those would like a floating desktop widget, a new extension is available for GNOME 40.

The new ‘Screen Net Speed‘ extension adds an animated widget to your screen displays current download & upload speed. By clicking on it will toggle display its position (so far only bottom left or bottom right).

The widget is always on top. And, it automatically rises (move up) when network speed increase and sets (move down) when speed slow down. As well, a paper plane icon is present in panel to toggle display the widget.

How to Install Screen Net Speed:

The extension at the moment only supports GNOME 40. Which means, you need Ubuntu 21.10.

1. Install ‘chrome-gnome-shell’

Firstly, make sure you have installed the chrome-gnome-shell package, which is required for installing Gnome Extensions in Ubuntu viaweb browser.

To install it, press Ctrl+Alt+T on keyboard to open terminal. Then, run command:

sudo apt install chrome-gnome-shell

2. Install Network Speed Widget:

NOTE: Firefox as Snap (pre-installed in Ubuntu 21.10) so far (March, 2022) does not support for installing Gnome Extensions! Use another browser or install Firefox as classic DEB package.

Now, go to the link button below in web browser and turn on the toggle icon to install the extension:

If you don’t see the toggle icon, try installing browser extension via ‘Click here to install browser extension’ link and refresh the web page.

shell browser extension

After installation, the widget should appear immediately on your desktop. That’s all. Enjoy!

Uninstall the Extension:

To remove this extension, either click the previous link button again and turn off the slider icon, or install and use Gnome Extensions app.

1. Install Gnome Extensions app by running command in terminal (Ctrl+Alt+T):

sudo apt install gnome-shell-extension-prefs

2. Search for and open ‘Extensions’ from the Activities overview screen.

3. Finally click expand the extension via the ‘‣’ icon and click remove it.

Want to limit the cpu usage of an app or process? It’s easy to do the trick in Ubuntu Linux via the LimitCPU tool.

LimitCPU is a simple command line tool that monitors a process and makes sure its CPU usage stays at or below a given percentage, by sending SIGSTOP and SIGCONT POSIX signals to process. All the children processes and threads of the specified process will share the same percentage of CPU.

LimitCPU is the direct child of the old CPUlimit. It’s available in the system repositories of all current Ubuntu repositories, though the package name is cpulimit.

Install LimitCPU in Ubuntu:

Press Ctrl+Alt+T on keyboard to open terminal. When it opens, run command to install the tool:

sudo apt install cpulimit

How to use Limit CPU in Ubuntu:

It’s quite easy to use the tool, because it has a good documentation. Just run man cpulimit in terminal, it will tell you how to use it. For lazy men, here are some examples.

1. Specify app or process to limit via:

  • -p follow with process id
  • -e follow with executable file name.
  • -P follow with absolute path to executable file.

For example, make sure process ‘1123’ to use less than 50% CPU (-l follow with number specify allowed CPU).

cpulimit -p 1123 -l 50

Many apps now use multiple processes, so you may specify which to limit via path to executable:

cpulimit -P /usr/bin/firefox -l 50

2. The tool can also used to launch an app and limit its CPU usage. For example, launch Firefox and allow up to 50% CPU amount:

cpulimit -l 50 firefox

3. There are some other command line flags, including:

  • -c specify the number of CPU cores available for the process.
  • -b / -f run cpulimit in background / foreground.
  • -q run in quite mode.
  • -k, kill the process when reach CPU limit.
  • -s, send alternative signal to watched process when kill it.

For example, launch Firefox and kill it when reach 30% CPU usage:

cpulimit -l 30 -k firefox

Limit process ‘1123’ to 25% CPU and allows 2 cores:

cpulimit -c 2 -p 1123 -l 25

Kill Firefox and send SIGTERM signal when it uses 20% CPU:

cpulimit -l 20 -e firefox -s SIGTERM

As mentioned, run man cpulimit in terminal for more information.

A new point release for VLC media player 3.0 branch, VLC 3.0.17 is out.

Without any tweak, VLC now support for playing .DAV video files, created via a DVR365 or Dahua Technology digital video recorder (DVR).

The release also features better notch support for new macbooks, adaptive streaming stack overhaul, and major codec updates.

Other changes include:

  • Add Webp image support.
  • Allow brackets in path part of URLs
  • Fix support for screen capture on macOS with avcapture
  • Improve HTTP2 memory usage, AVCapture module, AudioCD support and SMB compatibility
  • Add support for DTS LBR
  • Add support for new Fourcc for E-AC3, AV1, GeoVision
  • Fix playback of live AV1 streams
  • Support Uncompressed audio in mp4 (ISO/IEC 23003-5)
  • Third-party libraries updates and various fixes.

How to Install VLC 3.0.17 in Ubuntu:

Option 1: the official Snap package:

VLC provides official Linux package via Snap, though v3.0.17 is now in beta channel at the moment.

Ubuntu user may simply search for and install it from Ubuntu Software. It’ll update to the latest version automatically.

Option 2: Flatpak package

VLC is also available to install via the universal Flatpak package, which is now updated to v3.0.17.

Firstly, press Ctrl+Alt+T on keyboard to open terminal, then run command to install Flatpak daemon:

sudo apt install flatpak

For old Ubuntu 18.04 and ubuntu 16.04 need to add this PPA first.

Next, install VLC as Flatpak via command:

flatpak install https://dl.flathub.org/repo/appstream/org.videolan.VLC.flatpakref

How to Remove VLC:

For VLC installed via Snap, either remove it from Ubuntu Software or run command in terminal:

sudo snap remove vlc

For the Flatpak package, run the command below in a terminal window:

flatpak uninstall --delete-data org.videolan.VLC

And remove unused libraries via flatpak uninstall --unused.