Archives For November 30, 1999

install KDE 4.13.2 ubuntu 12.04

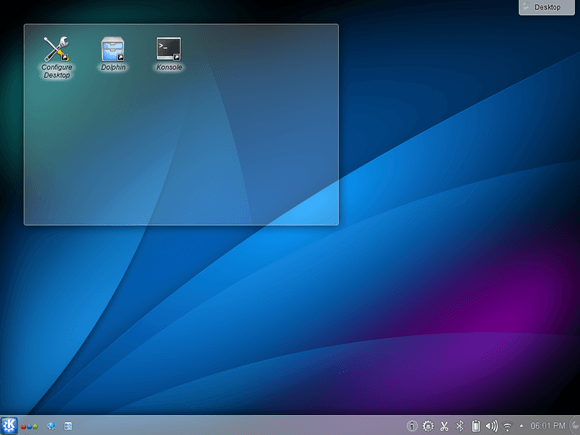
The latest release of KDE Software Compilation 4.13.2, which was released on June 10, now is available for Ubuntu 12.04 LTS in Kubuntu backports PPA.

According to the changelog, KDE 4.13.2 contains important fixes for Kopete:

  • a decrease in the exit time of Kopete with enabled statistics plugin
  • a fix for the compilation of jabber libjingle for non x86 architectures
  • another fix for voice call support in the jabber libjingle library.

Voice calls now works with GMail web plugin, old Google Talk windows client, telepathy-gabble and other Kopete versions. For more details, read the official announcement.

KDE 4.13.2

Install / Upgrade to KDE 4.13.2 in Ubuntu 12.04:

Press Ctrl+Alt+T on keyboard to open the terminal. When it opens, run the command below to add Kubuntu Backports PPA:

sudo add-apt-repository ppa:kubuntu-ppa/backports

Then update package lists and upgrade KDE:

sudo apt-get update; sudo apt-get upgrade

To install KDE 4.13.2, run:

sudo apt-get update; sudo apt-get install kubuntu-desktop

To have a minimal installation:

sudo apt-get update; sudo apt-get install --no-install-recommends kubuntu-desktop

XBMC 13.1

XBMC 13.1, the first bug-fix release of XBMC 13 Gotham, was finally announced after released two betas and a release candidate.

This 13.1 release contains only fixes compared to previous 13.0, and no new features. It can be safely installed on top of any previous XBMC releases.

  • Fix resume point of certain PVR items begin stale on playback.
  • Fix weirdness when certain TVs query XBMC’s UPnP server and it starts running a bunch of add-ons which cause popups on the XBMC machine.
  • Fix crash at exit while airplay is playing
  • Better recovery of VDPAU on errors.
  • Fixes for cropping of interlaced content using VDPAU.
  • Fix for FLAC tracks with large embedded images not playing.
  • Fix for crash if librtmp wasn’t available.
  • Fix for ffmpeg building on linux using later versions of librtmp.
  • Fix for broken m4a, mp4 playback with paplayer.
  • Fix for the hint text not being shown in editcontrols once unfocused.
  • Fix minor memory leak in PlayMedia builtin function.
  • Fix albumartist use in song smartplaylists.
  • Use unique client broadcast UID in the PVR api.

xbmc-gotham-13_1-splash-600x336

Install XBMC 13.1 in Ubuntu 14.04 / 13.10 / 12.04:

Important notice: 1. It’s always recommended to backup your current userdata before upgrading. 2. Due to changes related to the add-on system and skin improvement, certain plugins, scripts and skins may become incompatible when upgrading from XBMC 12.x.

To install or upgrade, press Ctrl+Alt+T on keyboard to open the terminal. When it opens, run the commands below one by one:

sudo add-apt-repository ppa:team-xbmc/ppa

sudo apt-get update

sudo apt-get install xbmc

Nvidia ubuntu 14.04

Nvidia 337.25 was released yesterday as the latest short lived branch version for Linux. The new driver brings lots of fixes and improvements and adds support for following GPUs:

  • GeForce GTX TITAN Z
  • GeForce GT 740
  • GeForce 830M
  • GeForce 840M
  • GeForce 845M
  • GeForce GTX 850M

For a complete list of changes, read the official announcement.

Install Nvidia Driver 337.25 in Ubuntu:

Below steps will teach you how to manually install the official .run package in Ubuntu:

1. Press Ctrl+Alt+T on keyboard to open the terminal. When it opens, run commands below one by one to remove previous installed proprietary driver:

sudo apt-get purge nvidia*

sudo apt-get update

sudo apt-get install nvidia-331-updates-dev

2. After restarted your computer, download the driver:

32 bit Linux 64 bit Linux 32 bit ARM

3. Switch to command console by pressing Ctrl+Alt+F1 (or F2 ~ F6) on keyboard and log in.

4. Kill the graphical session via:

sudo service lightdm stop

For Gnome GDM or Linux Mint MDM, you may replace lightdm with gdm or mdm in the command.

5. Give permission, start the installer and follow the on screen prompts.

chmod +x ~/Downloads/NVIDIA-Linux-*-337.25.run && sudo sh ~/Downloads/NVIDIA-Linux-*-337.25.run

Tips:You may keep the installer file so that you can remove this driver via below command if for some reason it does not work properly:

sudo sh ~/Downloads/NVIDIA-Linux-*-337.25.run --uninstall

Nvidia ubuntu 14.04

The latest proprietary driver Nvidia 331.79 for Linux has been announced. According to the changlog, the new release only fixed below bugs:

  • Fixed a bug that caused nvidia-installer to crash in environments where /proc is not mounted.
  • Fixed a bug that prevented module signing from working correctly for the NVIDIA Unified Memory kernel module when using module signing keys generated by nvidia-installer.
  • Fixed a bug that caused blank screens and flickering when rotating displays in a Base Mosaic layout.
  • Fixed a bug that caused BadRRCrtc or BadRROutput errors for big-endian X11 clients making certain XRandR requests.
  • Fixed a bug that corrupted certain software rendering, notably the stippled text used to represent disabled entries in xterm’s pop-up menus.

Below is how to install this driver in Ubuntu 14.04 or Ubuntu 12.04:

1. It’s recommended to remove previous installed proprietary driver and install the latest updates-dev package before getting started.

To do that, press Ctrl+Alt+T on keyboard to open terminal. When it opens, run the commands below one by one:

sudo apt-get purge nvidia*

sudo apt-get update

sudo apt-get install nvidia-331-updates-dev

2. Restart your computer.

3. Download the official Nvidia packages: 32 bit Linux | 64 bit Linux | 32 bit ARM

4. Press Ctrl+Alt+F1 (or F2 ~ F6) on keyboard to switch to command console and login.

5. Stop the graphical session:

sudo service lightdm stop

For Gnome GDM or Linux Mint MDM, you may replace lightdm with gdm or mdm in the command.

6. Now give executable permission and run the official package to start installing Nvidia 331.79:

chmod +x ~/Downloads/NVIDIA-Linux-*-331.79.run && sudo sh ~/Downloads/NVIDIA-Linux-*-331.79.run

Tips:You may keep the installer file so that you can remove this driver via below command if for some reason it does not work properly:

sudo sh ~/Downloads/NVIDIA-Linux-*-331.79.run --uninstall

free python ide

This quick tutorial is going to show you how to install Python 3.3.5 (or 3.4.0) and set as default in Ubuntu 14.04 and Ubuntu 12.04.

Python 3.3.5 was released on March 9th, 2014. It fixed:

  • a 3.3.4 regression in zipimport
  • a 3.3.4 regression executing scripts with a coding declared and Windows newlines
  • potential DOS using compression codecs in bytes.decode()

Python 3.4.0 was released one week later than 3.3.5 with below new features:

  • a “pathlib” module providing object-oriented filesystem paths
  • a standardized “enum” module
  • a build enhancement that will help generate introspection information for builtins
  • improved semantics for object finalization
  • adding single-dispatch generic functions to the standard library
  • a new C API for implementing custom memory allocators
  • changing file descriptors to not be inherited by default in subprocesses
  • a new “statistics” module
  • standardizing module metadata for Python’s module import system
  • a bundled installer for the pip package manager
  • a new “tracemalloc” module for tracing Python memory allocations
  • a new hash algorithm for Python strings and binary data
  • a new and improved protocol for pickled objects
  • a new “asyncio” module, a new framework for asynchronous I/O

Install:

A third party launchpad PPA contains older and newer Python version for Ubuntu. The two Python releases are available in the PPA for Ubuntu 14.04 and Ubuntu 12.04.

To add the PPA, press Ctrl+Alt+T on keyboard to open the terminal and run:

sudo add-apt-repository ppa:fkrull/deadsnakes

You may read the PPA description in the output and then:

Install Python 3.3.5 via:

sudo apt-get update; sudo apt-get install python3.3

Or install python 3.4.0 via:

sudo apt-get update; sudo apt-get install python3.4

To set your installed python as default, run the below commands one by one (You may change python3.3 to python3.4 in the code):

rm /usr/local/bin/python  

ln -s /usr/local/bin/python3.3 /usr/local/bin/python

install KDE 4.13 ubuntu 12.04

The KDE Software Compilation 4.13 is finally made into KUbuntu PPA for Ubuntu 12.04 and its derivatives.

The KDE Community announced KDE 4.13 on April 16, 2014. Among the changes you can find in KDE 4.13 today include:

  • KDE’s Kate text editor now has improved C++ syntax highlighting with some C++11 and C++1y/C++14 feature support, an improved build plugin, code completion for the D programming language, and a new predictive C++ indenter.
  • Artikulate as a new KDE application for pronunciation training.
  • KNotes has been ported to Akonadi.
  • The StorageServiceManager allows you to manage storage services like DropBox and YouSendIt.
  • Many updates to the Palapeli game.
  • Support for RAW camera image files within Gwenview.
  • Baloo replaces Nepomuk.

You can find out more details on the KDE 4.13 changes via the official announcement.

Install KDE 4.13 ubuntu 12.04

Install / Upgrade to KDE 4.13 in Ubuntu 12.04:

Press Ctrl+Alt+T on keyboard to open the terminal. When it opens, run the command below to add the KUbuntu PPA:

sudo add-apt-repository ppa:kubuntu-ppa/backports

After added the PPA, you can upgrade to KDE 4.13 via:

sudo apt-get update

sudo apt-get upgrade

Or install Kubuntu Desktop with 4.13 Software Compilation:

sudo apt-get update

sudo apt-get install kubuntu-desktop

Change Folder Color in Ubuntu

Want to change the color of your folders in Nautilus file browser to get a better visual layout? Well, there’s a small extension for Nautilus can do the job in Ubuntu 14.04 Trusty, Ubuntu 13.10 Saucy and Ubuntu 12.04 Precise.

See my file browser:

Change Folder Color in Ubuntu

So far, the tool support following colors: Blue, Light Blue, Pink, Black, Yellow, Violet, Orange (Ubuntu’s default), Green, Gray, Red. Also there’s an option to reset to default.

To install this simple tool, Press Ctrl+Alt+T on keyboard to open the terminal. When it opens, run the commands below one by one:

sudo add-apt-repository ppa:costales/folder-color

sudo apt-get update

sudo apt-get install folder-color

Don’t like Ubuntu PPA? Download & install the .deb package from launchpad page.

Once installed, restart Nautilus via:

nautilus -q

Finally you’re able to change a folder color in its context menu:

Different folder color ubuntu

Webpage: https://launchpad.net/folder-color

Nvidia ubuntu 14.04

Nvidia driver 331.67 for Linux has been released which brings new GPUs support and a few bug fixes. This tutorial will show you how to install this proprietary driver in Ubuntu 14.04 Trusty and Ubuntu 12.04 Precise.

Nvidia 331.67 release highlights:

  • Added support for the following GPUs:
    • GeForce GT 705
    • GeForce GT 720
    • GeForce GTX 860M
    • GeForce GTX 870M
    • GeForce GTX 880M
    • GeForce GTX TITAN Black
  • Fixed a bug that could lead to crashes when running Left 4 Dead 2 with threaded optimizations enabled.
  • Updated the makefile for the NVIDIA kernel module to work around a bug in older versions of GNU Make that prevented the NVIDIA kernel module from building correctly. This bug was fixed in version 3.81 of GNU Make.
  • Fixed a bug that causes some X clients to be disconnected from the X server when the screen is resized while RandR 1.4 display offloading is in use.
  • Fixed a bug that could cause display corruption when resuming from suspend on systems using RandR 1.4 display offloading with recent Linux kernels.
  • Added support for Tridelity SL stereo mode.
  • Fixed a bug that could cause nvidia-settings to crash or display incorrect information after switching virtual terminals while a color correction confirmation countdown was active.

Install Nvidia 331.67:

1. Press Ctrl+Alt+T on your keyboard to open the terminal. When it opens, run the commands below to remove the previous driver:

sudo apt-get purge nvidia*; sudo apt-get install nvidia-331-updates-dev

2. Restart your computer. Go to Software & Updates -> Additional drivers and switch to recommended open-source driver.

3. Download Nvidia 331.67 for:

32 bit Linux

64 bit Linux

32 bit ARM

4. Press Ctrl+Alt+F1 (or F2 ~ F6) key combination on your keyboard to switch to command console and login. Stop the graphic session by running the appropriate command below:

sudo service lightdm stop ## For the default LightDM

sudo service gdm stop ## For the Gnome GDM

sudo service mdm stop ## For the Linux Mint default MDM

5. Now give executable permission and start the installer, and finally follow the on-screen instructions to complete the process.

chmod +x ~/Downloads/NVIDIA-Linux-*-331.67.run && sudo sh ~/Downloads/NVIDIA-Linux-*-331.67.run

Tips: You may keep the installer file so that you can remove this driver via below command if for some reason this driver does not work properly:

sudo sh ~/Downloads/NVIDIA-Linux-*-331.67.run --uninstall

That’s it. Enjoy!

unity gtk greeter

This quick tutorial is going to show beginners how to changes an application icon in Ubuntu Unity. It’ll work on Ubuntu 14.04, Ubuntu 13.10, Ubuntu 12.04 and future Ubuntu releases if Unity still to be the default desktop environment.

In Unity Desktop, application launchers are actually files stored in your computer, with a ‘.desktop’ extension. So besides changing the icon theme, you can edit the ‘.desktop’ to change the launcher icon for an specific application.

Below are the steps to change the application icon, Firefox Web browser as example, in Ubuntu 13.10 Unity:

1. Edit the ‘firefox.desktop’

The ‘.desktop’ files are usually stored in “/usr/share/applications/”. For some applications that are installed in user’s directory, you may find the .desktop files in “~/.local/share/applications/” directory.

To edit the firefox.desktop, press Ctrl+Alt+T on keyboard to open terminal. When it opens, run:

cd /usr/share/applications

sudo gedit firefox.desktop

edit firefox.desktop

It will navigate to /usr/share/applications/ directory and open the firefox.desktop file via gedit editor. You can run ls |more to list all available files in that directory.

2. Change the value of Icon

In gedit window, scroll down to find out the line that starts with “Icon=” and change its value to the exact path to your NEW icon file. The image is usually .png file in 64×64 or 128×128.

change firefox icon ubuntu

3. After saved the changes, open the unity dash and search the launcher and see the result:

firefox-custom-icon1

firefox-custom-icon

That’s it. Enjoy!

KDE 4.12.2 Ubuntu

KDE 4.12.2 was released two weeks ago. Now it’s available in the Kubuntu Backports PPA for Ubuntu 13.10 Saucy.

KDE 4.12.2 brought more than 20 recorded bugfixes include improvements to the personal information management suite Kontact, the UML tool Umbrello, the document viewer Okular, the web browser Konqueror, the file manager Dolphin, and others. This release also included an updated Plasma Workspaces 4.11.6.

Upgrade / Install KDE 4.12.2:

Press Ctrl+Alt+T one your keyboard to open the terminal. When it opens, run the command below to add Kubuntu PPA:

sudo add-apt-repository ppa:kubuntu-ppa/backports

Update package lists and upgrade KDE:

sudo apt-get update

sudo apt-get dist-upgrade

If you’re going to install Kubuntu Desktop, run below command after updating package lists:

sudo apt-get install kde-standard kubuntu-desktop

Tips: The binary packages will soon be available for Ubuntu 12.04. By then, you can run previous commands to upgrade KDE in Precise.