BitTorrent Sync, a p2p file syncing service, now has been updated to version 1.4 with new simplified UI and other new features.
BitTorrent Sync is a simple tool that applies p2p protocol for direct live folder sync with maximum security, network speed and storage capacity. It has native versions for Mac, Windows and Linux, as well as native NAS integration.
New in the latest 1.4:
- New simplified UI
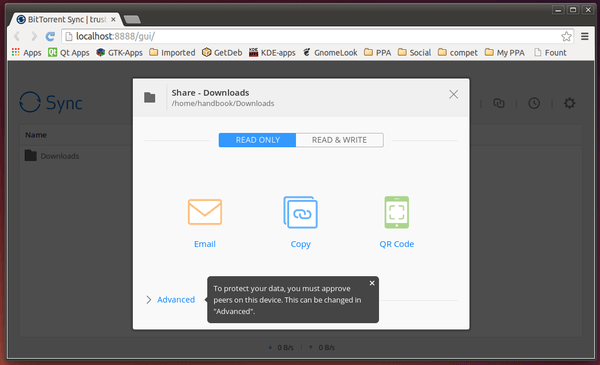
UI was fully revised and now looks similar on all platforms. Also, UI was simplified significantly to make Sync use faster, convenient, and easy to use.
- HTTPS links support
HTTPS links are generated by Sync and shared with a remote peer to exchange Keys securely, using X.509 certificates
- Proxy server support added
Direct connection between peers is possible as long as one of the two peers is not behind a proxy
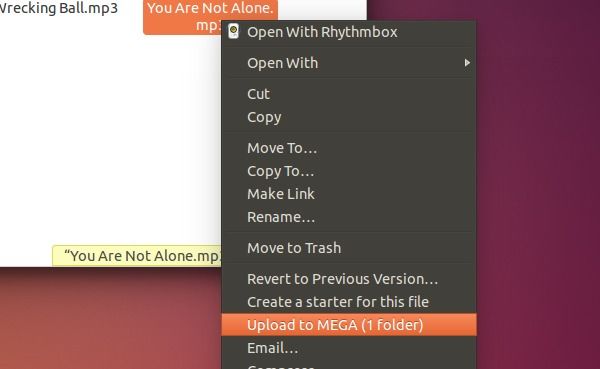
- Finder / Explorer integration added
Right-clicking on the folder in Explorer / Finder exposes “Share with BitTorrent Sync” item, which ads the folder to Sync and automatically generates a Key (Secret).
- Moved folder support
Sync tracks if synced folders move and automatically adjusts paths to keep the folder synced.
- Sync performance optimization
Improves data transfer speed, CPU consumption, peer discovery.
- Numerous bug fixes reported by users in 1.3
Install BitTorrent Sync in Ubuntu:
The official packages are available for download at the link below, check your OS type (32-bit or 64-bit), download the appropriate package under the Linux section, and finally run the executable from the extracted folder.
Download BitTorrent Sync
Finally, you can access the web client in your Web Browser by visiting “http://localhost:8888/gui/”
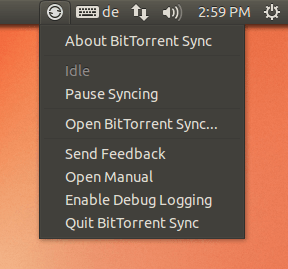
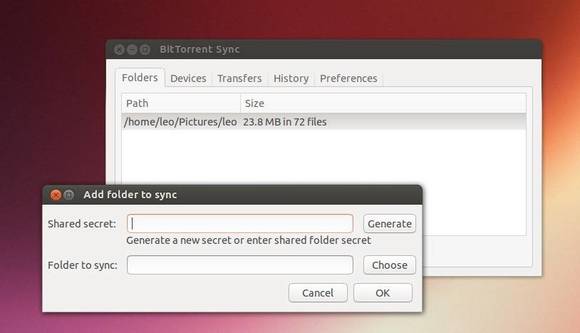
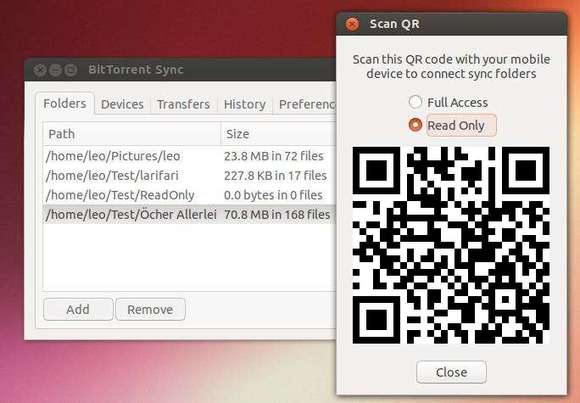
BitTorrent Sync Desktop App with Indicator Applet:
If you want an easy way to deploy BitTorrent Sync on Ubuntu, there’s a desktop GUI with Unity indicator created by community. At the moment of writing this tutorial, it is at version 1.3.1. The latest 1.4 should be available soon.
THE SOFTWARE AND THE PACKAGES BELOW ARE UNOFFICIAL AND NOT THE WORK OF BITTORRENT® INC.
via
To install this unofficial ready to use server and desktop packages, press Ctrl+Alt+T on keyboard to open the terminal, when it opens paste the commands below and run one by one:
sudo add-apt-repository ppa:tuxpoldo/btsync

sudo apt-get update

sudo apt-get install btsync-gui
If you want to install the gtk version without the indicator, run below instead:
sudo apt-get install btsync-gui-gtk
Above commands work for Ubuntu 14.10, Ubuntu 14.04, and Ubuntu 12.04. Once you installed it, open the gui from Unity Dash and enjoy!