Archives For January 31, 2016

Ubuntu 16.04 Xenial Xerus

The default desktop wallpaper for Ubuntu 16.04 Xenial Xerus, the next LTS release, has been unveiled. Grayscale versions are in progress.

The new default wallpapers from Grazina in the design team looks not all that different from the previous 15.10 and 15.04’s wallpapers.

Ubuntu 16.04 default wallpaper

Ubuntu 16.04 default wallpaper

Here are the default wallpapers for Ubuntu 15.10 and Ubuntu 15.04:

Ubuntu 15.10 default wallpaper

Ubuntu 15.10 default wallpaper

Ubuntu 15.04 default wallpaper

Ubuntu 15.04 default wallpaper

Download the wallpapers from link below:

Ubuntu 16.04 Default Wallpaper

Miam-player: An Open-source Qt5 Music Player

Last updated: February 28, 2016

Miam Player

Miam-Player is a cross-platform open source music player using QtAv media library which is based on Qt and FFmpeg.

Miam-player aims to be fast and reliable. It can read almost all music file formats: .mp3, .m4a (MP4), .flac, .ogg, .oga (OGG Vorbis), .asf, .ape (Monkey Audio), .opus and more!

It provides a built-in tag editor (using tablib), plugins, and customizable user interface, covers, and themes. And it’s still under development to add Soundcloud, Spotify streaming and other more features.

Miam Player Playlist mode

Miam Player library mode

How to Install Miam Player in Ubuntu:

The software has an official PPA repository for Ubuntu and based systems. So far, only Ubuntu 15.10 is supported.

Open terminal from app launcher or via Ctrl+Alt+T shortcut key, and follow the steps below:

1. Paste below command and hit run to add PPA for QtAv media library:

sudo add-apt-repository ppa:wbsecg1/qtav

QtAv PPA

Type in your password (no visual feedback when typing) when it asks and hit Enter to continue.

2. Add Miam-Player PPA:

sudo add-apt-repository ppa:bachelier-matthieu/ppa

3. Finally refresh your system cache and install the player via Synaptic Package Manager, or by running following commands one by one:

sudo apt-get update

sudo apt-get install miam-player

May need log out (or restart) and back in to be able to launch it from the Dash.

4. (Optional) You can always manage these PPAs via Software & Updates -> Other Software tab,

manage-ppas

and remove the music player via either Synaptic or below command:

sudo apt-get remove miam-player && sudo apt-get autoremove

Ubuntu 16.04

Ubuntu 16.04 Xenial Xerus, the next LTS (Long-Term Support) release, has reached the first Beta release. Features image for opt-in flavors: Lubuntu, Ubuntu Cloud, Ubuntu GNOME, Ubuntu MATE, UbuntuKylin, Ubuntu Studio and Xubuntu.

Beta 1 includes the Linux Kernel 4.4 (final release will ship with this kernel) and a number of software updates. As an Beta pre-release, it is only recommended for developers and those who want to test by finding, reporting, and/or fixing bugs.

Ubuntu 16.04 LTS

Release Highlights:

Ubuntu Gnome:

  • GNOME Shell 3.18
  • GNOME Software has replaced Ubuntu Software Center
  • Experimental wayland session available

Xubuntu 16.04:

  • won’t have a default media manager installed

Ubuntu Kylin:

  • Kylin style lightdm greeter based on unity-greeter

Download Ubuntu 16.04 Beta 1:

For a reminder of upcoming Ubuntu 16.04 release dates see the table:

March 24th Final Beta
April 14th FinalFreeze, ReleaseCandidate
April 21st Final release of Ubuntu 16.04

via: fridge.ubuntu.com

Kodi 16 Released, How to Install it via PPA

Last updated: February 21, 2016

kodi-icon

Kodi 16.0 (codenamed “Jarvis”), formerly known as XBMC, has been officially released. Official binary packages available for Ubuntu 16.04, Ubuntu 15.10, Ubuntu 14.04, and even Ubuntu 15.04 in PPA.

Kodi 16.0 features event logging, long press button support, 4:3 non-linear stretch support, add-on manager changes, music library improvements, Android surface rendering, and many other important changes. For more details, read the official announcement.

Kodi 16 splash

How to Install Kodi 16.0 in Ubuntu:

1. If you don’t have Kodi’s official PPA added in your system, launch terminal from App Launcher or via Ctrl+Alt+T shortcut key and paste below command and hit run:

sudo add-apt-repository ppa:team-xbmc/ppa

Kodi PPA

Type in password (no visual feedback when typing) when it asks and hit Enter to continue.

2. For those who have a previous release installed, launch Software Updater and you’ll see Kodi 16.0 available in the update lists after checking for updates.

upgrade Kodi

To install it for the first time, just run commands:

sudo apt-get update

sudo apt-get install kodi

Add --install-suggests option if you want to install audio codecs and other addons, so the last command will be:

sudo apt-get install --install-suggests kodi

Finally log out and select log in with Kodi session, or launch Kodi from Unity Dash in normal session.

BitTorrent Sync Linux repository

BitTorrent, the cross platfrom P2P file synchronization tool, now provides official Linux packages for Debian-based and RPM-based systems. Here’s how to install and use it in Ubuntu (tested in 15.10 wily).

Install BitTorrent Sync:

Launch terminal from App Launcher, or via Ctrl+Alt+T shortcut key. When it opens, paste below commands one by one and hit run:

1. Add btsync official Linux repository:

sudo sh -c 'echo "deb http://linux-packages.getsync.com/btsync/deb btsync non-free" > /etc/apt/sources.list.d/btsync.list'

Type in password (no visual feedback when typing) when it asks and hit Enter to continue.

BT sync official Linux repository

2. Install the public key so that your system will trust the packages from that repository:

wget -qO - http://linux-packages.getsync.com/btsync/key.asc | sudo apt-key add -

3. Update your system cache and finally install btsync:

sudo apt-get update

sudo apt-get install btsync

How to Use BT sync:

There’s already a few great tutorials about setting up Btsync in Ubuntu around the web. And below is a brief how-to:

First create a shared folder and set its permissions, here I created a folder shared_folder under the root of my current user:

cd && mkdir shared_folder

sudo chown YOUR_USER:btsync shared_folder

sudo chmod 2775 shared_folder

sudo usermod -a -G btsync YOUR_USER

Then start the btsync service:

sudo service btsync start

You may replace start with stop, enable, disable, or status to control Btsync.

Now go to localhost:8888 in your web browser and add the previous created folder:

btsync add folder

Finally share the link, key, or QRcode with your friends and enjoy!

btsync sending

The latest budgie-desktop (so far it’s 10.2.3), flagship desktop of Solus Linux Distribution, now gets a PPA (unofficial) for Ubuntu 16.04 and Ubuntu 15.10.

Budgie is the default desktop of Solus Operating System, written from scratch. Besides a more modern design, Budgie can emulate the look and feel of the GNOME 2 desktop.

Here are some screenshots of Budgie Desktop in Ubuntu 15.10:

budgie desktop bottom panel

budgie desktop app launcher

budgie desktop two panel and settings pane

Install budgie-desktop via PPA:

1. To Add PPA

Launch terminal from app launcher or via Ctrl+Alt+T shortcut key. When it opens, paste below command hit run:

sudo add-apt-repository ppa:budgie-remix/ppa

Type in password (no visual feedback when typeing) when it asks and hit Enter to continue.

budgie desktop new ppa

2. Then either launch Synaptic Package Manager(install it via Software Center) and install budgie-desktop after clicked Refresh button,

or run below command one by one in terminal:

sudo apt-get update

sudo apt-get install budgie-desktop-environment

For best results, Moka icons and arc-theme will be also installed.

After installation, log out and log in with Budgie session:

Budgie session in Ubuntu LightDM

3. (Optional) To remove this DE, use Synaptic or run below command in terminal. And remove PPA via Software & Updates -> Other Software tab.

sudo apt-get remove budgie-desktop-environment lighdm-gtk-greeter && sudo apt-get autoremove

via: xpress-ubuntu

handbrake logo

The popular HandBrake video transcoder has reached the 0.10.5 release one day ago. Due to licensing issues, the high quality FDK-AAC encoder has been removed from the official binary releases.

This change affects all of the device presets on Windows and Linux. OS X is unaffected because it has always used coreaudio for aac encoding. The LibAV AAC encoder is still present though it does not support HE-AAC.

HandBrake 0.10.5 features:

  • Removal of FDK AAC from our binary releases. --enable-fdk is required for “non-free” builds if compiling from source.
  • Updated x265 to 1.9 which brings bug fixes and performance improvements.
  • Few minor bug fixes since the 0.10.3 release. This includes improvements in large AVI file handling.

handbrake 0.10.5

Install HandBrake 0.10.5 in Ubuntu:

You can either install the new release in Ubuntu 15.10, Ubuntu 14.04, and derivatives via the official PPA:

launch terminal and run below commands one by one:

sudo add-apt-repository ppa:stebbins/handbrake-releases

sudo apt-get update

sudo apt-get install handbrake-gtk handbrake-cli

Or compile from source with --enable-fdk to plug fdk-aac library. See the compile instructions

To revert back the stock version of HandBrake in Ubuntu, just reinstall handbrake via Software Center which will ask to remove handbrake-gtk and/or handbrake-cli.

LibreOffice 5.1

The Document Foundation officially announced the release of LibreOffice 5.1 yesterday. PPA updated for Ubuntu 15.10, Ubuntu 14.04, and derivatives, e.g., Linux Mint 17.x, and Elementary OS Freya.

LibreOffice 5.1 offers a completely reorganized user interface, and several improved features targeted at enterprise deployments: better support for ODF 1.2, interoperability with proprietary document formats and file management on remote servers.

Read the announcement for more details.

LibreOffice 5.1.0
How to upgrade to LibreOffice 5.1:

LibreOffice 5.1 has been made into Software Center for Ubuntu 16.04 LTS. For ubuntu 15.10 and Ubuntu 14.04, it’s available in the LibreOffice 5.1.x series PPA.

For Linux Mint users who are still running LibreOffice 4.x, you have to do below changes to be available to upgrade via PPA:

Launch terminal, and run command to create and edit a file:

gksudo gedit /etc/apt/preferences.d/libreoffice.pref

When the file opens, paste below lines and save it.

Package: *
Pin: release o=LP-PPA-libreoffice
Pin-Priority: 700

1. To add LibreOffice 5.1.x PPA.

Launch terminal from App Launcher or via Ctrl+Alt+T shortcut key. When it opens, paste below command and hit run:

sudo add-apt-repository ppa:libreoffice/libreoffice-5-1

Type in password (no visual feedback when typing) when it asks and hit Enter to continue.

LibreOffice 5.1 series PPA

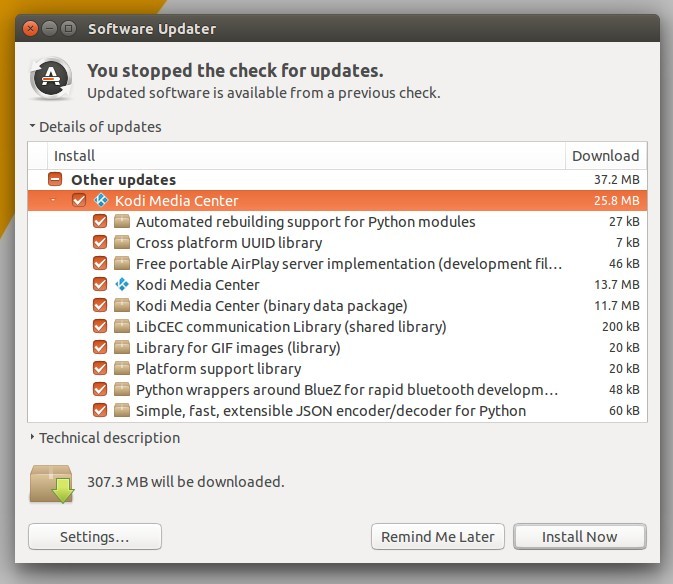
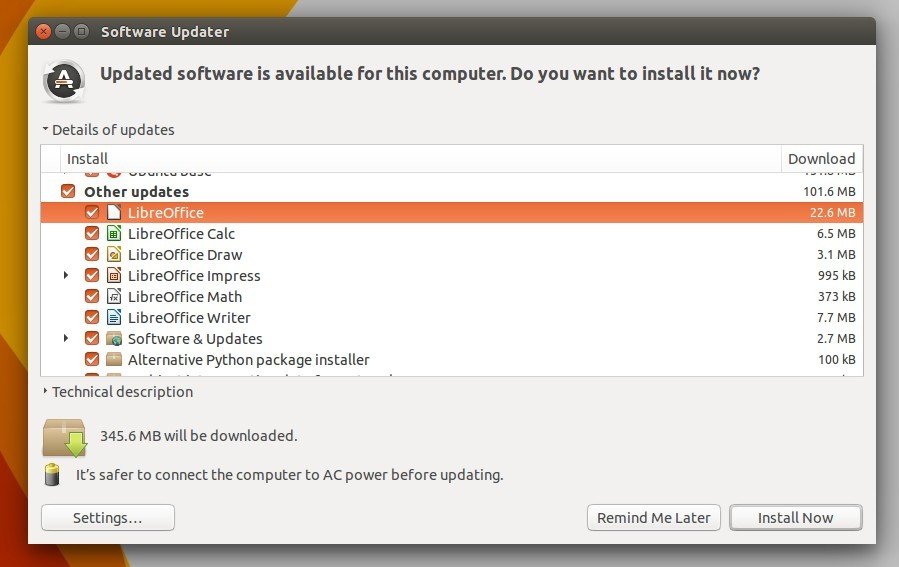
2. To upgrade LibreOffice

Launch Software Updater (or Update Manager for Mint), and install available updates after checking for updates.

upgrade to LibreOffice 5.1

3. (Optional) To revert the changes, install ppa-purge and purge the PPA:

sudo apt-get install ppa-purge

sudo ppa-purge ppa:libreoffice/libreoffice-5-1

For Linux Mint 17.x which is based on Ubuntu 14.04, use -d option to specify Ubuntu codename, so the last command should be:

sudo ppa-purge -d trusty ppa:libreoffice/libreoffice-5-1

How to Install VLC 2.2.2 in Ubuntu 15.10

Last updated: February 10, 2016

VLC icon

VLC 2.2.2, the second bugfix release for VLC 2.2 series, was released a few days ago. Here’s how to install it in Ubuntu 15.10 Wily via PPA.

VLC 2.2.2 “Weatherwax” is the second update to VLC’s 2.2 release series.

It fixes numerous security issues, notably in the MP4, RealRtsp and Sparkle modules, but also important crashes for the MXF, ADPCM, Telextext, Skins and Qt modules.

It also improves our codec support by adding new formats and providing faster decompression.

More than 100 fixes for issues reported for 2.2.1.

Full support of Mac OS X 10.11 El Capitan.

For a complete list of changes, see the ChangeLog.

Install VLC 2.2.2 in Ubuntu 15.10:

The new release has been made into Software Center for Ubuntu 16.04. Below is how to install VLC 2.2.2 in Ubuntu 15.10 using a third-party PPA repository.

1. Add PPA

Open terminal from App Launcher or via Ctrl+Alt+T shortcut key. When it opens, paste below command and hit run:

sudo add-apt-repository ppa:nicola-onorata/desktop

VLC 2.2.2 PPA

Type in password (no visual feedback when typing) when it asks and hit Enter to continue.

2. Launch Software Updater and upgrade VLC after checking for updates.

upgrade VLC

Or run below commands one by one in terminal:

sudo apt-get update

sudo apt-get install vlc

3. (Optional) To revert back the 2.2.1 release, purge the PPA via ppa-purge tool:

sudo apt-get install ppa-purge && sudo ppa-purge ppa:nicola-onorata/desktop

If everything goes OK, you may disable or remove the PPA via Software & Updates -> Other Software tab, since the PPA contains many other packages you may not want.

birdie twitter client

Birdie 2.0, an open-source twitter client for Elementary OS, now is in public beta, available in daily build PPA for test.

This beta release features:

  • An absolutely massive redesign
  • Great new pop-out media viewer
  • Automatically load more Tweets when you reach the bottom (infinite scrolling)
  • A native Instagram photo viewer
  • Circular avatars
  • Direct Messaging with conversation views
  • User account, hashtag, and link highlights
  • The icons in the timeline switcher change to alert you to new mentions and messages
  • Click the home button to return to the top of your timeline
  • Stars are out, hearts are in
  • Higher resolution images throughout
  • and much more!

birdie 2 beta

picture from birdie website

How to install Birdie 2.0 Beta in Freya:

Since it is a beta release, you may run into bugs and crashes. so if stability is crucially important for you, please wait until the final release.

1. Launch terminal from Applications launcher:

launch elementary os terminal

2. Add Birdie daily build PPA by running below command in terminal:

sudo add-apt-repository ppa:birdie-team/daily

Type in your password (no visual feedback when typing) when it asks and hit Enter to continue.

birdie daily build ppa

3. Birdie 2.0 requires the latest version of Granite, so also add elementary OS Daily PPA for the dependencies via command:

sudo add-apt-repository ppa:elementary-os/daily

4. Finally run commands to update and install birdie, the last command will also install the latest Granite and other dependencies:

sudo apt-get update

sudo apt-get install birdie

5. Since the Elementary OS daily PPA contains other unstable updates, it is recommended to remove / disable the PPA after installation.

To do so, launch Software & Updates and navigate to Other Software tab, then un-check or remove the two PPAs

disable the PPAs