Archives For November 30, 1999

Liferea Feed Reader

A new bug-fix release for Liferea 1.12 series was released today. Here’s how to install it in Ubuntu 18.04, Ubuntu 16.04, and derivatives.

This is a bugfix release. It includes an important bug fix that solves a possible endless loop on using “Next Unread” which several users experienced as endless high CPU usage. If you are affected by this: please upgrade!

This release also switches the keyring integration from GnomeKeyring to libsecret and introduces a flatpak JSON.

Changes in Liferea 1.12.5 according to the changelog:

  • Webkit browser now supplies ‘Liferea’ component in user agent
  • Added “Mark All As Read” button to headerbar plugin
  • Added flatpak JSON
  • Added item list column drag and drop reordering
  • Move from GnomeKeyring to libsecret
  • Correct instapaper sharing link
  • Update sharing links
  • Fix consistent over usage of CPU (trigger by “Next Unread” loop)
  • Dropping Inoreader support (API broke)

How to Install Liferea 1.12.5 in Ubuntu:

For Ubuntu 16.04, Ubuntu 18.04, Linux Mint 19, 18.x, the new release is available in the unofficial PPA repository.

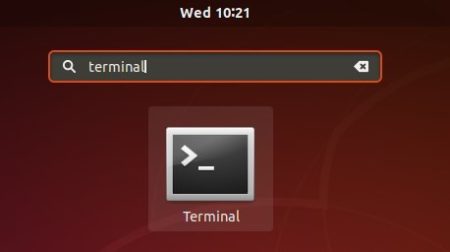
1. Open terminal either via Ctrl+Alt+T or by searching for ‘terminal’ from app launcher. When it opens, run command to add the PPA:

sudo add-apt-repository ppa:ubuntuhandbook1/apps

Type your password (no asterisks feedback while typing) when it prompts and hit Enter.

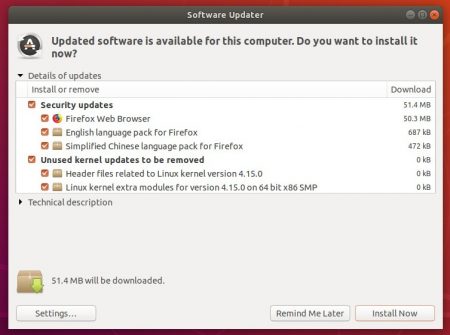
2. Then upgrade Liferea via Software Updater utility:

upgrade Liferea via Software Updater

or run commands one by one to install the Linux feed reader:

sudo apt-get update

sudo apt-get install liferea

Finally launch the news reader from your application launcher and enjoy! (Log out and log back if you don’t see the icon).

Uninstall Liferea:

As the PPA also contains many other software packages, you may remove it by launching Software & Updates and navigating to Other Software tab.

If you want to remove the Liferea news reader software, either use your system package manager or run command in terminal:

sudo apt-get remove --autoremove liferea

For those who want to play League of Legends in Ubuntu desktop, the game has been made into Snap, containerised software package designed to work within most Linux desktop.

The game package is based on wine platform, and it is using the wine-base-staging to use the latest changes released from winehq.org.

The snap so far is available for testing purpose. If you’re interested in this, do following steps to help testing it in Ubuntu 18.04 or Ubuntu 16.04:

1. Open terminal either via Ctrl+Alt+T shortcut key or by searching for ‘terminal’ from software launcher.

2. When terminal opens, run command to install the wine platform if you don’t have it:

snap install wine-platform

3. Then install the Lol snap package via command:

snap install leagueoflegends --edge --devmode

NOTE for Ubuntu 16.04, install snapd via command sudo apt install snapd if previous commands do not work.

4. Once installed, launch the game from your software launcher.

On first launch you’ll be prompted to choose the game installer region and the download process starts:

Lol will finally launch if everything goes well. And you can report issues at snapcraft.io.

Uninstall:

To remove Lol snap package, run command in terminal:

snap remove leagueoflegends

Firefox 55

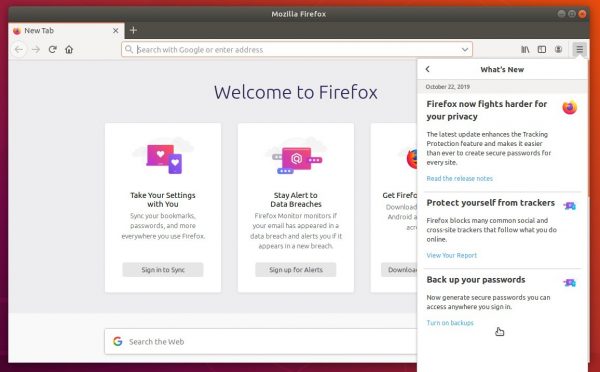
Mozilla Firefox 62.0 was released a day ago with new features, performance improvements, and various security fixes.

Firefox 62.0 release highlights:

  • Firefox Home (the default New Tab) allows to display up to 4 rows of top sites, Pocket stories, and highlights
  • “Reopen in Container” tab menu option appears for users with Containers that lets them choose to reopen a tab in a different container
  • A preference allows users to distrust certificates issued by Symantec. (go to about:config in the address bar and set the preference “security.pki.distrust_ca_policy” to 2.)
  • Added FreeBSD support for WebAuthn
  • Improved graphics rendering for Windows users without accelerated hardware
  • Support for CSS Shapes, allowing for richer web page layouts. This goes hand in hand with a brand new Shape Path Editor in the CSS inspector.
  • CSS Variable Fonts (OpenType Font Variations) support, which makes it possible to create beautiful typography with a single font file
  • AutoConfig is sandboxed to the documented API by default. You can disable the sandbox by setting the preference general.config.sandbox_enabled to false.
  • Added Canadian English (en-CA) locale, and various bug-fixes.

Download / Install Firefox in Ubuntu:

As usual, Ubuntu Mozilla Team will publish the new Firefox release packages through Ubuntu security & updates repositories.

So just wait and Firefix 62 will be available for upgrade via Software Updater in 2 or 3 days.

upgrade firefox

Jetbrains announced the release of IntelliJ IDEA 2018.2.3 a day ago with various bug-fixes and some improvements for v2018.2.

IntelliJ IDEA 2018.2.3 release highlights:

  • Ability to open HTML files in Edge using the Open in Browser action.
  • Fixed IntelliJ IDEA freezes.
  • Git: The built-in SSH doesn’t fail when Git protocol version 2 is enabled.
  • Fixed regressions in Mercurial support.
  • Docker: the IDE now validates Command line options and reports unknown options.
  • Docker: volume mounting now works on Windows using Linux containers.
  • Minor Gradle bug-fixes.

How to Insall the Latest IntelliJ IDEA in Ubuntu:

It’s quite easy to install the latest IDEA packages in Ubuntu since Jetbrains offers official snap (containerised software package) package in snappy store.

Simply open Ubuntu Software, search for and you’ll see IDEA ultimate and community packages available for install.

NOTE for Ubuntu 16.04 users who never installed a snap package, make sure snapd is installed by running command in terminal (Ctrl+Alt+T):

sudo apt install snapd snapd-xdg-open

LiVES 2.10.0, free and open-source video editor and VJ tool, was released earlier today. Here’s how to install it in Ubuntu 18.04, Ubuntu 16.04.

Changes in the LiVES 2.10.0 according to the changelog file:

  • Fix regression issues with youtube download.
  • Ensure audio waveform is redrawn after running fade audio.
  • Fix crash when adjusting cross-linked real time effect parameters (e.g LADSPA effects).
  • Fix an instability caused by NULL messages in the message cache (regression).
  • Fix possible crash when the real time effect parameters window is open during rendering.
  • Fix hang when clearing matches in the MIDI / JS learner window (GUI issue).
  • Improve the MIDI / JS tab in Preferences.
  • Add pref for creating a dummy alsa MIDI output port.
  • Add “OMC notify” to MIDI / JS mapper (MIDI -> OSC, sends USER1 notify event to all listeners).
  • Code cleanup. Standard checkbuttons and check menuitems now have their state set in the creation function.
  • Remove “use_mnemonic” parameter for widget functions. Use widget_opts.mnemonic_labels instead.
  • Amend the autolives toy so it can be triggered via OSC (and move to vj menu, add startup options).
  • MIDI channel can now used as a filter instead of a parameter to be matched.
  • Device mappings can now be shipped with builds.
  • Improved a/v synch with pulse audio.
  • Correct some minor GUI issues.
  • -noset startup option now has a permanent effect.
  • Add -asource [internal | external] startup option.
  • Fix bug in setting loop mode via OSC.
  • Fix broken framerate after pause / unpause during realtime playback.
  • Updated translation to Czech.

How to Install LiVES 2.10.0 in Ubuntu:

For Ubuntu 16.04, Ubuntu 18.04, Linux Mint 18.x and 19, you can easily install the latest packages from the unofficial PPA.

1. Open terminal via Ctrl+Alt+T shortcut key and then run command to add the PPA:

sudo add-apt-repository ppa:ubuntuhandbook1/lives

Type in your password (no visual feedback while typing due to security reason) when it asks and hit Enter.

LiVES PPA

2. Then upgrade the software from an existing release via Software Updater:

or simply run commands in terminal to install or upgrade LiVES:

sudo apt-get update

sudo apt-get install lives lives-plugins

Uninstall:

To remove the software, simply run commands:

sudo apt-get remove --autoremove lives lives-plugins

The PPA can be removed via Software & Updates utility under Other Software tab.
Flameshot is a simple yet powerful screenshot tool with annotation feature. Other than Shutter, it’s another of my favorite screen capturing tools for Ubuntu desktop so far.

Flameshot is written by C++ with Qt5 framework. It offers a system tray icon with ‘Take Screenshot’ and ‘Configuration’ menu options.

While selecting a screen area to capture, many editing tool buttons appear at the bottom. And you can press right-click to show color picker, and Space to open the side panel.

Other software features include:

  • Customizable appearance.
  • DBus interface.
  • Upload to Imgur.

How to Install Flameshot in Ubuntu:

The software is available in Ubuntu Software for Ubuntu 18.04 and higher, however, Canonical won’t provide regular update for the package.

For the latest release, grab the .deb package for Ubuntu 18.04 bionic or Ubuntu 16.04 xenial from the link below:

Flameshot releases

then right-click the .deb package -> Open with Other Application -> Gdebi package installer. (install gdebi via command sudo apt install gdebi in terminal).

Uninstall:

To uninstall the tool, open terminal either via Ctrl+Alt+T shortcut key or from software launcher. When it opens, run command:

sudo apt remove --autoremove flameshot

VLC media player 3.0.4 was released with support for decoding AV1 streams and various bug-fixes.

According to the changelog file, VLC 3.0.4 contains following changes:

  • Decode AV1 streams
  • Fix playback of low-fps files
  • Fix seeking with streams containing WebVTT subtitles
  • Fix decoding some CC-608 streams with roll-up
  • Fix crashes with LPCM streams
  • Fix colorspace of JPEG, PNG and screen inputs
  • Fix MediaCodec rotation handling
  • Fixes for ogg, flac, MKV, AVI, MP4, and incomplete RAR streams.
  • Support 44.1kHz DTS passthrough
  • Fix crashes on DirectSound output
  • Fix some crash in Direct3D11/Direct3D9 because of sensors
  • Fix some broken DVD subtitles rendering (OpenGL, notably)
  • Fix misc display in Direct3D11 due to broken drivers
  • Some text rendering fixes.
  • Fix ChromeCast compatibility with web interface
  • Fix detection SAT>IP servers
  • Fix tooltip display when using Wayland
  • Various fixes for Mac OS, and other more.

How to Install The Latest VLC in Ubuntu

For Ubuntu 18.04 Bionic Beaver, Ubuntu as usual will publish VLC 3.0.4 packages via security & updates repository.

At that time you can upgrade VLC via Software Updater (check the building page, The Bionic Beaver section).

For Ubuntu 16.04, Ubuntu 18.04 and higher, the VideoLan team offers the official Snap package, containerised software package designed to work securely within most Linux desktop.

You can simply install the snap (3.0.3 at the moment) via Ubuntu Software, and it will auto-updates to the latest VLC 3.0.4 once it’s published.

Note for Ubuntu 16.04 users who never installed a snap package, make sure if snapd daemon is installed via command:

sudo apt install snapd snapd-xdg-open

gnome shell

The default Gedit text editor in Ubuntu 18.04 always opens file in a new window, even though there’s already an existing instance. And there’s no easy option to change the behavior.

Thanks to fossfreedom, you can re-built Gedit pakages so to always open files in new tabs in the same gedit window.

1. Open terminal either via Ctrl+Alt+T shortcut key or by searching for ‘terminal’ from software launcher.

2. When terminal opens, paste the command below and hit run to install the building tools:

sudo apt-get install devscripts build-essential fakeroot

3. Launch Software & Updates, and click enable download Source code from Ubuntu repositories.

4. In user downloads, create a build folder and navigate to the directory.

cd ~/Downloads/ && mkdir build && cd build

5. Download the gedit source code via command:

sudo apt-get update; apt-get source gedit

Type your password (no asterisks feedback) when it prompts

6. Next edit the source file gedit-app.c:

cd gedit-* && gedit gedit/gedit-app.c

When the file opens, add new line return TRUE; as the picture shows (line 320 for Ubuntu 18.04):

7. Give a unique package name by editing the debian/changelog file.

gedit debian/changelog

8. Finally rebuild the gedit via commands:

sudo apt-get build-dep gedit

debuild -i -us -uc -b

The commands will take a few minutes building the gedit text editor packages.

9. At last, install the new packages via command and enjoy!

cd ~/Downloads/build/ && sudo dpkg -i gedit*.deb

In addition, you may lock the changes so it won’t be overwritten after installing system updates.

And it can be done easily via Synaptic package manager (available in Ubuntu Software). Simply search for ‘gedit’ and choose lock version for gedit and gedit-common packages one by one.

wireshark

The open-source network packet analyzer Wireshark 2.6.3 was released a few days ago with various bug-fixes and updated protocol support.

Wireshark 2.6.3 fixed following bugs:

  • Bluetooth AVDTP dissector crash.
  • Bluetooth Attribute Protocol dissector crash.
  • Radiotap dissector crash.
  • Wireshark Hangs on startup initializing external capture plugins.
  • Qt: SCTP Analyse Association Dialog: Segmentation fault when clicking twice the Filter Association button.
  • Incorrect presentation of dissected data item (NETMASK) in ISAKMP dissector.
  • Decode NFAPI: CONFIG.request Error.
  • udpdump frame too long error.
  • ISDN – LAPD dissector broken since version 2.5.0.
  • ASTERIX Category 062 / 135 Altitude has wrong value.
  • Wireshark cannot decrypt SSL/TLS session if it was proxied over HTTP tunnel.
  • TLS records in a HTTP tunnel are displayed as “Encrypted Handshake Message”.
  • BTATT Dissector: Temperature Measurement: Celsius and Fahrenheit swapped.
  • Diameter AVP User Location Info, Mobile Network Code decoded not correctly.
  • Heartbeat message “Info” displayed without comma separator. Bug 15079.

Install The Latest Wireshark via PPA in Ubuntu:

As the PPA packages are always a few days late than the release date, check the PPA link before getting started.

Wireshark stable PPA contains most recent packages for Ubuntu 18.04, Ubuntu 16.04, and Ubuntu 14.04.

1. Open terminal by either pressing Ctrl+Alt+T on keyboard or searching for ‘terminal’ from app launcher. When it opens, run command:

sudo add-apt-repository ppa:wireshark-dev/stable

Type your user password (no asterisks feedback due to security reason) when it prompts and hit Enter.

2. If you’ve the previous Wireshark 2.4.x installed on your system, remove it first via command:

sudo apt-get remove --autoremove wireshark

3. Finally run following commands one by one in terminal to install Wireshark 2.6.x:

sudo apt-get update

sudo apt-get install wireshark

Uninstall:

To remove the software, open terminal and run command:

sudo apt-get remove --autoremove wireshark wireshark-*

And remove the PPA by launching Software & Updates -> Other Software tab.

gnome shell

While the trash icon does not have ‘Add to Favorites‘ context menu option, here’s how to manually add a trash can icon to the left launcher in Ubuntu 18.04 Gnome Shell.

First see the result effect (in the picture, the left panel was replaced by Dash to Dock extension):

1. Open terminal either via Ctrl+Alt+T shortcut key, or by searching for ‘terminal’ from app launcher.

2. Run command to create and edit an empty file called trash.sh:

gedit ~/Documents/trash.sh

When the file opens, paste following lines and save it.

#!/bin/bash
icon=$HOME/.local/share/applications/trash.desktop

while getopts "red" opt; do
	case $opt in
    r)
	if [ "$(gio list trash://)" ]; then
		echo -e '[Desktop Entry]\nType=Application\nName=Trash\nComment=Trash\nIcon=user-trash-full\nExec=nautilus trash://\nCategories=Utility;\nActions=trash;\n\n[Desktop Action trash]\nName=Empty Trash\nExec='$HOME/Documents/trash.sh -e'\n' > $icon
	fi
	;;
    e)
	gio trash --empty && echo -e '[Desktop Entry]\nType=Application\nName=Trash\nComment=Trash\nIcon=user-trash\nExec=nautilus trash://\nCategories=Utility;\nActions=trash;\n\n[Desktop Action trash]\nName=Empty Trash\nExec='$HOME/Documents/trash.sh -e'\n' > $icon
	;;
    d)
	while sleep 5; do ($HOME/Documents/trash.sh -r &) ; done
	;;
  esac
done

3. Make the script file executable and run it via the 2 commands:

chmod +x ~/Documents/trash.sh

./Documents/trash.sh -e

4. Search for ‘trash’ in software launcher and select ‘Add to Favorites’ in its context menu.

5. Finally open Startup Applications, click Add to add a new startup app:

  • Type a name for the trash script.
  • Type command /home/YOUR_USER_NAME/Documents/trash.sh -d

Reboot Ubuntu, and the trash can icon will change when it’s empty or not empty.

via: ubuntuforums