![]()
SMPlayer media player 18.10 was released a day ago. Here’s how to install it in Ubuntu 18.10, Ubuntu 18.10, Ubuntu 16.04, and their derivatives.
SMPlayer 18.10 optimised the internal code for YouTube, so it now supports resolutions up to 4K. In addition, support for age restricted videos has been fixed.
How to Install SMPlayer 18.6 in Ubuntu:
For all current Ubuntu releases and their derivatives, do following steps to install or upgrade SMPlayer via the PPA repository.
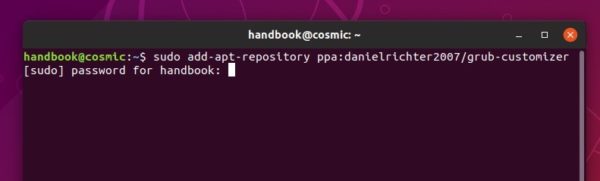
1. Search for and launch “terminal” from application menu. When it opens, run command to add the PPA:
sudo add-apt-repository ppa:rvm/smplayer
Type your user password (no asterisks feedback while typing) when it asks and hit Enter.

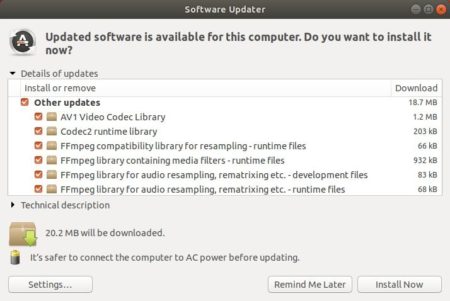
2. Then upgrade SMPlayer using Software Updater (or Update Manager):

or run commands in terminal to install (or upgrade) the media player:
sudo apt-get update

sudo apt-get install smplayer smtube smplayer-themes
Uninstall:
To remove SMPlayer, run command in terminal:
sudo apt-get remove --autoremove smplayer smtube smplayer-*
And remove the PPA via “Software & Updates” utility under “Other Software” tab.