Archives For jimingkui

GIMP 2.8.16

GIMP image editor 2.8.16 was released on its 20th birthday. Here’s how to install or upgrade in Ubuntu 16.04, Ubuntu 15.10, Ubuntu 14.04, Ubuntu 12.04 and their derivatives, e.g., Linux Mint 17.x/13, Elementary OS Freya.

GIMP 2.8.16 features support for layer groups in OpenRaster files, fixes for layer groups support in PSD, various user inrterface improvements, OSX build system fixes, translation updates, and more changes. Read the official announcement.

GIMP image editor 2.8,16

How to Install or Upgrade:

Thanks to Otto Meier, an Ubuntu PPA with latest GIMP packages is available for all current Ubuntu releases and derivatives.

1. Add GIMP PPA

Open terminal from Unity Dash, App launcher, or via Ctrl+Alt+T shortcut key. When it opens, paste below command and hit Enter:

sudo add-apt-repository ppa:otto-kesselgulasch/gimp

add GIMP PPA

Type in your password when it asks, no visual feedback so just type in mind, and hit enter to continue.

2. Install or Upgrade the editor.

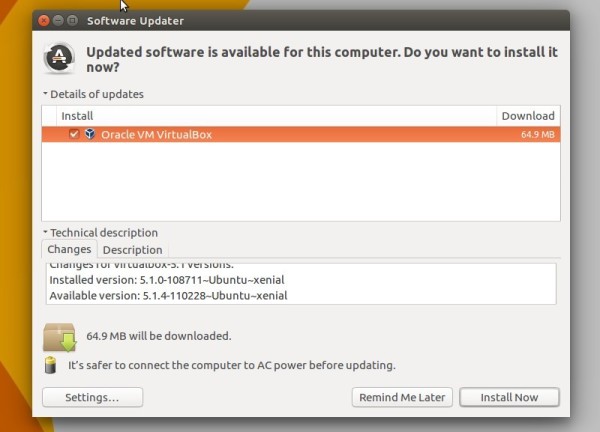
After added the PPA, launch Software Updater (or Software Manager in Mint). After checking for updates, you’ll see GIMP in the update list. Click “Install Now” to upgrade it.

upgrade-gimp2816

For those who prefer Linux commands, run below commands one by one to refresh your repository caches and install GIMP:

sudo apt-get update

sudo apt-get install gimp

3. (Optional) Uninstall.

Just in case you want to uninstall or downgrade GIMP image editor. Use Software Center to remove it, or run below commands one by one to purge PPA as well as downgrade the software:

sudo apt-get install ppa-purge

sudo ppa-purge ppa:otto-kesselgulasch/gimp

That’s it. Enjoy!

How to Install Wireshark 2.0 in Ubuntu 15.10 Wily

Last updated: November 24, 2015

wireshark 2.0

Wireshark has reached the new table 2.0 release recently and it has been made into Ubuntu 16.04’s official repositories. Here’s how to install Wireshark 2.0 in Ubuntu 15.10 using a PPA.

Wireshark 2.0 features a completely new user interface that provides a smoother, faster user experience. It has been fully rewritten in Qt5. It also has new protocol support, new file format decoding support, new dialogs, capture options, and many other improvements. See the release note.

Wireshark 2.0 in Ubuntu

Install Wireshark 2.0 in Ubuntu 15.10:

UPDATE: The official Wireshark PPA just updated with the 2.0 packages, available for not only Ubuntu 15.10, but also Ubuntu 15.04, Ubuntu 14.04 and Ubuntu 12.04.

1. Add PPA.

Open terminal from Unity Dash, App Launcher, or via Ctrl+Alt+T key combination. When it opens, paste below command and hit enter:

sudo add-apt-repository ppa:wireshark-dev/stable

wireshark-official-ppa

Type in your password when it asks, no visual feedback so just type in mind, and hit Enter to continue.

2. Install / Upgrade Wireshark.

If you have a previous installed, launch Software Updater. After checking for updates, you’ll see this popular network protocol analyzer in the list. Install the updates and done.

upgrade-wireshark2

Or, paste below commands one by one and run to update repository cache and install/upgrade the software:

sudo apt-get update

sudo apt-get install wireshark

3. Remove PPA.

The PPA also contains many other applications for 15.10 Wily, check HERE. You can keep the PPA or select remove it via below command once Wireshark 2.0 is installed.

sudo add-apt-repository --remove ppa:nicola-onorata/desktop && sudo apt-get update

nvidia-logo-1

NVIDIA 358.16, the first stable release in NVIDIA 358 series, has been announced with some fixes to 358.09 (Beta) and other small features.

NVIDIA 358 added a new nvidia-modeset.ko kernel module that works in conjunction with the nvidia.ko kernel module to program the display engine of the GPU. In a later driver release, the nvidia-modeset.ko kernel driver will be used as a basis for the mode-setting interface provided by the kernel’s direct rendering manager (DRM).

Thew new driver also has new GLX protocol extensions and a new system memory allocation mechanism for large allocations in the OpenGL driver. New GPUs GeForce 805A and GeForce GTX 960A are supported. NVIDIA 358.16 also supports X.Org Server 1.18 and OpenGL 4.3

How to Install NVIDIA 358.16 in Ubuntu:

Please don’t do it on production machines unless you know what you’re doing and how to undo it.

For the official binaries, please go to nvidia.com/object/unix.html.

For those who prefer an Ubuntu PPA, I’d recommend the Graphics Drivers PPA. So far, Ubuntu 16.04, Ubuntu 15.10, Ubuntu 15.04, Ubuntu 14.04 are supported.

1. Add PPA.

Open terminal from Unity Dash, App Launcher, or via Ctrl+Alt+T shortcut key. When it opens, paste below command and hit enter:

sudo add-apt-repository ppa:graphics-drivers/ppa

nvidia-ppa

Type your password when it asks. No visual feedback, just type in mind and hit Enter to continue.

2. Refresh and install new driver.

After adding PPA, run below commands one by one to refresh repository cache and install new driver packages:

sudo apt-get update

sudo apt-get install nvidia-358 nvidia-settings

(Optional) Uninstall:

Boot into the recovery mode from the grub menu, and drop into root console. Then run below commands one by one:

Remount the file system as writable:

mount -o remount,rw /

Remove all nvidia packages:

apt-get purge nvidia*

Finally back to menu and reboot:

reboot

To disable/remove the graphics driver PPA, launch Software & Updates and navigate to Other Software tab.

Install Intel Graphics Installer in Ubuntu 15.10

Last updated: November 20, 2015

Intel graphics installer

Intel has announced a new release of its Linux graphics installer recently. Ubuntu 15.10 Wily is required and support for Ubuntu 15.04 is deprecated in the new release.

The Intel® Graphics Installer for Linux* allows you to easily install the latest graphics and video drivers for your Intel graphics hardware. This allows you to stay current with the latest enhancements, optimizations, and fixes to the Intel® Graphics Stack to ensure the best user experience with your Intel® graphics hardware. The Intel® Graphics Installer for Linux* is available for the latest version of Ubuntu*.

intel-graphics-installer

How to Install:

1. Download the installer from the link page. The current is version 1.2.1 for Ubuntu 15.10. Check your OS type, 32-bit or 64-bit, via System Settings -> Details.

download-intel-graphics-installer

2. Once the download process finished, go to your Download folder and click open the .deb package with Ubuntu Software Center and finally click the install button.

install-via-software-center

3. In order to trust the Intel Graphics Installer, you will need to add keys via below commands.

Open terminal from Unity Dash, App Launcher, or via Ctrl+Alt+T shortcut key. When it opens, paste below commands and run one by one:

wget --no-check-certificate https://download.01.org/gfx/RPM-GPG-KEY-ilg -O - | sudo apt-key add -

wget --no-check-certificate https://download.01.org/gfx/RPM-GPG-KEY-ilg-2 -O - | sudo apt-key add -

trust-intel

NOTE: While running the first command, if the cursor is stuck and blinking after downloading the key, as above picture shows, type your password (no visual feedback) and hit enter to continue.

Finally launch Intel Graphics Installer via Unity Dash or Application launcher.

FeedReader

FeedReader is a modern desktop client for popular RSS-Web-Services such as TinyTinyRSS, ownCloud News or Feedly.

The application features:

  • Desktop notifications
  • Fast search and filters
  • Full articles instead of previews for known sites
  • Tagging (plugin needed for Tiny Tiny RSS)
  • Sharing to “read-it-later” services like Pocket and Instapaper
  • Handy keyboard short-cuts
  • Keep all your old articles as long as you like
  • Consistent formating of articles
  • automatically saved state of the UI

The application requires at least GTK+ 3.12. So only elementary OS Freya or Ubuntu 15.04 and higher are supported at the moment.

FeedReader in Elementary OS Freya

The most recent release is FeedReader 1.4, features ownCloud News support, memory leaks fixes, sync and other improvements.

How to Install FeedReader via PPA:

Open terminal from App Launcher. When it opens, run below command to add PPA:

add-apt-repository ppa:eviltwin1/feedreader-stable

feedreader-ppa

After that, refresh your system repository cache and install the client by running below commands one by one:

sudo apt-get update

sudo apt-get install feedreader

For those who don’t want to add PPA, grab the the .deb package in Trusty series from the PPA web page.

Project page:launchpad.net/feedreader

Flatabulous – Best Flat Theme for Ubuntu

Last updated: May 27, 2016

theming-ubuntu

Flatabulous is a new GTK theme said to be the best flat theme for Ubuntu and other Gnome based Linux Systems.

The theme is based on the Ultra-Flat theme. It was designed specially for the Unity environment on Ubuntu. Here are some screenshots:

Flatabulous theme

flatabulous-sublimetext

terminal-transparent-back

flatabulous-folder

Like the theme? Below is how to install the GTK theme as well as Ultra-Flat icon theme:

1. Download the GTK theme from the link below:

Flatabulous Theme Zip

Then extract the archive so that you have the result folder shown below:

flatabulous-source

2. Open a new Nautilus (file browser) window. Press Ctrl+H to view hidden file folders, and create .themes folder under user’s Home directory if not exist.

user-themes-folder

3. Move Flatabulous-master folder from the Downloads folder to .themes folder.

install-theme

OK, now apply the theme by launching Unity Tweak Tool (available in Software Center) and navigate to Theme page.

apply-flatabulous

For the Icon Theme, go to:

noobslab icon repository page

Select download .deb package for ultra-flat-icons, ultra-flat-icons-green, or ultra-flat-icons-orange. Finally install it via Ubuntu Software Center.

For those who prefer adding a PPA, open terminal and run below commands one by one to get the icon theme:

sudo add-apt-repository ppa:noobslab/icons

sudo apt-get update

sudo apt-get install ultra-flat-icons ultra-flat-icons-green ultra-flat-icons-orange

Also apply the icons via Unity Tweak Tool -> Icons page.

via: github.com/anmoljagetia/Flatabulous

Install Komodo Edit in Ubuntu

Komodo IDE finally reached the 9.3 release with language updates, new features and tons of improvements. Here’s how to install its free and open-source counterpart Komodo Edit using PPA.

Komodo 9.3 added support for PHP 7 and Python 3.5, syntax highlighting & checking support for Lua, syntax highlighting support for Swift, Mustache, R Lang.

The new release also features:

  • CSS, LESS, and SCSS auto-completions and code browsing
  • A new Console pane
  • Auto multi-caret for HTML/XML tags
  • Support for Elastic Tabstops. (disabled by default)
  • Package Manager 2.0 with more functionality, ie. uninstall, update, etc.
  • Quick Bookmarks
  • Auto-wrap delimiters while having text selected.
  • In-line Syntax Checking
  • updated language icons.
  • quick start options on new tab
  • and much more at the release page.

Komodo Edit 9.3

How to Install Komodo Edit 9.3 in Ubuntu:

Mystic Mirage is maintaining a PPA with most recent Komodo Edit packages well integrated with the default Unity Desktop. Ubuntu 15.10, Ubuntu 14.04, Ubuntu 15.04, Ubuntu 12.04 are supported so far.

1. Add Komodo Edit PPA.

Open terminal from Unity Dash, App launcher, or via Ctrl+Alt+T shortcut key. When it opens, run command:

sudo add-apt-repository -y ppa:mystic-mirage/komodo-edit

komodo-edit-ppa

Type your password in mind when it asks, since there’s no display due to security reason.

2. Install the editor in below ways.

After adding the PPA, you can install or upgrade Komodo Edit by:

  • Synaptic Package Manager:

    install-komode-edit-synaptic

  • Software Updater if a previous release installed.
  • running below commands one by one:
    sudo apt-get update
    
    sudo apt-get install komodo-edit

For those who don’t want to add PPA, grab the .deb installer directly from THIS PAGE.

Uninstall:

Remove the PPA by launching Software & Updates and navigating to Other Software tab.

Remove the editor using Synaptic Package Manger, or by running apt-get command with remove option:

sudo apt-get remove komodo-edit && sudo apt-get autoremove

mupdf-icon

MuPDF, a free, open-source, and lightweight PDF and XPS viewer, now reaches the 1.8 release with new features, improvements and various fixes.

MuPDF is a lightweight PDF viewer and toolkit written in portable C, which also reads XPS, OpenXPS and EPUB documents. It works on Windows, Android, and Linux.

The renderer in MuPDF is tailored for high quality anti-aliased graphics. It renders text with metrics and spacing accurate to within fractions of a pixel for the highest fidelity in reproducing the look of a printed page on screen.

What’s New in MuPDF 1.8:

Headline changes:

  • New OpenGL-based barebones desktop viewer.
  • New URW fonts with greek and cyrillic.
  • 64-bit file support.
  • Ghostscript proofing mode (source only; not in shipped binaries).

EPUB improvements:

  • User style sheets.
  • GIF images (also for CBZ).
  • Table of contents.
  • CJK text.
  • Page margins.
  • Many bug fixes.

Bug fixes:

  • Updated FreeType to version 2.6.1.
  • Various font substitution bug fixes.
  • Fix setjmp/longjmp behaviour which could cause optimizing compilers to misbehave.

In addition, mudraw has been merged into mutool, use mutool draw to use mudraw.

How to Install MuPDF 1.8 in Ubuntu:

There are Android, Windows installers, and source tarball available in its official download page.

For Ubuntu and derivatives, you can either build the viewer from the source or use my personal binaries in PPA.

Method 1:

Open terminal from Unity Dash, App Launcher, or via Ctrl+Alt+T shortcut key. When it opens, run below commands one by one to add my PPA and install MuPDF:

sudo add-apt-repository ppa:ubuntuhandbook1/apps

sudo apt-get update

sudo apt-get install mupdf mupdf-tools

Method 2 For those who don’t want to add PPA:

Depends on your Ubuntu edition (e.g., 15.10, 15.04, 14.04, and 12.04), and OS type (i386.deb for 32-bit and amd64.deb for 64-bit)

select download the .deb packages for mupdf and mupdf-tools from the link below:

MuPDF in PPA page

Finally click install the packages via Ubuntu Software Center.

How to Use:

The PDF viewer doesn’t have a launcher. To use it, right-click on the file and select it from the “Open With” option.

mupdf

To set default, go to file’s context menu -> Properties -> Open With tab -> select MuPDF from list -> finally click ‘Set as default’ button.

For mouse behavior and key bindings run man mupdf command in terminal.

Uninstall:

You may remove the PPA by launching Software & Updates and then navigate to Other Software tab. Also remove MuPDF via Ubuntu Software Center if you want.

Audacious Audio Player

Audacious, an open-source descendant of XMMS audio player, has reached a new stable 3.7 series with some new features and various bug-fixes.

New features in Audacious 3.7:

  • Playlists can be shuffled by whole albums rather than single tracks.
  • Internet streams can be recorded while playing via a simple record button (GTK+ only).
  • The playlist export window displays supported formats in a drop-down list (GTK+ only).
  • A new, unified window has been added for managing equalizer presets (GTK+ only).
  • The user interface automatically adjusts to be more usable on high-resolution screens (GTK+ only).
  • An “Edit Lyrics” option has been added to the LyricWiki plugin, which opens the edit page for the current song.
  • Guessing of missing tag fields can be disabled.
  • Decoding and playback of standard input is possible with e.g. echo file.mp3 | audacious –
  • QT interface:
    • several new appearance settings, many other small fixes and improvements
    • Plugins port to QT: Winamp Classic Interface, Playlist Manager, Search Tool, Status Icon.

There are also various bugfixes and other changes in the new release, see the release note for details.

Audacious default interface

Audacious default interface

audacious winamp interface

audacious winamp interface

How to Install / Upgrade Audacious in Ubuntu:

Webupd8 Team is maintaining a PPA with latest audacious packages for all current Ubuntu releases (Ubuntu 15.10, Ubuntu 15.04, and Ubuntu 14.04), and their derivatives.

1. Add the PPA repository.

Open terminal from Unity Dash, App Launcher, or via Ctrl+Alt+T shortcut key. When it opens, run command:

sudo add-apt-repository ppa:nilarimogard/webupd8

webupd8-ppa

Type in your password when it asks (type in mind and hit enter, there’s no display when typing password).

2. After added PPA.

Launch Software Updater if you have a previous release installed, you’ll see Audacious 3.7 in the update list after checking for updates.

Or, run below commands one by one in terminal to check for updates, and install the player:

sudo apt-get update

sudo apt-get install audacious

Once installed, launch audacious GTK 2 or Qt version from the Dash.

launch-audacious

3. (Optional) To remove the PPA, launch Software & Updates and then go to Other Software tab. And use Ubuntu Software Center to remove audacious player if you want.

Unsettings

Unsettings is another graphical configuration tool for the default Unity Desktop. It can be used as a complement to System Settings and Unity Tweak Tool.

Unsettings 0.11 was released recently with Ubuntu 15.10 support and new settings:

  • New keyboard settings: “Shift key behaviour”, “Caps Lock key behaviour”, “Alt/Win key behaviour”, “Numpad delete key behaviour”
  • New Fonts setting: “Scale factor”
  • Added “User folders” tab
  • Fixed bug with Unity version detection
  • Added Czech, English (United Kingdom) translations

unsettings-folder

unsettings-keyboard

Install Unsettings in Ubuntu:

Download the installer “unsettings_x.xx_all.deb” at the bottom of its official web page:

Unsettings Home Page

Then click install it via Ubuntu Software Center, Gdebi, or dpkg command.

Once installed, launch it from Unity Dash or from-in System Settings at next login.

unsettings-icon