Archives For November 30, 1999

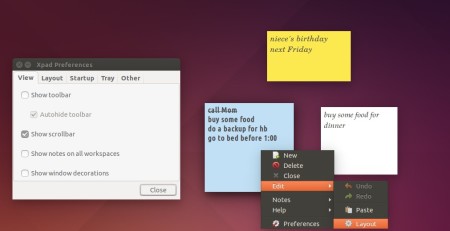
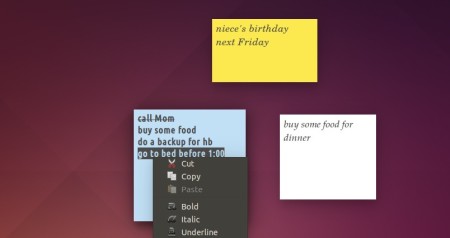
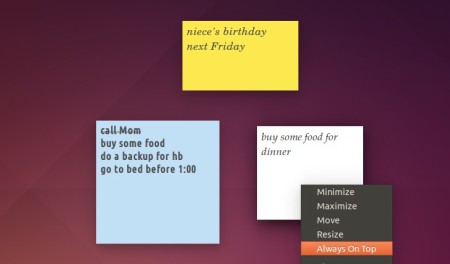
Indicator Stickynotes is a simple application similar to Windows Sticky Notes that allows you to jot down thoughts, lists, and reminders.

Indicator Stickynotes is meant for Ubuntu’s Unity interface. It has also been tested on the GNOME Shell, XFCE/Xubuntu, KDE/Kubuntu, MATE/Mint, and Cinnamon/Mint interfaces, but support for these platforms is not guaranteed.

Sticky Notes Ubuntu 13.10

Install Indicator Stickynotes:

This simple app is hosted on Launchpad.net. The developer has created a PPA that provides the app packages for Ubuntu 13.10, Ubuntu 13.04, Ubuntu 12.10 and Ubuntu 12.04.

To install it, press Ctrl+Alt+T on keyboard to open the terminal. When it opens, run the command below to add the PPA:

sudo apt-add-repository ppa:umang/indicator-stickynotes

After that, update package lists and install the Sticky Notes Indicator:

sudo apt-get update

sudo apt-get install indicator-stickynotes

Once installed, start the app from Unity Dash or Menu and enjoy!

Sticky-Notes-indicator-unity-dash

shotwell 0.18 ubuntu 13.10

Yorba Team has announced the 0.18 release of its shotwell photo manager recently with various bug fixes and translation updates.

According to the release note, Shotwell 0.18 contains below changes:

  • Tumblr publishing fixed
  • Fixed resource leak when importing videos
  • Improved searching for event comments and diacritics
  • Various bug fixes
  • Compile and install translated help files
  • Updated translations

shotwell 0.18 ubuntu 13.10

Install Shotwell:

Yorba’s Stable PPA only provides the update for Ubuntu 13.10 Saucy. To install it, press Ctrl+Alt+T on keyboard to open the terminal. When it opens, run the commands below one by one:

sudo add-apt-repository ppa:yorba/ppa

sudo apt-get update

sudo apt-get install shotwell

For Ubuntu 14.04 and Ubuntu 12.10, besides building it from the source code. You can use the Yorba’s Daily build PPA.

sudo add-apt-repository ppa:yorba/daily-builds

sudo apt-get update

sudo apt-get install shotwell

NOTE: As the Daily PPA’s description says, “This PPA contains daily builds of Yorba’s software, including Shotwell Photo Manager and Geary. Because these builds correspond to the current state of the development source tree, they are untested and highly volatile. Us it at your own risk!”

NetBeans IDE 8.0

NetBeans IDE 8.0 was finally released on March 18, 2014, which provides out-of-the-box code analyzers and editors for working with the latest Java 8 technologies.

Besides the Java 8 support, the IDE also has a range of new enhancements that further improve its support for Maven and Java EE with PrimeFaces; new tools for HTML5, in particular for AngularJS; and improvements to PHP and C/C++ support. See the release note for more details.

Install Netbeans 8.0 Ubuntu 14.04

Install NetBeans IDE 8.0:

1. Download the installer:

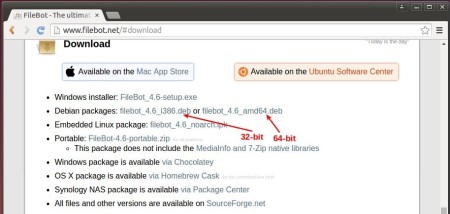
NetBeans IDE 8.0 works better and faster with JDK distribution, so you can download the oracle’s Co-bundled package from the links below. You may check your OS type 32-bit (x86) or 64 bit (x64) via System Settings -> Details.

Download the Linux x86 or x64 package

You can also download the other bundles at netbeans.org/downloads/.

2. Give executable permission.

Press Ctrl+Alt+T on your keyboard to open the terminal. When it opens, run the command below to make the installer executable.

chmod +x ~/Downloads/jdk-8-nb-8-linux-*.sh

You may change the file name “jdk-8-nb-8-linux-*.sh” in the code to yours, also do this in next command.

3. Start the installer:

In the terminal run:

cd ~/Downloads && ./jdk-8-nb-8-linux-*.sh

This will bring up the install wizard. Just follow it and you’ll finally get the NetBeans IDE 8 installed on your system.

Install Netbeans 8.0 ubuntu 14.04

(Optional) To uninstall the IDE, run ./uninstall.sh in the install directory.

That’s it. Enjoy!

syncwall wallpaper changer

UPDATE: SyncWall is NO LONGER in active development since 2014!!

SyncWall, a wallpaper changer with multi-monitor support, is now at version 2.0.0. In this tutorial I will show you how to install or upgrade it in Ubuntu 14.04, Ubuntu 13.10, Ubuntu 12.10, or Ubuntu 12.04.

As you may know, SyncWall is quite a basic wallpaper changer with the ability to synchronize wallpaper change between several workstations with a basic (and unsecured) client/server protocol. Another interesting feature is a simple multi-monitor support. Because SyncWall is written with Qt, it runs on Windows and Linux.

syncwall-ubuntu

Changes in SyncWall 2.0.0:

  • Autostart on linux
  • Direct synchronization of wallpapers across network (sharing the same file is no more used)
  • Add Romanian translation. Thanks to jaff.
  • Change default location of translation file on linux (“/share/hotshots/locale” instead of “/share/locale”)
  • Ability to keep wallpaper system settings (on Windows)
  • Add MacOSX target
  • Add debian package files
  • Bug fixes:
    • find the correct path for translation files on linux in some cases
    • incorrect display on multiple screen configuration in some cases
    • incorrect display of splashscreen on linux in some cases
    • incorrect decoding of image parameters during synchronization
    • incorrect clipping with horizontal center alignment
    • relaunch scheduler when wallpaper is changed manually
    • invalid lock of UI in server mode
    • incorrect behavior with fixed time scheduling
    • compilation error on quite old CentOS platform

Install SyncWall in Ubuntu:

The Webupd8 Team PPA, maintained by the popular Ubuntu Linux blog webupd8.org, provides the latest build of SyncWall for all current support Ubuntu releases.

To add the PPA, press Ctrl+Alt+T on keyboard to open the terminal. When it opens, run the command below:

sudo add-apt-repository ppa:nilarimogard/webupd8

Then update and install the wallpaper manager via:

sudo apt-get update

sudo apt-get install syncwall

(Optional) Uninstall:

To remove the ppa, run:

sudo apt-get remove syncwall && sudo apt-get autoremove

To remove the PPA:

sudo add-apt-repository -r ppa:nilarimogard/webupd8

Avidemux, a video editor designed for simple cutting, filtering and encoding tasks has reached version 2.6.8. In this tutorial I will show you how to install or upgrade to this release in Ubuntu 13.10, Ubuntu 12.10, Ubuntu 12.04 and their derivatives.

Changes in Avidemux 2.6.8:

  • Image/export: Proper initialization of Qz for jpeg export
  • UI : Add an override menu to force language
  • tinypy : Add support for os.environ
  • x264 : Improved settings (tobias)
  • Win32 : Fix crash when having an audio problem
  • Win32 : Re-add mp4v2 to installer files
  • Audio/FAAC : Fix channel mapping when source is mono
  • Audio/AMR : Re-enabled AMR
  • Audio/lavc : Fixed encoding for codec not supporting planar (MP2)
  • Audio : Fixed importing MP2 audio detected as MP3
  • Editor : Fix deleting chunks of the video leading to seek errors
  • Editor : Initial copy/paste support
  • Editor/audio: Fix issue when source has more than 4 tracks
  • Editor : Better detection of double fps input files
  • TS/Demux : Brute force eac3 probe
  • TS/Demux : Better initialization, avoid dropping audio
  • MP4/Demux : Fix management of PCM audio
  • Mkv/Demux : Proper re-indexing for mpeg2 in mkv
  • Mp4v2/Mux : Add fast start mode back
  • OpenSolaris : Some fixes by pfelecan
  • Subtitles : Update libass + very simple srt2ssa converter
  • OsX : Enables more optional codecs…
  • avsfilte : Performance Improvements (fahr)

avidemux 2.6 ubuntu 13.10

Install:

The default versions in Ubuntu universe repository is avidemux 2.5.x. To install the latest version, you can use the GetDeb repository or Thanh Tung Nguyen’s PPA.

Method 1: To add the GetDeb repository, download and install this deb.

Then press Ctrl+Alt+T on keyboard to open the terminal. When it opens, run the commands below one by one:

sudo apt-get update

sudo apt-get install avidemux2.6-qt

These commands will install the video editor in Ubuntu 13.10 or Ubuntu 12.04. If you’re still running Ubuntu 12.10, use the Method 2:

sudo add-apt-repository ppa:rebuntu16/avidemux+unofficial

sudo apt-get update

sudo apt-get install avidemux2.6

This PPA is maintained by a French guy, due to lack of time, he will update the PPA later this night.

cuttlefish ubuntu 14.04

Cuttlefish is a simple tool, which realises reflexes on your computer by executing actions when specific events are triggered. You can configure the tool in such way that cuttlefish can for example change your default printer according to the currently connected wireless network. You can also lock/unlock your computer, when a specific USB device is dis/reconnected.

cuttlefish ubuntu 14.04

Install:
The cuttlefish is available in Ubuntu 12.04 Precise’s repository. If you want to install this app on Ubuntu 14.04 or Ubuntu 13.10, besides building from source, you can use my PPA which contains the latest build released in December 2013.

Changes in 13.12 release:

  • Fixed activate/deactivate reflex not show options.
  • Fixed bug in start/stop application.
  • Removed dependencies on launchpad
  • Added default null logger
  • Added local directory for finding plugins during development
  • Fixed help and about menu items
  • Made dialogs popup centered on main window
  • Changed to mono-icon for indicator
  • Some bug fixes

Press Ctrl+Alt+T on keyboard to open terminal. When it opens, run the commands below one by one:

sudo add-apt-repository ppa:ubuntuhandbook1/apps

sudo apt-get update

sudo apt-get install cuttlefish

For the source code, go to code.launchpad.net/cuttlefish

blender 2.70 ubuntu install

 
This simple tutorial is going to show you how to install the Blender 2.70 in Ubuntu 14.04, Ubuntu 13.10, Ubuntu 12.04 and Ubuntu 12.10 via PPA repository.

At the moment, Blender 2.70 is at its second release candidate. New features include initial support for volumetrics in Cycles, and faster rendering of hair and textures. The motion tracker now supports weighted tracks and has improved planar tracking. For mesh modeling there are new Laplacian deform and wireframe modifiers, along with more control in the bevel tool. The game engine now supports object levels of detail.

The first results from the new user interface project are also in this release, with dozens of changes to make the interface more consistent and powerful. This is also the first release of the multithreaded dependency graph, which makes modifier and constraint evaluation faster in scenes with multiple objects. See the release note.

blender 2.70 PPA

Install Blender 2.70

The IRIE Shinsuke’s PPA contains the 2.70 RC builds for all current support Ubuntu releases. You’ll be able to upgrade to the Blender 2.70 stable version via this PPA when it’s released.

To do so, press Ctrl+Alt+T on keyboard to open the terminal. When it opens, run the commands below one by one to add the PPA, update system and install or upgrade the software.

sudo add-apt-repository -y ppa:irie/blender

sudo apt-get update

sudo apt-get install blender

That’s it. Enjoy!

ubuntu1404-lts-logo-icons


The default wallpapers of Ubuntu 14.04 Trusty Tahr LTS are now available for download in launchpad.net. There are the classic purple background and other 11 wallpapers from the wallpaper contest.

Ubuntu 14.04 default background:

ubuntu1404-wallpaper

Download the original picture

The other wallpapers:

Ibanez_Infinity_by_Jaco_Kok

Foggy_Forest_by_Jake_Stewart

Jelly_Fish_by_RaDu_GaLaN

Sea_Fury_by_Ian_Worrall

Partitura_by_Vincijun

SONY DSC

Reflections_by_Trenton_Fox

Backyard_Mushrooms_by_Kurt_Zitzelman

Berries_by_Tom_Kijas

Mono_Lake_by_Angela_Henderson

Water_web_by_Tom_Kijas

Download all the 11 wallpapers at launchpad.net (ubuntu-wallpapers-trusty_*_all.deb under the trusty tahr section).

Nuvola Cloud Music Player in Ubuntu

Nuvola cloud music player gets a new release days ago. Here’s how to install it in Ubuntu 14.04, Ubuntu 13.10, Ubuntu 12.10, Ubuntu 12.04, Linux Mint and other derivatives.

As you may know, Nuvola Player is a desktop app that integrates Google Music, Bandcamp, Deezer, Grooveshark, Hype Machine, 8tracks, Pandora, Rdio and Amazon Cloud Player. Version 2.3.1 was release on March 09, 2014 with following fixes:

  • Google Play settings are applied settings instantly.
  • Fixed occasional JavaScript crashes. (Closes: LP:1263705)
  • Google Play: Remove broken feature Hide Google+ buttons. The developer have given up fixing.
  • Google Play: fixed pause action (Closes: LP:1282346)
  • Imported translations.

Nuvola Player supported Cloud Music services

nuvola player ubuntu 13.10

Install Nuvola Player:

Ubuntu, Linux Mint and their derivatives can easily install this player from the developer’s PPA. Just press Ctrl+Alt+T on keyboard to open the terminal. When it opens, run the commands below one by one:

sudo add-apt-repository ppa:nuvola-player-builders/stable

sudo apt-get update

sudo apt-get install nuvolaplayer

That’s it. Enjoy!

HP printers in Linux


HP Linux Imaging and Printing (HPLIP), a HP-developed solution for printing, scanning, and faxing with HP inkjet and laser based printers in Linux now is at version 3.14.3, which added support for new printers, new Distro’s as well as various fixes.

New printers added in HPLIP 3.14.3:

  • HP Deskjet Ink Advantage 4640 e-All-in-One Printer series
  • HP Deskjet Ink Advantage 4645 e-All-in-One Printer
  • HP Deskjet Ink Advantage 4646 e-All-in-One Printer
  • HP Deskjet Ink Advantage 4648 e-All-in-One Printer
  • HP LaserJet Pro MFP M125a
  • HP LaserJet Pro MFP M125nw
  • HP LaserJet Pro MFP M125rnw
  • HP LaserJet Pro MFP M126a
  • HP LaserJet Pro MFP M126nw
  • HP LaserJet Pro MFP M127fp

New Linux Distro’s support for:

  • Debian 6.0.9,7.3,7.4
  • Fedora 20
  • Linux Mint 16

Issues fixed:

  • Fixed align functionality issue with HP OfficeJet 6100
  • Systray notification does not pop-up after configuring the device using ‘hp-setup’ command
  • Unable to configure second fax queue in interactive mode
  • Fixed missing ‘No 6 3/4 Envelope’ media size for HP OfficeJet 7619 Series
  • Printer name does not change when navigate back and forward to change the printer queue configuration through ‘hp-setup’

Install HPLIP:

1. Download the .run file from sourceforge page.

2. Right-click on the file and go to its Properties window, under Permissions tab check the box “Allow executing file as program”

allow hpip executable

3. Press Ctrl+Alt+T on keyboard to open the terminal. When it opens, run the below command to start the installer:

./Downloads/hplip-3.14.3.run

Answer the questions and you’ll finally get the latest version of HPLIP installed on your system.

HPLIP website