Archives For November 30, 1999

bitdefender linux repository

This tutorial shows how to install BitDefender Antivirus Scanner in Ubuntu 13.10 Saucy or Linux Mint 16 Petra from bitdefender repository.

Bitdefender is an antivirus software suite developed by Romania-based software company Softwin. You can use the Free Edition on Ubuntu Linux to scan remove devices and ntfs partitions.

Tutorial Objectives:

  • Install BitDefender Scanner in Ubuntu 13.10 or Linux Mint 16
  • Enjoy!

To get started, press Ctrl+Alt+T on your keyboard to open terminal. When it opens, run commands to add BitDefender repository for Linux:

sudo sh -c 'echo "deb http://download.bitdefender.com/repos/deb/ bitdefender non-free" >> /etc/apt/sources.list.d/bitdefender.list'

Then get the key:

wget -O- -q http://download.bitdefender.com/repos/deb/bd.key.asc | sudo apt-key add -

After that, you can install the Scanner after checking for updates. Or run:

sudo apt-get update; sudo apt-get install bitdefender-scanner-gui

You can also install Bitdefender-samba, Bitdefender-mail with the commands below:

sudo apt-get install bitdefender-samba bitdefender-mail

Once installed, restart your computer and you’ll see the shortcut icon in Unity Dash.

bitdefender ubuntu 13.10

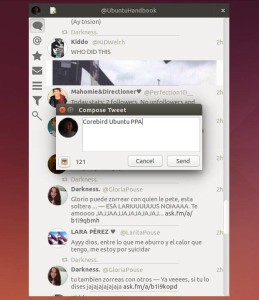
Birdie is a beautiful Twitter client designed for elementary OS. It is fast, easy to use and works great. It provides all the basic Twitter features and allows you to enjoy Twitter right on your desktop.

Birdie is built by volunteers. All the source code is licensed under the GPLv3 and freely available for anyone to use, modify or share.

Birdie has been written using native technologies, like Vala and Gtk. It provides a seamless integration with elementary OS and feels like a first-class app.

birdie ubuntu 13.10

Install Birdie in Ubuntu

Birdie gets a launchpad PPA, but it is not available for Ubuntu 13.10 Saucy Salamander. You can download the Deb from the link below:

32 bits for Ubuntu

64-bits for Ubuntu

Once downloaded, press Ctrl+Alt+T on your keyboard to open terminal. When it opens, run below to install the DEB as well as fix dependencies.

sudo dpkg -i birdie_0.3*.deb; sudo apt-get -f install

SmillaEnlarger is a small graphical tool (based on Qt) to resize, especially magnify bitmaps in high quality.

The used algorithm is an invention of developer’s own. This tool is free, open source and runs on Windows, Linux and Mac OSX.

This tutorial shows you how to install SmillaEnlager via PPA in Ubuntu 13.10 Saucy Salamander, which also works in Ubuntu 13.04, Ubuntu 12.10, Ubuntu 12.04 and Linux Mint 13/14/15/16/

image enlarging ubuntu

To get started, press Ctrl+ALt+T on your keyboard to open terminal. When it opens, run command to add the PPA:

sudo add-apt-repository -y ppa:dhor/myway

Then update package lists and install it:

sudo apt-get update; sudo apt-get install -y smillaenlarger

Google Search in terminal

Want to use ‘Search on Google’ in selected text’s context menu in your Gnome Terminal? The developer of Ubuntu Tweak did a little hack on Gnome Terminal, added the Google search support for it.

So that you can quickly Google command line errors from terminal. Highlight the text, right-click on it and choose ‘Search on Google’. It opens the default web browser and go to the google search result page.

search on google in terminal ubuntu 13.10

The developer has created a PPA to make it easy to install, but Ubuntu 13.10 is not supported yet. Fortunately, Ubuntu 13.10 Saucy Salamander uses Gnome Terminal 3.6.1 which is same in Ubuntu 13.04 Raring. So you can install the DEBs for Raring on Saucy.

To get started, click the links below to download the debs:

Install both data & main debs and apply the changes by restart your terminal.

emerald ubuntu 13.10

Emerald is a custom window decorator which was shipped with Compiz. It decorates windows borders and title bars by installing and editing themes.

Emerald has been discontinued, but the latest v0.9.5 works great in all current Canonical supported Ubuntu releases. Webupd8 team has created a PPA for Ubuntu 13.04, Ubuntu 12.10, Ubuntu 12.04. Here’s how to install and use Emerald in Ubuntu 13.10.

emerald ubuntu 13.10

Tutorial Objectives:

  • Install Emerald Window Decorator in Ubuntu 13.10
  • Enjoy!

To get started, press Ctrl+ALt+T on your keyboard to open terminal. When it opens, run command to install the required packages:

sudo apt-get install git autoconf libtool libwnck1.0-cil-dev libwnck-dev intltool libdecoration0-dev gawk compizconfig-settings-manager

Download the source tarball:

wget cgit.compiz.org/fusion/decorators/emerald/snapshot/emerald-0.9.5.tar.gz

Uncompress and go into result folder:

tar -zxvf emerald-0.9.5.tar.gz && cd emerald-0.9.5/

Run commands below one by one to compile it:

./autogen.sh
make clean
make distclean
./configure --prefix=/usr --libdir=/usr/lib${LIBDIRSUFFIX} LIBS='-ldl -lm'
make
sudo make install

To enable Emerald:

emerald --replace &

To make Emerald permanently, install CompizConfig Settings Manager from Ubuntu Software Center. Open CCSM and navigate to Effects -> Window Decoration. In command area replace the default with emerald --replace &

enable emerald in Ubuntu

After all, open Emerald Window Manager from Unity Dash. Download and install themes from compiz-themes.org

How to Install Nuvola Player 2.2 in Ubuntu 13.10

Last updated: October 20, 2013

Nuvola Cloud Music Player

Nuvola is a cloud music integration for your Linux desktop. It supports Google Play Music, Amazon Cloud Player, 8tracks, Grooveshark, Hype Machine, Pandora, Rido.

Although the maintainer has discontinued the development of this project, it’s still available for Ubuntu 13.10 Saucy, Ubuntu 13.04, Ubuntu 12.04 and their derivatives on its PPA.

Tutorial Objectives:

  • Install Nuvola Player in Ubuntu 13.10
  • Enjoy!

To get started, press Ctrl+Alt+T on your keyboard to open terminal. When it opens, run command below to add the unstable PPA which works great on my laptop.

sudo add-apt-repository ppa:nuvola-player-builders/unstable

Then update system package lists:

sudo apt-get update

Install the cloud player as well as the flash plugin:

sudo apt-get install nuvolaplayer nuvolaplayer-flashplugin

nuvola player ubuntu 13.10

Google Music uploader
This tutorial shows you how to install Google Music Manager, a simple application for adding the music files on your computer to your Google Play Music library.

Music Manager is compatible with desktop and laptop computers and is not available to download onto mobile devices. With it you can:

  • Upload up to 20,000 songs from your iTunes library, Windows Media Player library, My Music folder, or folders of your choice to Google Play.
  • Only upload what you want – choose individual songs or upload songs automatically.
  • Adjust the bandwidth available for uploading songs.
  • View your upload progress.
  • Download any songs that you previously uploaded to your music library, as well as songs you purchased from Google Play.

Install Google play music manager:

Press Ctrl+ALt+T on your keyboard to open terminal. When it opens, follow the steps below:

1. Copy and paste below command and run to add the Google repository for Ubuntu Linux:

sudo sh -c 'echo "deb http://dl.google.com/linux/musicmanager/deb/ stable main" >> /etc/apt/sources.list.d/google-musicmanager.list'

2. Get the key:

wget -q -O - https://dl-ssl.google.com/linux/linux_signing_key.pub | sudo apt-key add -

3. update package lists on your system:

sudo apt-get update

4. Now you can install the app via:

sudo apt-get install google-musicmanager-beta

Google Music Manager Setup

Hotshots is a screenshot tool with some editing features. It is particularly suitable for writing documentation (as used in the following chapters) but you can use it to highlight some details on a map image or what ever you want. Because HotShots is written with Qt, it runs on Windows and Linux (MacOSX isn’t tested yet).

Current features:

  • Grab current screen, all monitors (in case of multi-monitors configuration), current window or a part of the desktop.
  • Save the screenshot in multiple formats (PNG, JPG, BMP, …).
  • Automatically save the screenshot to clipboard, disk or launch the editor tool.
  • Automatically scale the screenshot to a given size.
  • Use “system” shortcuts to take a screenshot.
  • Add automatically some “post-effects” to the screenshot (drop shadow, rotation, border, …).
  • Can be minimized to system tray and work in background.
  • Can be launch at system start-up (Windows).
  • Export edited image in multiple formats (PNG, JPG, BMP …).
  • Save/Restore edited image in proprietary format.
  • Send image directly to printer.
  • Install Hotshots via PPA:

    Hotshots is available in a launchpad ppa for Ubuntu 13.10 Saucy, Ubuntu 13.04 Raring, Ubuntu 12.10 Quantal, Ubuntu 12.04 Precise and Linux Mint 13 Maya, 15 Olivia, 14 Nadia , 16 Petra and other Ubuntu derivatives.

    To add the PPA, press Ctrl+Alt+T on your keyboard to open terminal. When it opens, run below command:

    sudo add-apt-repository ppa:dhor/myway

    After that, update package lists and install the tool:

    sudo apt-get update; sudo apt-get install hotshots

    hotshots ubuntu 13.10

    Linux Kernel 3.10.17

    The Latest Long Time Support Linux Kernel 3.10.17 has been released. All users of Kernel 3.10 series are urged to upgrade as soon as possible. Here’s how to do it in Ubuntu 13.10, Ubuntu 13.04, Ubuntu 12.10, Ubuntu 12.04 and Linux Mint 13 / 14 / 15 /16.

    Linux Kernel 3.10.17 includes architecture updates, including arc, ARM, mips, parisc, PowerPC, s390, SPARC and x86, various Radeon and Intel i915 updates, some Btrfs and EXT4 filesystem fixes, and sound improvements. See official release announcement.

    Install / Upgrade Kernel 3.10.17:

    Press Ctrl+Alt+T on your keyboard to open terminal. Follow the steps below by copying and pasting the commands into terminal and hit run.

    1. Download the DEBs from kernel PPA:

    For 32-bit system:

    wget http://kernel.ubuntu.com/~kernel-ppa/mainline/v3.10.17-saucy/linux-headers-3.10.17-031017-generic_3.10.17-031017.201310181435_i386.deb
    
    wget http://kernel.ubuntu.com/~kernel-ppa/mainline/v3.10.17-saucy/linux-headers-3.10.17-031017_3.10.17-031017.201310181435_all.deb
    
    wget http://kernel.ubuntu.com/~kernel-ppa/mainline/v3.10.17-saucy/linux-image-3.10.17-031017-generic_3.10.17-031017.201310181435_i386.deb

    2. For 64-bit system:

    wget http://kernel.ubuntu.com/~kernel-ppa/mainline/v3.10.17-saucy/linux-headers-3.10.17-031017-generic_3.10.17-031017.201310181435_amd64.deb
    
    wget http://kernel.ubuntu.com/~kernel-ppa/mainline/v3.10.17-saucy/linux-headers-3.10.17-031017_3.10.17-031017.201310181435_all.deb
    
    wget http://kernel.ubuntu.com/~kernel-ppa/mainline/v3.10.17-saucy/linux-image-3.10.17-031017-generic_3.10.17-031017.201310181435_amd64.deb

    3. Install the downloaded packages to upgrade kernel:

    sudo dpkg -i linux-headers-3.10.17-*.deb linux-image-3.10.17*.deb

    4. Restart your computer and done.

    5. If something goes wrong, run command below to remove Linux Kernel 3.10.17:

    sudo apt-get purge linux-image-3.10.17-*

    CTorrent is a lightweight command-line bittorrent client which is written in the C++. Original ctorrent’s upstream has stopped its development and now it’s kept updated with new releases/bug fixes by a new developer. It’s built as a console program and it can be even used remotely in a machine that provides outside ssh access. Other main features are:

    • Support for large files (>2GB) and large torrents (>255 files).
    • Strategic selection of pieces to request for download.
    • Continuous queueing of download requests, tuned based on latency and throughput for each peer.
    • Improved download performance, including parallel requests in initial and endgame modes.
    • Improved bandwidth regulation.
    • Improved compatibility with other peers.
    • Performance optimization and bug fixes.
    • An interface for monitoring and managing multiple clients.
    • Dynamic cache allocation and management, including prefetch.

    Install cTorrent:

    You don’t have to do something special to install cTorrent, just search for and install the package from Ubuntu Software Center.

    install-ctorrent

    To run ctorrent:

    ctorrent -s new_filename -e 12 -C 32 -p 6881 example.torrent

    For more options, run:

    ctorrent