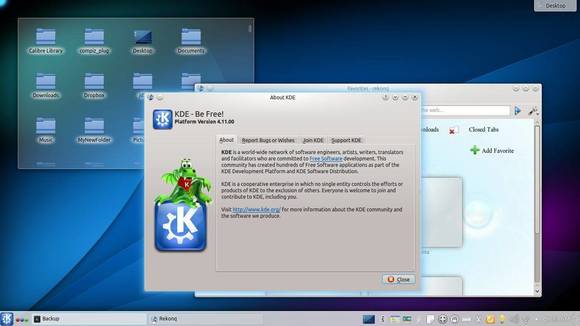
Archives For jimingkui

The Qupzilla web browser will be available by default in Ubuntu 13.10 Saucy’s universe repository. Since then, you can directly install it from Ubuntu Software Center.

qupzilla for Ubuntu 13.10

Below is the discription from the Ubuntu Software Center:

QupZilla is a new and very fast QtWebKit browser. It aims to be a lightweight web browser available through all major platforms. This project has been originally started only for educational purposes. But from its start, QupZilla has grown into a feature-rich browser.

QupZilla has all standard functions you expect from a web browser. It includes bookmarks, history (both also in sidebar) and tabs. Above that, you can manage RSS feeds with an included RSS reader, block ads with a builtin AdBlock plugin, block Flash content with Click2Flash and edit the local CA Certificates database with an SSL Manager.

QupZilla’s main aim is to be a very fast and very stable QtWebKit browser available to everyone.

Once installed the browser, you’ll be able to open it from the Unity Dash. Enjoy!

qupzilla in ubuntu

This simple tutorial will show you how to install the QupZilla Web Browser from its ppa repository in Ubuntu 13.04 Raring Ringtail.

As you may know, QupZilla is a new and very fast QtWebKit browser. It aims to be a lightweight web browser available through all major platforms. This project has been originally started only for educational purposes. But from its start, QupZilla has grown into a feature-rich browser.

qupzilla web browser

News:QupZilla will be available in upcoming Ubuntu 13.10 Saucy’s default repository. Just search for and install it from Ubuntu Software Center

Install QupZilla:

Press Ctrl+Alt+T on your keyboard to open terminal. When it opens, run below command to add the ppa repository:

sudo add-apt-repository ppa:nowrep/qupzilla

add qupzilla ppa

Update package lists and install the browser:

sudo apt-get update; sudo apt-get install qupzilla

install qupzilla web browser

Once installed, you’ll be able to open it from Unity Dash.

qupzilla in ubuntu

This simple and brief tutorial is going to show you how to install Zipwhip text messaging app in Ubuntu. As you may know, Zipwhip is a small utility that allows you to text anyone from PC, Android tablet, or web browser using your existing mobile number.

Zipwhip-starting

Tutorial Objectives:

  • Install Zipwhip Text Messaging app in Ubuntu
  • Enjoy!

To get started, press Ctrl+Alt+T on your keyboard to open terminal. When it opens, run below commands to download the app:

For 32-bit system:

wget http://zipwhip.cachefly.net/zipwhip-desktop-i586.deb

For 64-bit system:

wget http://zipwhip.cachefly.net/zipwhip-desktop-amd64.deb

Both 32-bit & 64-bit run below command to install the package:

sudo dpkg -i zipwhip-desktop*.deb

Once installed, you may need a restart to be able to open this tool from Unity Dash. Then input your phone number and a password (register for free):

Zipwhip-phone

In this tutorial I’ll introduce you a new project, FSGamer, which can improve full screen gaming in Ubuntu Linux (still in alpha).

FSGamer ubuntu game

FSGamer ubuntu

FSGamer runs games in their own X server, which can improve the speed, reduce annoying interruptions, and make switching between fullscreen games and your desktop easy and reliable.

To install this tool, click to download the deb and then follow below steps:

1.) First, install from the deb package, assuming it is in Downloads:

sudo dpkg -i ~/Downloads/fsgamer_0.1.1_all.deb

2.) Allow FSGamer to start extra X server:

sudo cp /etc/X11/Xwrapper.config /etc/X11/Xwrapper.config.backup
sudo gedit /etc/X11/Xwrapper.config

then change the line allowed_users=console to allowed_users=anybody.

3.) Allow audio to work in the new X server (change $USER to your username):

sudo usermod -a -G audio $USER

After the previous step, you may have to reboot in order for the audio settings to take effect.

NOTE: This is alpha quality software. It is also very sloppily written, and may crash everything and make you cry. So save your work! :)

Project Homepage: http://michaelb.org/projects/fsgamer/

This simple tutorial will show you how to install the Jitsi Video Calls and Chat & add its repository in Ubuntu 13.04 Raring, 12.04 Precise and 12.10 Quantal.

Jitsi call window

As you may know, Jitsi is an audio/video Internet phone and instant messenger written in Java. It supports some of the most popular instant messaging and telephony protocols such as SIP, Jabber/XMPP (and hence Facebook and Google Talk), AIM, ICQ, MSN, Yahoo! Messenger.

Jitsi contact

Install Jitsi:

The official download page provides the latest Deb installer for Ubuntu users

Press Ctrl+Alt+T on your keyboard to open terminal. When it opens, run below command to download it:

For 32-bit system:

wget https://download.jitsi.org/jitsi/debian/jitsi_2.2-latest_i386.deb

For 64-bit system:

wget https://download.jitsi.org/jitsi/debian/jitsi_2.2-latest_amd64.deb

Both 32-bit & 64-bit run below command to install the Deb:

sudo dpkg -i jitsi_2.2-latest_*.deb

It installs Jitsi as well as adds its repository to your system so that you’ll receive updates when a new release comes out.

This simple tutorial will show you how to install and use Faenza Icons 1.3.1 in Ubuntu 13.10 Saucy Salamander while the PPA is not available yet.

faenza icons 1.3.1

As I know, the Faenza icons ppa contains actually the same DEB package for Ubuntu 13.04 Raring, 12.10 Quantal, 12.04 Precise. We can also use the Deb on Ubuntu 13.10 Saucy to install this icon set. Here’s how:

1.) Click on below link to download the theme:

faenza-icon-theme_1.3.1_all.deb

2.) Press Ctrl+Alt+T on your keyboard to open terminal. When it opens, run below command to install the Deb:

sudo dpkg -i ~/Downloads/faenza-icon-theme_1.3.1_all.deb

install faenza icons

3.) To apply this theme to your system, install unity-tweak-tool in Ubuntu Software Center. Or run below command in terminal:

sudo apt-get install unity-tweak-tool

Once installed, open it from Unity Dash. You’ll be able to choose Faenza icons under Appearances -> Icons.

apply faenza icons

XnRetro is a small tool that allows you to create stunning images with vintage or instant effect on your Desktop. It allows to share the result to Flickr, Picasa, Facebook and more.

xnretro retro camera app

Features:

  • 20 color effects
  • 15 light effects such as bokeh, leak
  • 28 frame borders
  • Adjustement like contrast, gamma, saturation, …
  • Vignetting
  • Noise
  • Save or share the result to Flickr, Picasa, Facebook, Imgur, Thmblr, ImageShack, Yfrog, GlowFoto, TwitPic, and Email.

Install XnRetro:

First download the app:

XnRetro for Windows 32-bit |Windows 64-bit

XnRetro for Ubuntu Linux

For Ubuntu users, decompress the package and copy and paste the result folder into /opt/ folder. To do so, press Alt+F2 on your keyboard and type in gksudo nautilus to open file browser with root privilege.

open nautilus as root

Then drag and drop the extract folder from your ~/Downloads folder to /opt/:

move-xnretro-to-opt

Finally follow below steps to create a launcher for this tool:

1.) Press Ctrl+Alt+T on your keyboard to open terminal. When it opens, run below commands to install required package:

sudo apt-get install gnome-panel --no-install-recommends

2.) Run command to bring up Create Launcher dialog.

sudo gnome-desktop-item-edit /usr/share/applications/ --create-new

In next window type following:

name = XnRetro
command = /opt/XnRetro/xnretro.sh
select an icon from /opt/XnRetro/xnretro.png

xnretro-launcher

Once done, click Ok and you’ll see the XnRetro icon from the Unity Dash home.

yEd graph editor

This tutorial shows how to install the most recent yEd Graph Editor in Ubuntu 24.10, Ubuntu 24.04, Ubuntu 22.04, Ubuntu 20.04, and Linux Mint 21/22.

yEd is a powerful desktop application that can be used to quickly and effectively generate high-quality diagrams. Create diagrams manually, or import your external data for analysis. The automatic layout algorithms arrange even large data sets with just the press of a button.

Install yEd via its official script

The official website provides the yEd installer script for 64-bit (AMD/Intel CPU) Linux systems, which includes a suitable JRE.

To download this script, simply click the link below to go to its download page:

After downloaded the script, press Ctrl+Alt+T on keyboard to open up a terminal window, then run 2 commands below one by one:

  • First, add executable permission to the script for current user:
    chmod u+x ~/Downloads/yEd*.sh

    Here, assume you saved the downloaded script in user’s Downloads folder.

  • Then, run the script via command:
    sh ~/Downloads/yEd*.sh

    It will pop-up an installer wizard. Just follow it until done. Finally, you may launch it from system start menu or Gnome overview.

Uninstall yEd

The yEd installer script by default installs it into user’s Home directory. So, just delete that folder will remove it from your system.

To get rid of the leftovers, such as desktop entry, and app data, open terminal (Ctrl+Alt+T) and run command to remove them:

rm -R ~/.yEd && rm rm ~/.local/share/applications/*yEd*.desktop

How to Install Jupiter in Linux Mint 15

Last updated: July 29, 2013

This simple and brief tutorial is going to show you how to install Jupiter from JoliCloud PPA in Linux Mint 15 Olivia.

jupiter linux mint 15

As you may know, Jupiter is a powerful and lightweight power and hardware control applet. It has been retired and last supported release is up to Linux Mint 14 Nadia. However, Jupiter is available for Olivia from JoliCloud Desktop Environment PPA.

The webupd8team add the packages to the ppa and it’ll be used as a background program for JoliCloud session. I’ve installed it on my laptop and it’s working well.

Install Jupiter on Linux Mint 15:

Press Ctrl+Alt+T on your keyboard to open terminal. When it opens, run below command to add the PPA repository:

sudo add-apt-repository ppa:jolicloud-team/ppa

Then update package lists and install:

sudo apt-get update; sudo apt-get install jupiter

To install Jupiter support package for Eee PCs:

sudo apt-get install jupiter-support-eee

The latest stable Linux Kernel 3.10.4 has been released. This simple tutorial will show you how to install / upgrade this kernel in Ubuntu 13.04 Raring, 12.10 Quantal and 12.04 Precise.

Linux Kernel 3.10.4

Linux kernel 3.10.4 is an important release, which brings many improvements to IPv4 and IPv6 protocols, as well as many updated drivers and ARM fixes. All users of the 3.10 kernel series are urged to upgrade as soon as possible. See official announcement.

To get started, press Ctrl+Alt+T to open a terminal window, copy and paste below command into terminal and run to download the kernel:

for 32-bit system:

wget http://kernel.ubuntu.com/~kernel-ppa/mainline/v3.10.4-saucy/linux-headers-3.10.4-031004-generic_3.10.4-031004.201307282043_i386.deb http://kernel.ubuntu.com/~kernel-ppa/mainline/v3.10.4-saucy/linux-headers-3.10.4-031004_3.10.4-031004.201307282043_all.deb http://kernel.ubuntu.com/~kernel-ppa/mainline/v3.10.4-saucy/linux-image-3.10.4-031004-generic_3.10.4-031004.201307282043_i386.deb

for 64-bit system:

wget http://kernel.ubuntu.com/~kernel-ppa/mainline/v3.10.4-saucy/linux-headers-3.10.4-031004-generic_3.10.4-031004.201307282043_amd64.deb http://kernel.ubuntu.com/~kernel-ppa/mainline/v3.10.4-saucy/linux-headers-3.10.4-031004_3.10.4-031004.201307282043_all.deb http://kernel.ubuntu.com/~kernel-ppa/mainline/v3.10.4-saucy/linux-image-3.10.4-031004-generic_3.10.4-031004.201307282043_amd64.deb

After that, both 32-bit and 64-bit run below command to install the kernel

sudo dpkg -i linux-headers-3.10.4-*.deb linux-image-3.10.4*.deb

Finally apply changes to grub boot loader:

sudo update-grub

You can remove the downloaded packages after the kernel is properly installed.