![]()
Shared Folders feature does not work for your OS in VirtualBox Virtual Machine? Here’s a quick workaround to transfer files between host and VMs.
VirtualBox has port forwarding feature that allows to access a service or an app running in VM from the host or even the internet. With it, you can setup a quick http or ftp server in VM, then access the files outside. Or, use scp command to transfer files.
Step 1: Configure Port forwarding
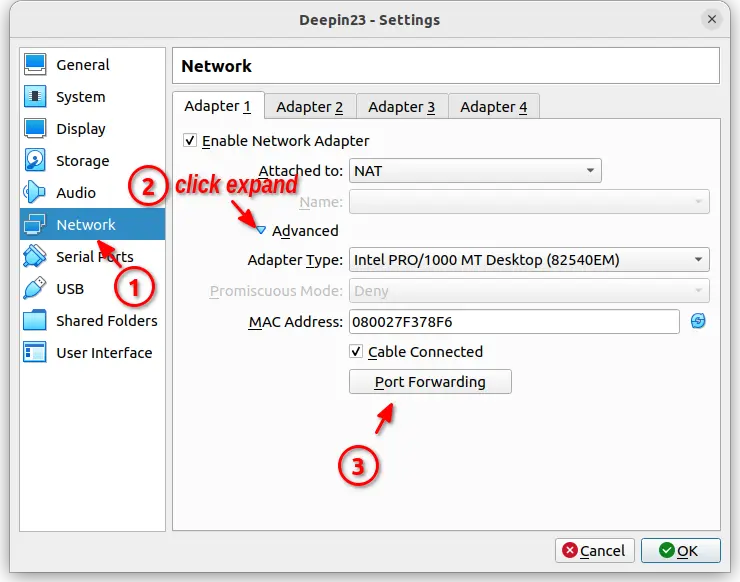
Firstly, shutdown your virtual machine. Then, open its ‘Settings‘. In pop-up dialog, navigate to ‘Network’ -> Adapter 1 -> Advanced -> Port Forwarding.
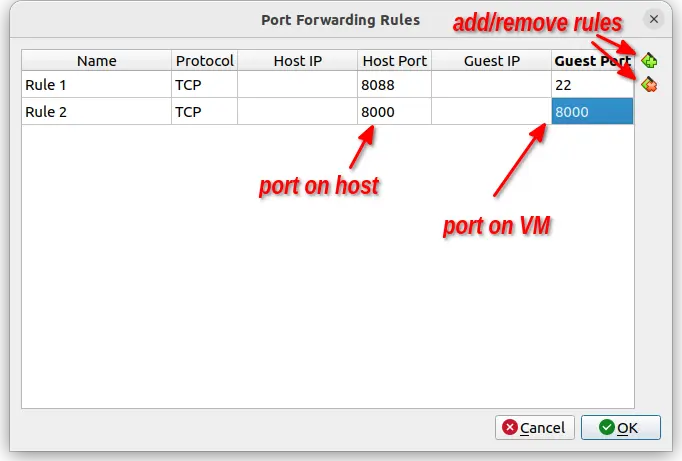
In next “Port Forwarding Rules” dialog, click the right-corner icons to add/remove rules. Then, set host port and corresponding guest port.
- For example, if you want to SSH or SCP to VM, then add a rule and set guest port to 22 (if default SSH port in use) and set host port to whatever that’s not in use.
- In my case, I want to set up a temporary Python http server, then access from the host, so I added a rule and set both host and guest ports to 8000.
Step 2: Setup a temporary http server to transfer files
Python is pre-installed in most Linux. It has a built-in script, allows to quickly setup a http server via a single command.
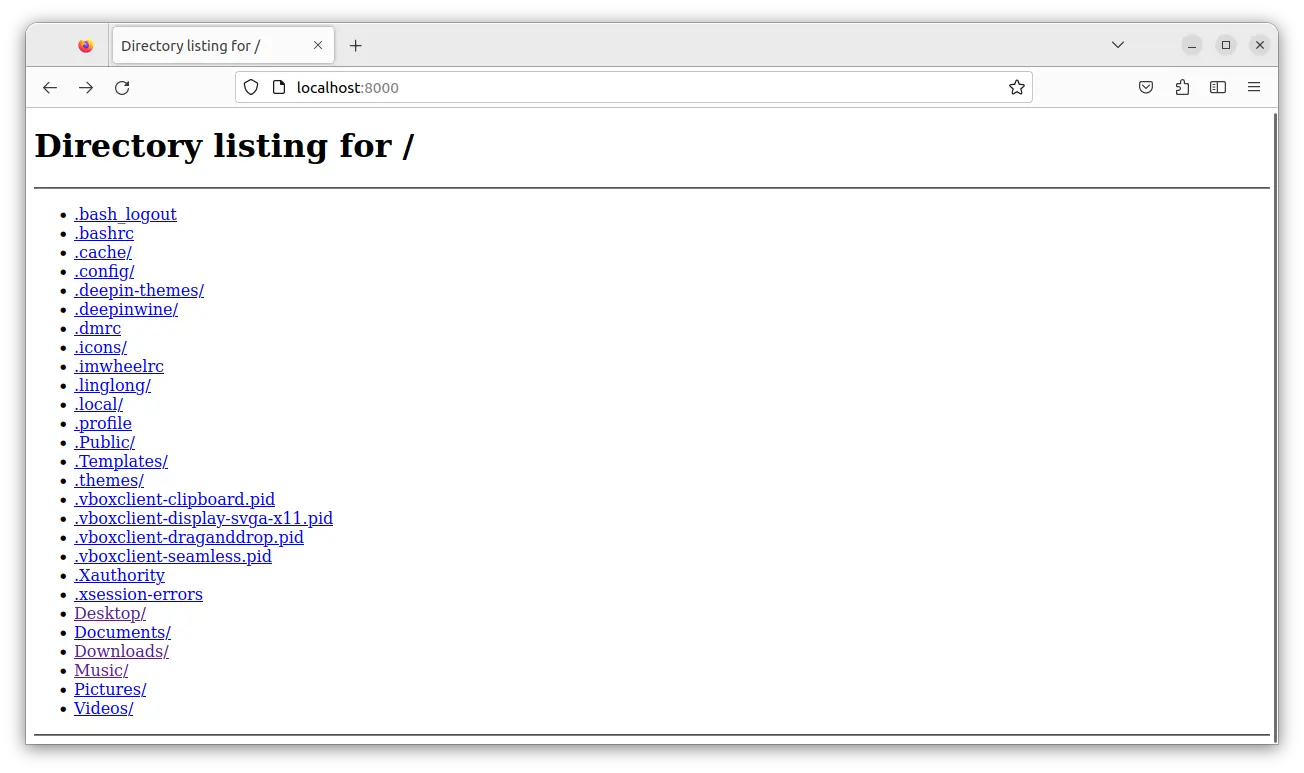
Just, boot your Linux Virtual Machine. Then, right-click on your desired folder and select “Open in Terminal” or “Open Terminal Here”. Finally, run command to setup a simple http server on VM:
python3 -m http.server
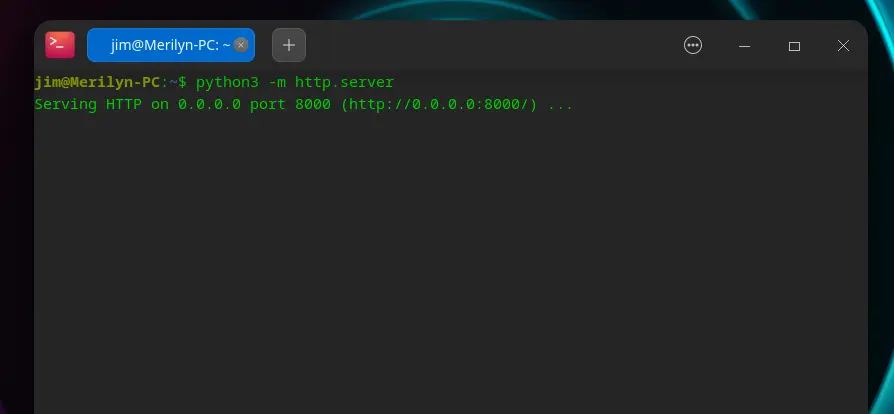
Finally, in host machine, open up a web browser and go to localhost:8000. Then, you can access (download) all files under that folder in the VM.
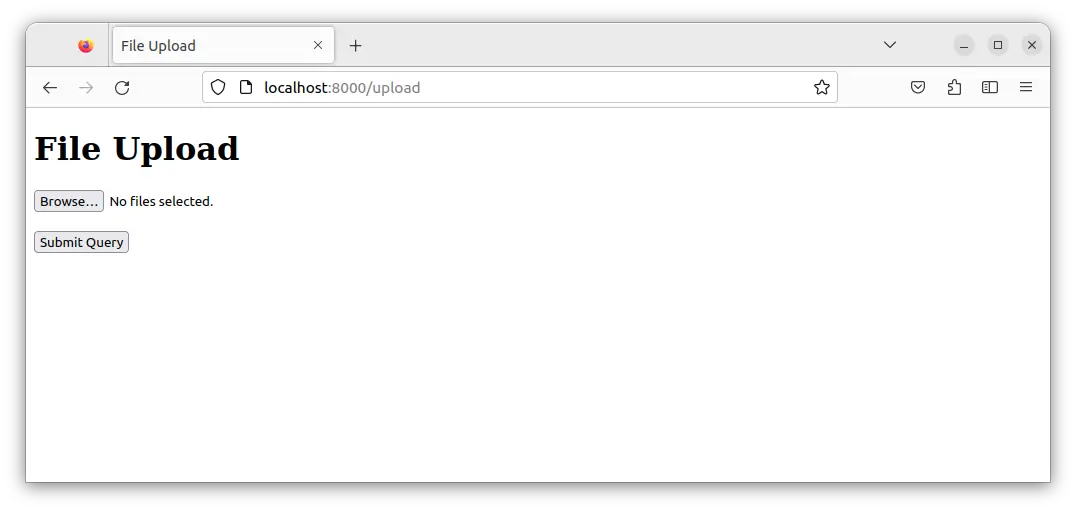
If you want to create a temporary http server with upload support, then install uploadserver module in your VM via command:
pip install uploadserver
In some Linux, you may add --break-system-packages flag. So the command will be:
pip install uploadserver --break-system-packages
Then start the http server with upload feature by running command:
python3 -m uploadserver
Finally, in host go to localhost:8000/upload to upload files to VM.
Step 3: (Optional) Use SSH/SCP
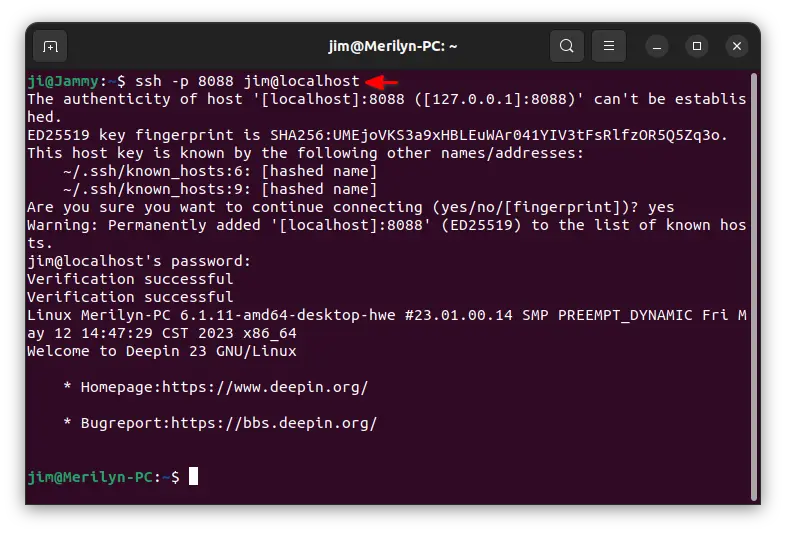
For choice, you can also use secure shell (SSH) protocol to access your VM. In the case, you need to map port 22 in guest to any unused port (8088 in my case) in host.
SSH is available in most Linux repository, and Windows can install it from Settings -> Apps -> Optional Features -> Add a feature -> OpenSSH Server.
By running SSH server in VM, host machine can run the command below to access it:
ssh -p 8088 jim@localhost
Replace port number 8088, and VM’s username jim to yours.
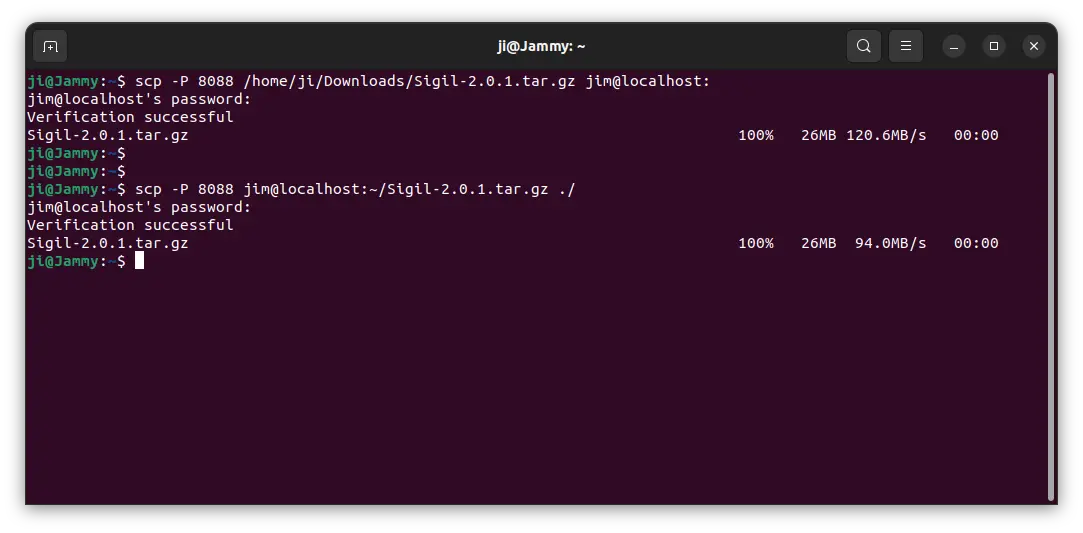
Or, use scp command to transfer files between host and VM. For example, send ‘Sigil-2.0.1.tar.gz’ package in host’s Downloads folder to VM user jim’s home directory:
scp -P 8088 /home/ji/Downloads/Sigil-2.0.1.tar.gz jim@localhost:
Or send ‘Sigil-2.0.1.tar.gz’ from VM user jim’s home directory to current directory in host machine:
scp -P 8088 jim@localhost:~/Sigil-2.0.1.tar.gz ./