Archives For November 30, 1999

Install Vuze bittorrent client Ubuntu
 
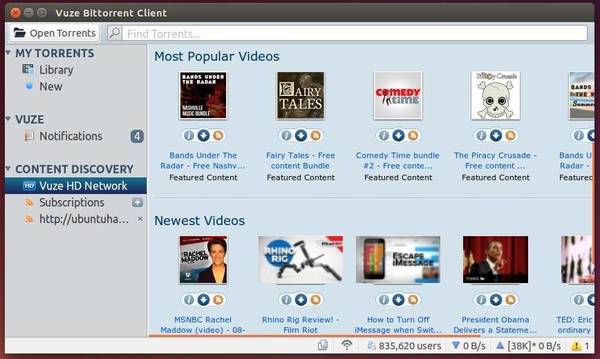
Vuze BitTorrent client has finally reached v5.4.0 with new features, UI changes and various bug fixes.

Vuze is a multimedia BitTorrent client based on Azureus intended for DVD and HD video. It includes some social-networking features to share videos among friends.

Vuze Bittorrent in Ubuntu

User Interface

  • Added ‘force start’ and ‘super seeding’ options to the create-torrent wizard
  • File filter added to torrent-options dialog
  • Minimum/Target share ratio setters added to column menu and torrent options view
  • Added ‘SHA1′ column to files-view
  • Added a default save directory to apply when ‘best guess’ is enabled and nothing matches
  • File path names can now be entered into the search box to open the torrent
  • New column showing the date of completion of the most recent file
  • Added ‘initial tags’ to the create-torrent wizard
  • Enabled networks can now be specified in torrent-options dialog
  • Added an ‘apply to current’ function to tags with initial-save/move-on-complete set
  • Added ‘availability’ button to torrent-options to allow a torrent’s availability to be checked before addition
  • Tag buttons can now be enabled in Library view; category buttons can be hidden
  • Added ‘pause for’ option for selected torrents in Library view via Advanced menu

Client Core

  • Added simple tag constraint language (e.g. to define a tag that contains downloads whose title matches a regex)
  • BEP 40: Canonical Peer Priority
  • Added ‘copy-on-complete’ function to tags
  • HTTPS support for web-seeds
  • Speed limit handler can now start/stop downloads assigned to particular tags

Install Vuze in Ubuntu:

The getdeb apps repository contains the latest packages for Ubuntu 14.04, see: GetDeb.net

If you don’t want to add this repository, go to the link below:

Download Vuze .DEB

Download and install below packages via Gdebi (available in Software Center):

  • azureus_5.4.0.0-1~getdeb1_all.deb
  • vuze_5.4.0.0-1~getdeb1_all.deb

Linux RSS Reader Liferea

Liferea 1.11.0, the first release of the new unstable release line, has been released with experimental InoReader and Reedah support.

Liferea is an open source feed reader and news aggregator with an embedded graphical browser (supports playing video, audio). It’s a Linux native app comes with below distinguishing Features:

  • Read articles when offline.
  • Synchronizes with InoReader, Reedah (since 1.11), TheOldReader, TinyTinyRSS.
  • Permanently save headlines in news bins.
  • Match items using search folders.
  • Play Podcasts in Liferea

liferea ppa

According to the release note, the latest 1.11.0 also added tray icon plugin (removed build in tray icon support), category/folder support for TheOldReader, folder auto-removal for TinyTinyRSS & TheOldReader. And support for libindicate and libnotify has been removed (to be added as plugin maybe).

The new release has fixed below bugs:

  • Mistakenly claims “TinyTinyRSS source is not self-updating”
  • Crash on font resize at startup.
  • Honor preferences when opening links
  • Selecting last unread item in reduced feed list jumps to next feed
  • Fixed missing “Via” metadata type
  • Fixed incorrect new count reset handling in item_state.c and some of the node source implementations.
  • missing installation of liferea.convert file
  • liferea-add-feed doesn’t process feed:https//
  • startup race with LifereaHtmlView
  • Parsing errors not visible with dark themes
  • Do not use bold text for feeds/folders with unread items in the leftmost treeview
  • Liferea does not update feeds with TinyTinyRSS
  • subscription prop/source: not all fields and buttons visible
  • RTL comments appear incorrectly
  • Images do not autosize to fit the available space
  • Add TinyTinyRSS Enclosure Support
  • “Any of the following” search condition doesn’t work
  • Some dialogs scrolling areas do not request enough height
  • Doesn’t automatically update feed name and favicon for new feed
  • Update to new libxml2 buffer API
  • Avoid copying list in itemset_merge_items
  • Make Liferea use ETags and send If-None-Match
  • Support NOCONFIGURE for RPM builds

Known Bugs:

issue #48: Need to start Liferea twice simultaneously before it shows the window.

Install Liferea 1.11.0 in Ubuntu:

As an unstable release line it might have bugs. I’ve uploaded it into a new PPA, available for Ubuntu 14.10, Ubuntu 14.04 and Ubuntu 12.04.

To add the PPA, press Ctrl+Alt+T to open the terminal and run:

sudo add-apt-repository ppa:ubuntuhandbook1/liferea-unstable

If you want the latest stable release (1.10.10 so far), remove the previous PPA by running above command with parameter -r and then add the below one:

sudo add-apt-repository ppa:ubuntuhandbook1/apps

After added an appropriate PPA, install or upgrade Liferea via Synaptic or Software Updater after checking for updates. Or just run below commands one by one:

sudo apt-get update

sudo apt-get install liferea

(Optional) To purge the PPA as well as downgrade Liferea, run:

sudo apt-get install ppa-purge

sudo ppa-purge ppa:ubuntuhandbook1/liferea-unstable

Map Network Drive

This simple tutorial shows you how to map a network drive, Windows share as example, onto Ubuntu 14.04 LTS with read and write permission permanently.

UPDATE-2024: This tutorial is outdated, and no longer works in current Ubuntu releases!!

All things will be done in a terminal window. Not familiar with Linux command? Don’t be afraid, just paste the command into terminal and hit enter to run one by one. There will be a few pictures to make things more clear.

Preparation:

There are a few preliminary actions we need to do before we can start mounting using cifs.

1. Press Ctrl+Alt+T on keyboard to open the terminal. Paste the command below and run to create a mount point, you can replace ‘Ji-share’ to what you want.

sudo mkdir /media/Ji-share

Create a mount point for network share

2. Install cifs-utils, which provides support for cross-platform file sharing with Microsoft Windows, OS X and other Unix systems.

Install it from Ubuntu Software Center, or via below command:

sudo apt-get install cifs-utils

3. Edit the /etc/nsswitch.conf:

sudo gedit /etc/nsswitch.conf

Find the line looks like:

hosts: files mdns4_minimal [NOTFOUND=return] dns

change it into:

hosts: files mdns4_minimal [NOTFOUND=return] wins dns

Ubuntu resolve Windows Hostname

4. Run below command so that your Ubuntu can resolve Windows computer name on a DHCP network.

sudo apt-get install libnss-winbind winbind

Reboot Ubuntu, or restart your network.

Mount (map) network drive:

Now edit the fstab file to mount network share on start up.

1. Make a backup by running the command below:

sudo cp /etc/fstab /etc/fstab_old

If you need to restore your backup, run:

sudo mv /etc/fstab_old /etc/fstab

2. Create a credentials file via:

gedit ~/.smbcredentials

insert the username and password for accessing the remote share. Replace “Ji” & “741852963” with yours and save the file.

username=Ji
password=741852963

create-credentials

3. Run command to get your gid and uid. Replace handbook with your user name.

id handbook

Get Ubuntu user id

4. Now edit the fstab by running the command:

sudo gedit /etc/fstab

Add below line (one line) to the end and save it. REPLACE WORDS IN RED!

//192.168.1.5/share /media/Ji-share cifs credentials=/home/handbook/.smbcredentials,iocharset=utf8,gid=1000,uid=1000,file_mode=0777,dir_mode=0777 0 0

Map Network Share in Ubuntu

Finally run sudo mount -a in terminal and you’ll get the network share mapped in Unity Launcher and Nautilus file browser:

Map network share Ubuntu 14.04

digikam 4.2.0 ubuntu 14.04

digiKam, open-source image organizer and tag editor, has reached version 4.2.0 one days ago on August 5th. The developer team announced in the website:

Dear digiKam fans and users,

The digiKam Team is proud to announce the release of digiKam Software Collection 4.2.0. This release includes important features to simplify photograph workflow :

These features have been introduced by Mohamed Anwer Google Summer of Code project which have been completed in time and judged ready for production.

As usual, we have worked hard to close your reported issues since the previous stable release 4.1.0. A list of the issues closed in digiKam 4.2.0 is available through the KDE Bugtracking System.

digiKam 4.2 loading

Install / Upgrade to digiKam 4.2 in Ubuntu 14.04:

Besides building from the source tarball, you can upgrade digiKam through this third-party PPA.

Press Ctrl+Alt+T on keyboard to open the terminal. When it opens, run the commands below one by one to add the PPA and install or upgrade digiKam in Ubuntu 14.04:

sudo add-apt-repository ppa:philip5/extra

sudo apt-get update

sudo apt-get install digikam

If you’ve upgrade to KDE 4.14 through Kubuntu Backports PPA, run below commands instead to avoid dependencies issue.

sudo add-apt-repository ppa:philip5/kubuntu-backports

sudo apt-get update

sudo apt-get install digikam

That’s it. Enjoy!

Linux Kernel 3.16

The latest Linux Kernel 3.16 has been released. Linus Torvalds wrote in the Linux Kernel Mailing List (lkml.org):

So nothing particularly exciting happened this week, and 3.16 is out there.

And as usual (previous release being the exception) that means that the merge window for 3.17 is obviously open. And for the third time in a row, the timing sucks for me, as I have travel coming up the second week of the merge window. Many other core developers will be traveling too, since it’s just before the kernel summit in Chicago.

So we’ll see how the next merge window goes, but I’m not going to worry about it overmuch. If I end up not having time to do all the merges, I might delay things into the week of the kernel summit, but I’ll hope to get most of the big merging done this upcoming week before any travel takes place, so maybe it won’t come to that. So this is just a heads-up that the merge window *might* be extended.

Anyway, back to the changes since -rc7: it’s really fairly small stuff randomly all over, with a third being architecture updates, a third drivers, and a third “misc” (mainly mm and networking). The architecture stuff is small ARM updates (mostly DT), some x86 Xen fixups, some random small powerpc things. The shortlog gives a good idea of what kind of stuff it all is, but it’s really just 83 commits (plus merges and the release commit) and about a third of them are marked for stable.

So while 3.16 looked a bit iffy for a while, things cleared up nicely, and there was no reason to do extra release candidates like I feared just a couple of weeks ago.

What’s New in Linux Kernel 3.16:

  • Samsung Exynos multi-platform support so that the Samsung ARM SoC kernel support is on-par with many other ARM SoCs and the ability to have a single kernel image support multiple ARM devices.
  • Better upstream Jetson TK1 ARM development platform support.
  • Broadwell support within Intel’s P-State driver.
  • Dell free-fall driver support to see if your Latitude laptop is falling.
  • A new Synaptics input driver.
  • Blk-mq is nearly feature complete as the multi-queue block layer implementation.
  • For those still with an old Nokia N900 smart-phone, the modem is now supported by the mainline Linux kernel.
  • Initial GK20A support as the NVIDIA Kepler-based GPU within the Tegra K1 SoC. The ARM hardware support in general has improved a fair amount with this new kernel.
  • Nouveau support for Kepler GPU re-clocking albeit the support varies and there’s more improvements to be made.
  • Intel Cherryview support for the upcoming Intel Atom SoC succeeding Bay Trail / Valley View graphics.
  • AMD Radeon graphics are faster with DRM improvements made in this latest kernel release.

via: phoronix

Install / Upgrade to Kernel 3.16 in Ubuntu:

Be aware that proprietary drivers may or may not work correctly with this kernel version. You need to rebuilt (or install) your video driver after kernel update.

The Ubuntu Kernel Team has made the .deb installers which are available at:

Download Kernel 3.16 DEBs

Check your OS type (32-bit = i386, 64-bit = amd64) via System Settings -> Details and download the generic or low latency packages and install them in below orders:

  1. linux-headers-3.16.0-xxxxxx_all.deb
  2. linux-headers-3.16.0-xxx-generic / lowlatency-xxx_i386/amd64.deb
  3. linux-image-3.16.0-xxx-generic / lowlatency-xxx_i386/amd64.deb

For command line, you can run below commands one by one to download and install the new kernel:

1. For 32-bit system:

cd /tmp/

wget http://kernel.ubuntu.com/~kernel-ppa/mainline/v3.16-utopic/linux-headers-3.16.0-031600-generic_3.16.0-031600.201408031935_i386.deb

wget http://kernel.ubuntu.com/~kernel-ppa/mainline/v3.16-utopic/linux-headers-3.16.0-031600_3.16.0-031600.201408031935_all.deb

wget http://kernel.ubuntu.com/~kernel-ppa/mainline/v3.16-utopic/linux-image-3.16.0-031600-generic_3.16.0-031600.201408031935_i386.deb

sudo dpkg -i linux-headers-3.16.0-*.deb linux-image-3.16.0-*.deb

2. For 64-bit system:

cd /tmp/

wget http://kernel.ubuntu.com/~kernel-ppa/mainline/v3.16-utopic/linux-headers-3.16.0-031600-generic_3.16.0-031600.201408031935_amd64.deb

wget http://kernel.ubuntu.com/~kernel-ppa/mainline/v3.16-utopic/linux-headers-3.16.0-031600_3.16.0-031600.201408031935_all.deb

wget http://kernel.ubuntu.com/~kernel-ppa/mainline/v3.16-utopic/linux-image-3.16.0-031600-generic_3.16.0-031600.201408031935_amd64.deb

sudo dpkg -i linux-headers-3.16.0-*.deb linux-image-3.16.0-*.deb

Reboot and done.

If for some reason this kernel release doesn’t work properly for you, reboot into previous kernel (Grub -> Advanced -> select previous kernel) and run this command to remove Linux Kernel 3.16:

sudo apt-get remove linux-headers-3.16.0-* linux-image-3.16.0-*

Finally update grub menu:

sudo update-grub

LibreOffice 4.3 PPA
 
LibreOffice, the default office suite in Ubuntu, has finally reached version 4.3 with a large number of improvements and new features.

The packages has been made into 4.3 series PPA – available for Ubuntu 14.04 and Ubuntu 12.04 – which will provide future minor release updates (4.3.1, 4.3.2, 4.3.3 …).

LibreOffice 4.3 in Ubuntu 14.04

What’s New in LibreOffice:

  • Better OOXML interoperability, and support of legacy Mac file formats
  • Better comment management, and highly intuitive spreadsheet handling
  • 3D models in Impress, and support for “monster” paragraphs
  • LibreOffice 4.3 also support “monster” paragraphs exceeding 65,000 characters
  • See the release note for details

Upgrade to LibreOffice 4.3 in Ubuntu:

1. Add the 4.3 series PPA, available for Ubuntu 14.04, Ubuntu 12.04 and their derivatives.

Press Ctrl+Alt+T on keyboard to open the terminal. When it opens, paste the command below and hit enter to run:

sudo add-apt-repository ppa:libreoffice/libreoffice-4-3

2. Open Software & Updater from Unity dash. After checking for updates, you’ll see the latest LibreOffice packages available in the update list. Click the Install Now to install updates.

upgrade to libreoffice 4.3

You can also run the commands below to do the upgrade process:

sudo apt-get update; sudo apt-get upgrade

That’s it. Enjoy!

Texmaker 4.3 Ubuntu

Texmaker, an open source LaTeX editor with an integrated PDF viewer, has finally reached v4.3 with new features and translation updates.

Texmaker is entirely a Qt app that works on Windows, Linux and Macos. The editor includes full unicode support, inline spell checking, auto-completion, code folding and rectangular block selection. Regular expressions are also supported for the find-and-replace actions.

Texmaker LaTeX editor in Ubuntu

The latest Texmaker 4.3 was released on August 1st, 2014 with below changes:

  • a visual diff view has been added to the “source viewer” (differences between the current files loaded in the editor and in the “source viewer”) based on jsdifflib from Chas Emerick (BSD license)
  • when a command fails, the command is now displayed with the error message “Could not start the command”
  • an “reload all documents from file” option has been added to the “File” menu (users request)
  • if a “completion.txt” file is found in the same directory than texmaker.exe on windows, in the “/usr/share/texmaker/” folder on linux and in the “Resources” subdirectory of the .app package on macosx, all items from this file will be added automatically for the autocompletion (the syntax must be the same than for the .”Customize completion” option of the “User” menu.
  • an option to launch the “Clean” tool when exiting the program has been added (users request)
  • a texmaker man page and a texmaker.menu file have been added in the “utilities” directory of the source (thanks to Bernd Warken for the man-page)
  • the cs, el, es, hu and se translations have been updated (thanks to all the translators)

Install Texmaker 4.3 in Ubuntu:

The official website provides .deb installer available for Ubuntu 14.04 LTS, Ubuntu 12.04 LTS, Ubuntu 13.10, Ubuntu 13.04, and Ubuntu 12.10.

First check out your OS type, 32-bit (i386) or 64-bit (amd64), by going to System Settings -> Details.

Then download the package that matches your Ubuntu edition and os type:

Download Texmaker

Finally double-click the package in file browser to open it with Ubuntu Software Center and click install.

install Skype 4.3 in Ubuntu

The latest skype for Linux 4.3 was released in the middle of June with updated UI, new cloud-based Group chat experience. Now it’s available in the Canonical Partners repository for Ubuntu 14.10, Ubuntu 14.04, Ubuntu 12.04 and their derivatives.

From now on, enable Canonical Partners repository via Software & Updates utility, then you are able to upgrade to Skype 4.3 by running regular system updates via Software Updater

Skype 4.3 in Ubuntu 14.04

What’s New in Skype 4.3:

  • An updated UI
  • Our new cloud-based Group Chat experience
  • More reliable file transfer support when using multiple devices at once
  • Greater accessibility by blind and visually impaired users
  • PulseAudio 3.0 and 4.0 support
  • Lot of bug fixes
  • Skype 4.3 release note.

Install / Upgrade to Skype 4.3:

1. Open Software & Updates or Software Sources from Unity Dash, go to Other Software tab and enable Canonical Partners repository.

Enable canonical partners repository

2. To install Skype, just search for and install it from Ubuntu Software Center.

To upgrade Skype, open Software Updater, after checking for updates, you’ll see Skype 4.3 available for update:

Upgrade to Skype 4.3

If you are familiar with command line, just run:

sudo apt-get update; sudo apt-get install skype

Skype 4.3 Ubuntu 14.04

There are a few applications for Linux desktop that change the wallpaper automatically. Webilder is one of them that rotates your wallpaper with photos directly downloaded from flickr and webshots.com.

The application provides an indicator applet for Ubuntu Unity and GNOME that allows you to downloads the most interesting photos from Flickr, browser photo collection, and select next photo (as wallpaper).

In its preferences window, you can set Webilder to automatically download photos every day, download Flickr photos that match your given tags, view and download Webshots photos with an account.

Webilder download and rotate wallpaper from flickr

Features:

  • downloads the most interesting photos from Flickr.
  • view Webshots photos on your Linux desktop (requires Webshots account).
  • downloads Flickr photos that match tags (for example: beach,party)
  • downloads photos from Flickr users of your choice.
  • automatically downloads new photos for you every day.
  • change your wallpaper every few minutes.
  • import webshots collections (wbz or wbc formats).
  • photo collection browser that will let you view the images in fullscreen, or set them as a wallpaper.
  • browser integration for Webshots – downloaded images are automatically added to your collection.
  • command-line photo downloader webilder_downloader

webilder-preferences

Install Webilder in Ubuntu:

The website provides the .deb package for Ubuntu and its derivatives, download it from the link below and double-click to open with Ubuntu Software Center and finally click install:

Download Webilder (webilder_xxx.deb)

Once installed, open Webilder indicator form Unity Dash or app menu. It will start automatically the next time you log in.

XT7-Player is currently one of the best multimedia video player for KDE / Kubuntu. Here are the main features and how to install it.

Xt7-Player is an open source gui to mplayer. While there are plenty out there, it’s hard to find one which gives access to all mplayer options. This is what Xt7-Player aims to be, a complete graphical interface to mplayer, focusing on usability.

Among the main features of XT7 player include support for video playback from DVD, DVB-T support for allowing us then to be able to watch TV channels through a PCI card or USB for digital terrestrial connected to our personal computers. XT7-Player enables us to search and play videos from YouTube (also support for multiple playlists and offline mode for playback of favorite videos even when you’re not connected to the Internet by accessing the happy cached Flash system), we can also manage and play web radio, podcasts, and also there is also the Media Info section with details about our media files.

Simple and functional, XT7 Player has many customizations as well as a useful video and audio equalizer, support for Karaoke mode and the introduction of custom filters, there is also the shutdown mode that allows us to Turn off the PC after playback of a playlist or video in progress and much more.

xt7-player-dvbt

xt7-player-flash

xt7-player-dvd

Install XT7-Player in Kubuntu via PPA:

So far, the latest release is available in PPA for Ubuntu 14.04, Ubuntu 12.04, Ubuntu 10.04 and their derivatives.

Press Ctrl+Alt+T on keyboard to open the terminal. When it opens, paste below command and hit enter to add the gambas3 PPA:

sudo add-apt-repository ppa:gambas-team/gambas3

Then paste the command below to add the XT7-Player PPA:

sudo add-apt-repository ppa:xt7-player-dev-team/daily

Finally update and install the player:

sudo apt-get update; sudo apt-get install xt7-player